


If you’re a multilingual person and need to chat or write in several languages on your Windows 11 computer, you might want to know how to change the language keyboard shortcut. While you can always use the language button in the system tray to switch to another keyboard layout, using a keyboard language shortcut is always faster. If speed is what you’re looking for, read this guide and find out the default keyboard language shortcuts in Windows 11 and how to change them to something more comfortable:
NOTE: This tutorial was created using Windows 11 Moment 2 Update. To find out which version you have installed, read our guide on checking the Windows 11 version and edition.
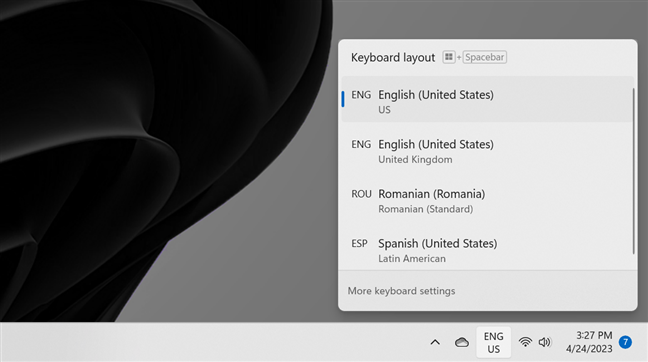
 The Windows 11 keyboard language shortcut uses the language bar
TIP: If you’d like to know more about these keyboard language shortcuts, as well as how to add new input languages or keyboard layouts, I recommend reading this guide: How to change the keyboard language on Windows 11.
The Windows 11 keyboard language shortcut uses the language bar
TIP: If you’d like to know more about these keyboard language shortcuts, as well as how to add new input languages or keyboard layouts, I recommend reading this guide: How to change the keyboard language on Windows 11.
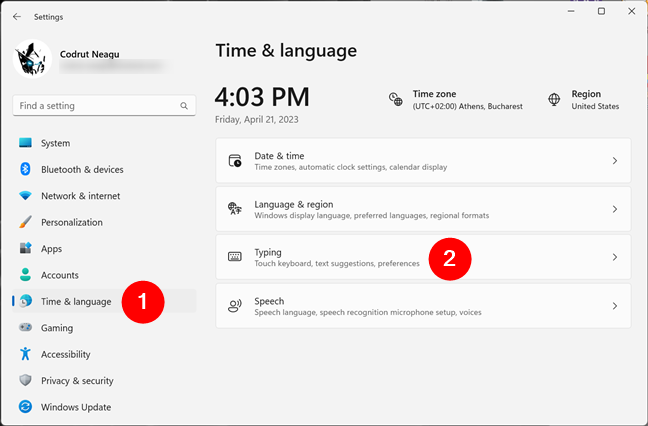
 To change the keyboard language shortcut go to Settings > Time & language > Typing
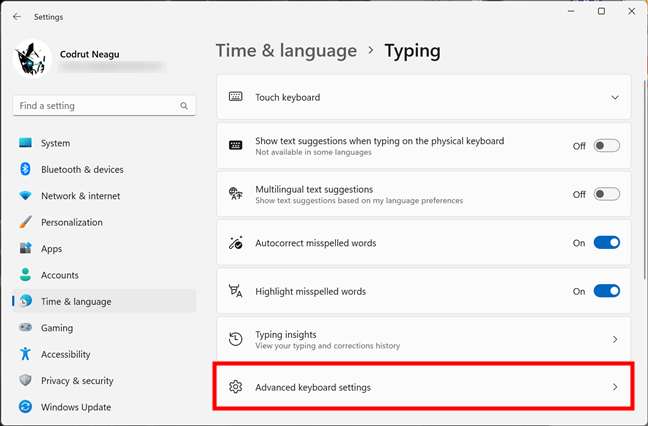
On the Typing settings page, scroll down to locate the Advanced keyboard settings entry and click or tap on it.
To change the keyboard language shortcut go to Settings > Time & language > Typing
On the Typing settings page, scroll down to locate the Advanced keyboard settings entry and click or tap on it.
 Access Advanced keyboard settings
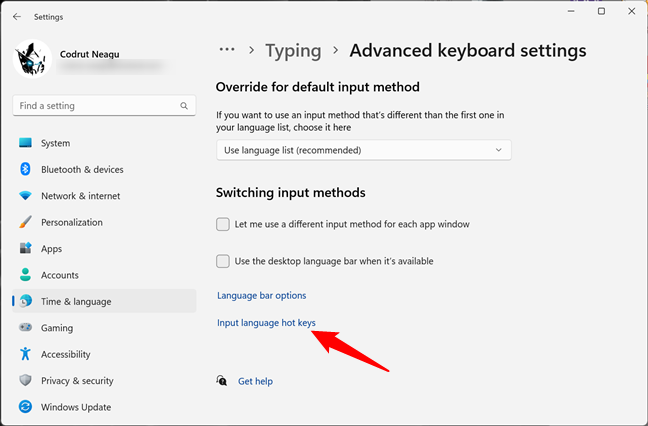
This opens a new settings page called Advanced keyboard settings. At the bottom, you should see the “Input language hot keys” link. Click or tap on it.
Access Advanced keyboard settings
This opens a new settings page called Advanced keyboard settings. At the bottom, you should see the “Input language hot keys” link. Click or tap on it.
 Click or tap on Input language hot keys
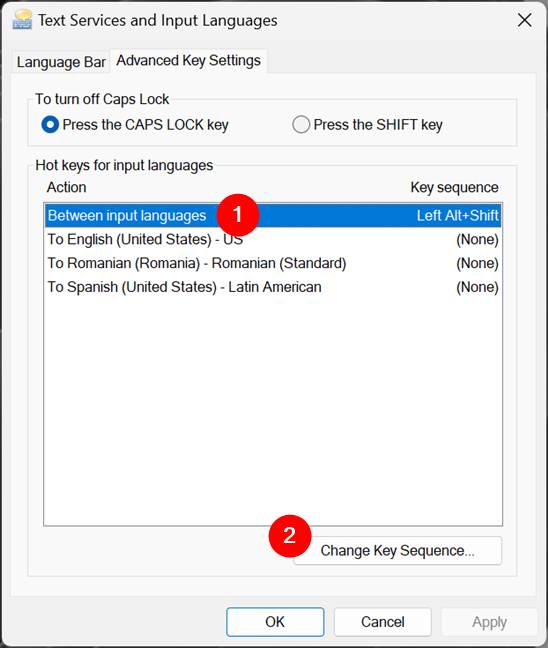
An old-style window called “Text Services and Input Languages” opens, and its Advanced Key Settings tab is automatically focused. This is where you can change the keyboard language shortcuts used by Windows 11, from the “Hot keys for input languages” section that takes up most of the window.
Click or tap on Input language hot keys
An old-style window called “Text Services and Input Languages” opens, and its Advanced Key Settings tab is automatically focused. This is where you can change the keyboard language shortcuts used by Windows 11, from the “Hot keys for input languages” section that takes up most of the window.
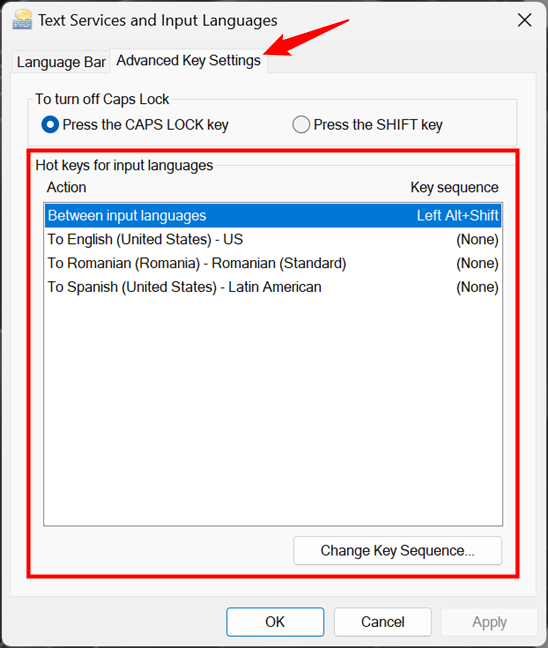
 Hot keys for input languages
 How to change the keyboard language shortcut
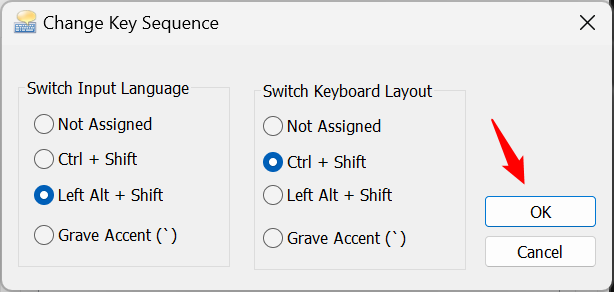
When you press the “Change Key Sequence” button, Windows 11 opens a new window bearing the same name. In it, there are two panels with alternative shortcuts for the “Switch Input Language” and “Switch Keyboard Layout” keyboard shortcuts. While you can’t specify your own keyboard shortcut for any of them, you can choose between four preset options for each.
Select Not Assigned to disable a keyboard language shortcut, or choose the Grave Accent (`) to change the language or layout with just one key. When you’re done, click or tap on OK.
How to change the keyboard language shortcut
When you press the “Change Key Sequence” button, Windows 11 opens a new window bearing the same name. In it, there are two panels with alternative shortcuts for the “Switch Input Language” and “Switch Keyboard Layout” keyboard shortcuts. While you can’t specify your own keyboard shortcut for any of them, you can choose between four preset options for each.
Select Not Assigned to disable a keyboard language shortcut, or choose the Grave Accent (`) to change the language or layout with just one key. When you’re done, click or tap on OK.
 Select the language change shortcut key and press OK
NOTE: You can’t assign the same keyboard shortcut for switching the input language and the keyboard layout.
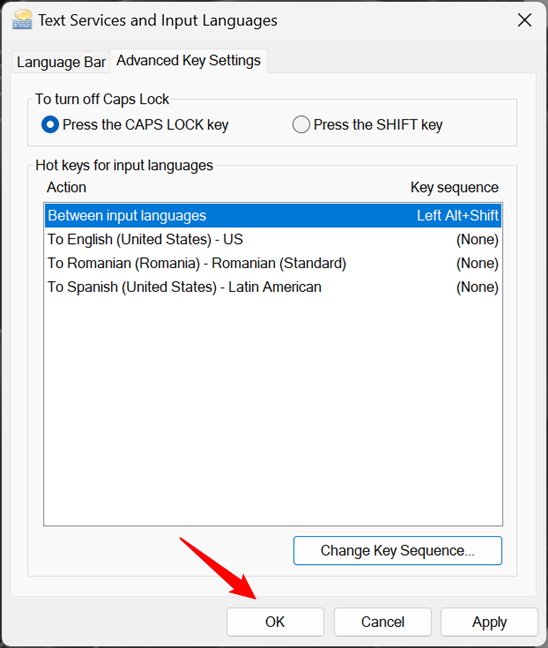
Pressing OK brings you back to the “Advanced Key Settings” tab of the “Text Services and Input Languages” window. Click or tap OK or Apply to save the new settings.
Select the language change shortcut key and press OK
NOTE: You can’t assign the same keyboard shortcut for switching the input language and the keyboard layout.
Pressing OK brings you back to the “Advanced Key Settings” tab of the “Text Services and Input Languages” window. Click or tap OK or Apply to save the new settings.
 Change the language keyboard shortcut and press OK or Apply
Starting now, you can use the new shortcut(s) you’ve set in order to change the keyboard language and layout.
Change the language keyboard shortcut and press OK or Apply
Starting now, you can use the new shortcut(s) you’ve set in order to change the keyboard language and layout.
 Select a layout and press Change Key Sequence
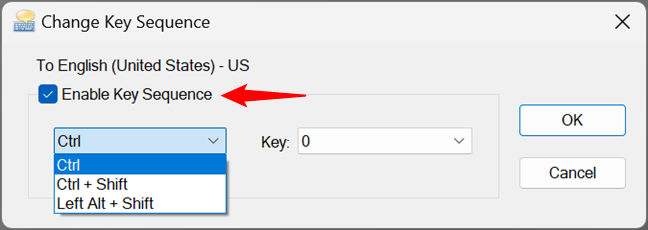
In the window that shows up, check the “Enable Key Sequence” box.
Select a layout and press Change Key Sequence
In the window that shows up, check the “Enable Key Sequence” box.
 Check Enable Key Sequence to set a language keyboard shortcut
Then, use the two dropdown menus to set the keyboard shortcut you prefer:
Check Enable Key Sequence to set a language keyboard shortcut
Then, use the two dropdown menus to set the keyboard shortcut you prefer:
 Set a keyboard shortcut to change the language to the one you use more
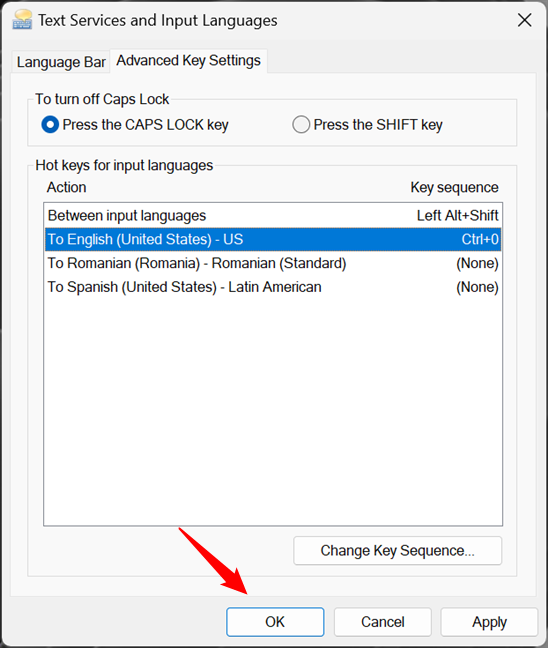
Confirm your choice once more by clicking/tapping OK or Apply.
Set a keyboard shortcut to change the language to the one you use more
Confirm your choice once more by clicking/tapping OK or Apply.
 Confirm your choice to use the new keyboard language shortcut
From now on, every time you use the new keyboard shortcut, the language assigned to it is instantly enabled.
TIP: If you’ll want to disable such a custom shortcut later on, follow the same steps and uncheck the “Enable key sequence” box in the “Change Key Sequence” window.
Confirm your choice to use the new keyboard language shortcut
From now on, every time you use the new keyboard shortcut, the language assigned to it is instantly enabled.
TIP: If you’ll want to disable such a custom shortcut later on, follow the same steps and uncheck the “Enable key sequence” box in the “Change Key Sequence” window.
What’s the default Windows 11 change language shortcut?
Before we get to the change keyboard language shortcut part, you should first know the standard shortcuts for it. Because yes, there’s not just one shortcut, but three different shortcuts for changing the keyboard language or layout:- Windows + Spacebar - switches to the next option in the list of installed keyboard languages or layouts. While this keyboard language shortcut can’t be modified in Windows 11, all the others can be changed.
- Left Alt + Shift - is the standard shortcut to change the keyboard language in Windows 11. If you have multiple keyboard layouts installed for the same language, it ignores them and switches to the first one available for the next language.
- Ctrl + Shift - toggles between the keyboard layouts available for the current language. Evidently, it works only if you’ve added multiple keyboard layouts for the currently selected input language.
How to change the keyboard language shortcuts in Windows 11
Now that we know the default keyboard language/layout shortcuts used by Windows 11, let’s see how to change them to something more to your liking:Step 1. Get to the Advanced Key Settings
The first step is to open the Settings app: a quick way is to press Win + I on your keyboard. Then, select Time & language on the left sidebar, and click or tap Typing on the right side of the window.Step 2. Change the default keyboard language shortcuts
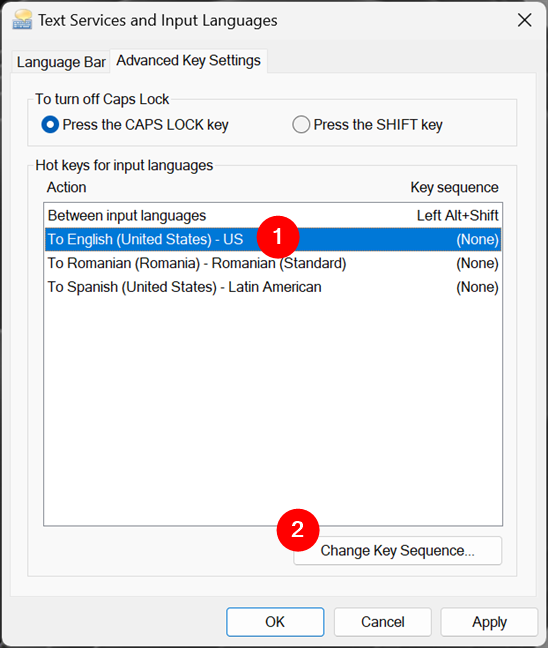
As you know now, in Windows 11, the default shortcut for changing the keyboard language is Left Alt + Shift. The one that toggles the keyboard layouts is Ctrl + Shift. In most cases, these shortcuts are OK. However, if you want to use one or both of these keyboard shortcuts for other things, you need to either disable or change the hotkeys used to change the language/layout. Here’s what you need to do for that: In the “Hot keys for input languages” section, select “Between input languages” and click or tap on the “Change Key Sequence” button at the bottom.Bonus step: Set a keyboard shortcut for enabling a specific keyboard input language
If you’re using multiple languages while typing or you like working with several different keyboard layouts, switching between them with the standard keyboard shortcuts can quickly become time-consuming. Fortunately, Windows 11 also allows you to set hotkeys for switching to specific languages or layouts previously added. In the “Text Services and Input Languages” window, select any layout from the “Hot keys for input languages” list and click or tap on “Change Key Sequence.”- Choose Ctrl, Ctrl + Shift, or Left Alt + Shift in the left menu to select the first key sequence
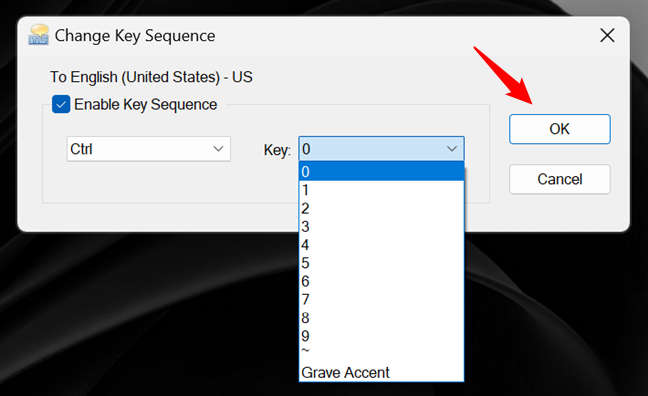
- Choose one of the numbers from 0 to 9, the Tilde (~), or the Grave Accent (`) in the second list to select the second part of the keyboard shortcut.

Discussion (1)
thank you for the guide