03.05.2023
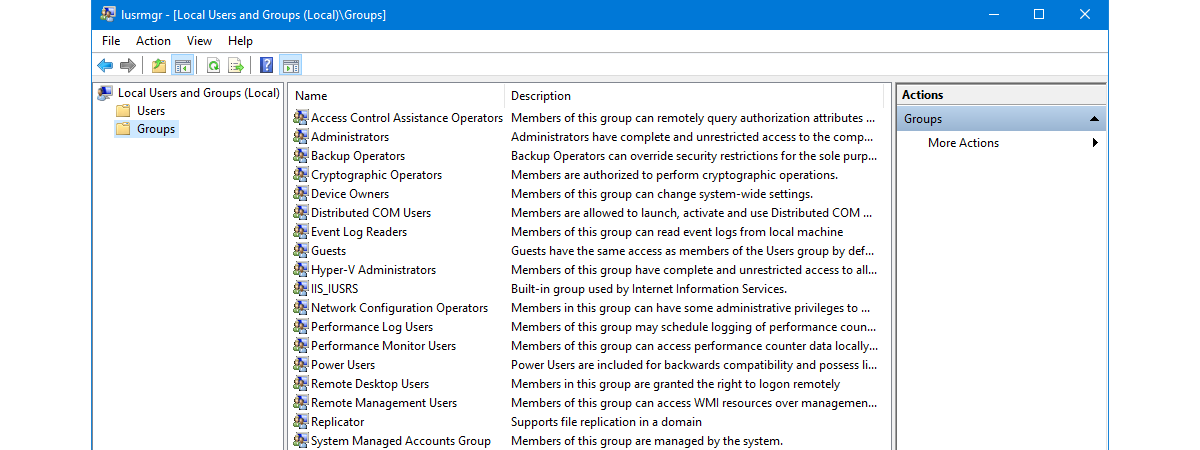
Most people edit Windows user accounts from the Settings app or the User Accounts section in the Control Panel. However, there’s another way to perform Windows user management, one that gives you access to much more detailed information about the users and groups on your PC and the permissions they have. I’m talking about managing Local Users and Groups using the snap-in console that bears the same name. You can access it from Computer Management or by running its lusrmgr.msc file directly. Here’s how to see and manage all the local users and groups on your Windows 11 or Windows 10 PC:
IMPORTANT: Local Users and Groups (lusrmgr.msc) is available only in the Pro, Enterprise, and Education editions of Windows 11 and Windows 10. Unfortunately, Home editions don’t include this tool. For help in identifying the edition you’re using, check these guides:
- What is the latest version of Windows 10? Check the version you have
- How to check the Windows 11 version and edition
The Local Users and Groups (lusrmgr.msc) in Windows 11 is identical to the one in Windows 10, both in terms of appearance and features offered. Thus, to keep things as simple as possible, most of the screenshots included in this guide are from Windows 11.
How to find all the local users and groups using lusrmgr.msc
In both Windows 11 and Windows 10, the Local Users and Groups snap-in, also known as lusrmgr.msc, offers the best way to see all the users and groups configured on the system. This tool shows you the “visible” user accounts, as well as all the hidden user accounts and groups that are available on the system but are disabled by default, such as the Administrator account. Here’s how to see your local users and groups:
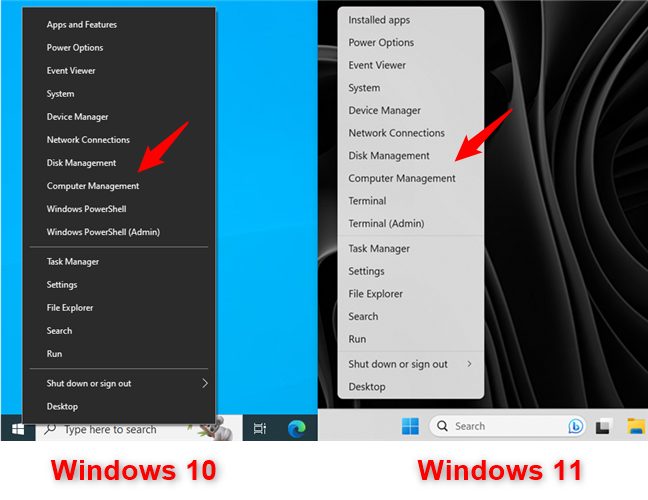
Open Computer Management - a quick way to do it in either operating system is to simultaneously press Win + X on your keyboard and select Computer Management from the menu.
For Windows user management, open Computer Management
In Computer Management, select “Local Users and Groups” in the left panel.
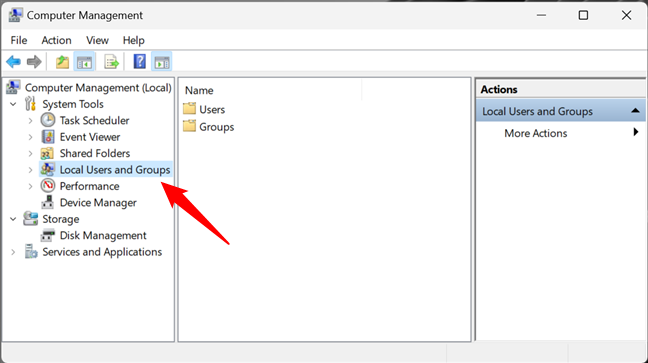
Local Users and Groups in Computer Management
An alternative way to open Local Users and Groups is to run the lusrmgr.msc command. You can do it from the Run window (Win + R), Command Prompt, and PowerShell.
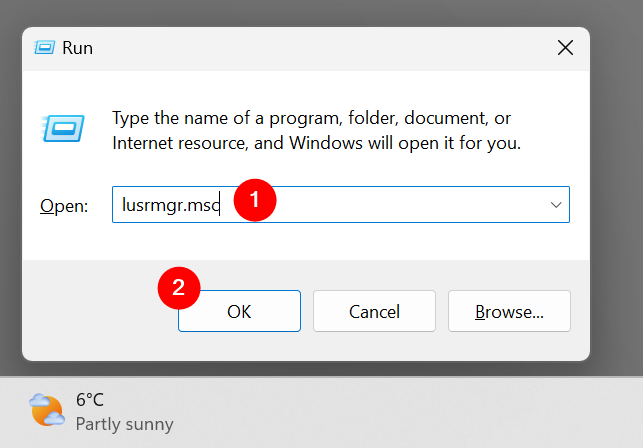
Run lusrmgr.msc in Windows
Running the lusrmgr.msc command opens the Local Users and Groups console directly and without loading it in Computer Management.
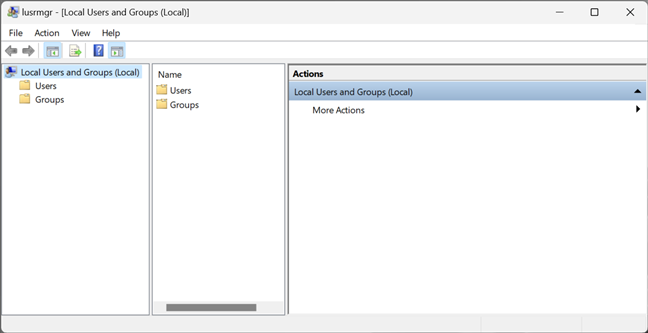
lusrmgr.msc - Local Users and Groups
Regardless of how you choose to open Local Users and Groups (lusrmgr.msc), this is where you find all the user accounts and groups that are configured on your Windows computer or device, split into two folders: Users and Groups.
How to find and manage Windows users with lusrmgr.msc (Local Users and Groups)
In the Users folder, you see all the user accounts available on your Windows 11 or Windows 10 PC. This includes accounts that are hidden or disabled.
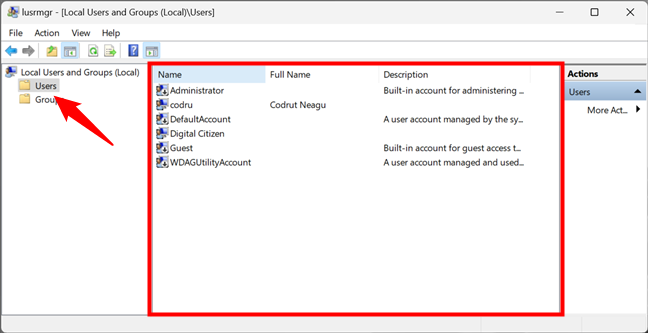
List of user accounts shown by lusrmgr.msc
What are the user accounts found on every Windows computer? There aren’t as many as you might think. You have:
- All the user accounts you have created on your Windows PC;
- Administrator - a built-in account created by Windows for administration purposes, regardless of whether you use it or not;
- DefaultAccount - a user account that’s managed by Windows;
- Guest - a legacy built-in account that, in older versions of Windows, could be used for guest access on the computer or domain - in Windows 11 and Windows 10, it’s no longer operational;
- WDAGUtilityAccount - managed and used by the Microsoft Defender antivirus for running certain processes (like the Microsoft Edge browser) in sandboxed/virtualized environments.
TIP: You can also view a list of all user accounts with PowerShell or Command Prompt. Find out all the ways to do that by reading this tutorial: How to list all the users on a Windows computer.
As you might have noticed, some of the user accounts shown by Local Users and Groups have a small arrow on their icons. The little arrow signals that a user account is disabled and thus can’t be used, even if it is available on your Windows computer.
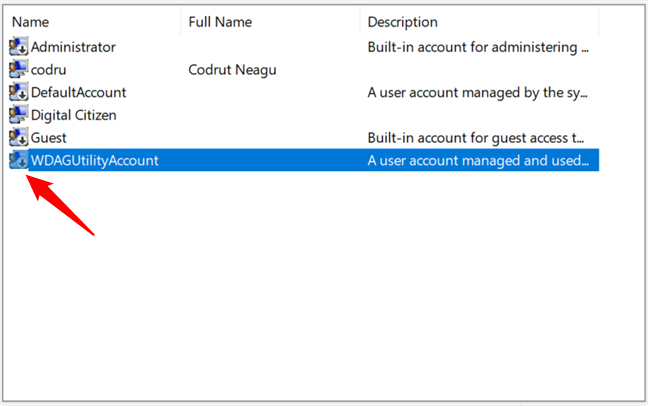
Deactivated users are marked with arrows
Double-clicking or double-tapping on a user account opens a Properties window that displays more information about that account and different customization options. For instance, you can set its password to expire, disable the account, or change the user groups to which it belongs.
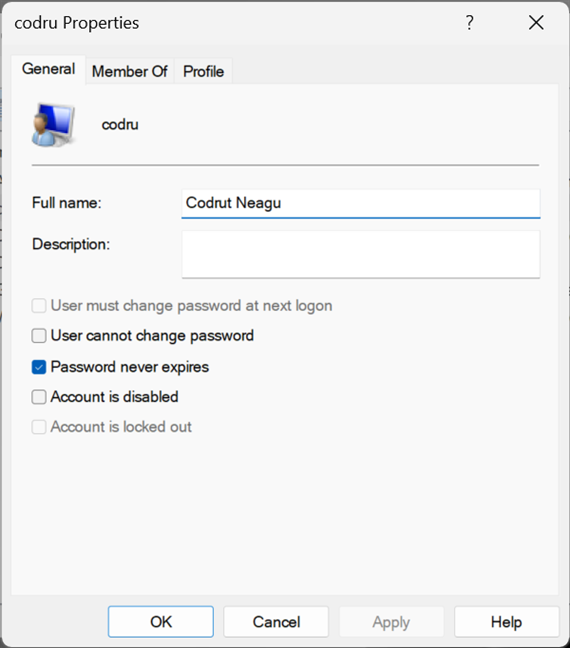
Properties of a user account
TIP: Speaking of which, here’s how to change your user account password in Windows.
How to find and manage user groups in Windows with lusrmgr.msc (Local Users and Groups)
Going back to the Local Users and Groups console (lusrmgr.msc), access the Groups folder to see all the user groups available on your Windows computer. The list is long and includes user groups created by Windows as well as third parties, such as drivers or virtualization software, which need hidden users and groups to operate properly.
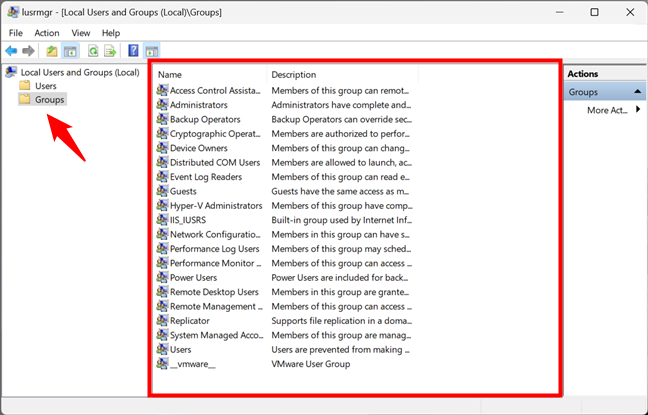
List of user groups in Windows shown by lusrmgr.msc
On most Windows PCs, you should have at least the following groups:
- Access Control Assistance Operators – members of this group can run remote queries for authorization attributes and permissions on your Windows computer. This group is used on computers that belong to a domain, so it’s mainly useful for network administrators in large companies.
- Administrators – it includes all the user accounts with administrative permissions on your computer. The Administrators group can’t be deleted or renamed.
- Backup Operators – user accounts with permission to perform backup and restore operations using tools like Backup and Restore.
- Cryptographic Operators – user accounts with permission to encrypt or decrypt data using tools like BitLocker.
- Device Owners – Windows says that the members of this group can change system-wide settings. However, as far as I know, this group is not currently used in either Windows 11 or Windows 10.
- Distributed COM Objects – this user group is harder to explain. It’s used mostly for user accounts that need to participate in more complex scenarios, such as distributed computing across computers on a network. Therefore, it is mainly used in business environments.
- Event Log Readers – this group gives permission to its members to read Windows 10 and Windows 11 event logs that show what is happening on the system.
- Guests – legacy user accounts (non-operational in Windows 10 and Windows 11) that cannot perform any administrative tasks on your computer. They can be used only for light computing activities like browsing the internet or running the installed applications. They cannot modify the system’s configuration, access or modify another user’s data, etc.
- Hyper-V Administrators – gives its members unrestricted access to all the features available in Hyper-V.
- IIS_IUSRS – this group is used only by the Internet Information Services you may choose to install from the Windows Features panel.
- Network Configuration Operators – this group permits users to configure networking features in Windows.
- Performance Log Users & Performance Monitor Users – members are given permission to perform advanced logging in Windows and collect performance data.
- Power Users – this user group was used in older versions of Windows to provide limited administrative permissions to specific user accounts. It is still present in Windows 10 and Windows 11 but only to provide backward compatibility for old legacy applications.
- Remote Desktop Users – this user group provides its members with permission to log on remotely to the computer via the Remote Desktop.
- Remote Management Users – members can access WMI resources remotely.
- Replicator – this user group is used in network domains and gives its members the permissions required to do file replication across the domains.
- System Managed Accounts Group – the Windows 10 or Windows 11 operating system manages the members of this group.
- Users – it includes the standard user accounts defined on your Windows PC. Its members do not have administrative permissions. They can only run installed applications and cannot make system changes that affect other users.
On your computer, you might also find other groups installed by Windows features, drivers, or third-party applications. Double-clicking or double-tapping on a user group opens a properties window that displays more information about it and several options. For step-by-step guidance on how to work with the available options, read the last part of this tutorial: Create new Windows user accounts and groups like an IT Pro.
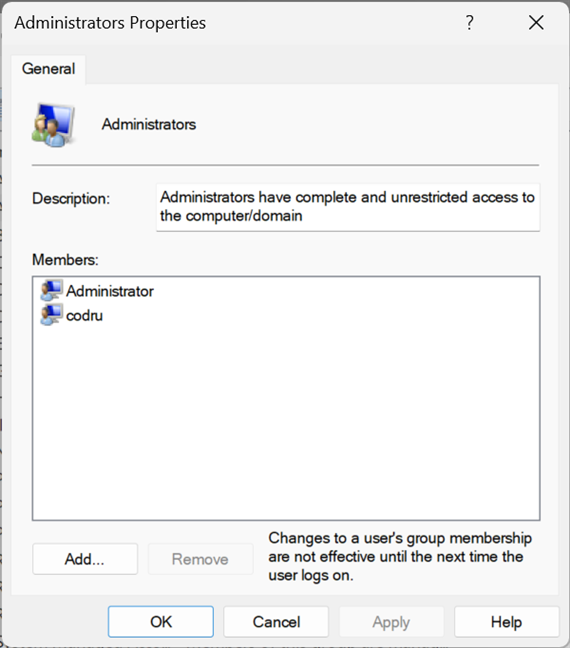
Properties of the Administrators group in Windows
What’s great about user groups is that you can use them to give additional permissions to standard user accounts. For example, if you create a user account that is a member of Users but not Administrators, that user can’t connect remotely to the computer. If you make that user account a member of Remote Desktop Users, it can connect remotely. This principle applies to all user groups. Add a user account as a member, and it receives both the permissions and restrictions of that user group.
NOTE: If you look at all the user groups listed on your Windows computer or device, you will likely notice that the user accounts defined as administrators are not listed as members of the other groups. That’s because administrators already have permission to do everything on your Windows computer, so they don’t need to be part of a special group to inherit its permissions.
Warning: Don’t change the standard Windows users and groups!
You may feel the urge to clean up and delete some of the standard user accounts and groups found on your Windows 11 or Windows 10 PC. If you try to do something like that, you should get a warning from the operating system about the issues that are likely to arise. For example, this is what you see if you try to delete the Administrator account:
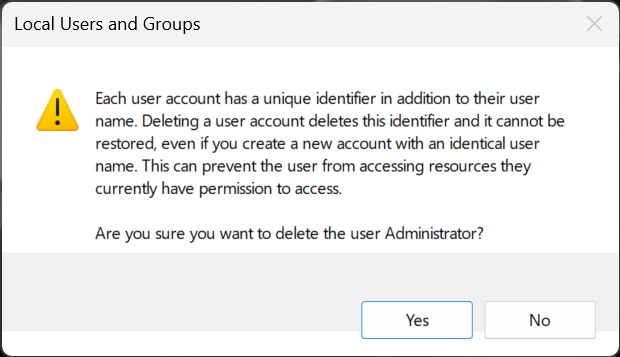
Default users and groups from Windows shouldn't be altered or removed
Deleting or changing standard user accounts and groups from Windows 11 or Windows 10 can cause apps and system features to malfunction. Understanding all the connections between standard user accounts, user groups, and Windows features is difficult. One minor change can have unexpected consequences on many features and ruin your computing experience, so my strong recommendation is “Don’t touch the standard users and groups from Windows!”
Do you use lusrmgr.msc to manage local users and groups on your Windows PC?
I hope you enjoyed this tutorial and now you know more about Windows user management. If you have anything to add to this guide, let me know in the comments below. Also, don’t hesitate to ask if you have questions about how to work with lusrmgr.msc for managing local users and groups.