

The Windows 11 right-click menu is just one of the many controversial additions to the new operating system. Its design is cleaner, the actions are more logically sorted, but so far, very few apps have updated the way they integrate into the Windows 11 interface, so you have to dig deep inside the contextual menu to find the associated actions. If you want a simple way to access or restore the old right-click menu in Windows 11, read on:
 How to access the old right-click menu in Windows 11
This displays the familiar menu which was available in Windows 10. Alternatively, you can select the item and press Shift + F10 simultaneously on your keyboard to access the old menu directly.
How to access the old right-click menu in Windows 11
This displays the familiar menu which was available in Windows 10. Alternatively, you can select the item and press Shift + F10 simultaneously on your keyboard to access the old menu directly.
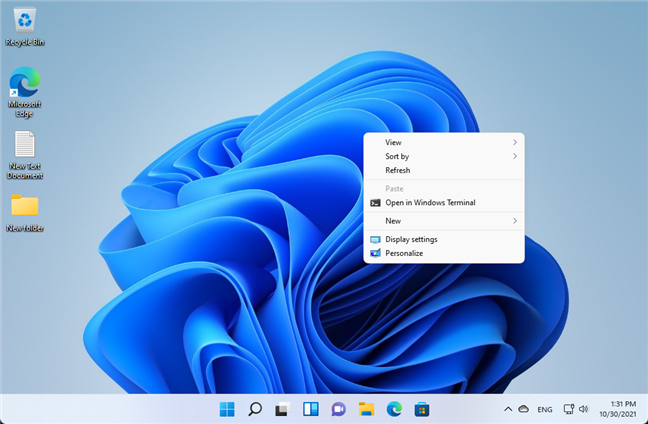
 Open the old right-click menu in Windows 11 by pressing Shift +F10
Both of these actions take longer than a simple right-click, so in the next section, we describe a way to modify the interface so that right-clicking opens the old menu directly.
Open the old right-click menu in Windows 11 by pressing Shift +F10
Both of these actions take longer than a simple right-click, so in the next section, we describe a way to modify the interface so that right-clicking opens the old menu directly.
 Remove the new right-click menu in Windows 11 using Terminal
Now, all you need to do is restart your system. The next time you right-click an item, the old menu should be displayed.
Remove the new right-click menu in Windows 11 using Terminal
Now, all you need to do is restart your system. The next time you right-click an item, the old menu should be displayed.
 Re-enable the default Windows 11 right-click menu using Windows Terminal
Don’t forget to reboot your system for the changes to take effect.
Re-enable the default Windows 11 right-click menu using Windows Terminal
Don’t forget to reboot your system for the changes to take effect.
Accessing the old right-click menu in Windows 11
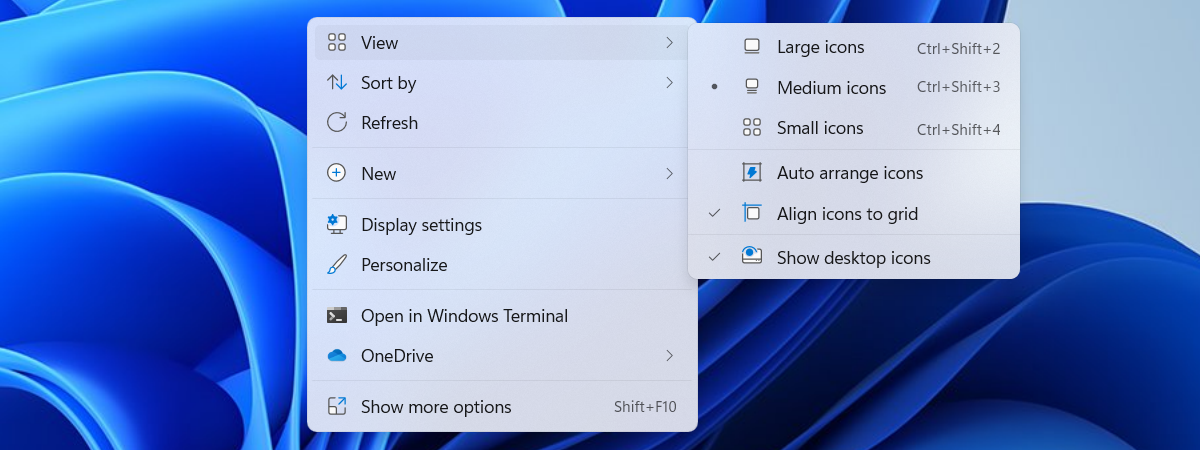
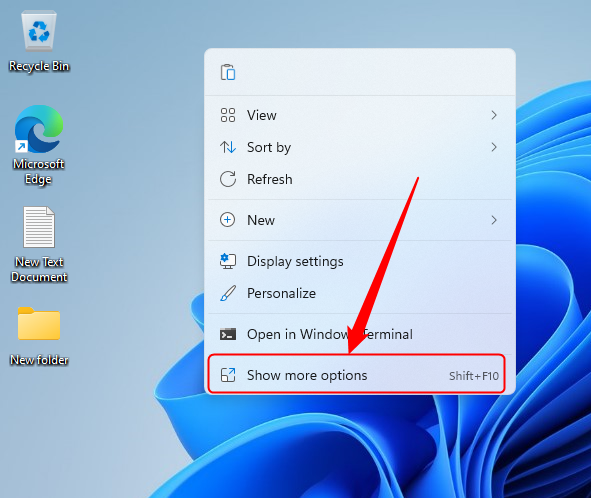
The new right-click menu from Windows 11 is quite different from the one used in Windows 10. It looks better and has a very different set of sorting rules to prevent it from reaching exaggerated sizes once you install all your favorite apps. If you want to know more about the new Windows 11 right-click menu, you can read this article. It seems the user experience designers at Microsoft are aware of the fact that many apps haven’t yet updated their integration into Windows 11, so they inserted an option to display the old right-click menu in the new one. To access it, just right-click the item and then click on “Show more options”.Restoring the old right-click menu in Windows 11 using Windows Terminal
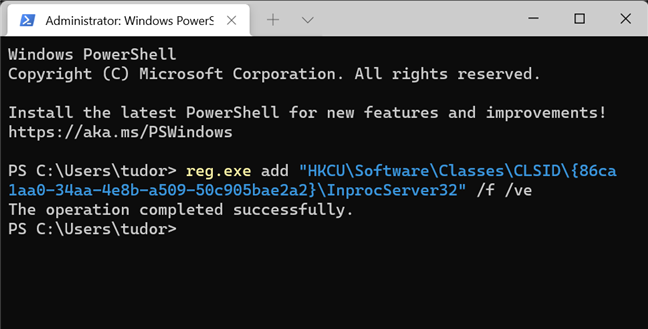
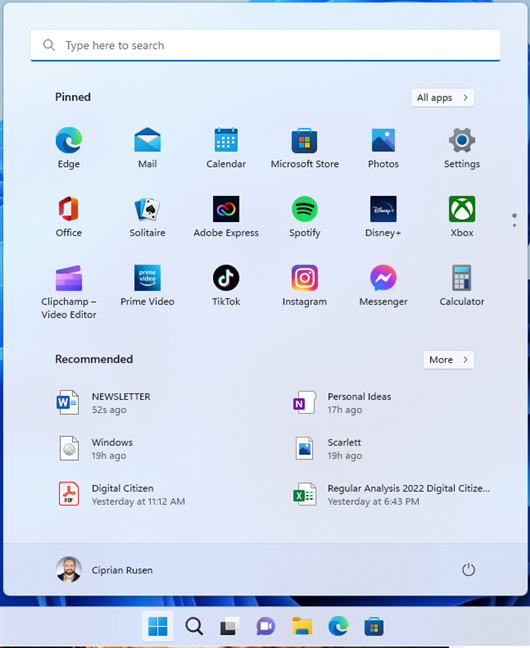
To disable the new right-click menu in Windows 11, first start Windows Terminal as an administrator. One way to do it is by opening the Start Menu, typing terminal, right-clicking Windows Terminal in the result list, and choosing Run as administrator. Choose Yes in the User Account Control window that appears. Now, you should type in the following command (or just copy it from here and paste it in the Terminal window) and then press Enter:
reg.exe add "HKCU\Software\Classes\CLSID\{86ca1aa0-34aa-4e8b-a509-50c905bae2a2}\InprocServer32" /f /ve
The interface should display a confirmation message once the command is executed.
Hot to re-enable the default Windows 11 right-click menu
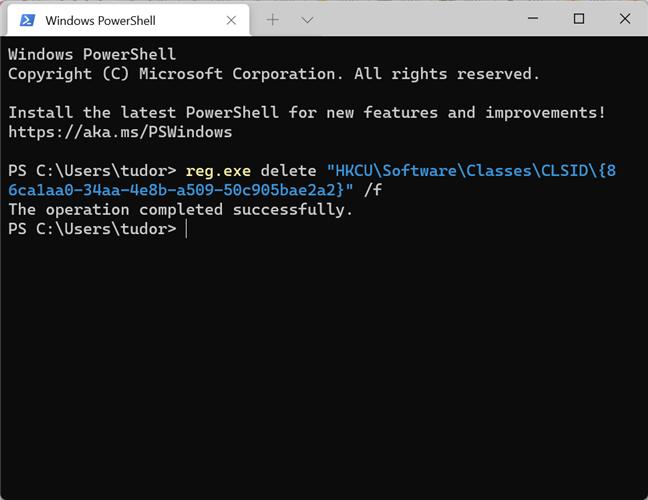
If you want to revert the change, just open Windows Terminal as administrator and execute the following command:
reg.exe delete "HKCU\Software\Classes\CLSID\{86ca1aa0-34aa-4e8b-a509-50c905bae2a2}" /f
This command removes the registry entry created in the previous section. You should get a confirmation message once the action is completed.
Discussion (8)
Hi. the thing i HATE about windows 11 are the popup screens. Being 66 yrs of age. it is IMPOSSIBLE for me to read these screens. I have to use “Magnifier” which is a pain in the Bum.
Its ridiculous you buy a top PC and a widescreen monitor. and can hardly use it 🙁
Come on Microsoft get updated !!!!!!!
It must be very frustrating indeed. Thanks for sharing your experience.
Upon using the Win 111 right click hack for the first time, I was able to use Winrar straight away to decompress a file folder but, I was unable to access my preferred tag editor MP3 tag. I even tried re installing it to no avail so, I RELUCTANTLY and, sadly reverted back to the original win 11, right click context menu as, MP3 tag is an app I use quite frequently.
Thank you for the win 11 right click hack😊… My main beef with the “new and improved” wi 11 context menu is that It required an additional click to get the the old and, familiar context menu which in my personal opinion along with the changes to the start menu & the touch keyboard (positioning & design) are completely unnecessary changes to the long established windows ecosystem. As the saying goes…”if it isn’t broken, don’t fix it” P.S Please post a hack to give me back the old (win 10) start menu view
I read elsewhere this doesnt work since an update 22000.71 update. I can confirm it doesn’t work for OS BUILD 22000.258 Windows 11 Pro. Is it working for others?
Nevermind we figured it out.
In order to make this work, it must be done as the user that wants this functionality. In other words you cannot do this as an admin.
I might do this fix because the item I most want in the right click menu is NEW and I usually have to do MORE to get it. To me, the Copy and Rename icons are less than intuitive. I’m sure that Microsoft could have found better ones for those two functions.
All we can hope for is that Microsoft listens to feedback from users…