19.10.2022
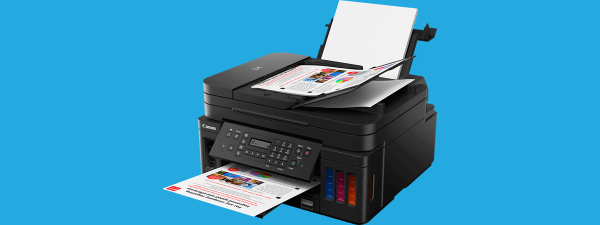
There are many people who need to install a printer in their home network. Suppose you are planning to buy one soon. In that case, you should consider a wireless printer, as it allows you to print from anywhere in your home and helps you eliminate one more wire. This lets you place your printer in an easy-to-access place while also giving you more room on your desk. One thing to keep in mind, though: installing and configuring a Wi-Fi printer requires a bit more work than installing a traditional printer using a USB cable. However, you should have no issues if you go through all the steps in this tutorial:
NOTE: We created this tutorial using a Canon Pixma MX535 printer. Although some installation steps might differ depending on what wireless printer you want to hook up, the basics we cover in this guide are the same for all Wi-Fi network printers. Also, note that because there’s no difference between a wireless printer and a Wi-Fi printer, we’re using both terms freely during this guide.
Step 1. Unpack your wireless printer and place it within your router’s broadcast range
Unpack your printer and put it somewhere close enough to your Wi-Fi router to receive a good radio signal. Furthermore, the spot you choose should be accessible to people using the printer. Pay attention to the instructions in the wireless printer’s manual regarding removing all packaging and protection. Printers usually come in really rich packaging and are filled with stickers, tapes, and other protections.
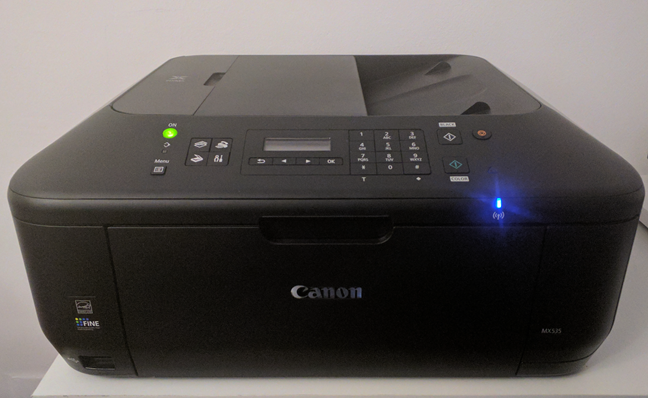
A wireless printer made by Canon
Also, your router should broadcast its signal on the 2.4 GHz band using the Wi-Fi 4 standard. Older printers may not be compatible with new routers that use the Wi-Fi 6 standard on the 2.4 GHz band instead of the Wi-Fi 4, that’s compatible with any device that can connect to a wireless network.
TIP: If you want help deciding which wireless router to get, here’s what makes a good wireless router and how to choose one.
Step 2. Turn the wireless printer on and access its network configuration menu
Once all packaging is removed, it’s time for you to set up your wireless printer and configure it for the first time. You need to connect its power cord, plug it into a power socket, install the cartridge(s) (depending on the manufacturer and model), and turn it on. Then, run its configuration wizard. You might be asked to set the language used through the printer’s menus. Also, be sure to wait while the printer cleans and aligns its cartridges.
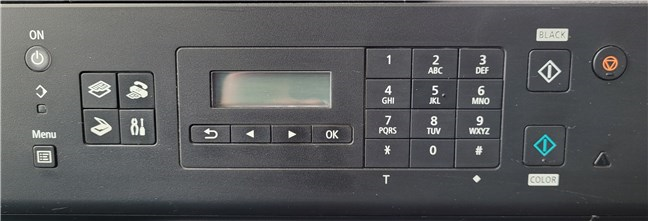
Turn on the Wi-Fi printer and start configuring it
Before you can connect the Wi-Fi printer to your computers or other types of devices, you need to connect it to the network. Browse through the printer's menus and search for one called LAN settings, Wireless LAN setup, Wi-Fi settings, or something similar.
Enter the Wireless LAN setup menu, and you should find an option to connect the printer via its Wi-Fi network card. Depending on your wireless printer model, you might also find an option to connect it via a network cable.
Step 3. How to add a wireless printer to your home network
At this point, to set up a wireless printer, there are three common alternatives:
a. Manually connect the Wi-Fi printer to your wireless network
One way is to connect the wireless printer to your home network by entering the network’s name, also known as the SSID, and its password in the printer’s configuration options. This choice only works if your Wi-Fi printer has a screen and buttons which you can use to type the network information directly on the printer.
Select the Wi-Fi connection and go through your printer’s setup wizard. You probably have security enabled on your router. In that case, you should be asked to select the network and enter the password (security key). After you finish entering all the details, the printer starts the connection procedure. Unless you have an out-of-the-ordinary setup (e.g., old router, MAC filtering), the Wi-Fi connection should be established in a couple of seconds.
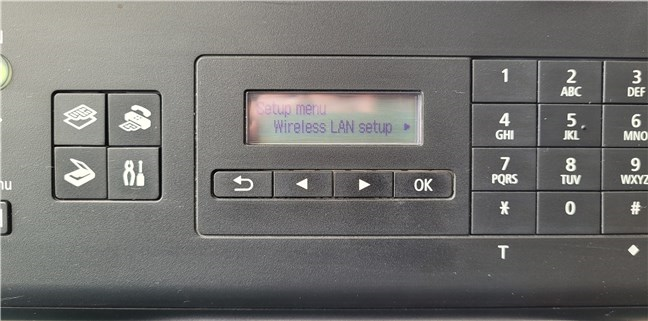
Accessing the Wireless LAN setup menu on a Wi-Fi printer
b. Connect your Wi-Fi printer to the network using WPS
An alternative and easy way to set up a wireless printer and connect it to your home network is by pressing the WPS button on the printer and the router. First, you have to press the WPS button found on your router to turn on the discovery of new devices. Then, push the WPS button on the printer too. The wireless printer automatically detects and connects to your Wi-Fi network without entering the network password or other details. Even if you shut down your printer or router, they remember their configuration and should connect as soon as you turn them back on.
c. Connect the printer to your network using an Ethernet cable
There is another method you can sometimes use when your wireless printer does not have the display and buttons used to enter the details of your home Wi-Fi network and if the WPS button is also absent. Some Wi-Fi printers can also connect to your router via an Ethernet network cable. In this situation, the printer gets an IP address automatically from your router. You can find the printer IP address on the router’s web administration page. Enter the printer’s IP address in a web browser to visit its web interface. There, look for a settings section called Wireless LAN or similar, and enter the name, password, and other necessary details for your Wi-Fi network. Note that specific Wi-Fi printer models also offer the same settings directly in their driver installation software. In that case, you can also use its software to automatically detect the printer connected to the home network and configure it to connect to the Wi-Fi network.
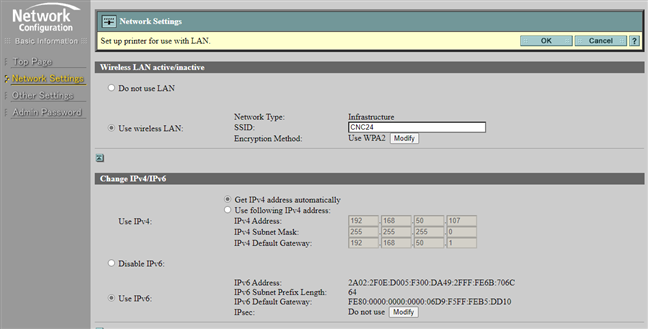
The web-based configuration interface of a wireless printer
Step 4. Check that the printer is connected to the Wi-Fi network
If you encounter issues, check your printer’s manual for troubleshooting instructions and look at your router’s configuration for any settings that could block your printer’s connection to the network.
To double-check that everything is okay, you can ask the printer to print its network configuration details. There, you can see important details such as its MAC address, the IP address received from your router, and other details.
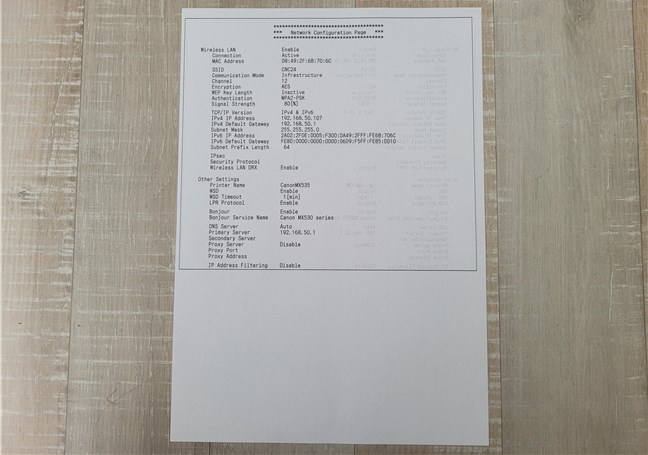
The Network Configuration Page shows the connection details for a wireless printer
Step 5. How to add a Wi-Fi printer on your Windows 10 or Windows 11 computer
Now you should install the wireless printer on your computers. You should not have executed any installation/configuration steps on your devices until now. For your computers to locate the printer over the network and use it for printing, you have to install and configure the printer’s drivers on each computer that is part of your network.
Whether you’re using Windows 10 or Windows 11, the operating system should handle this part of the process automatically. It might happen that it didn’t detect and configure your wireless printer automatically. In that case, you can either use your operating system’s built-in wizards to add the printer to your computer or run the printer’s bundled software.

How to add a wireless printer
If you choose to use the printer’s bundled software, follow the installation wizard’s steps, but do not forget to choose the option called “Use the printer with wireless LAN connection” (or similar) when asked about the printer connection method.
If you choose to use the wizard from the Settings app in Windows 10 or Windows 11, there is nothing different between a network and a local printer. The steps are the same, and we already detailed them in this tutorial: How to install a local printer on your Windows computer.
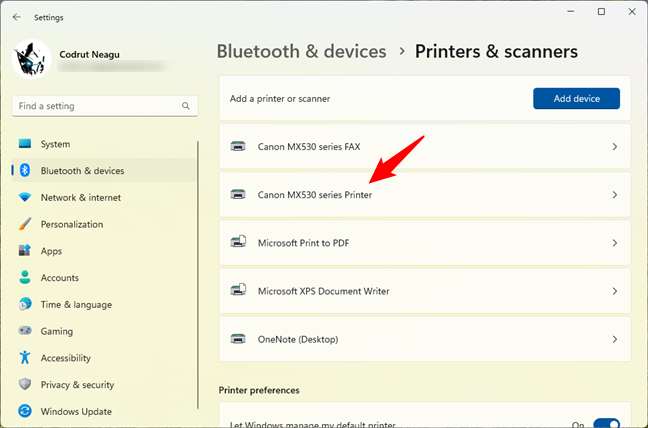
A wireless printer installed and listed in Windows 11's Settings
If you decide to use the printer wizard available in the Control Panel, the procedure is slightly different. In this case, when the wizard asks you to choose how to find your printer, instead of “local printer,” you have to select one of the options in the list below, depending on what information you know about your wireless printer:
- “Add a Bluetooth, wireless, or network discoverable printer” - this is the first thing you should try. If it can find it in your network, your Windows 10 or Windows 11 computer shows it and lets you install the printer using this option.
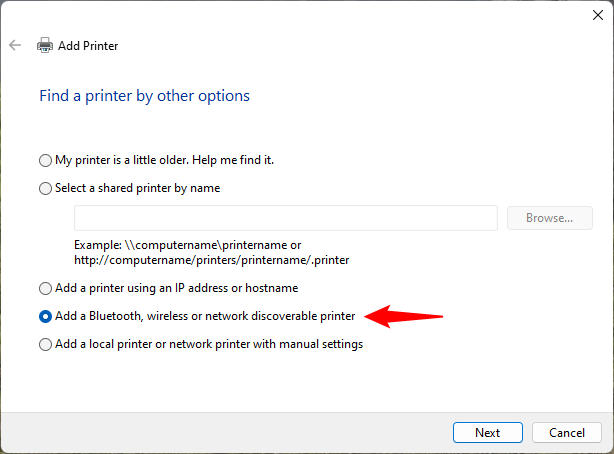
How to add a wireless printer from the Control Panel
- “Add a printer using a TCP/IP address or hostname” - if you know the IP address or the name of your wireless printer, you can use this option. Enter the information in the wizard, and then Windows starts installing its drivers for you.
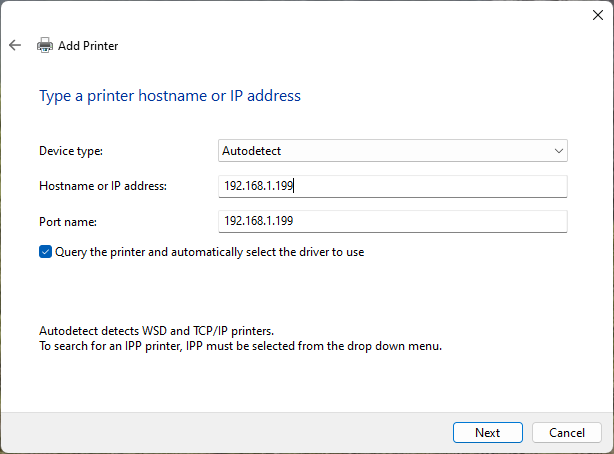
How to add a wireless printer from Control Panel using an IP address
- “Add a local printer or network printer with manual settings” - use this option only if you are an experienced user and know the exact port and driver your wireless printer will use on your Windows computer.
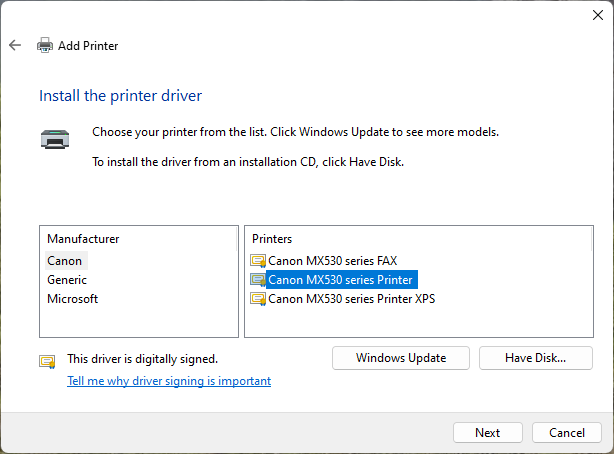
How to set up a wireless printer using manual settings
TIP: After your wireless printer is installed, here’s how to print anything you want with it.
Step 6. How to install a wireless printer on your smartphone(s) and tablet(s)
If you have a smartphone or a tablet, you can print wirelessly from them too. Look for printing applications from the manufacturer of your printer. For example, Canon has a free application called Canon PRINT Inkjet/SELPHY that is available both for iPhone and Android.
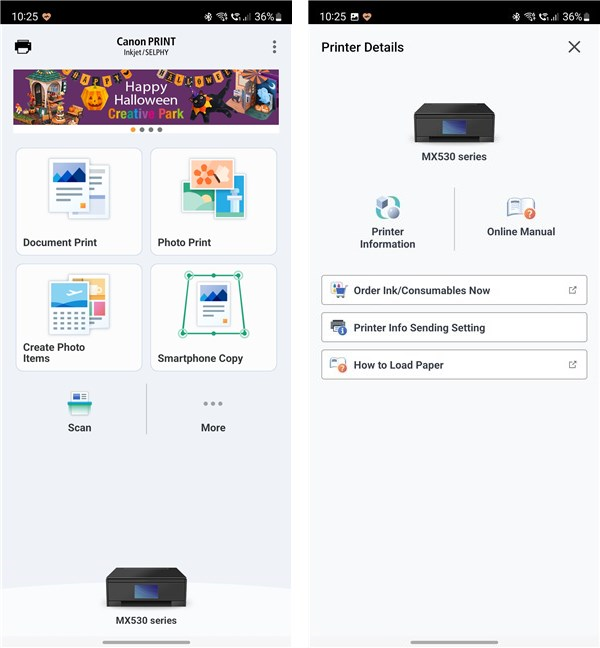
A mobile app for a wireless printer
Other manufacturers, such as Epson, Brother, or HP, also provide similar free apps.
Did you manage to hook up your wireless printer to your Wi-Fi router without issues?
As you can see, installing a wireless network printer requires quite a bit of time and work. Also, you must be careful not to miss any steps or essential configuration items. However, the time saved when using the wireless printer pays off. Being able to print from anywhere in your home, anytime, helps improve your productivity.