

RAM can cause some of the most frustrating computer problems. Symptoms can be diverse and somewhat random: you may encounter high system instability, data corruption, or unexplained behaviors that leave you puzzled. When you have problems like these, it is a good idea to test the RAM on your Windows computer. One way to do it is to use the built-in Windows Memory Diagnostic app. It is available in Windows 10, as well as in older versions. Here is how to use it to troubleshoot memory problems and view diagnostic results:

 Starting Windows Memory Diagnostic from CMD
If you are in a rush and don’t want to read another guide, a quick way to open the Windows Memory Diagnostic app is to search for its name and then click or tap on the appropriate search result.
Starting Windows Memory Diagnostic from CMD
If you are in a rush and don’t want to read another guide, a quick way to open the Windows Memory Diagnostic app is to search for its name and then click or tap on the appropriate search result.
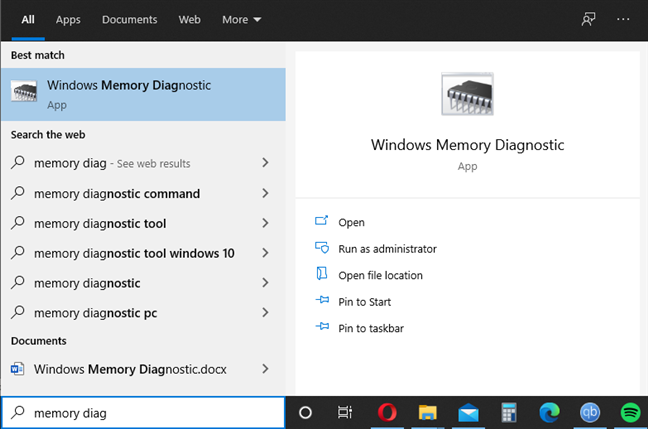
 Search for Windows Memory Diagnostic
 Windows Memory Diagnostic
 reboots your Windows computer or device and runs in full-screen, in an environment that reminds us of the old MS-DOS operating system. By default, it runs two Standard test passes with the cache turned on, and then it reboots automatically.
Windows Memory Diagnostic
Windows Memory Diagnostic reboots your Windows computer or device and runs in full-screen, in an environment that reminds us of the old MS-DOS operating system. By default, it runs two Standard test passes with the cache turned on, and then it reboots automatically.
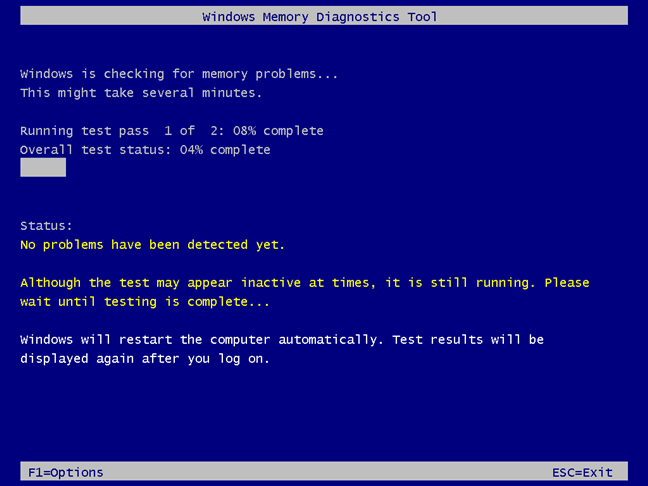
 Windows Memory Diagnostic runs two Standard test passes
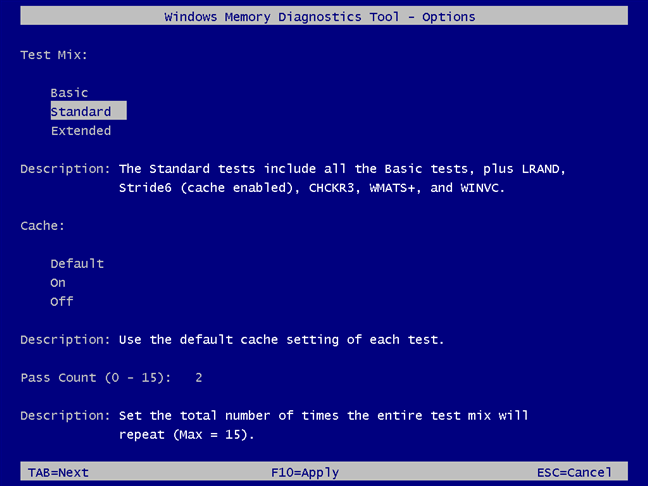
If you want to configure the type of tests and how many times they are run, press F1 on your keyboard. You see all the options that can be configured about the Windows Memory Diagnostics tool: the test mix used, the cache settings, and the pass count.
Windows Memory Diagnostic runs two Standard test passes
If you want to configure the type of tests and how many times they are run, press F1 on your keyboard. You see all the options that can be configured about the Windows Memory Diagnostics tool: the test mix used, the cache settings, and the pass count.
 Windows Memory Diagnostic - set things your way
Navigate the available options by pressing TAB on your keyboard to change the following items:
Windows Memory Diagnostic - set things your way
Navigate the available options by pressing TAB on your keyboard to change the following items:
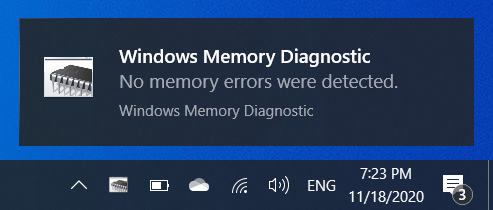
 Windows Memory Diagnostic notification
To see the results of your RAM diagnostics, open the Event Viewer, and go to “Windows Logs -> System.” There, look for events that have MemoryDiagnostics-Results mentioned as the Source in the column in the middle.
Windows Memory Diagnostic notification
To see the results of your RAM diagnostics, open the Event Viewer, and go to “Windows Logs -> System.” There, look for events that have MemoryDiagnostics-Results mentioned as the Source in the column in the middle.
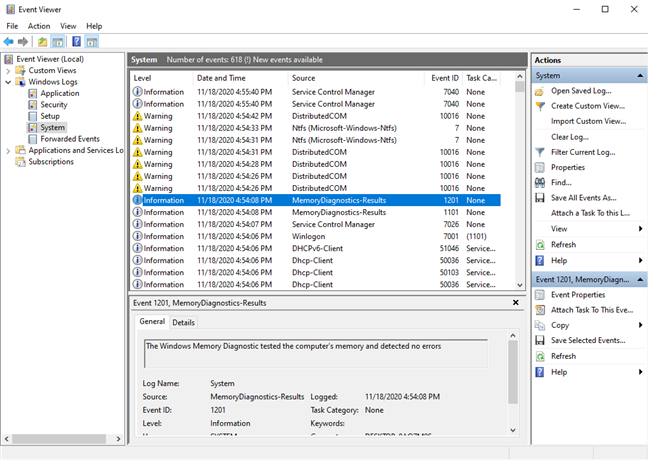
 In Event Viewer, look for MemoryDiagnostics-Results
Click on those events, and you see details about the results you’ve got, similar to the screenshot below. If you go to the Details tab, you see lots of technical information about each test pass.
In Event Viewer, look for MemoryDiagnostics-Results
Click on those events, and you see details about the results you’ve got, similar to the screenshot below. If you go to the Details tab, you see lots of technical information about each test pass.
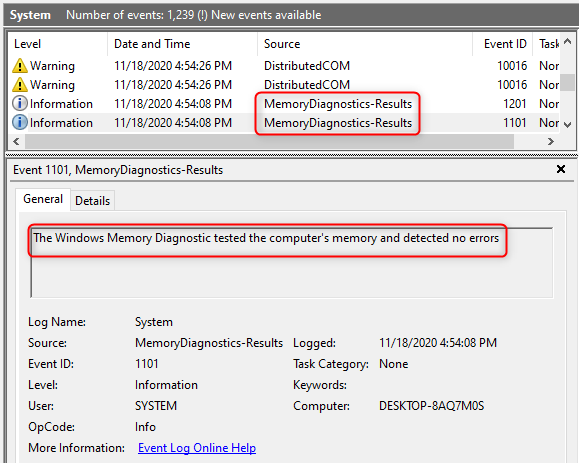
 Event Viewer shows details about the Windows Memory Diagnostic
When you are done understanding whether you have problems with the RAM on your computer, close Event Viewer.
Event Viewer shows details about the Windows Memory Diagnostic
When you are done understanding whether you have problems with the RAM on your computer, close Event Viewer.
Step 1. Start the Windows Memory Diagnostic tool
If you want to use the Windows Memory Diagnostic app for troubleshooting RAM problems, you need to start it first. We have a dedicated guide with everything you need to know, including ways to start the app when Windows doesn’t boot or from the Command Prompt: 12 ways to start the Windows Memory Diagnostic troubleshooting app.Step 2. Configure and run Windows Memory Diagnostic
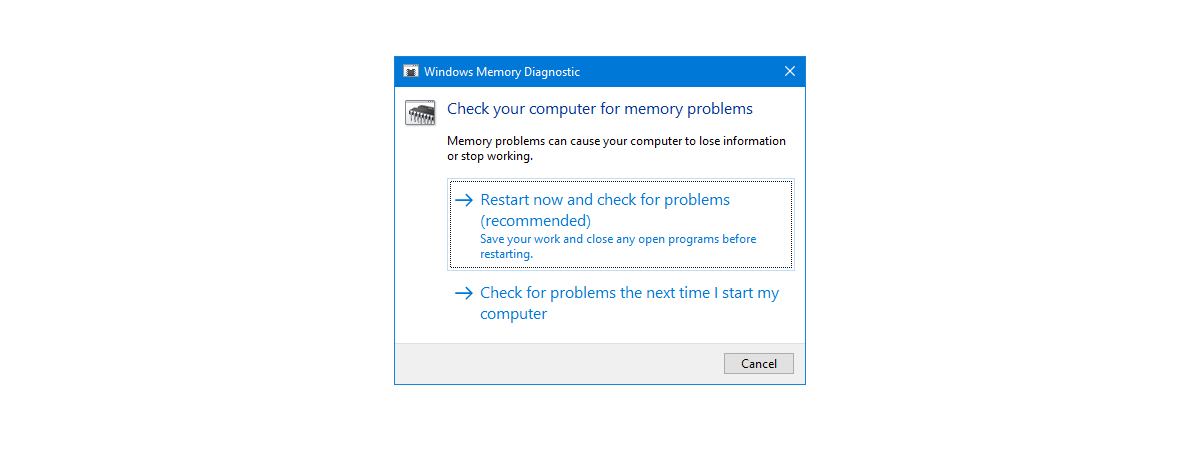
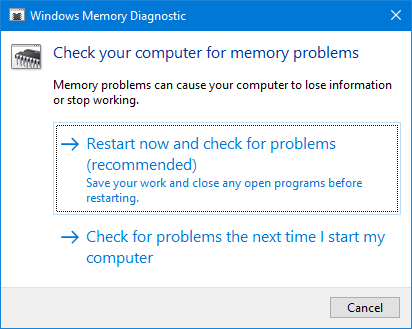
When you open Windows Memory Diagnostic, it asks whether you want it to restart your PC now and check for problems, or scan for problems the next time you start your computer. If you want to troubleshoot your issues right away, choose the first option.- Test Mix – choose between Basic, Standard, or Extended diagnostics. Even though their description is somewhat technical, what is evident is that the complexity and length of the tests that get executed grows from Basic to Standard to Extended. If you want to be sure there is no problem with your RAM, the Extended test does the job, but the testing duration increases significantly, from a couple of minutes to several hours.
- Cache – you can choose between Default, On, or Off. I think it is best to use the default cache setting and not fiddle with it.
- Pass Count – type the number of times you want the test mix to be repeated. The default number is two, and it should be good enough for most people. If you’re going to go the extra mile, three passes should provide enough clarity.
Step 3. See the results of the Windows Memory Diagnostic
After you log into Windows, you may see a notification from Windows Memory Diagnostic, telling you whether memory errors were detected or not. Unfortunately, this notification is not always shown, and you may miss it on your PC.
Discussion (3)
Thank you so much this article saved my life, you dont understand how much this saved my skin my computer would not boot and I was going to do a fresh install of the os but realised it could be a ram issues reading this prevented hours of reinstalling crap omg thanks ♡♡♡♡♡
are those w8 screen shots of memo..and if yes how’d u did em? great job and ty alot
Yes, those are W8 screen shots. Any Win8 screen shots with a dark blue background were done by Ciprian Rusen (my W8 background is teal). He is MUCH better at it than I am. 🙂 I am hoping he’ll chime in with how it was done.