


Robots run on code that tells their motors, sensors, and processors how to behave. You can program a robot easily once you understand how its parts work, what platform it uses, and how to write basic movement and sensing instructions. This guide walks you through each step with simple examples and clear paths for beginners.
1) Understand what robot programming means
Robot programming describes the process of writing instructions that the robot follows to complete tasks. You combine sensor data, movement commands, and logic to control how the robot reacts to its environment.
Inputs, outputs, and movement basics
Sensors provide data so the robot can interpret light, distance, or sound. Motors perform actions, and logic ties everything together. Understanding this loop helps you predict how your robot responds to code.
Common robot types you can program
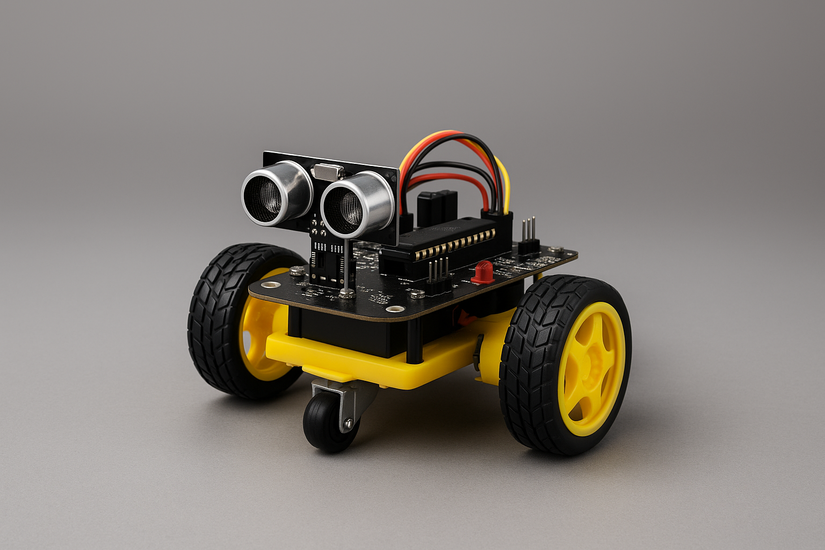
Wheeled robots, robotic arms, educational kits, and DIY microcontroller builds all follow the same programming principles. Knowing your robot type helps you choose the right tools later.
2) Choose a programming platform
Different platforms use different hardware and software, so choosing the right one helps you avoid setup issues. Pick a platform that matches your skills and project goals.
Arduino for simple robots
Arduino works well for basic robots that need straightforward motor control and simple sensors. It uses C/C++ and runs on affordable microcontroller boards.

Raspberry Pi for advanced logic
Raspberry Pi runs a full operating system, which makes it ideal for complex tasks like object recognition or navigation. It supports Python and powerful add-on modules.
Micro:bit and block coding for kids
Micro:bit uses drag-and-drop coding and simple JavaScript or Python. It provides a friendly environment for beginners and classrooms.

ROS for large or complex robots
Robot Operating System suits advanced users and supports modular robotics development. It powers many research and industrial robots.
3) Pick the right programming language
Your choice of programming language affects how quickly you learn and what projects you can build. Select a language that fits your robot platform.
Python for fast learning
Python is easy to read and works with Raspberry Pi, MicroPython boards, and many simulators. It helps new users learn logic quickly.

C or C++ for high-precision control
C and C++ let you manage sensors and timing with tight control. Arduino boards use these languages for low-level behavior.
Block coding for complete beginners
Visual drag-and-drop interfaces help new learners understand logic without typing code. These tools create a smooth path into text-based languages.
4) Set up your robot development environment
A working development environment ensures your computer can detect the robot and upload code without errors. This step prevents the most common setup failures.
Install your coding IDE
Download and install the IDE for your platform, such as Arduino IDE, Thonny, VS Code, or MakeCode. These tools let you write, edit, and upload programs.

Connect your board or robot to the computer
Use USB, Bluetooth, or Wi-Fi depending on your robot model. Make sure your robot appears in the IDE’s device list.
Verify communication and upload tools
Check the selected board type and communication port. This ensures your program uploads successfully.
5) Write your first robot program
Start with a simple project so you can see immediate results. A basic movement script teaches you the full program-upload-test workflow.

Create a basic movement command
Write a short script that runs a motor or moves a servo. This confirms your development environment works correctly.
Add a sensor input
Read values from a distance sensor, light sensor, or button. This introduces input-based behavior.
Combine movement and sensing
Use simple logic such as “Move until the distance sensor detects an obstacle” to build reactive motion.
6) Test and debug your robot code
Testing improves your robot’s reliability and helps you identify wiring, logic, or timing problems.
Check wiring and power first
Loose wires or weak batteries cause most robot failures. Reseat connectors and confirm your power supply is stable.
Use serial output or logs
Print sensor values to a serial monitor to verify what your robot sees. This helps you find incorrect readings.
Fix timing and logic issues
Adjust delays or thresholds so your robot behaves consistently. Fine-tuning these values improves accuracy.
7) Learn advanced robot programming concepts
PID motor control
PID loops smooth out navigation and control speed more accurately. This helps with self-balancing robots or precise movement.
Simulators and virtual robots
Simulators help you test ideas without hardware. They provide a safe environment to experiment.
Adding computer vision
Use cameras with Python and OpenCV to detect objects or follow shapes. This enables more intelligent behavior.
8) Troubleshooting common robot programming issues
- Robot not responding to code: Confirm that your board type, COM port, and drivers are correct in the IDE.
- Sensor values not updating: Check wiring polarity and verify that your code reads the correct input pin.
- Motors jitter or stop suddenly: Check your power supply, battery capacity, and PWM signal. These factors affect stability.
FAQs
Do I need experience to start programming a robot? You can start with no experience by using beginner-friendly platforms like Arduino or Micro:bit. Simple projects help you build confidence quickly.
How long does it take to program a basic robot? Most beginners can write a simple movement or sensor program within an hour. More complex behaviors take additional practice.
Can I learn robot programming without buying hardware? Yes, you can use robot simulators and virtual coding platforms to practice movement, sensing, and logic before buying a robot kit.
What robot kit is best for beginners? Kits like Arduino-based cars, Micro:bit robots, and simple Raspberry Pi builds offer an easy learning path with strong community support.
Summary
- Understand how sensors, motors, and logic work together.
- Choose a platform like Arduino, Raspberry Pi, Micro:bit, or ROS.
- Select a language such as Python, C/C++, or block coding.
- Set up your IDE and connect your robot correctly.
- Write and test a simple movement or sensing program.
Robot programming becomes manageable once you understand the basic components, choose the right platform, and practice with small projects. Start with simple movement scripts, add sensor input, and expand into more advanced tasks as you build confidence. With a clear setup and structured testing, your purchased or self-made robot will run smoothly and respond accurately to your code.


Discussion (0)
Be the first to comment.