




Peltier modules move heat by pulling energy from one side and pushing it to the other. You can build a peltier CPU cooler if you prepare your materials and understand how to manage condensation and electrical load. This guide explains every step in a clear order so you can assemble and test your system safely.
Table of contents
What you need before starting
A peltier setup requires correct part selection and safety planning. These choices prevent overheating and moisture damage.
Tools and materials checklist
Have your parts ready before you begin. This reduces build errors and ensures all components fit together correctly.
- Gather a TEC module, cold plate, hot-side cooler, thermal paste, PSU, wiring, and insulation foam.
- Set aside zip ties, a screwdriver set, dielectric grease, and foam tape.
- Keep a temperature controller ready for better regulation.

Choosing the right TEC module
A TEC works best when it matches your CPU’s heat output. Proper sizing improves stability and cooling performance.
- Compare the CPU’s rated TDP to the wattage of the TEC.
- Pick a TEC that can handle more heat than your CPU produces.
- Avoid oversizing the TEC because it increases heat and power draw.
Power supply requirements
A TEC needs more current than a motherboard header provides. A dedicated PSU protects your system.
- Check the TEC’s voltage and amperage needs.
- Choose a PSU that exceeds those requirements.
- Use clean wiring paths to reduce heat buildup.
Safety considerations
A peltier system can cause condensation and electrical stress. You protect your PC by sealing moisture points and regulating voltage.
- Keep the cold surface insulated at all times.
- Use a fuse to prevent electrical shorts.
- Never expose uninsulated cold components to room air.
Prepare the CPU and cold-side components
Preparing your CPU area helps prevent early condensation. This protects the motherboard during testing.
Mount the cold plate
The cold plate keeps the CPU in contact with the TEC’s cool side. A clean surface improves thermal transfer.
- Remove old paste and clean the CPU with isopropyl alcohol.
- Apply a thin layer of thermal paste.
- Set the cold plate on the CPU and secure it with proper mounting hardware.
Add insulation to the CPU socket
Insulation blocks warm air from touching cold metal. This reduces condensation risk.
- Cover the CPU socket area with neoprene foam.
- Seal gaps around the mounting bracket.
- Apply dielectric grease to exposed metal contacts.
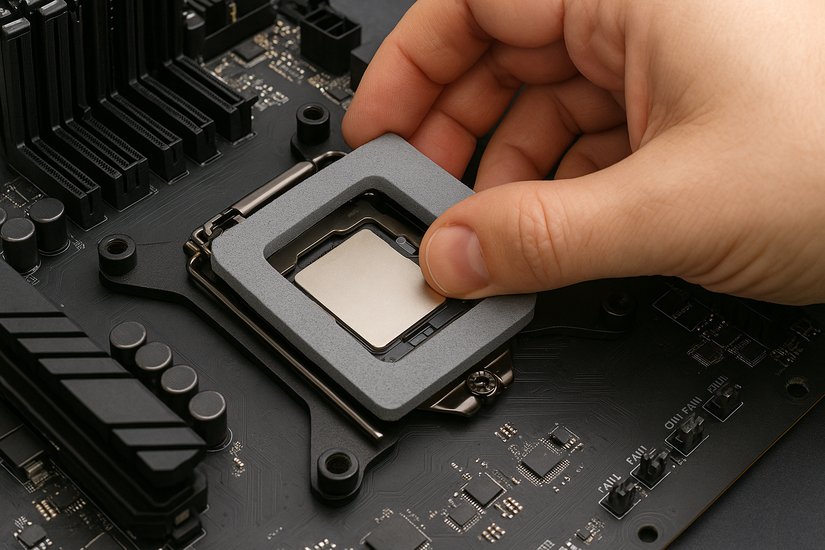
Seal the edges for moisture control
A sealed surface keeps humidity out. This improves long-term safety.
- Press foam tape around the cold plate edges.
- Fill small openings with closed-cell foam.
- Confirm that no air can reach the cold side.
Assemble the TEC and hot-side cooling
The TEC must sit between the cold plate and the hot-side cooler. Proper orientation ensures correct heat flow.
Position the TEC module
The TEC works only if the cold side faces the CPU. Orientation errors degrade performance.
- Identify the cold and hot surfaces on the TEC.
- Place the cold side against the cold plate.
- Center the TEC to improve pressure distribution.
Attach the hot-side cooler
The hot side produces more heat than your CPU alone. Strong cooling prevents thermal runaway.
- Apply a thin layer of thermal paste on the TEC’s hot surface.
- Mount a water block or performance air cooler.
- Tighten bolts evenly to maintain plate pressure.
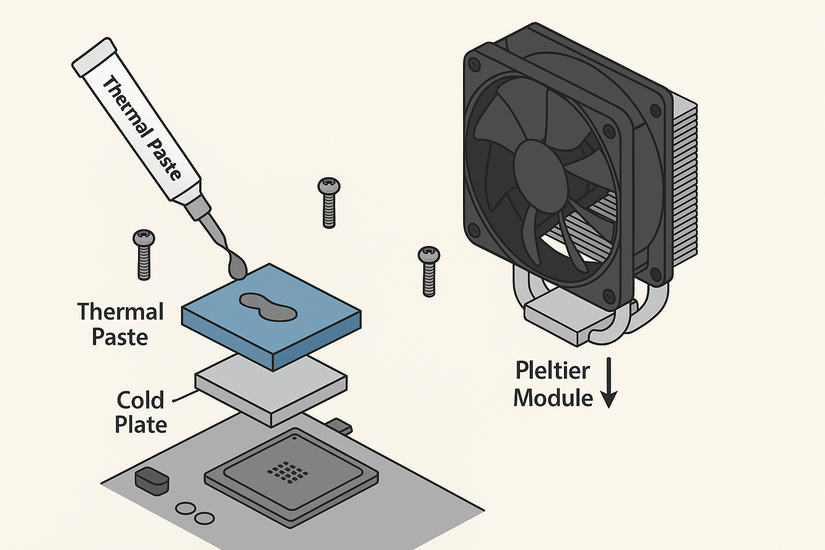
Add thermal compound to both interfaces
Good paste application improves contact and temperature control.
- Use a small amount of paste on each surface.
- Spread the paste without creating air gaps.
- Confirm even coverage before securing parts.
Wiring the peltier cooler safely
Wiring determines stability and overall safety. Voltage control reduces condensation and power spikes.
Connect the TEC to the PSU
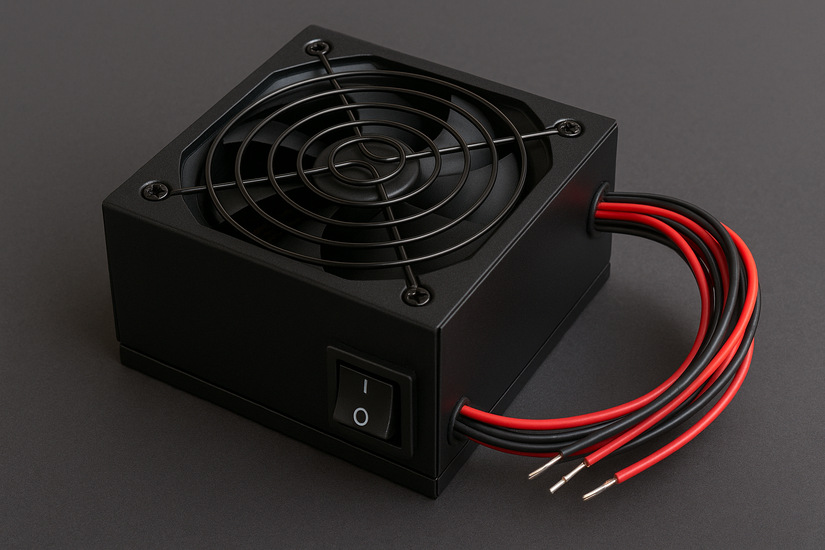
A TEC does not connect to the motherboard. The PSU must support its current draw.
- Match polarity correctly when attaching wires.
- Connect the TEC directly to the PSU output.
- Add an inline fuse for protection.
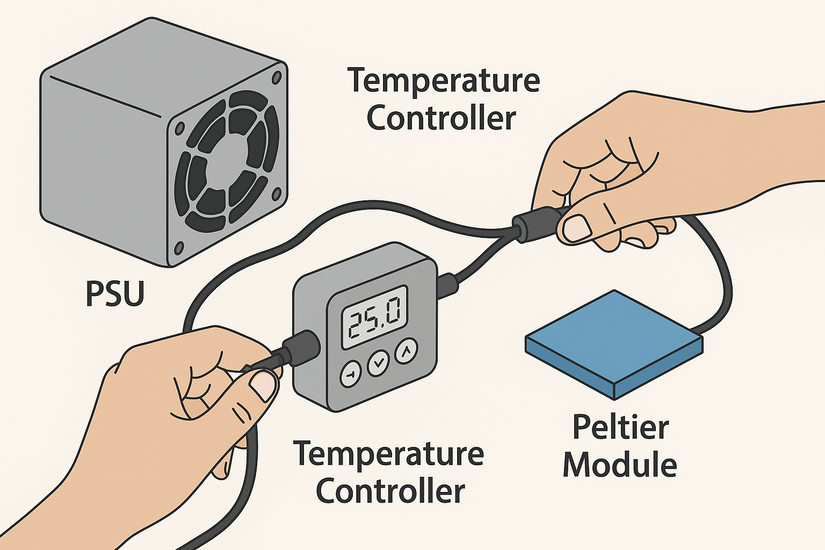
Install a PWM or temperature controller
A controller regulates cold-side temperature. This reduces condensation and improves efficiency.
- Place the controller between the PSU and TEC.
- Set initial power levels to a moderate output.
- Adjust settings based on thermal performance.
Add fuses and cable management
Proper wiring keeps airflow unobstructed. Fuses reduce electrical risk.
- Secure wires with zip ties to prevent movement.
- Place fuses within reach for maintenance.
- Keep cables away from hot components.
Test and tune the system
Testing verifies that insulation and wiring work correctly. You can adjust power levels after initial checks.
Power on and check temperatures
Temperature monitoring helps you confirm correct installation.
- Boot the system and watch temperature readings.
- Use CPU stress tests to measure thermal response.
- Record temperature changes over several minutes.
Inspect for condensation
Moisture checks are essential for sub-ambient cooling. Catching early condensation prevents damage.
- Look around the cold plate edges for water buildup.
- Check foam surfaces for moisture changes.
- Shut down the system if water appears.
Adjust controller settings
Fine-tuning keeps the system safe and efficient.
- Reduce TEC power if condensation begins.
- Increase hot-side cooling to improve efficiency.
- Repeat tests until the system stays stable.
Monitor long-term performance
A peltier system behaves differently over time. Proper maintenance prevents failures.
Understand thermal limitations
A TEC cools well at idle but struggles under heavy load.
- Expect temperatures to rise during long CPU tasks.
- Use stronger cooling if you see thermal throttling.
- Monitor performance weekly for changes.
Maintenance and safety checks
Regular checks keep your setup reliable.
- Inspect insulation every few weeks.
- Reapply thermal paste when temperatures drift upward.
- Confirm the PSU stays within safe temperature ranges.
Is building a peltier CPU cooler worth it?
A peltier cooler costs more energy and requires more maintenance than standard cooling. You should weigh performance gains against complexity.
Cost vs performance
The cooler can reach sub-ambient temperatures, but it needs strong cooling and higher electricity use.
- Add up part costs, including PSU and insulation.
- Compare results to high-end liquid coolers.
- Decide based on your workload and budget.
Risks and alternatives
A TEC can damage hardware if not insulated correctly. Safer options may suit more users.
- Consider high-performance air coolers or AIO liquid coolers, like the Deepcool AIO liquid cooler.
- Use a TEC only if you understand condensation management.
- Avoid TEC builds if your PC runs in a humid space.
Safety tips and practices
- Keep the cold plate fully insulated to prevent moisture issues.
- Reduce TEC power if condensation starts.
- Use a multimeter to confirm voltage before testing.
FAQs about Peltier CPU Cooler
How long do peltier modules last? Most last several years when cooled correctly.
Can a TEC run directly from a PC PSU? Yes, but only if the PSU meets the amperage requirement.
Does a TEC always cause condensation? Only if cold surfaces stay below the room’s dew point.
Is a water loop required? A strong air cooler may work, but water cooling improves hot-side performance.
Summary
- Choose a TEC that matches your CPU’s heat output.
- Prepare the CPU socket with insulation and moisture barriers.
- Mount the TEC between the cold plate and hot-side cooler.
- Wire the TEC to a dedicated PSU with proper safety controls.
- Test for temperature stability and condensation before long-term use.
Building a peltier CPU cooler requires planning, insulation, and voltage control. With careful assembly and testing, you can reach sub-ambient temperatures while protecting your hardware.


Discussion (0)
Be the first to comment.