Windows 10 includes a feature called Storage Sense that is useful if you don't have a lot of free space available on your computer or device. Storage Sense provides you with an automatic way to regularly clean your Windows 10 installation drive. That way, you don't have to struggle to manually erase temporary files, delete things that you keep in your OneDrive, or uninstall apps to clear the clutter and make room for others. In this guide, we show you how to turn on Storage Sense, and also how to configure it to automatically clean your Windows 10 drive:
What is Storage Sense?
Storage Sense is a feature of Windows 10 that allows the operating system to free up space automatically. It removes files that you do not need, like temporary files and the contents of your Recycle Bin.
By default, Storage Sense is enabled, and Windows 10 runs it automatically whenever you're low on disk space. However, you can also configure it to run on a schedule, every day, week, or month. You can also free up space manually whenever you want to.
Storage Sense in Windows 10
It is also important to note that Storage Sense can run only on the C: drive, on which Windows 10 is installed. Storage Sense doesn't work on other drives you might have on your PC like D: or E:, regardless of whether those drives are physical hard disk drives, solid-state drives, optical drives, or just partitions on your main drive.
Storage Sense was first included in Windows 10's 2017 Fall Creators Update and has since then received new features and options. In this tutorial, we are covering Storage Sense from the Windows 10 November 2019 Update. If you have an older version of the operating system, some of the features and settings in this tutorial might not be available on your PC or device.
How to turn on Storage Sense in Windows 10
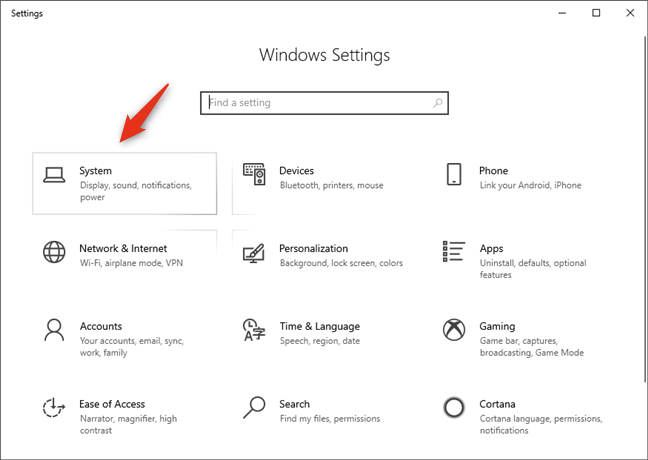
You can access Storage Sense from the Windows 10 Settings app. So, for starters, open the Settings app. A quick way to do that is to open the Start Menu and then click or tap on the gear-like icon from the left. Or, if you have a keyboard on your Windows 10 device, press the Windows + I keys simultaneously. In the Settings app, open the System category.
The System category of Windows 10 Settings
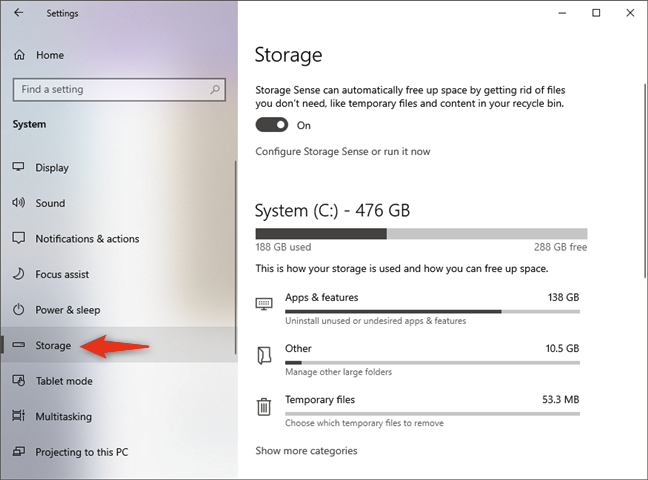
On the left side of the window, go to Storage.
The Storage section from the System Settings
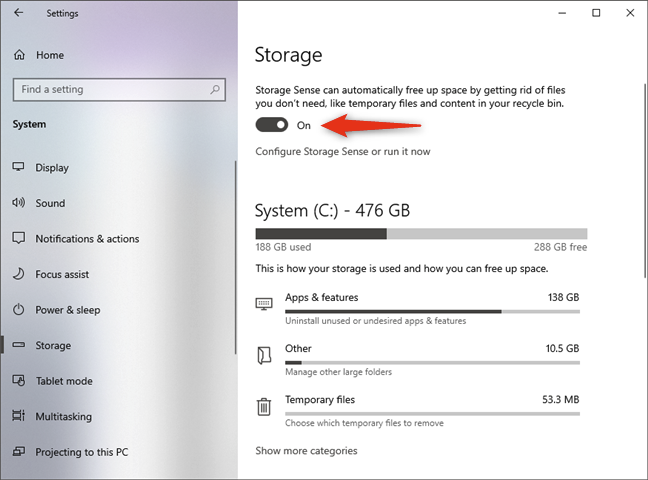
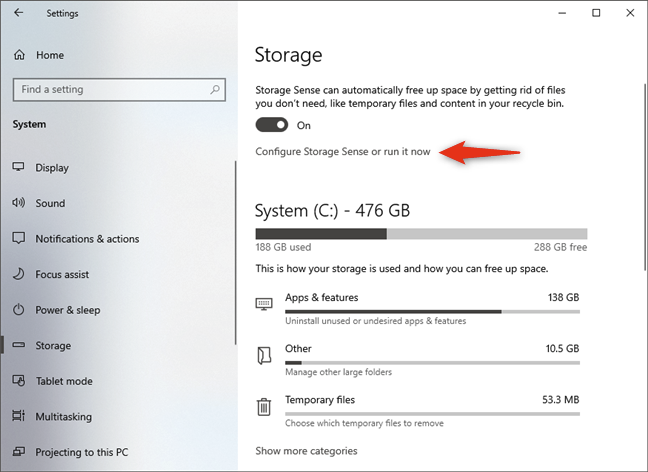
On the right side, the first section you see is Storage Sense. Here, Microsoft lets you know that "Storage Sense can automatically free up space by getting rid of files you don't need, like temporary files and content in your recycle bin." Although it should be enabled by default, if it's not, you can turn on Storage Sense by activating its switch.
Turn on Storage Sense in Windows 10
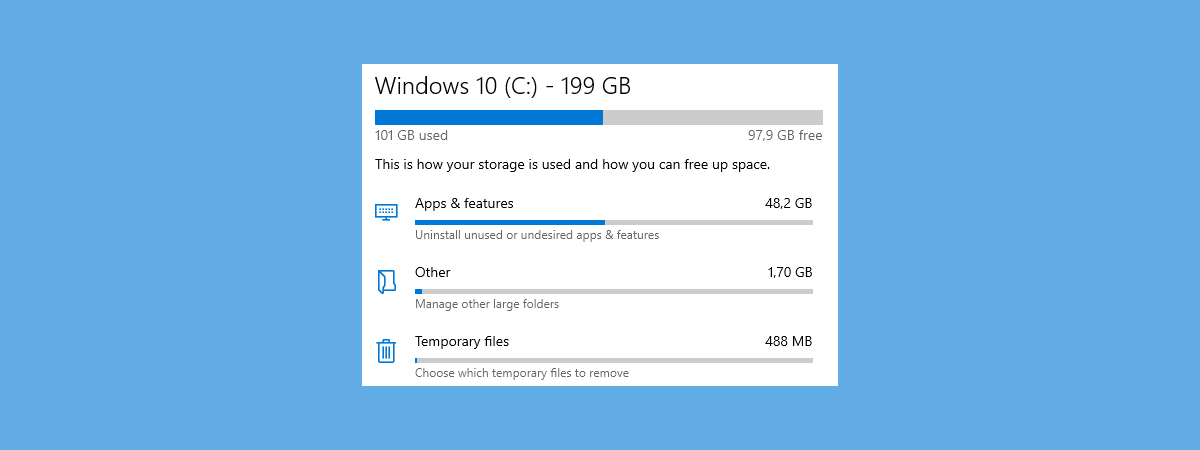
NOTE: Under the Storage Sense section, Windows 10 also shows you "how your storage is used and how you can free up space." That includes details on how space is used on your Windows 10 drive, in a list of different categories such as Apps & features, Temporary files, and Other. If you want to learn how to use this Storage information and tools, we've covered them in a separate article: How to clean up Windows 10 storage space like a Pro.
How to configure Storage Sense in Windows 10
Right under the Storage Sense switch, there's a link called "Configure Storage Sense or run it now." To change how Storage Sense works on your Windows 10 PC, click or tap on it.
Configure Storage Sense or run it now
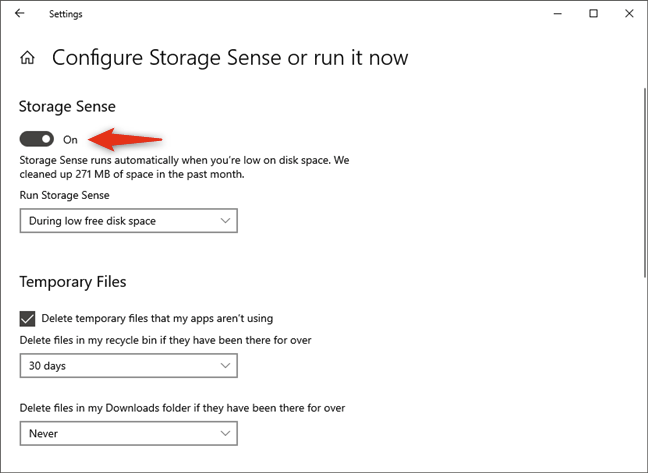
The "Configure Storage Sense or run it now" page is where you can configure how Storage Sense cleans your Windows 10 drive of unneeded files. Although a bit redundant, the first thing on this page is the same Storage Sense switch that we've seen earlier. You can use it to turn on Storage Sense or to disable it.
The switch for turning Storage Sense on or off
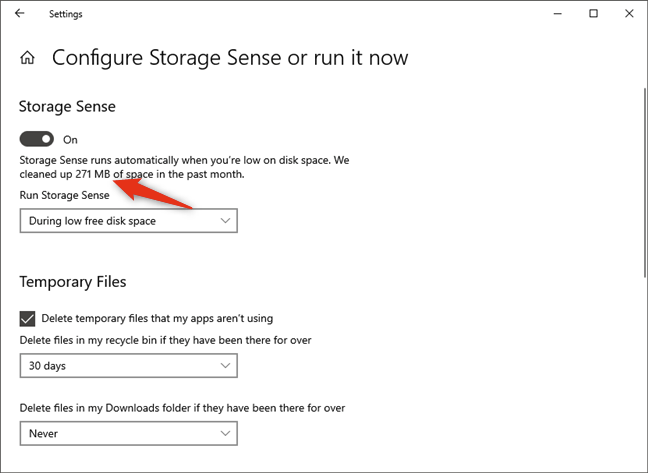
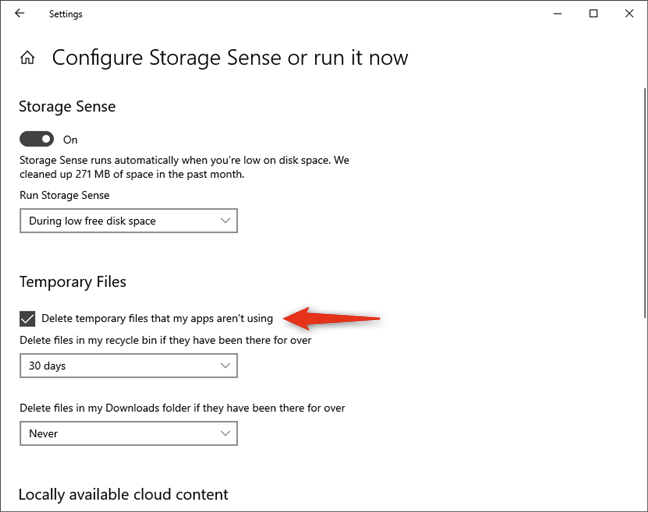
Under the Storage Sense On/Off switch, Windows 10 shows you how much storage space has been cleaned up in the past month. For instance, on one of our computers, it cleaned 271 MB.
The amount of space cleaned up by Storage Sense
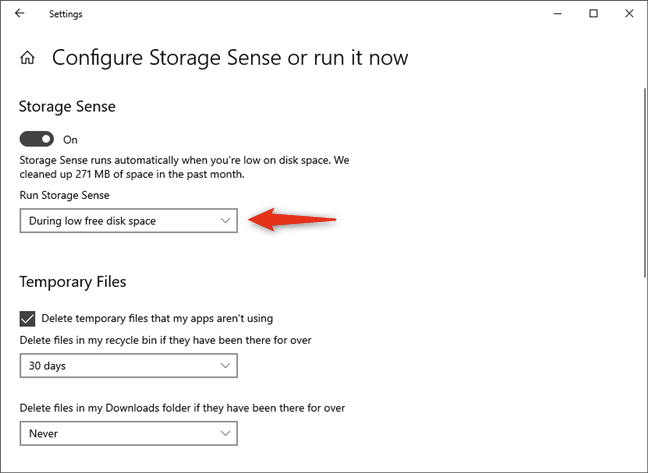
Then, you can choose when to "Run Storage Sense" automatically. By default, Windows 10 runs it "During low free disk space." However, if you prefer, you can also configure Storage Sense to run Every day, Every week, or Every month.
When to automatically run Storage Sense
Then, you can choose what files should be considered temporary by Storage Sense and be deleted automatically by Windows 10.
In the Temporary Files section, configure whether you want Storage Sense to "Delete temporary files that my apps aren't using." This setting makes Windows 10 automatically remove temporary files created by your apps on the Windows installation drive.
Delete temporary files that apps aren't using
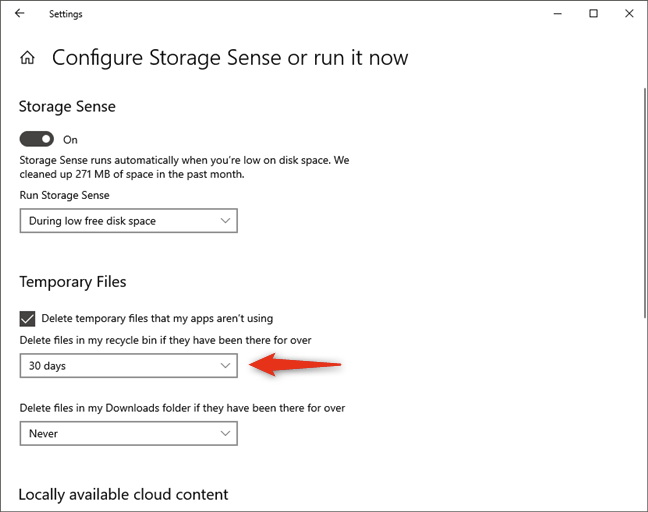
Then, Windows 10 lets you choose whether Storage Sense should "Delete files in my recycle bin if they have been there for over" a time that you select. This automatically erases all the files you've deleted and have been kept in your Recycle Bin for more than the specified time, which is set to 30 days by default. If you prefer, you can change the time to 1 day, 14 days, or 60 days.
Delete files in the Recycle Bin if they have been there for some time
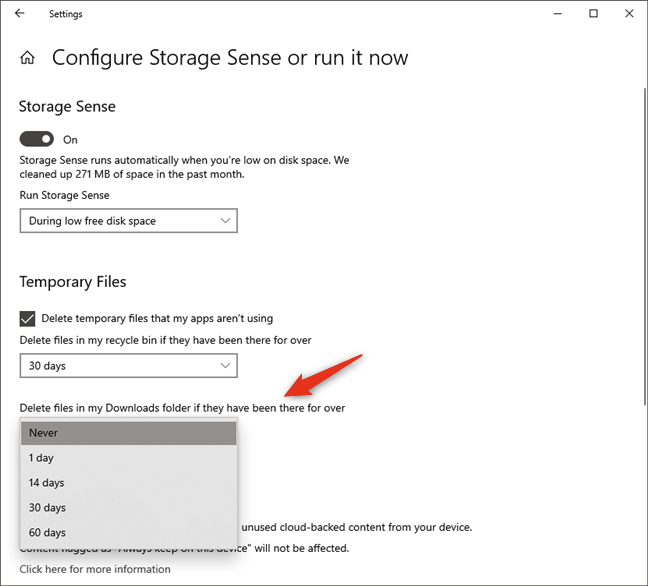
The third option is called "Delete files in my Downloads folder if they have been there for over" and Storage Sense uses it to know if you want to remove all the files from your Downloads folder automatically. It is a setting that's off by default (set to Never), as many users keep important files that they saved from the internet in their Downloads folders. That's why automatically deleting those files is not always a great idea. However, if you don't keep important files in your Downloads folder and you care about storage space more, you can turn this option on and set the period to 1 day, 14 days, 30 days, or 60 days.
Delete files in the Downloads folder if they have been there for some time
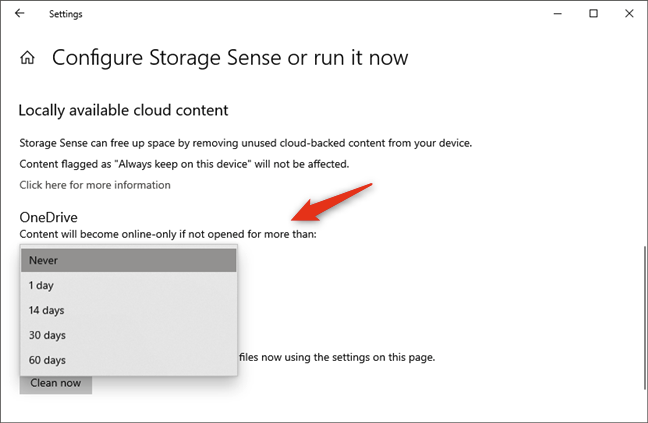
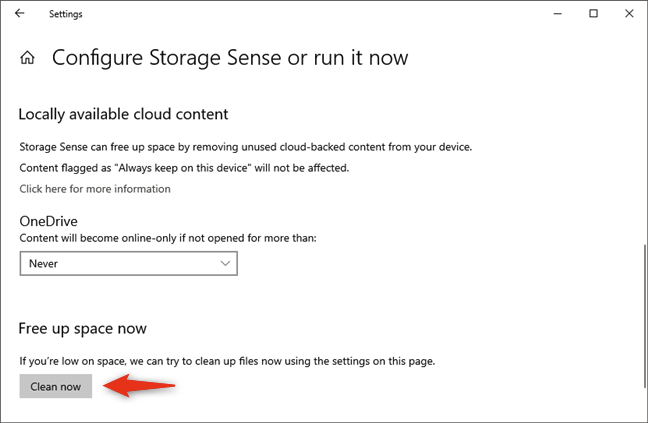
The Files-On Demand feature of Windows 10's OneDrive lets you access all the files saved in your OneDrive cloud, with File Explorer, regardless of whether they are downloaded or not on your PC. However, if you work with many of those files, they get downloaded on your computer or device and can quickly add up and eat space that you might need. Storage Sense can help with that too. If you want, you can configure Storage Sense to automatically mark the OneDrive files that you haven't opened for a specified amount of time as online-only. That means that those files are still kept in your OneDrive and are accessible from File Explorer, but they no longer occupy space on your PC.
You can choose whether OneDrive "Content will become online-only if not opened for more than"1 day, 14 days, 30 days, or 60 days. However, note that this setting is available in Storage Sense only if the location of your OneDrive folder is on your C: drive, where Windows 10 is installed.
OneDrive files become online-only if not opened for more than a specified time
Finally, at the end of the page, Storage Sense includes a "Free up space now" section. In it, Microsoft tells you that "If you're low on space, we can try to clean up files now using the settings on this page." If you need to clean your Windows 10 drive urgently, click or tap the Clean now button. That runs Storage Sense immediately, without waiting for its schedule.
Manually cleaning space on the Windows 10 drive using Storage Sense
That's all there is to say about the automatic cleaning of your Windows 10 drive using Storage Sense. If you want to delve more into this subject and see how to free up space on your Windows 10 installation drive manually, check this guide: How to clean up Windows 10 storage space like a Pro.
Are you using Storage Sense in Windows 10?
The fact that Windows 10 includes an option to clean your disks and recover free space automatically is a good thing. It can prove quite useful, especially for users who struggle with limited space on their Windows 10 computers and devices. If you didn't already use it, try Storage Sense and let us know what you think about this feature in the comments below.


Discussion (2)
Would not Disk Cleanup utility accomplish the same thing?
Yes, it does. This tool is just more visible and easily accessible from the Settings app.