


Google Photos keeps your images safely backed up online, but sometimes you need those files directly in your phone’s Gallery. Maybe you want to edit them offline, share them faster, or simply manage them locally. Here’s how to move your photos from Google Photos to your device’s Gallery with clear, simple steps for Android, iPhone, and desktop users.
1) Move photos from Google Photos to Gallery on Android
Android users can easily save photos from Google Photos to their Gallery using built-in options. The steps vary slightly depending on your phone model and Android version.
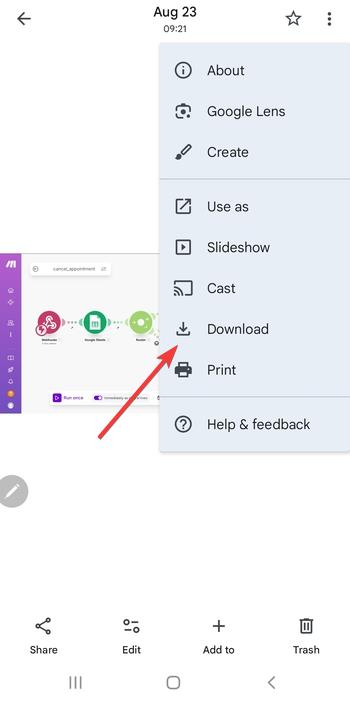
If you want to save individual photos, open the Google Photos app and tap the photo you want to save. Then, press the three-dot menu in the top right corner. Lastly, select Download or Save to device.
To download multiple photos at once, tap and hold on one photo until checkmarks appear. Next, select all the photos you want to download. Lastly, tap the Download icon at the top and the images will appear in the Downloads or Pictures folder, automatically visible in most Gallery apps.
Tip: If the option doesn’t appear, the image is already stored locally. You can check this by opening your file manager and confirming its presence in the DCIM or Downloads folder.
2) Move photos from Google Photos to Gallery on iPhone
iPhone users can also download their photos from Google Photos into the iOS Photos app, where they appear under the Recents tab.
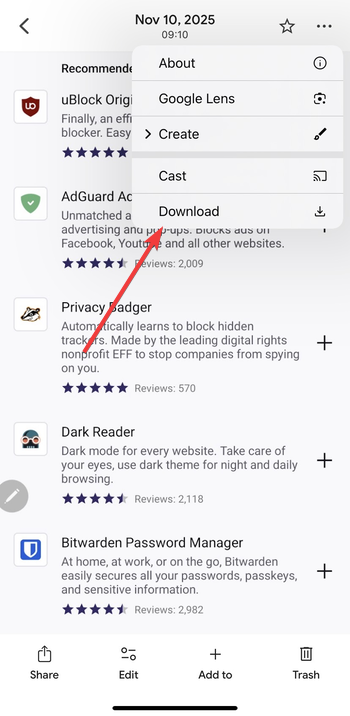
To save from the Google Photos app, open the Google Photos app and choose a photo. Next, click the three vertical dots at the top and select Download.
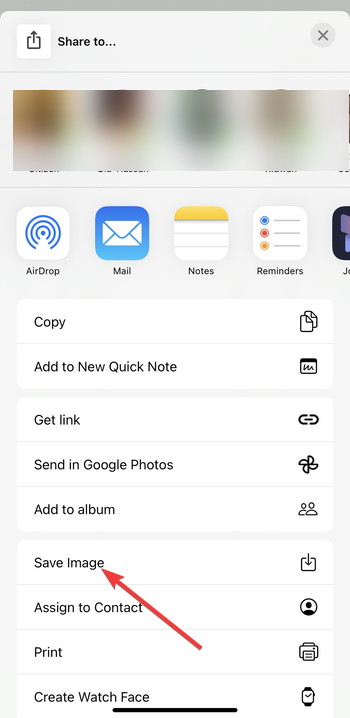
Alternatively, you can tap the Share icon and select Save to device or Save Image. The picture will instantly appear in the iPhone Photos app, synced with iCloud if enabled.
3) Transfer Google Photos to Gallery using a computer
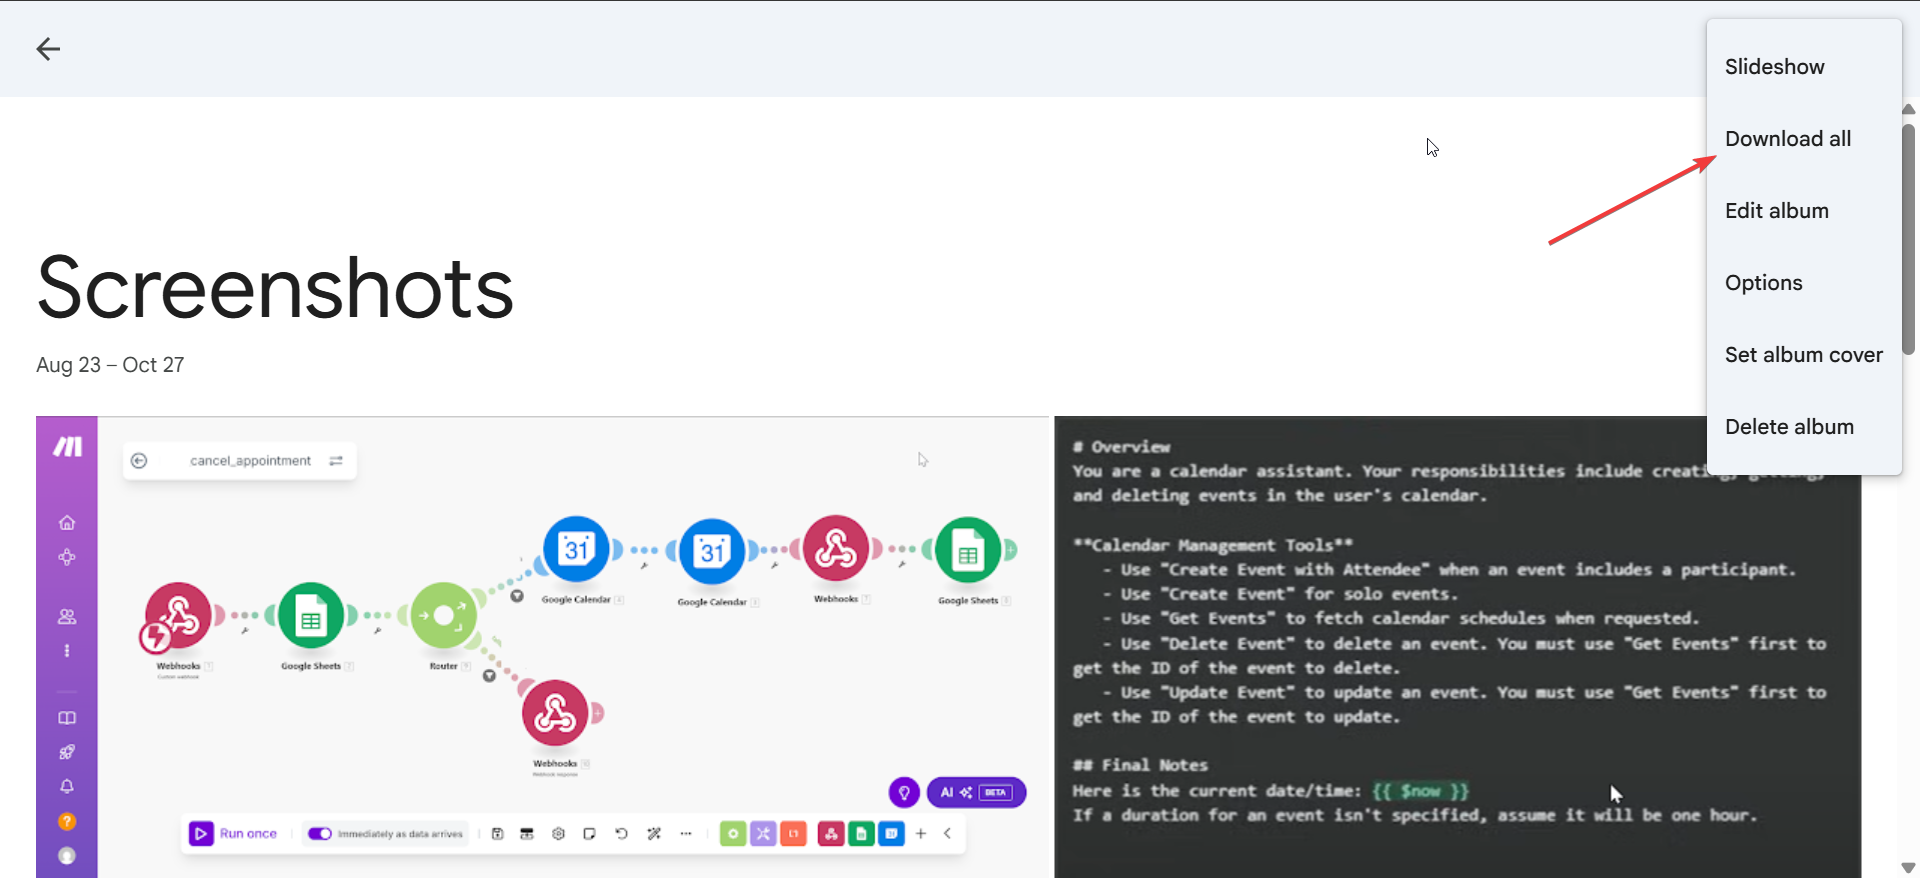
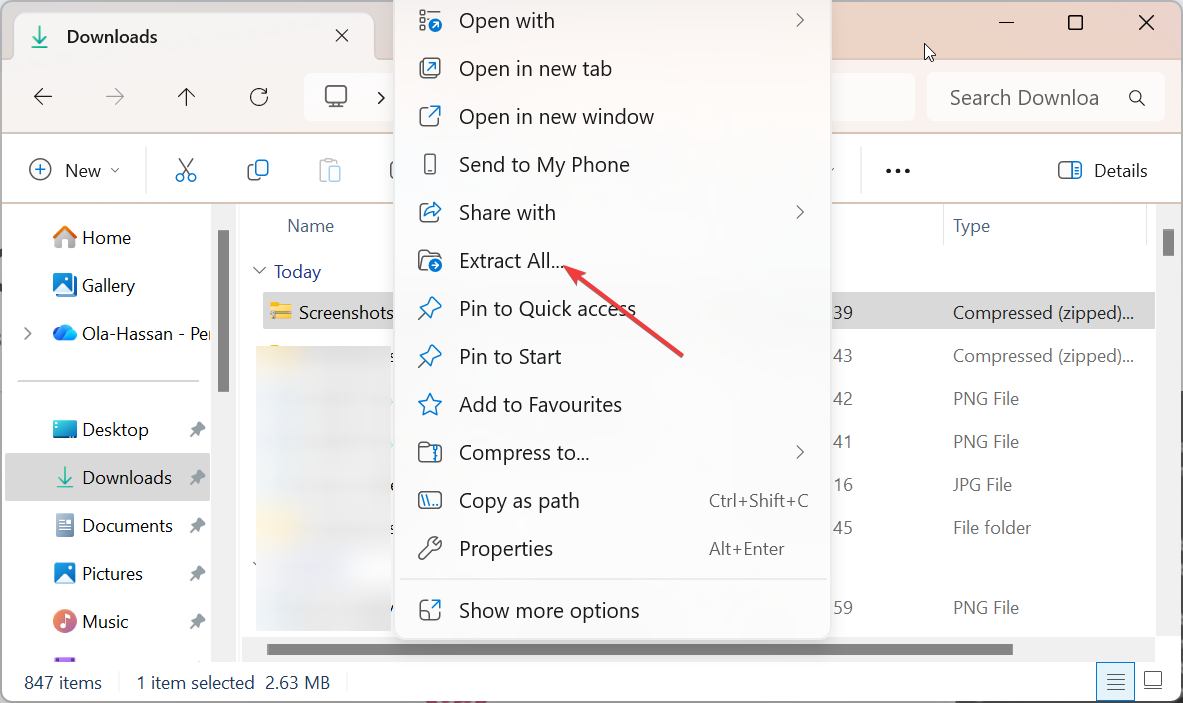
Go to the Google Photos web app on your computer, select your album, click the three vertical dots at the top, and click Download all to save a ZIP file. Next, right-click the zipped file and select Extract all to unzip it. Now, connect your phone via USB and open its storage directory.
Finally, copy the photos into the DCIM or Pictures folder. Once copied, the images will appear in your phone’s Gallery within seconds.
4) Move all photos at once using Google Takeout
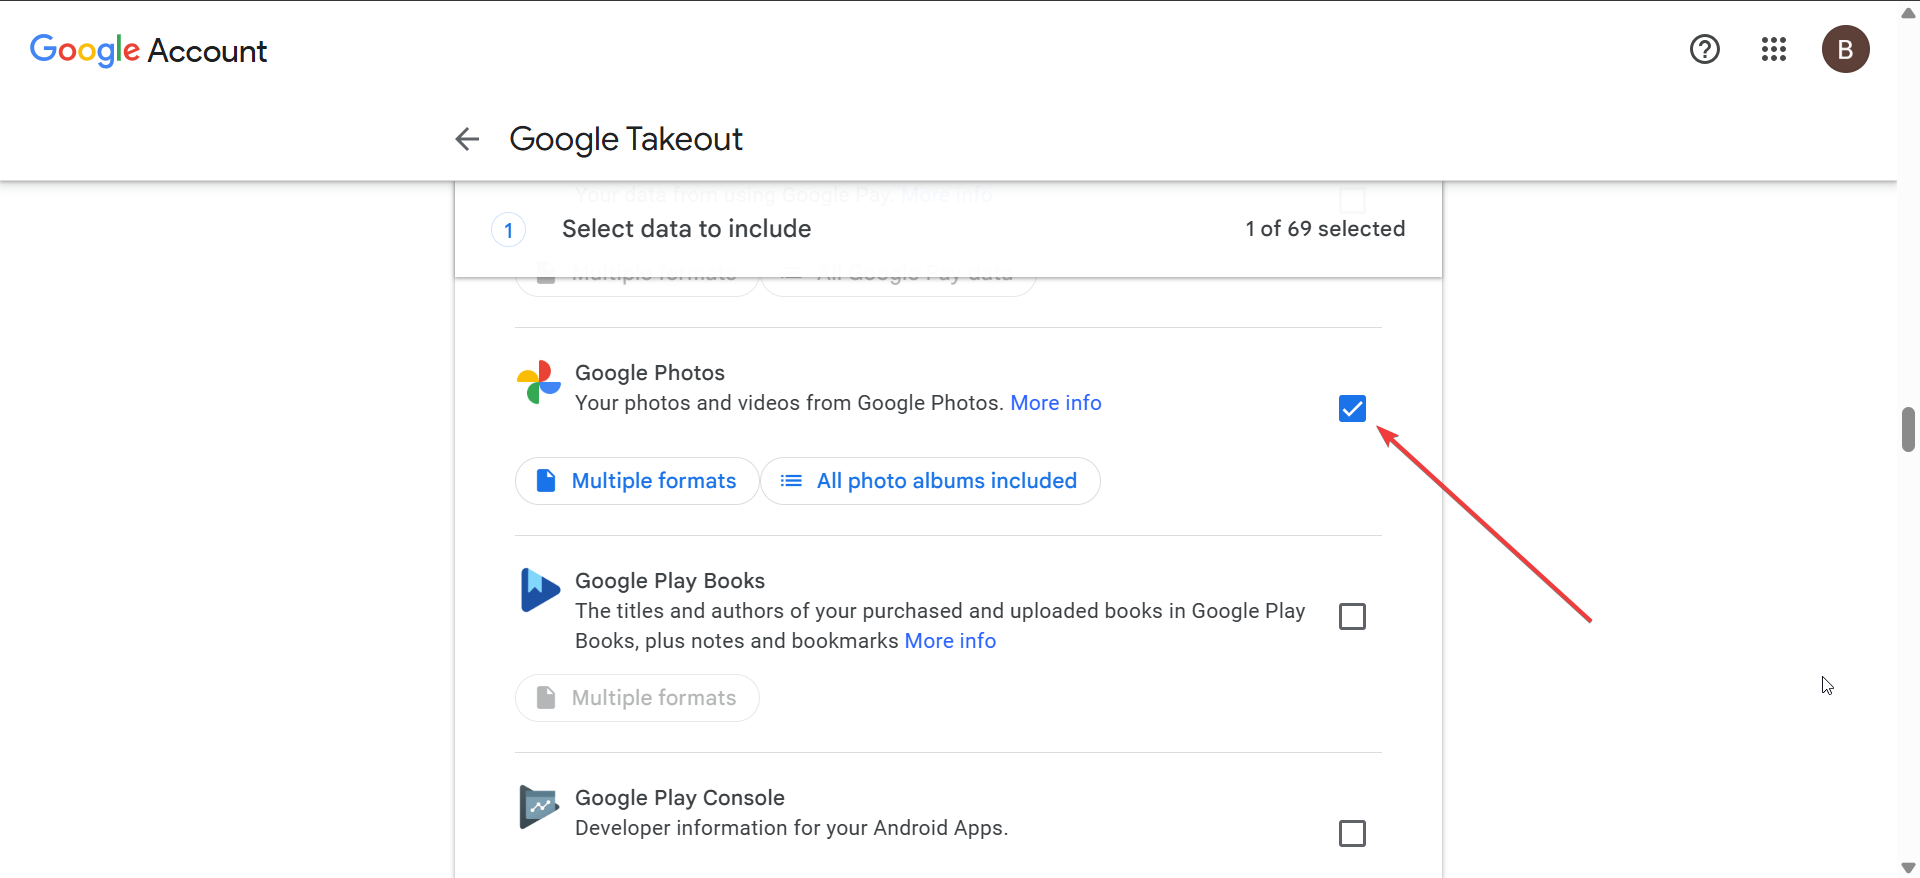
Google Takeout downloads your full Google Photos library at once. Go to the Google Takeout web page, deselect everything except Google Photos. Now, set file type and size, then export.
You will be notified by email when the exportation is complete and there will be a link to download the ZIP file. After downloading the file, transfer its contents to your device’s photo folders. This method is best for large backups but may strip certain metadata.
5) Use a third-party app for easier transfers
Apps like AirDroid, MultCloud, or Files by Google simplify bulk photo transfers between cloud and local storage. They let you sync, manage, and move large image sets without manually connecting cables.
6) Troubleshoot: Photos not showing in the Gallery
- Restart your device to refresh the media database.
- Open your file manager and move photos into the DCIM folder if needed.
- Clear cache or storage data for the Gallery app.
- Use a file manager to trigger a “Rescan media” action.
If images still don’t appear, check for hidden folders or recently created albums that may not be indexed yet.
Tips for managing downloaded photos
- Organize photos in specific albums to make them easy to find.
- Remove duplicates after syncing or backup restoration.
- Use storage-saver or compression tools if your phone is low on space.
FAQs
Why don’t my photos appear in Gallery after saving? Your Gallery only scans certain folders. If you saved images in Downloads, move them to DCIM or Pictures for them to appear.
Will the photo quality change after downloading? If you used Storage Saver in Google Photos, your downloaded copy will match that reduced quality. Only photos saved in Original Quality preserve full resolution.
Can I delete photos from Google Photos after moving them to Gallery? Yes, but make sure cloud sync is off first. Otherwise, deleting from Google Photos might remove the image from your local copy too if sync remains active.
Summary
- Use Google Photos’ Save to device option to move pictures locally.
- For bulk downloads, use a PC or Google Takeout.
- Move files into the DCIM folder so they appear in Gallery.
- Use reliable third-party tools for automation if needed.
Conclusion
Moving photos from Google Photos to your Gallery gives you full offline control over your pictures while keeping cloud backups safe. Whether you use the app’s built-in save option, connect your phone to a computer, or rely on tools like AirDroid, the process is straightforward once you know where files are stored.
For large libraries, use Google Takeout or a desktop transfer to keep albums organized without losing quality. After syncing, check your Gallery folders and clear duplicates for smoother management. With these quick steps, your memories stay accessible anytime - online or off.
Discussion (0)
Be the first to comment.