02.12.2021
If you are using Windows 10 or Windows 11 and you are a gamer, you've probably heard about the Game Mode. In theory, this feature helps make gaming smoother, regardless of how fast your PC is. Although Windows automatically enables the Game Mode when you are playing a game, it may fail to do so for older games or titles that are in early development. If you want to know how to enable Game Mode in Windows 11 or in Windows 10, disable Game Mode or force it in certain apps, read on:
TIP: If you want to know more about Windows Game Mode, read the following article: What is Windows Game Mode? What does Game Mode do?.
1. How to enable Game Mode in Windows Settings
To see the Game Mode status and turn it on or off for all the games in Windows 11, you must first open the Settings app. The fastest way to do it is by pressing Windows + I on your keyboard. In the Settings app, click or tap on Gaming. Now, in the Gaming category, select Game Mode.
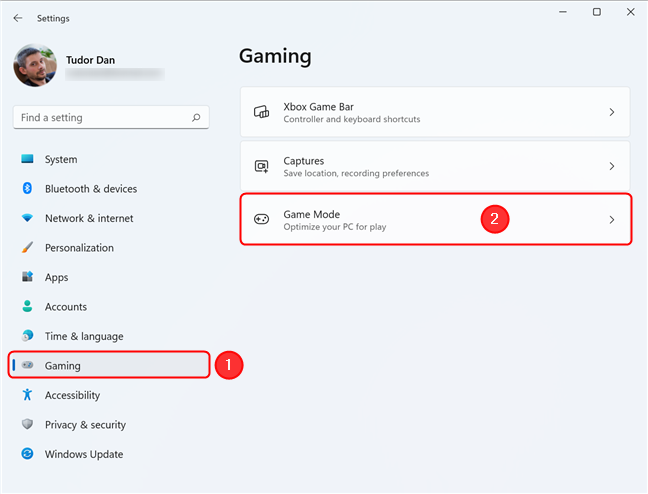
Open Game Mode from the Gaming section of the Settings app
In the Game Mode window, you get a brief explanation of this feature: it optimizes your PC for play by turning things off in the background. The switch next to Game Mode should be in the ON position (it’s activated by default on a fresh Windows installation). If it isn’t, flip it to ON.
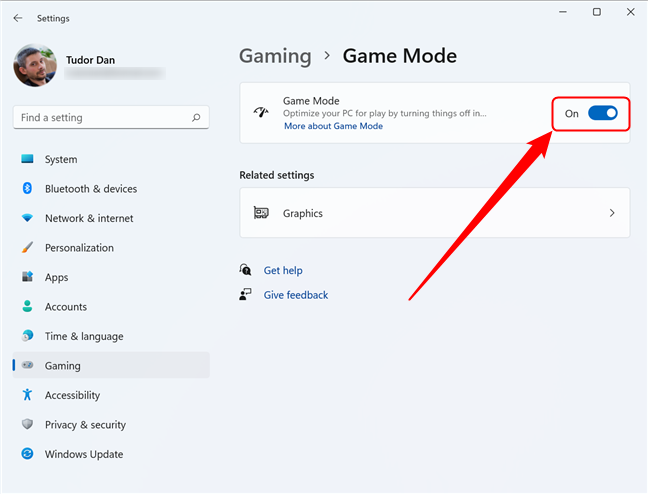
Turn on Game mode in Windows 11
The Game Mode is now enabled globally, which means that Windows uses it for all the games you play on your PC. The method described in this section also applies to Windows 10, although the buttons have a slightly different position. Just open the Settings app, click or tap on Gaming and follow the same steps.
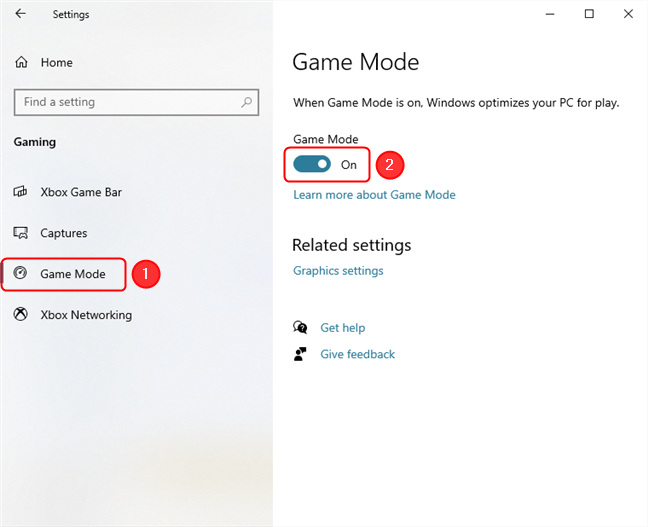
Enabling Game Mode in Windows 10
2. Force Game Mode for individual games using the Game Bar
If you followed the steps from the previous section, Game Mode should be enabled in all the games that you play on your Windows PC. However, in some rare cases, the operating system might fail to recognize your game, especially if you are playing an old title. Unfortunately, Microsoft does not provide us with a list of the games supported by Game Mode.
However, you can manually set Windows to turn on Game Mode for any game (or any application for that matter), by telling it to remember that the app you're running is a game. To do so, you need to open that game and, while it is in focus, open the Game Bar. To launch the Game Bar, simultaneously press on the Windows + G keys on your keyboard, or use the keyboard shortcut you set for the Game Bar. On the Game bar, click or tap the Settings button. It looks like a gear, and you can find it in the top-right area of the menu. This is what it looks like in Fantasy General II.
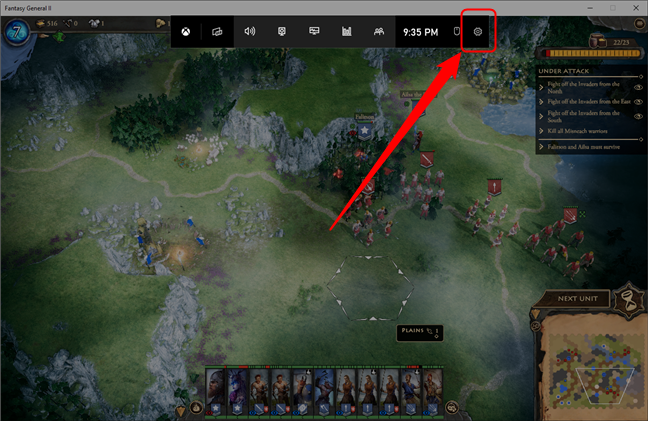
The Game Bar Settings button
In the General tab of the Game Bar, check the "Remember this is a game" setting. If the option is not present, either the game is not in focus or the game is on the list of games that are officially supported.
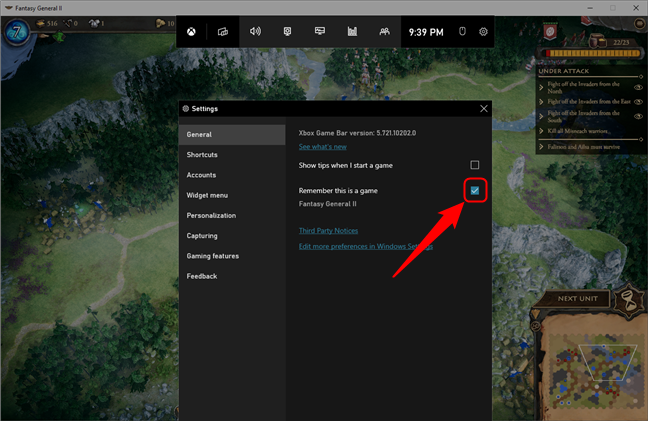
Enable Game mode for each game from the Game Bar
Exit the Game Bar overlay by clicking somewhere outside of the Game Bar windows, or by pressing Windows + G once more. From now on, Windows should use the Game Mode feature for your game.
TIP: To further increase game performance on your dual-GPU laptop, make sure you have the right graphics card active for the game you are playing. Here’s a tutorial on how to check and change the default GPU for each application in Windows 11 and one for Windows 10.
3. Enable or disable Game mode using the Registry Editor
If you’re having trouble activating Game Mode or the option is grayed-out or missing, you can still enable it by modifying the Windows Registry Editor. This method requires you to have administrative privileges on your computer and is identical for Windows 11 and Windows 10. First, open the Registry editor. A quick way to do this is by pressing Windows + R, then typing “regedit” and pressing Enter. In the User Account Control window that appears, press or tap on Yes.
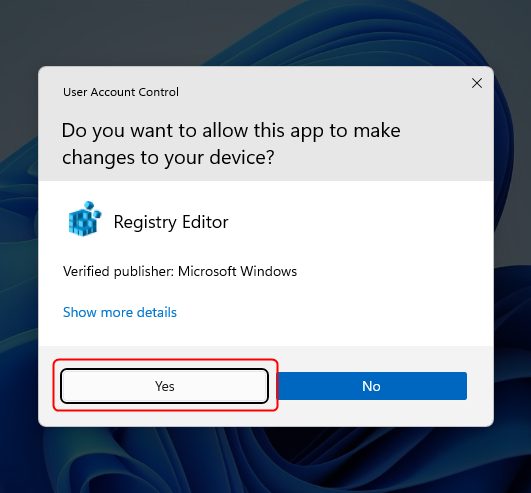
Press Yes in the User Account Control window to access Registry Editor
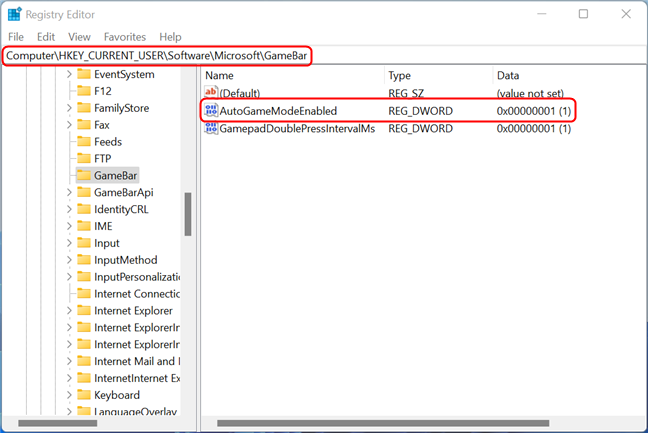
Next, type the following path in the Address bar (or just navigate from the left pane), then press Enter:
Look for an entry called AllowAutoGameMode on the right. If you can find it and the value in the Data field is 0x00000001 (1), then the automatic switching of Game mode is already active.
The Registry Editor entry for Game Mode
If the entry is not present, you need to create it. Right-click or tap and hold on an empty space in the right pane, then select New > DWORD (32-bit Value).
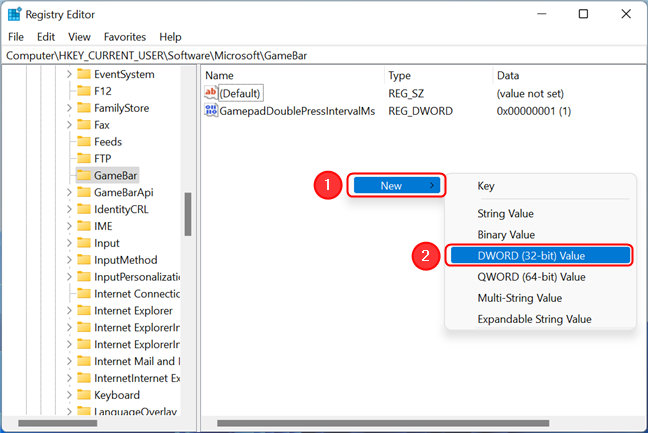
Create a new registry entry in Windows
Name the new key AllowAutoGameMode and press Enter. Next, double-click (or double-tap) on the AllowAutoGameMode entry and change the value to 1. Press OK afterwards. This last step also applies if the entry is already present, but its Data field shows 0x00000000 (0).
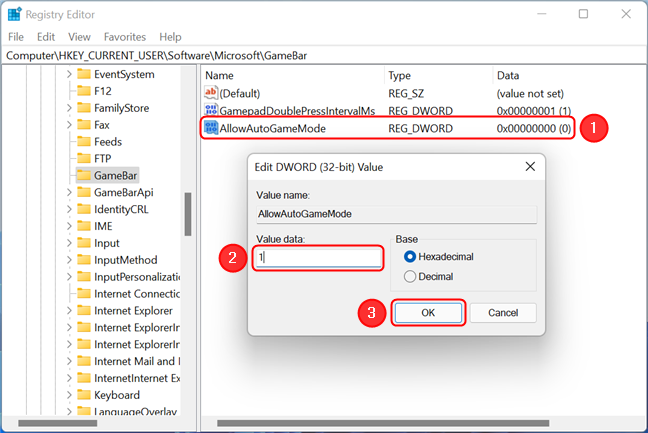
Change the value of the string, then press OK
TIP: if you’re having trouble enabling the Game Bar or the Game Mode, try one of the troubleshooting methods described in this article: Xbox Game Bar is not working. 3 ways to fix it in Windows.
Did you enable Game Mode on your Windows gaming machine?
We did it, although in our tests we did not find the Game Mode to improve gaming significantly. Did you succeed in enabling Game Mode? Did you notice your games to be running smoother after enabling it? Share your experience with other readers in the comments section below. Also, if you have any questions about Game Mode, do not hesitate to ask.