22.04.2022
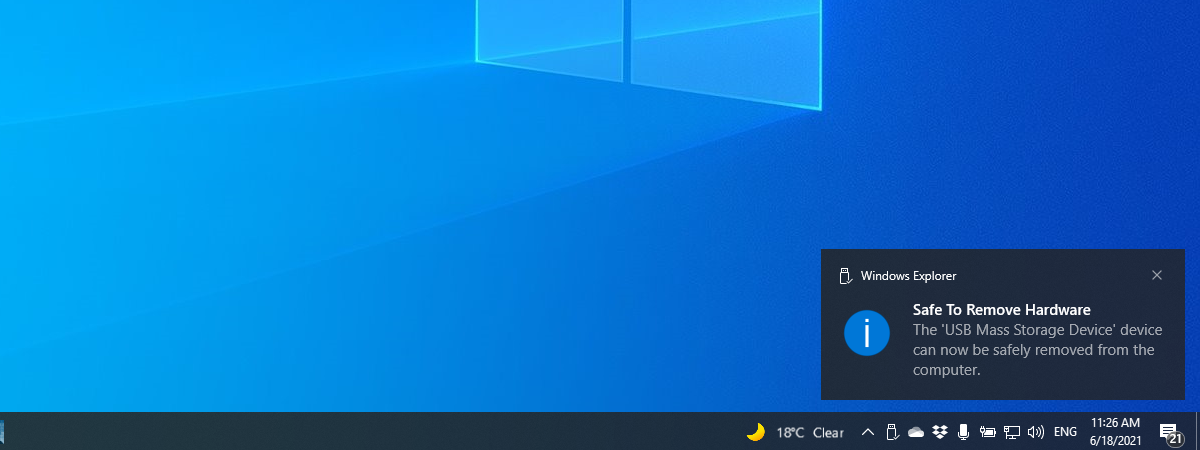
A long, long time ago, the story says, you had to use the “Safely Remove Hardware” option when you wanted to unplug a USB memory stick or eject an external hard drive from Windows. It was something you had to do; otherwise, you risked corrupting files on your portable USB drives. But that’s no longer true. Both Windows 10 and Windows 11 let you unplug external USB devices such as flash memory sticks or external hard disk drives directly, without compromising the data on them. Here’s what you should know about the USB “safely remove” feature in Windows:
Why you don’t need to safely remove USB drives in Windows
In older Microsoft operating systems, such as Windows 7 or Windows 8.1, you had to use the “Safely Remove Hardware” feature. Although you could simply ignore it, reconnecting an unsafely removed USB drive might have alerted you that the files stored on it had a problem. Sometimes, there was nothing actually wrong with the files on that drive, and you could use them without issues. However, in other cases, some of the files on the USB drive were indeed corrupt. That no longer holds true today.
In Windows 10 and Windows 11, you can simply unplug any USB drive, regardless of whether it’s a USB memory stick, a portable hard-disk drive, or a solid-state drive, without having to use the “Safely Remove Hardware” notification icon. But why?

Safely Remove Hardware and Eject Media icon in Windows 11
Well, Windows operating systems have always treated removable devices such as USB memory sticks or portable drives in one of two ways. The standard policy is to configure each USB drive plugged in either for quick removal or better performance. This dictates the way the operating system interacts with the USB drive:
- Quick removal disables Windows’ ability to cache write operations on the drive - while performance can slightly deteriorate, the drive is safe to remove at any time (without having to use the “Safely Remove Hardware” option)
- Better performance allows Windows to cache write operations on the USB drive, improving its performance, but you need to use the “Safely Remove Hardware” option
In older versions of Windows, the default policy for external storage devices was to configure them for better performance. In Windows 11 and Windows 10 (since version 1809, released in October 2018), the default policy for USB drives is “quick removal.”
However, it’s extremely important not to unplug a USB drive from your computer while data is being transferred from or on it! If you do that, data will be lost regardless of the “safely remove” policy of Windows.
How to check if the USB safe removal policy is enabled in Windows
In case you’re wondering and want to be sure that the “safely remove” option is turned on, here’s how to check its status for any USB drive in Windows 10 and Windows 11:
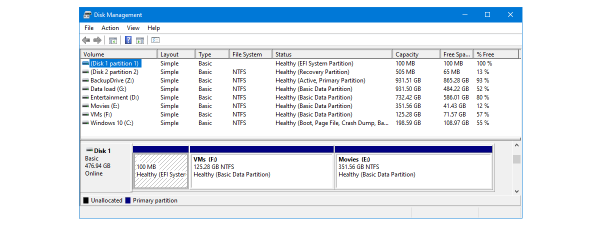
First, open the Disk Management tool. The WinX menu offers a quick way to do that in both operating systems. Press Win + X on your keyboard, or right-click (press and hold) on the Windows button from your taskbar. Then, select Disk Management from the list of options.
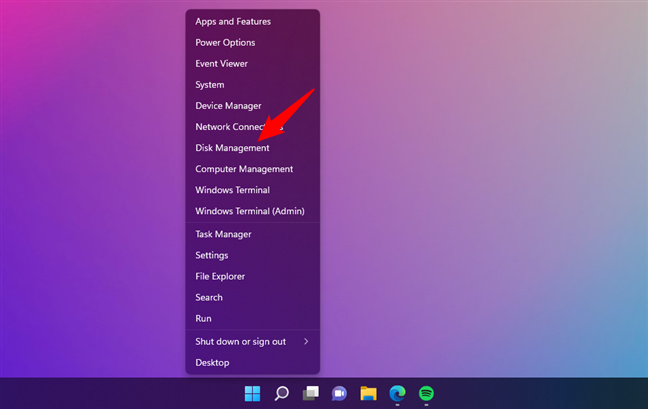
Disk Management in the WinX menu
In the Disk Management app, look through the list of drives to identify the USB drive you want to check. Once you’ve found it, right-click (or press and hold) on it and select Properties from the context menu. Make sure you click on the disk (shown on the left side of the window), not any of the partitions or volumes listed on the right.
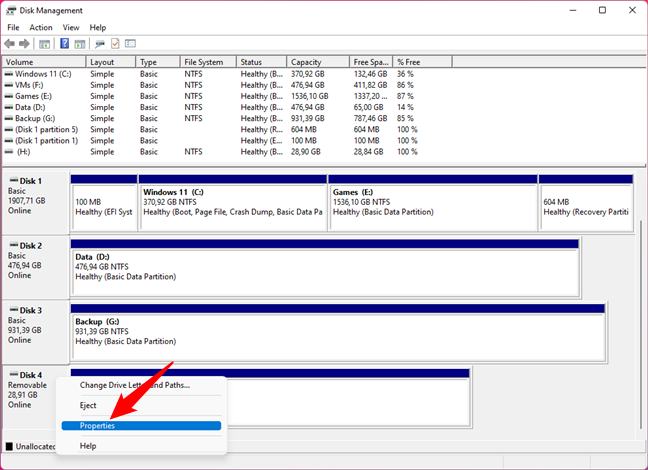
Opening Properties of a removable drive
This opens the Properties window for the selected USB drive. In it, go to the Policies tab.
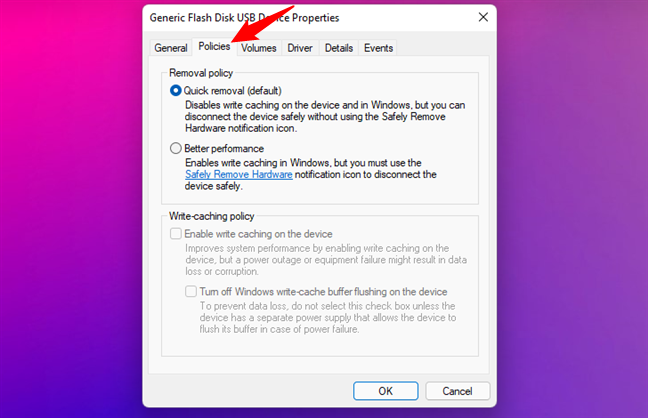
The Policies tab from the Properties window
On the Policies tab, you’ll see two removal policies listed: “Quick removal (default)” and “Better performance.” The “Quick removal (default)” policy should be the one selected.
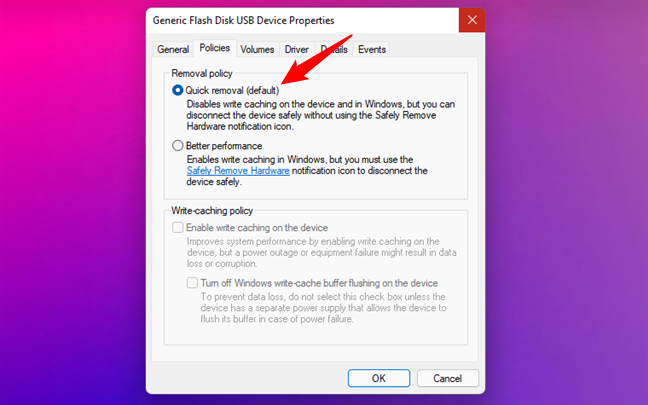
Quick removal is the default policy for USB drives
If the “Quick removal” policy is not selected, although it should be by default, you can enable it on your own. On the other hand, if you prefer the “Better performance” policy, make sure that you always use the “Safely Remove Hardware” option when you unplug your USB drive from your computer.
NOTE: If you prefer, instead of Disk Management, you can also use the Device Manager to see and change the removal policy for USB drives. Open the Device Manager, expand the list of Disk drives, and double-click on the USB drive you’re interested in. Then, the Properties window for that drive opens, and in it, you’ll find the same Policies tab we’ve talked about in this chapter.
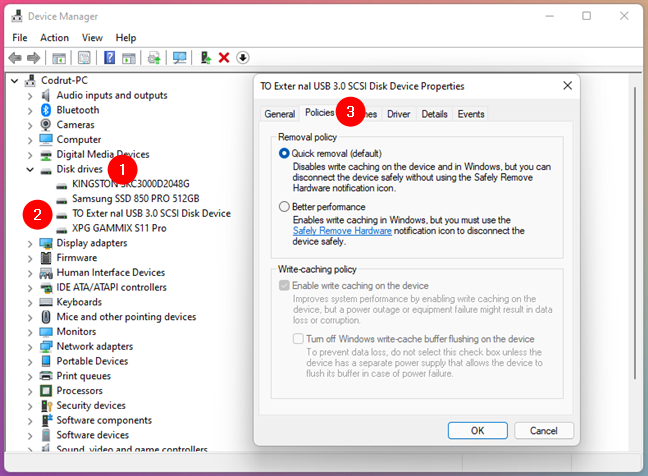
Accessing a USB drive's Policies from Device Manager
How to safely remove USB drives from Windows
You know now what “Safely Remove Hardware and Eject Media” means and why you don’t need to use these options in neither Windows 10 nor Windows 11. Do you still want to use them? Then, you should read this guide we wrote, explaining 5 ways to eject an external hard drive or USB from Windows.
What if the “Safely Remove Hardware and Eject Media” icon is missing or not working? It might be just a simple case of a “hidden Safely Remove Hardware icon.” In that case, we have another tutorial for you that might help you out: The Windows system tray - How to show or hide icons.
Addendum: The impact of “Quick removal” vs. “Better performance” on the speed of USB drives
In theory, not using write caching in Windows for external USB devices should impact their performance. We wanted to test this hypothesis, so we did a little experiment. Using CrystalDiskMark, we tested the real-world speeds of three USB drives with the “remove safely” policy enabled and disabled. For this experiment, the drives we chose were: a 16GB Kingston DataTraveler Locker+ G3, a 1TB Western Digital My Passport 0748 external hard-disk drive, and an ultra-fast 2TB Kingston XS2000 portable SSD. We ran all the tests on an ASUS ROG Strix G17 G713 laptop with Windows 11 installed, trying to find the differences between the two policies.
Here are the results we got with the 16GB USB 3.0 Kingston DataTraveler Locker+ G3:
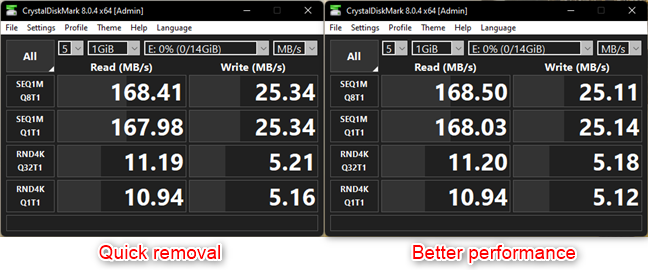
Benchmarking a USB memory stick: Quick removal vs. Better performance
Here’s what speeds we measured for the 1TB Western Digital My Passport 0748 external hard-disk drive:
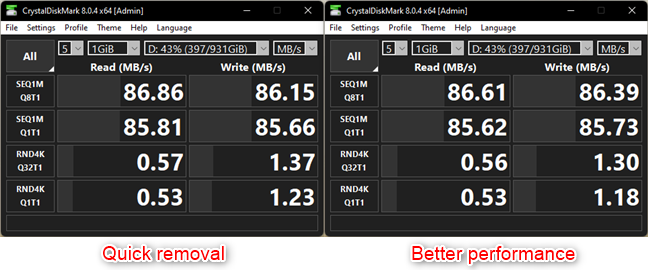
Benchmarking a USB HDD: Quick removal vs. Better performance
And last but not least, here are the measured data transfer speeds for the 2TB Kingston XS2000 portable SSD (note that this drive supports USB 3.2 Gen 2x2, and its speed was limited by the USB 3.2 Gen 2x1 Type-C port on our laptop):
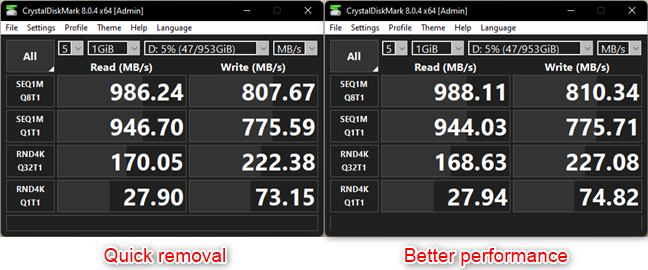
Benchmarking a USB SSD: Quick removal vs. Better performance
Did you see any changes in transfer speeds? Neither did we. This means that there is no meaningful and noticeable performance impact when using either policy - Quick removal or Better performance - on external USB devices such as memory sticks, external hard-disk drives, or portable solid-state drives.
Do you still use the “Safely Remove Hardware” option for USB drives?
Now you know what “safely removing” USB drives means, what it does, and why you don’t need this option turned on. Both Windows 10 and Windows 11 already use the Quick removal policy for such drives, and even if they didn’t, Better performance doesn’t bring meaningful benefits. As you’ve seen, the performance levels are almost identical between the two options, and you earn the comfort of making fewer clicks to remove external USB devices. So, do you still “safely remove” USB drives? Let us know in a comment below.