
 24.05.2021
Do you have a PPPoE internet connection and a TP-Link router with Wi-Fi 6 that needs to be set up? Do you want your router to correctly connect to the internet and share it with your entire network? Do you need to adjust some PPPoE settings and use a custom DNS server or a different MAC address for your TP-Link Wi-Fi 6 router? Then, you are in the right place. In this guide, we share everything there is to know about setting PPPoE on a TP-Link router. Let’s get started:
NOTE: If you are not familiar with PPPoE internet connections, read: What is PPPoE and what does it do?. This guide was created using a TP-Link Archer AX10 router. The steps involved are the same on all Wi-Fi 6 routers from TP-Link.
How to set up your PPPoE internet connection during the TP-Link Quick Setup wizard
When you buy your TP-Link Wi-Fi 6 router, and you need to set it up for the first time, you must go through the Quick Setup wizard, which has been covered in detail here: 2 ways to set up your TP-Link Wi-Fi 6 router.
After you create the admin password for your TP-Link router, choose the time zone you’re in. You are prompted to select the internet connection type you use. Since you have a PPPoE connection, select this type, and press Next.
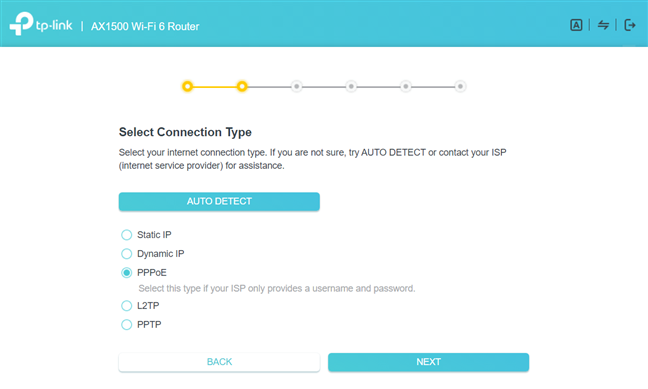
Select PPPoE as the internet connection type
Then, you are asked to enter the username and password for your internet connection. These details are given to you by the internet service provider (ISP) when you sign your contract with them. You should have received a piece of paper with your connection details. The username associated with your client account may have up to 11 characters and includes both letters and numbers that are case-sensitive. If you don’t have these details, contact the tech support service of your ISP and ask them to provide them to you.
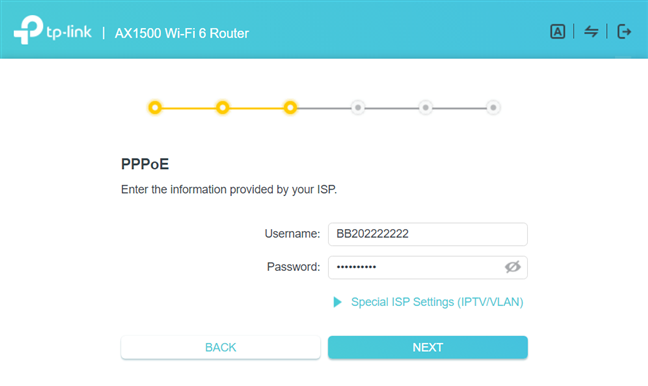
Enter the username and password for PPPoE
In some countries like Australia, Singapore, Portugal, or New Zealand, PPPoE internet providers use custom profiles. To see if your TP-Link Wi-Fi 6 router has a special profile for your connection, click or tap on “Special ISP Settings (IPTV/VLAN)” and then on the ISP Profile drop-down list, and scroll through it. If you find your country and internet service provider in the list, select it and press Next.
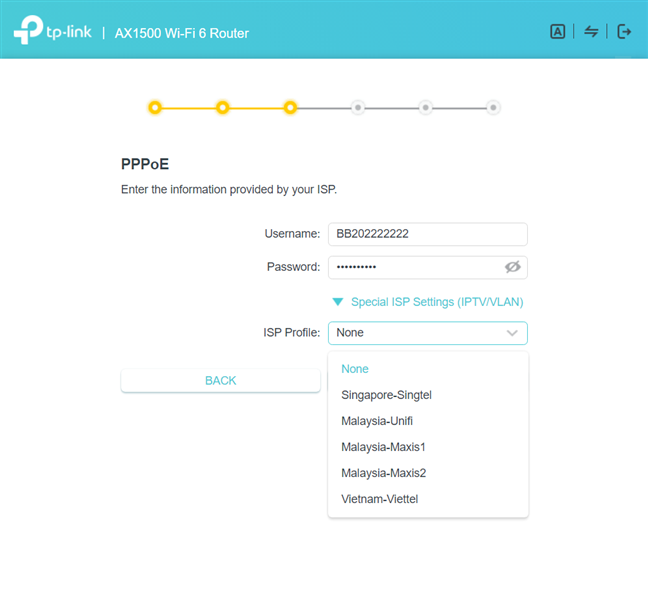
Selecting the IPS Profile for PPPoE
Then, continue with the Quick Setup wizard, as detailed in our dedicated guide, including setting up your Wi-Fi and updating your router’s firmware.
How to configure your PPPoE internet connection after the initial setup
You may have skipped through the initial Quick Setup wizard, or you didn’t and later on, you need to change the type of the internet connection to PPPoE. Or you may have changed your account details with your ISP. No matter the reason, you can quickly change the PPPoE settings. Read this section to learn how:
On a laptop or PC connected to the network managed by your TP-Link Wi-Fi 6 router, go to tplinkwifi.net or 192.168.0.1. This should load the user interface for administering the router, and it starts with asking you for your administrator password. Type it, and press LOG IN.

Enter the admin password for your TP-Link router
TIP: If the login prompt above doesn’t load, your TP-Link router may have a different IP address than the one we mentioned earlier. To help you find it, read: How do I find my router's IP address?.
When you see the user interface for administering your router, click or tap on the Internet section on the top.
Go to Internet
This loads the basic settings for configuring the internet connection used by your router. First, in the “Internet Connection Type” dropdown list, choose PPPoE. Then, enter the username and password for your internet connection (not for your Wi-Fi) and press Save.
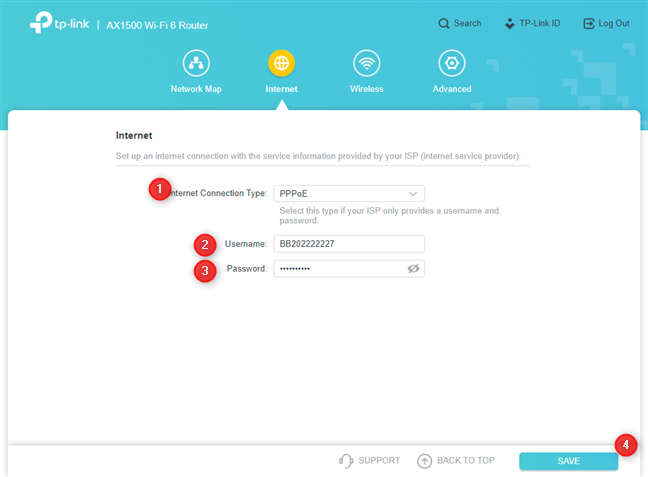
Set up your PPPoE internet connection
Your TP-Link router will now take some time to connect to the internet, using your newly entered details.
How to configure your PPPoE internet connection from the Tether app
If you want to use the Tether mobile app for Android or iOS, fire it up on your smartphone. Your device should be connected to the Wi-Fi emitted by your TP-Link Wi-Fi 6 router, or the Tether app should be using a TP-Link ID to connect to your router from anywhere in the world remotely. In the Tether app, tap on the name of your router.
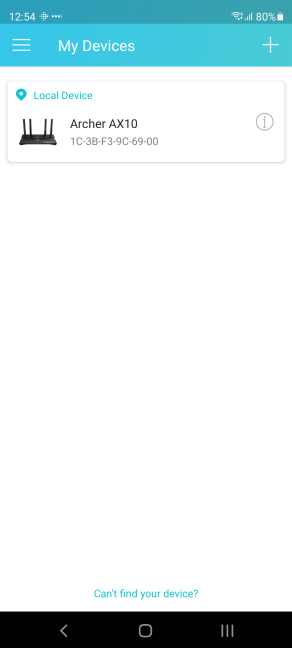
Tap the name of your TP-Link router
Then, tap the Tools button on the bottom-right corner.
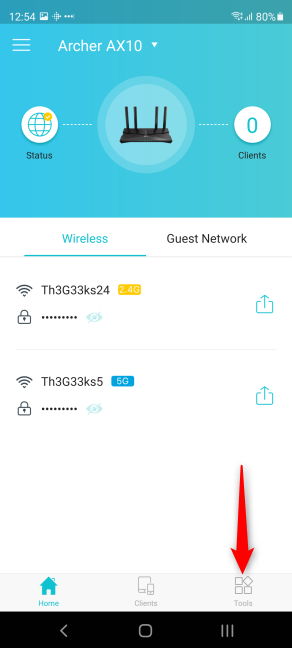
Tap on Tools
In the list of Tools, tap Internet Connection.
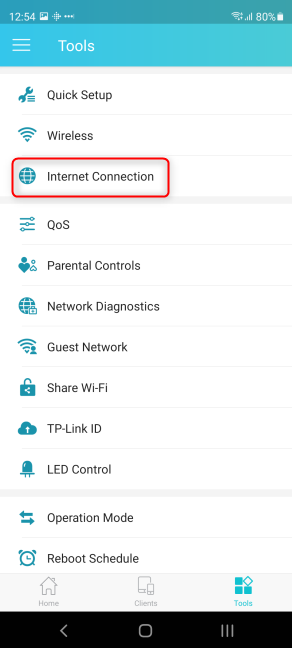
Tap on Internet Connection
Here, you can set the internet connection type and enter the necessary connection details. Choose PPPoE, and when you’re done entering the data, press Save.
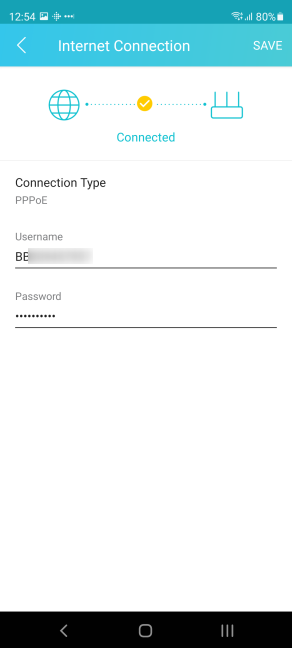
Set up your PPPoE connection in the Tether app
Your router will spend a couple of seconds applying your new PPPoE connection settings and trying to connect to the internet.
How to configure the advanced settings for your PPPoE internet connection
The methods shared earlier work for setting up only the basic connection settings for your PPPoE internet connection. If you want to set up more advanced settings, like the DNS servers used for your PPPoE connections, or the MAC address used by your TP-Link Wi-Fi 6 router, you need to go another way:
On a laptop or PC connected to the network managed by your TP-Link Wi-Fi 6 router, go to the address tplinkwifi.net or 192.168.0.1. The router asks for your administrator password. Type it, and press LOG IN.
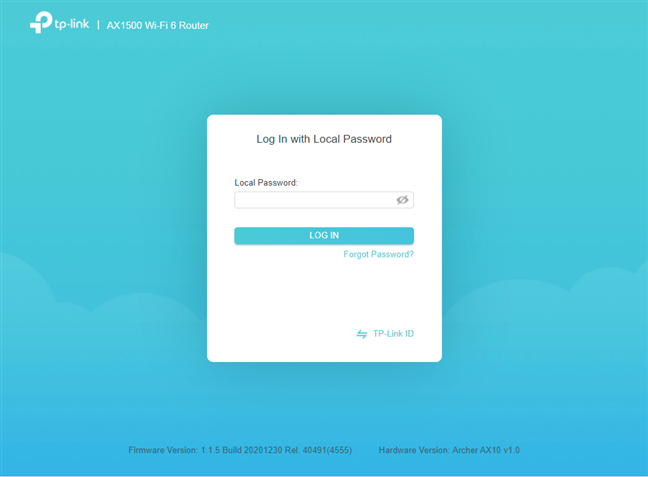
Log in to your TP-Link Wi-Fi 6 router
After you are logged in, click or tap on Advanced at the top.
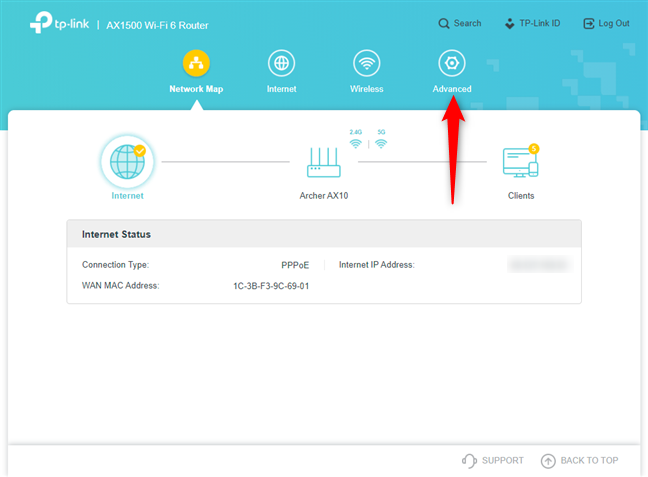
Go to Advanced
In the column on the left, choose Network, and go to Internet. On the right, you see all the settings related to your internet connection. In the “Internet Connection Type,” choose PPPoE, and then enter the username and password for your client account. After a couple of seconds, if you press Connect, you see the IP address given to your TP-Link router by the ISP and the default DNS servers used by your internet connection. If you want to customize your Advanced Settings, click or tap the link with the same name.
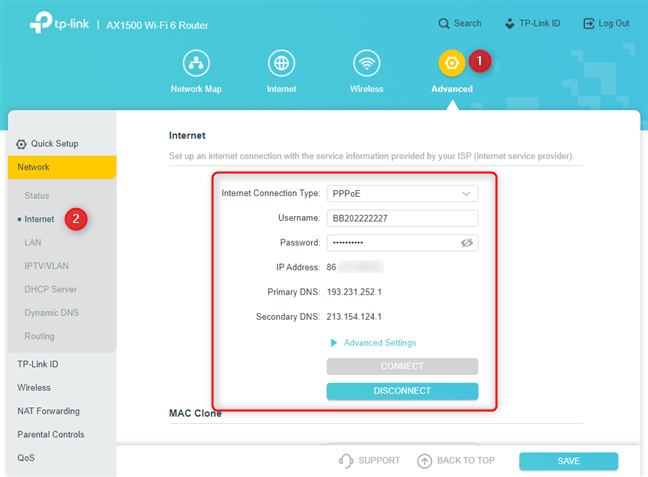
Change your internet settings
Scroll down, and you see plenty of settings. You can change the IP address used by your router or the DNS Addresses. Instead of “Get Dynamically from ISP,” click and choose “User the following…”, and then manually type the IP addresses that you want to use.
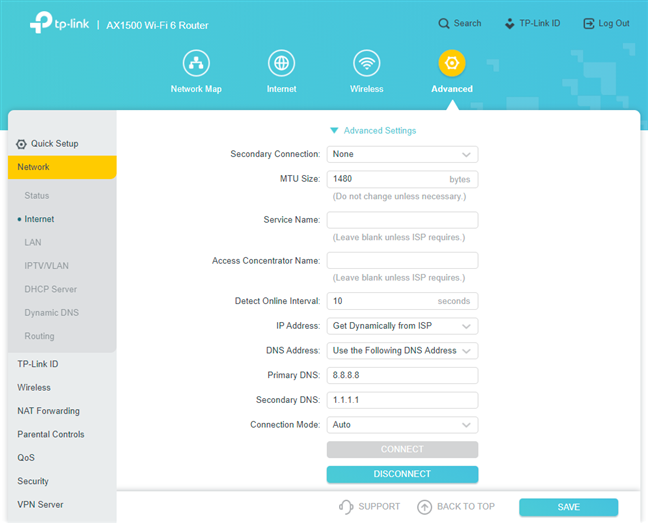
More advanced settings
If you scroll further down, you can also set the MAC address used by the router to a custom one, enable or disable NAT (Network Address Translation), or manually set the speed of the internet port on the back of your TP-Link Wi-Fi 6 router.
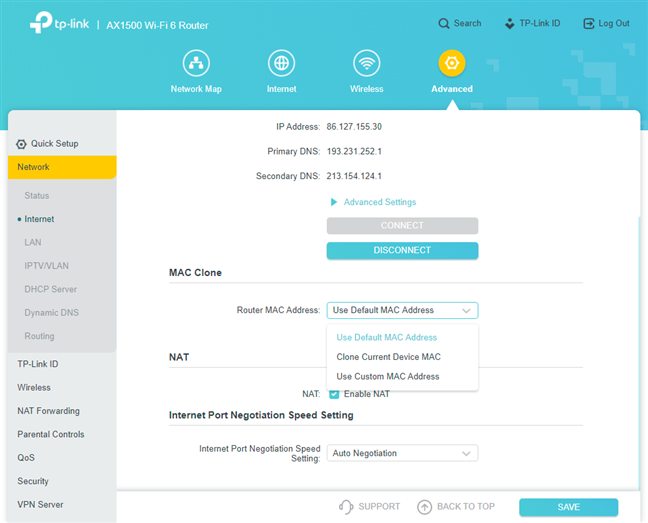
Setting up the MAC address used by the router
Don’t forget to press Save in the bottom right corner when you want to save everything.
How do I know if my PPPoE settings work well?
After you have fiddled with the PPPoE internet connection settings, wait for about 30 seconds for your router to apply your settings and use them to connect to the internet. Then, look at the internet LED on it, which signals whether the internet connection works well or not. If the LED is green, everything is good. If it is red or orange, the PPPoE connection details you have entered are not correct, and you need to try again. Or some error took place during the connection process.
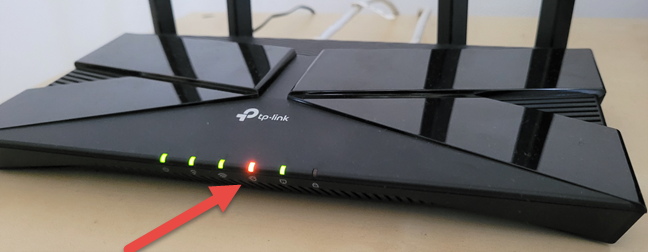
The internet LED on your TP-Link router
In the Tether app, you see the status in the Internet Connection page where you set up your PPPoE settings, when you come back to it, after a couple of seconds.
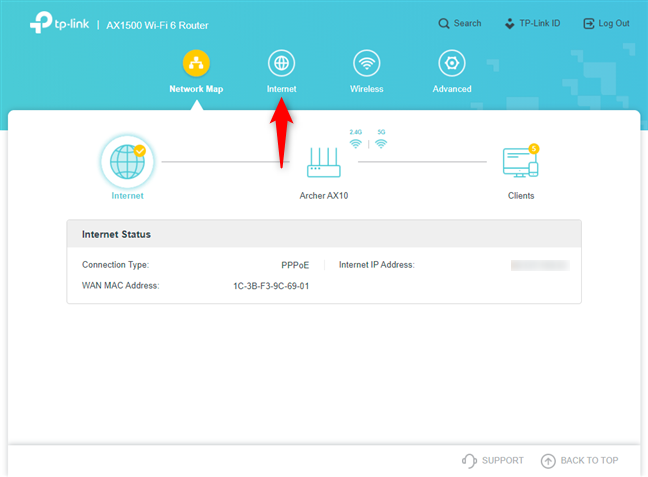
You can also verify from TP-Link’s admin interface in your web browser. Go to the Network Map at the top, and then click or tap the Internet icon. If it says “No Internet Connection”, your configuration didn’t work. Follow the recommendations shown by your TP-Link router and try again.
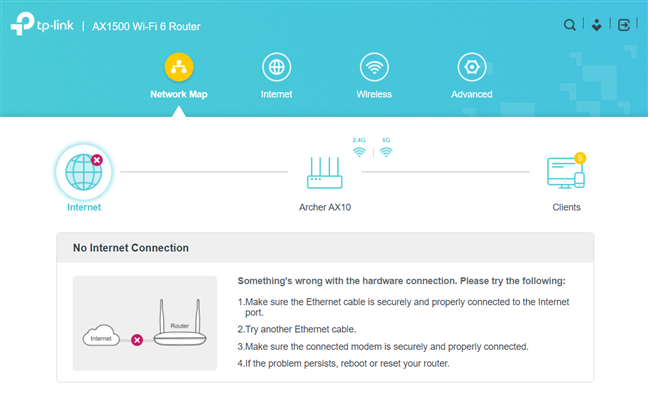
The PPPoE internet connection is not working
If the PPPoE connection works well, the Internet icon has a checkmark signaling this, and when you click or tap on it, you see technical details about the internet status.
Did you set up your TP-Link Wi-Fi 6 router the way you wanted?
Now you know everything about setting up PPPoE internet connections on TP-Link Wi-Fi 6 routers. Before you close this tutorial, tell us which setup method you preferred: did you use a web browser on your PC, or the Tether mobile app on your smartphone? Also, did you need to fiddle with the more advanced settings, like setting up the DNS servers used by your router? Comment below and let’s discuss.