


All modern wireless routers, including those manufactured by TP-Link, can use IPv6 addresses for internet connections. Your internet service provider should offer IPv6 connections, and, if it does, you should enable IPv6 on your router. The benefits of making this switch include better security and slightly better speeds. Therefore, here is how to activate IPv6 on any TP-Link router with Wi-Fi 6:
NOTE: This guide was created on a TP-Link Archer AX10 wireless router, but the steps involved are the same on all TP-Link routers with Wi-Fi 6. If you are not familiar with IPv6 and IPv4 addresses, we recommend reading: What is an IP address and a subnet mask, in simple terms?
 Log in to your TP-Link Wi-Fi 6 router
TIP: If none of the two addresses mentioned above work, see all the ways to find the IP address of your router. Also, if the TP-link firmware is not in the language you want, here is how to change the language on your TP-Link Wi-Fi 6 router.
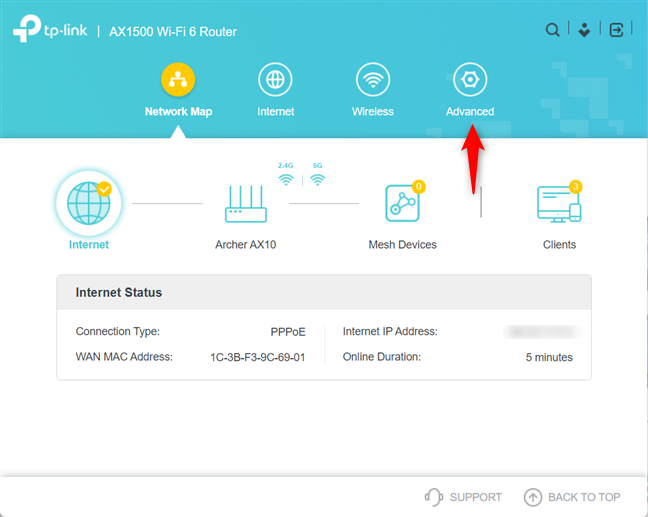
At first, you see the network map and some basic settings. The IPv6 settings can be found by clicking or tapping on Advanced.
Log in to your TP-Link Wi-Fi 6 router
TIP: If none of the two addresses mentioned above work, see all the ways to find the IP address of your router. Also, if the TP-link firmware is not in the language you want, here is how to change the language on your TP-Link Wi-Fi 6 router.
At first, you see the network map and some basic settings. The IPv6 settings can be found by clicking or tapping on Advanced.
 Go to Advanced
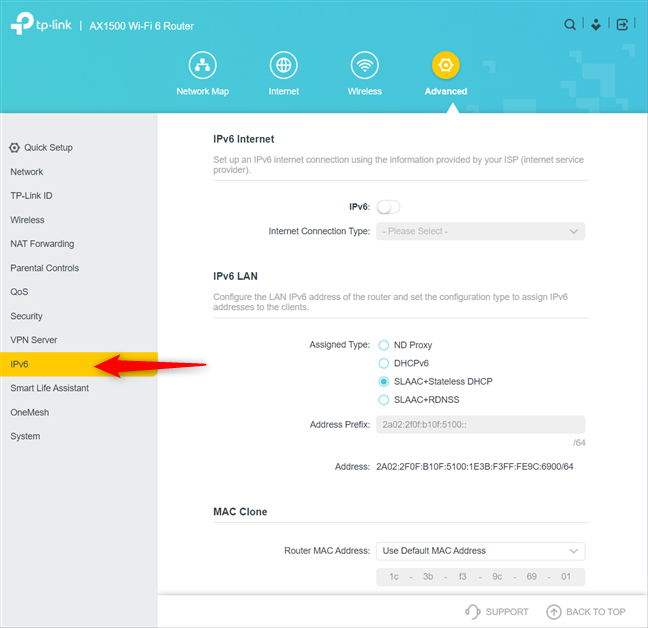
In the left sidebar, scroll down and press IPv6. Then, you can see all the IPv6 settings of your TP-Link router on the right.
Go to Advanced
In the left sidebar, scroll down and press IPv6. Then, you can see all the IPv6 settings of your TP-Link router on the right.
 Go to IPv6 in the column on the left
TIP: If you want to manage your TP-Link router from anywhere on the internet, here’s how to create and add a TP-Link ID to your TP-Link Wi-Fi 6 router.
Go to IPv6 in the column on the left
TIP: If you want to manage your TP-Link router from anywhere on the internet, here’s how to create and add a TP-Link ID to your TP-Link Wi-Fi 6 router.
 Activate the IPv6 switch
By default, your TP-Link router should use the same internet connection type and settings as it does for IPv4. However, if you are not happy with the settings, click or tap the “Internet Connection Type” drop-down list, choose the appropriate type, and enter your settings.
Activate the IPv6 switch
By default, your TP-Link router should use the same internet connection type and settings as it does for IPv4. However, if you are not happy with the settings, click or tap the “Internet Connection Type” drop-down list, choose the appropriate type, and enter your settings.
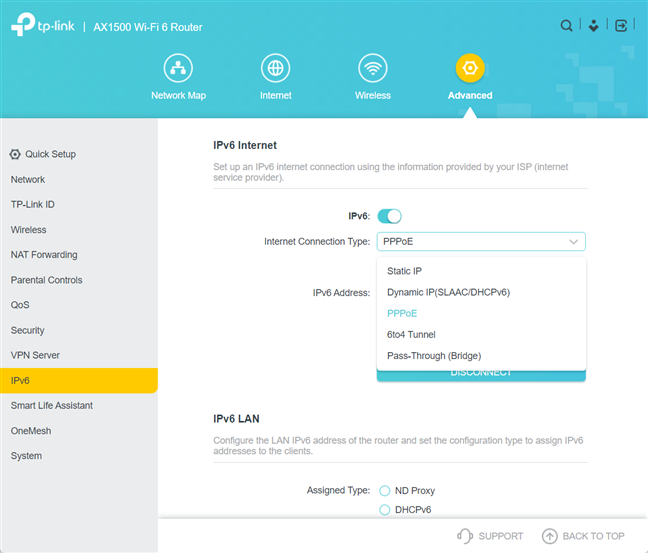
 Set the Internet Connection Type
Our internet connection is PPPoE, and the TP-Link Wi-Fi 6 router correctly checks the option to “Share the same PPPoE session with IPv4,” meaning that there was no other configuration left for us to do. However, if you have a different internet connection type, like Static IP or 6to4 Tunnel, you may need to enter your specific settings. There’s also an Advanced Settings link available.
Set the Internet Connection Type
Our internet connection is PPPoE, and the TP-Link Wi-Fi 6 router correctly checks the option to “Share the same PPPoE session with IPv4,” meaning that there was no other configuration left for us to do. However, if you have a different internet connection type, like Static IP or 6to4 Tunnel, you may need to enter your specific settings. There’s also an Advanced Settings link available.
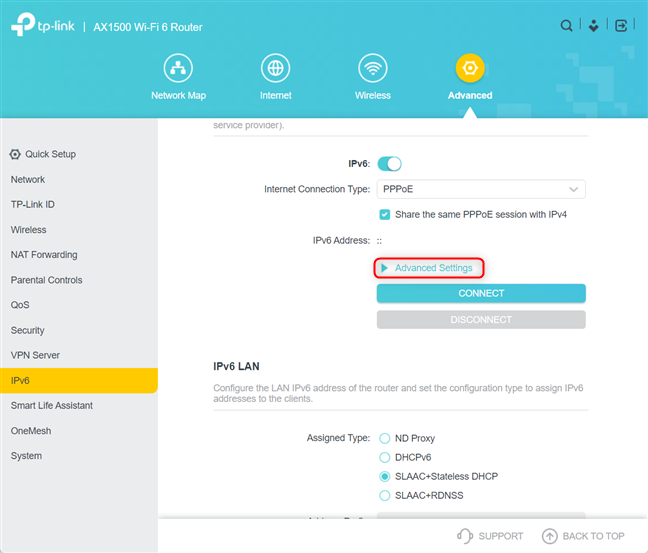 Access the Advanced Settings
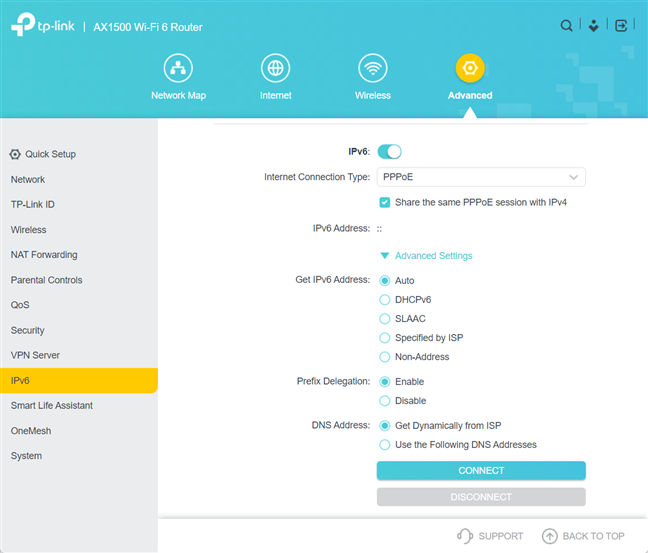
Pressing Advanced settings reveals more configuration options where you set how the router gets IPv6 addresses. We recommend using Auto or Specified by ISP (after talking to them to get the necessary settings). You can also set what DNS addresses are used. If you want to use custom ones, choose “Use the Following DNS Addresses” and enter the IPv6 addresses of your favorite DNS servers.
Access the Advanced Settings
Pressing Advanced settings reveals more configuration options where you set how the router gets IPv6 addresses. We recommend using Auto or Specified by ISP (after talking to them to get the necessary settings). You can also set what DNS addresses are used. If you want to use custom ones, choose “Use the Following DNS Addresses” and enter the IPv6 addresses of your favorite DNS servers.
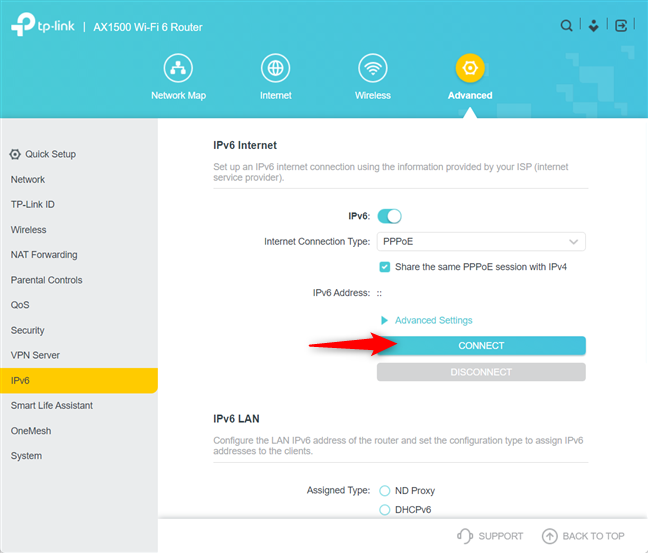
 Customize how IPv6 works on your TP-Link router
When you are done setting things up, don’t forget to press Connect, so that the TP-Link router connects to the internet using your new settings and starts using an IPv6 address.
Customize how IPv6 works on your TP-Link router
When you are done setting things up, don’t forget to press Connect, so that the TP-Link router connects to the internet using your new settings and starts using an IPv6 address.
 Press Connect to use IPv6
Your internet won’t work for a couple of seconds while the router establishes the connection through IPv6.
TIP: If you want the best performance from your TP-Link router, it is a good idea to update its firmware. Read this guide to learn how: 2 ways to update the firmware on a TP-Link Wi-Fi 6 router.
Press Connect to use IPv6
Your internet won’t work for a couple of seconds while the router establishes the connection through IPv6.
TIP: If you want the best performance from your TP-Link router, it is a good idea to update its firmware. Read this guide to learn how: 2 ways to update the firmware on a TP-Link Wi-Fi 6 router.
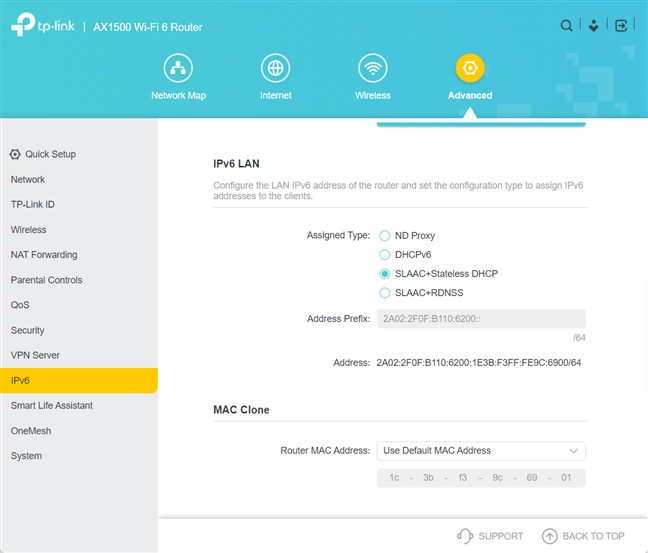 The IPv6 LAN section
However, for most users, the defaults used by the TP-Link router work just fine, and there’s no need to change anything.
The IPv6 LAN section
However, for most users, the defaults used by the TP-Link router work just fine, and there’s no need to change anything.
How do I find the IPv6 settings on my TP-Link Wi-Fi 6 router?
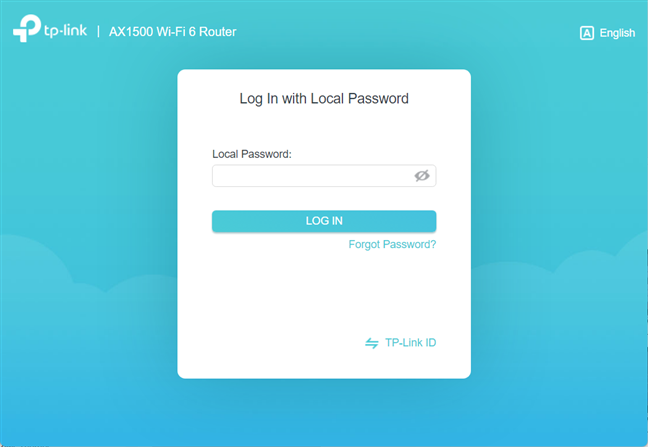
Before activating IPv6 internet connections and addresses on your TP-Link router, you must access the appropriate settings. This can be done only from the firmware of your TP-Link router and not from the Tether app. Therefore, open a web browser on your computer, and navigate to tplinkwifi.net or 192.168.0.1. Next, enter the admin password for your TP-Link Wi-Fi 6 router, and press LOG IN.How to enable IPv6 on your TP-Link Wi-Fi 6 router
In the IPv6 Internet section on the right, set the IPv6 switch to On.BONUS: Set how the TP-Link Wi-Fi 6 router uses IPv6 addresses in your network
When you enable IPv6 using the steps above, your TP-Link router also uses IPv6 addresses for the computers and devices inside your network. These work in parallel with the older IPv4 addresses. Therefore, you shouldn’t worry about not accessing computers and devices using the shorter IPv4 addresses. However, if you want to configure how the TP-Link router assigns IPv6 addresses on the IPv6 page, scroll down to the IPv6 LAN section on the right. Then, change the Assigned Type and the Address Prefix the way you want.
Discussion (5)
I turned on IPv6 on my Archer C4000 but I can’t even ping (using “ping -6” from Linux) the router from another computer on the network. It says host unreachable. I have no idea why. Yes, I have IPv6 enabled on the Linux PC I am using.
Try to reboot the router after enabling IPv6. It should help.
Great article, but I’m afraid for the Deco X73-DSL and my internet provider Internode it did not help me resolve IPv6 configuration.
The user interface with the X73 is quite limited: the web app REALLY minimal, and the phone app pretty basic too.
I have National Broadband Network (NBN), using Fibre to the Node (FTTN). This means I configure for PPPoE, and use same account as per IPv4. The remaining settings I’m less clear on 🙂
Get IPv6 Address: I think should be Auto, but have tried stateless.
Prefix Delegation: this is my main confusion -> is this an optional item you can choose to use or mandatory? When enabled it seems to bring my internet access to a crawl.
Assigned Type: I thought it should be DHCPv6, but read that Android devices do not like that so believe it should be SLAAC_Stateless DHCP?!
Anyway, I’ve spent hours cycling through the options, and it fails all the online IPv6 tests 🙁
FYI: I replaced a Netgear DM200 and Netgear R9000; this worked fine with IPv6.
Get IPv6 Address – leave to Auto. If you use this setting, then Prefix Delegation – Enable should work just fine. If it doesn’t, disable it. However, it is better to talk to your ISP’s Tech Support and ask.
Assigned Type – is better to use SLAAC+Stateless DHCP.
Great info, but there is no “Connect” box on the page where all this is set up. Maybe they did away with it so it is automatic now in 2022?