




Large video files are common on modern Macs, especially when recording in HD or 4K. While high resolution looks great, it makes videos harder to store, upload, or share. Video compression on Mac solves this by reducing file size while keeping acceptable visual quality.
macOS includes built-in tools that let you compress a video file on Mac without installing extra software. Depending on how much control you need, you can choose a quick method or a more adjustable one.
Compress A Video File On Mac Using QuickTime Player
QuickTime Player comes preinstalled on macOS and offers the fastest way to shrink a video file. This method works best when you want a smaller file quickly, with minimal configuration.
- Open QuickTime Player on your Mac

- Click File in the menu bar, then select Open File
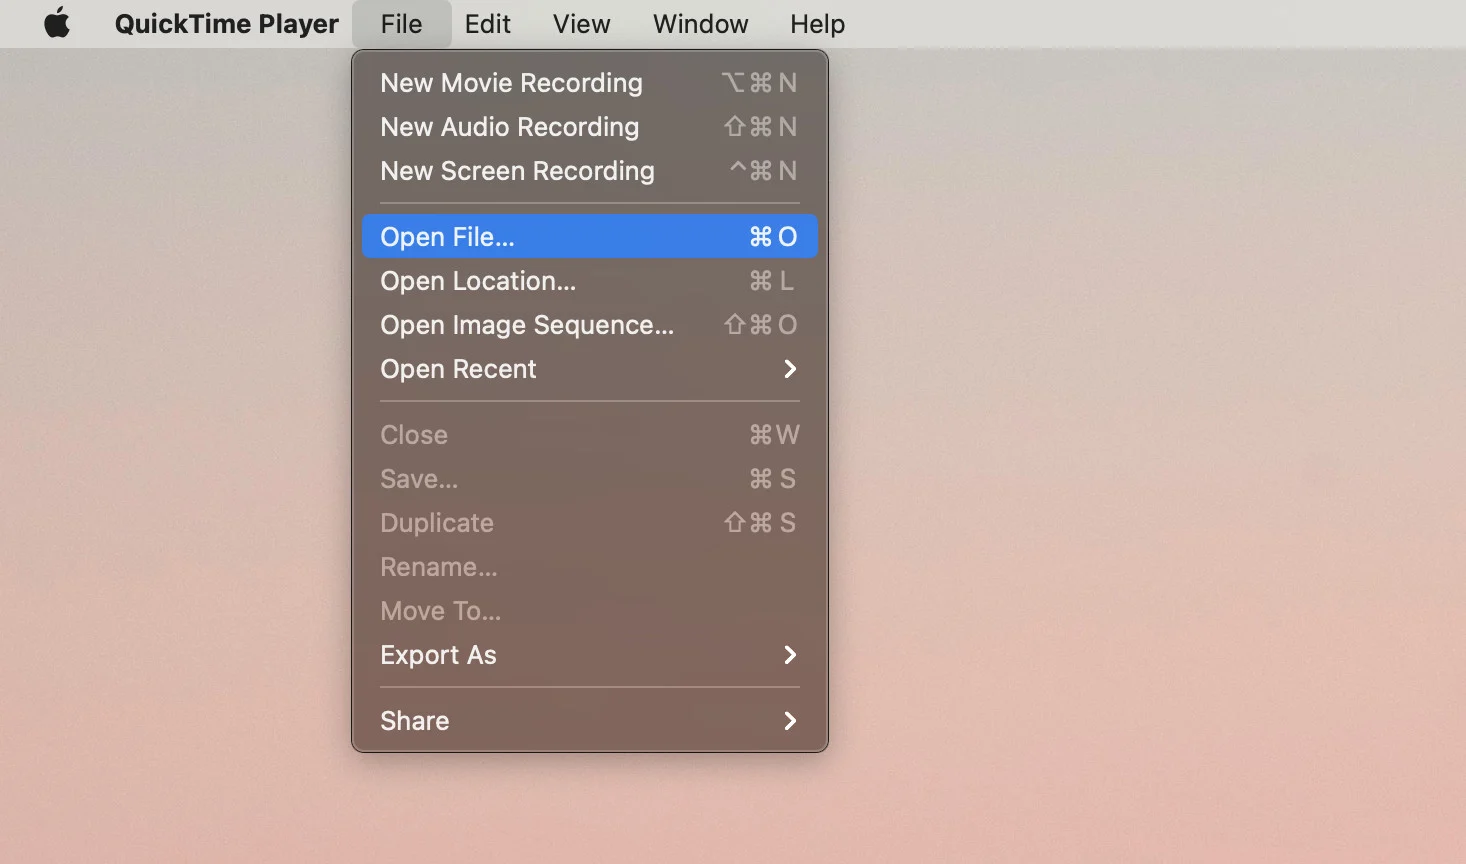
- Select the video you want to compress and click Open
- Click File again and choose Export As
- Select a lower resolution such as 1080p or 720p

- Choose a save location and click Save
QuickTime exports the compressed video as a MOV file. Lower resolutions produce smaller file sizes, making this method ideal for basic compression needs.
Compress A Video On Mac Using iMovie
iMovie gives you more control over compression compared to QuickTime. It allows you to adjust resolution, quality, and compression speed, making it useful when you want to balance size and clarity.
- Open iMovie and create a new project
- Click File and select Import Media
- Select the video file and import it into the timeline
- Click File in the menu bar, then choose Share > File
- Adjust Resolution, Quality, and Compress options
- Review the estimated file size shown on screen
- Click Next, choose a destination, and select Save
iMovie exports videos as MP4 files, which are widely compatible across devices and platforms. This method works well when compressing MP4 videos on Mac for sharing.
Compress A Video File On Mac Using Third-Party Tools
If you need precise control over bitrate, frame rate, or codec selection, a dedicated Mac video compressor may be a better option. These tools offer advanced compression options beyond built-in apps.
Most third-party compressors allow you to:
- Change video bitrate and frame rate
- Convert MOV to MP4 or HEVC formats
- Compress videos without noticeable quality loss
- Preview file size before exporting
This approach is best for professional workflows or when compressing very large video files.
Troubleshooting Common Problems
If compression fails or the file size does not reduce as expected, check the export resolution and quality settings. Exporting at the same resolution as the original will not significantly reduce size.
If the compressed video looks blurry, increase the quality setting or choose a higher resolution during export. For compatibility issues, MP4 is generally safer than MOV.
Tips
- Lowering resolution has the biggest impact on file size
- MP4 files are easier to share than MOV files
- HEVC compression reduces size more than H.264
- Always preview the estimated file size before exporting
- Keep a backup of the original video before compression
FAQ
Can I compress a video on Mac without losing quality?
All compression reduces quality to some degree, but using high-quality settings and modern codecs minimizes visible loss.
Which format is better after compression, MP4 or MOV?
MP4 is more compatible across devices and usually produces smaller files.
Does compressing a video reduce its resolution?
Only if you choose a lower resolution during export. Resolution changes are optional.
Why is my compressed video still large?
The resolution or bitrate may be too high. Adjust export settings to reduce file size further.
Summary
- Mac includes built-in tools for video compression
- QuickTime offers the fastest compression method
- iMovie provides better control over quality and size
- Third-party tools allow advanced compression settings
Conclusion
Compressing a video file on Mac makes storage, sharing, and uploads far more manageable. Whether you use QuickTime for speed or iMovie for control, macOS offers reliable ways to reduce video size without unnecessary complexity. Choosing the right method depends on how much control you need over quality and file format.



Discussion (0)
Be the first to comment.