


Do you have a video that you want to send to someone over the internet, but it is too big to do it via email, chat apps, or other similar services? Do you have to record your homework and upload it on an e-learning platform so that your teacher can grade you? You might stumble upon an annoying size limitation that doesn’t let you do that simply because your 4K or Full HD video is too large. Regardless of your reasons, if you want to learn how to make a video smaller in size, read this guide. I’ll show you several different ways to reduce a video file’s size on any Windows PC:
NOTE: This guide works for Windows 10 and Windows 11. The first three methods work on older Windows versions too.
 The Convert / Save option from the Media menu in VLC
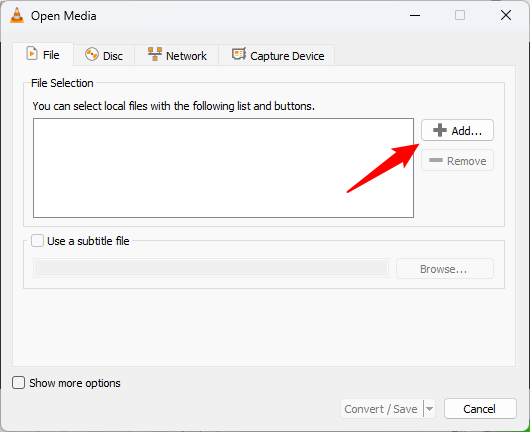
This shows a window called Open Media. In the File tab, which is selected by default, click or tap the Add button on the right.
The Convert / Save option from the Media menu in VLC
This shows a window called Open Media. In the File tab, which is selected by default, click or tap the Add button on the right.
 The Add button from the Open Media window
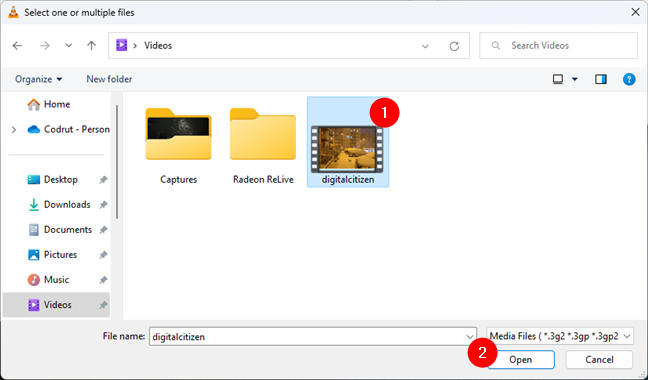
Browse through your Windows PC to find and select the video that you want to make smaller. Once you do that, click or tap on Open.
The Add button from the Open Media window
Browse through your Windows PC to find and select the video that you want to make smaller. Once you do that, click or tap on Open.
 Selecting the video file to shrink
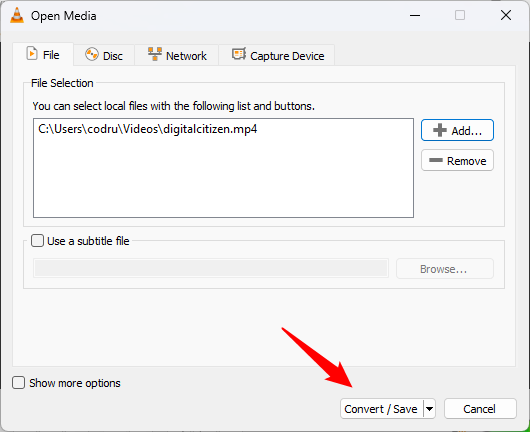
That adds the video to the list of files that will be converted by VLC. Click or tap on the Convert / Save button from the bottom-right corner of the window.
Selecting the video file to shrink
That adds the video to the list of files that will be converted by VLC. Click or tap on the Convert / Save button from the bottom-right corner of the window.
 The Convert / Save button from VLC’s Open Media window
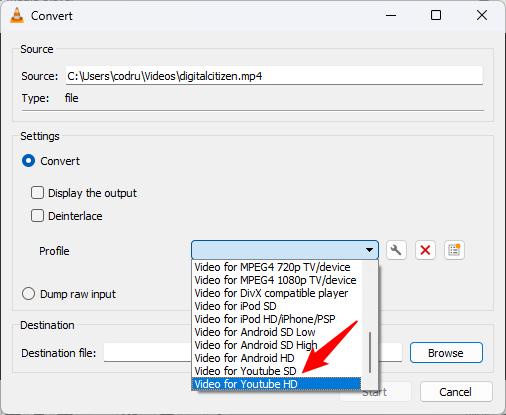
Click or tap on the field next to Profile and select one of the predefined video profiles. In my experience, the last one - Video for Youtube HD - is one of the best choices, as it’s supported by almost every media player and online video-sharing website. It also offers one of the best video compression rates without compromising too much on quality. For an even smaller file size, you can also use Video for Youtube SD.
The Convert / Save button from VLC’s Open Media window
Click or tap on the field next to Profile and select one of the predefined video profiles. In my experience, the last one - Video for Youtube HD - is one of the best choices, as it’s supported by almost every media player and online video-sharing website. It also offers one of the best video compression rates without compromising too much on quality. For an even smaller file size, you can also use Video for Youtube SD.
 Choosing to use the Video for Youtube profile
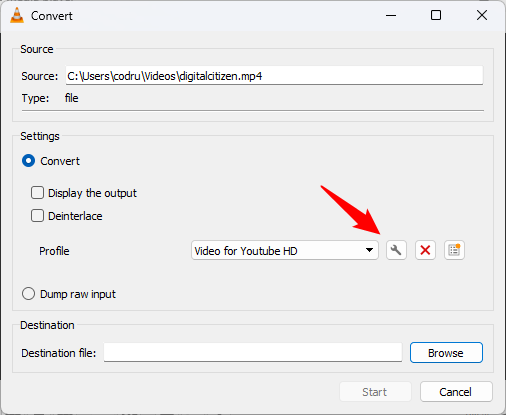
You could leave this profile as it is, and you would still get good results by making the video smaller. However, if you want to ensure the result is small enough for your needs, you can further adjust the profile’s settings. To do so, click or tap on the small wrench button next to the Profile field, and VLC gives you access to all the settings available.
Choosing to use the Video for Youtube profile
You could leave this profile as it is, and you would still get good results by making the video smaller. However, if you want to ensure the result is small enough for your needs, you can further adjust the profile’s settings. To do so, click or tap on the small wrench button next to the Profile field, and VLC gives you access to all the settings available.
 The wrench button allows you to customize the profile settings
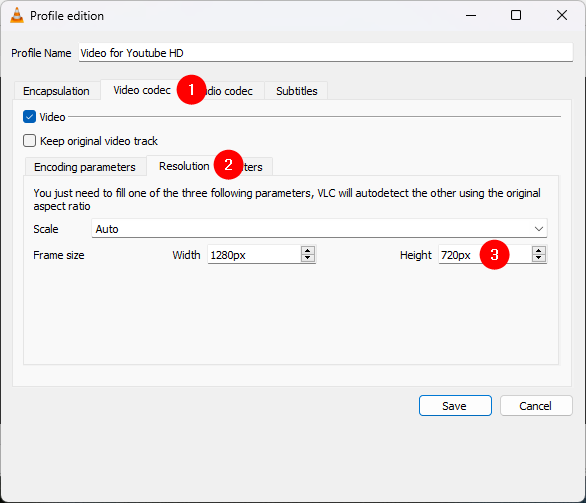
One of the best ways to ensure the video’s size is reduced compared to the original is to decrease its resolution. You can do that from the profile’s settings in the Video codec > Resolution tab. There, either choose to Scale down the video or manually input a new and smaller resolution. For example, in the screenshot below, you can see that the video will be resized to a height of 720 pixels (720p). Once you’ve changed the settings as you want, click or tap Save at the bottom.
The wrench button allows you to customize the profile settings
One of the best ways to ensure the video’s size is reduced compared to the original is to decrease its resolution. You can do that from the profile’s settings in the Video codec > Resolution tab. There, either choose to Scale down the video or manually input a new and smaller resolution. For example, in the screenshot below, you can see that the video will be resized to a height of 720 pixels (720p). Once you’ve changed the settings as you want, click or tap Save at the bottom.
 Changing the resolution of the video
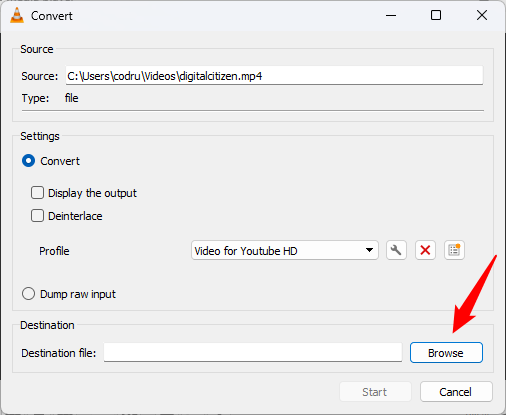
Back in the Convert window, click or tap on Browse to the right of the “Destination file” field.
Changing the resolution of the video
Back in the Convert window, click or tap on Browse to the right of the “Destination file” field.
 The Browse button from VLC’s Convert window
Browse through your Windows PC to select the location for the newly converted video and choose its name.
The Browse button from VLC’s Convert window
Browse through your Windows PC to select the location for the newly converted video and choose its name.
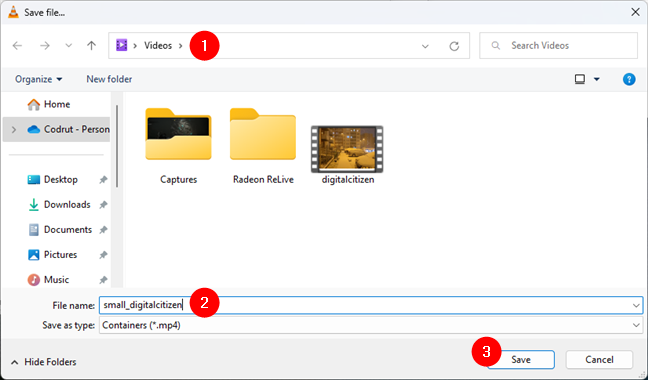 Choosing where to save the smaller video file
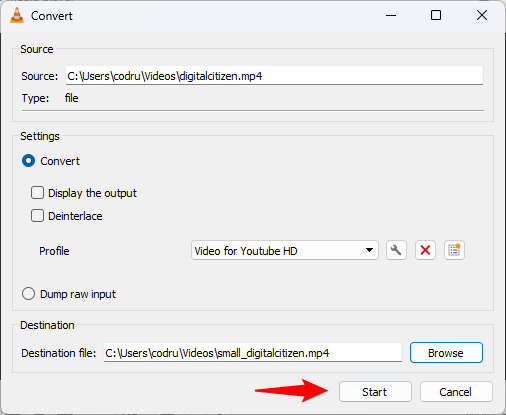
Back in the Convert window, click or tap the Start button.
Choosing where to save the smaller video file
Back in the Convert window, click or tap the Start button.
 Starting the video conversion
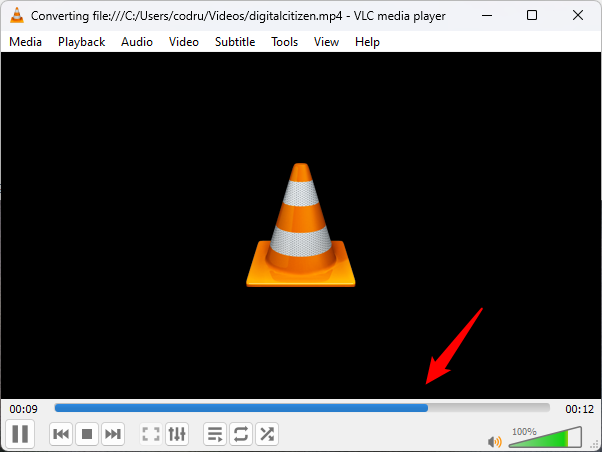
Wait for VLC to convert and save the new video file. You can monitor the progress in real time, as displayed at the bottom of the VLC window.
Starting the video conversion
Wait for VLC to convert and save the new video file. You can monitor the progress in real time, as displayed at the bottom of the VLC window.
 Monitoring the video conversion in VLC
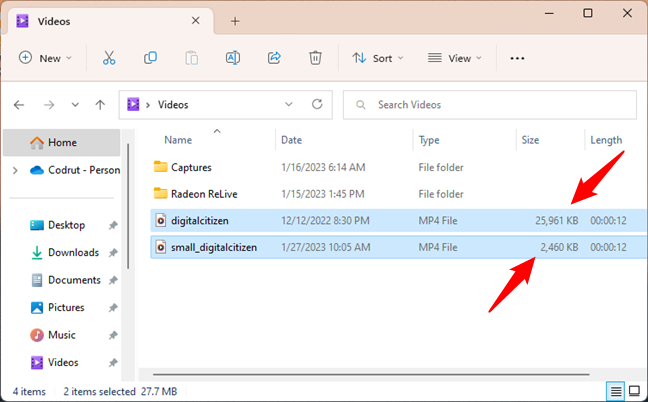
When it’s done, you can find the new video where you chose to save it. Using the settings mentioned earlier, I managed to compress a video that was roughly 26 MB in size into a smaller video file of just 2.5 MB, at an acceptable image quality.
Monitoring the video conversion in VLC
When it’s done, you can find the new video where you chose to save it. Using the settings mentioned earlier, I managed to compress a video that was roughly 26 MB in size into a smaller video file of just 2.5 MB, at an acceptable image quality.
 The compressed video file is smaller than the original video
In my experience, VLC media player is the best option if you want to make your videos smaller.
TIP: You may also want to read: 4 ways to take a VLC screen capture and save video frames.
The compressed video file is smaller than the original video
In my experience, VLC media player is the best option if you want to make your videos smaller.
TIP: You may also want to read: 4 ways to take a VLC screen capture and save video frames.
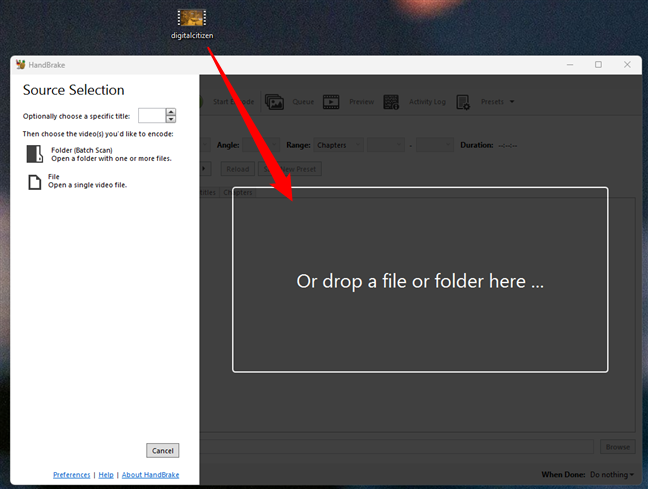
 Loading a video file in HandBrake
After HandBrake loads your video file, you should see a window with many options and settings, like the one below. Don’t be scared by the wealth of options: making a video smaller is quite easy, and you only need to use a few of these settings and buttons.
Loading a video file in HandBrake
After HandBrake loads your video file, you should see a window with many options and settings, like the one below. Don’t be scared by the wealth of options: making a video smaller is quite easy, and you only need to use a few of these settings and buttons.
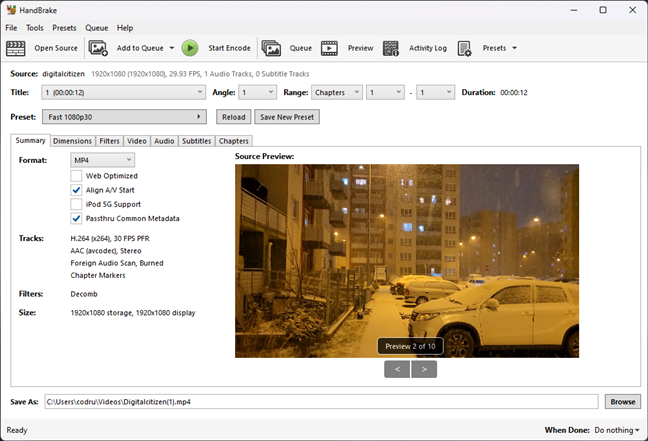
 The HandBrake interface
On the Summary tab, click or tap on Presets and navigate through the list to select the video profile that best matches your intentions regarding the video that you want to make smaller. Note that, to make sure that the converted video is smaller than the original, you should choose a preset that uses a smaller resolution than the initial one. For example, if you have a short video filmed in 1080p resolution and want to send it to someone via email, you could use the “Email 25 MB 3 Minutes 720p30” profile, which lowers its resolution to 720p and surely makes it smaller. This step offers many options, so the best way to get a smaller video without too much quality loss is to experiment.
The HandBrake interface
On the Summary tab, click or tap on Presets and navigate through the list to select the video profile that best matches your intentions regarding the video that you want to make smaller. Note that, to make sure that the converted video is smaller than the original, you should choose a preset that uses a smaller resolution than the initial one. For example, if you have a short video filmed in 1080p resolution and want to send it to someone via email, you could use the “Email 25 MB 3 Minutes 720p30” profile, which lowers its resolution to 720p and surely makes it smaller. This step offers many options, so the best way to get a smaller video without too much quality loss is to experiment.
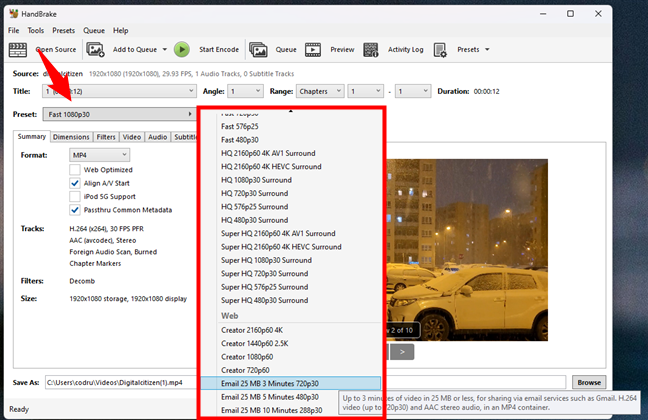
 Choosing a video preset in HandBrake
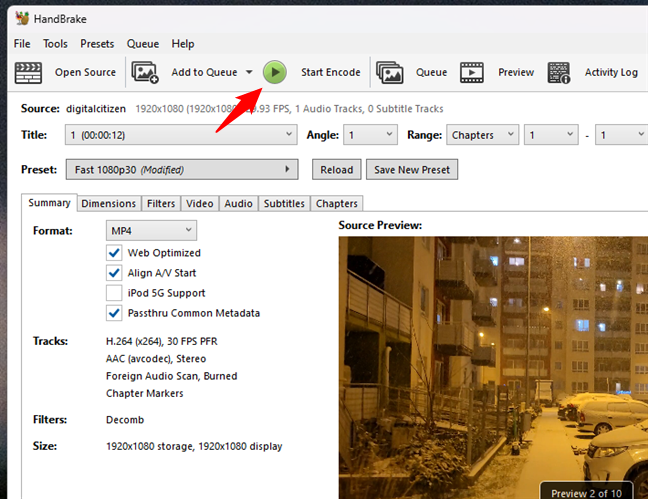
Then, in the Format section, select to compress the video in MP4 and to make it Web Optimized, so that your smaller video is compatible with as many devices and platforms as possible.
Choosing a video preset in HandBrake
Then, in the Format section, select to compress the video in MP4 and to make it Web Optimized, so that your smaller video is compatible with as many devices and platforms as possible.
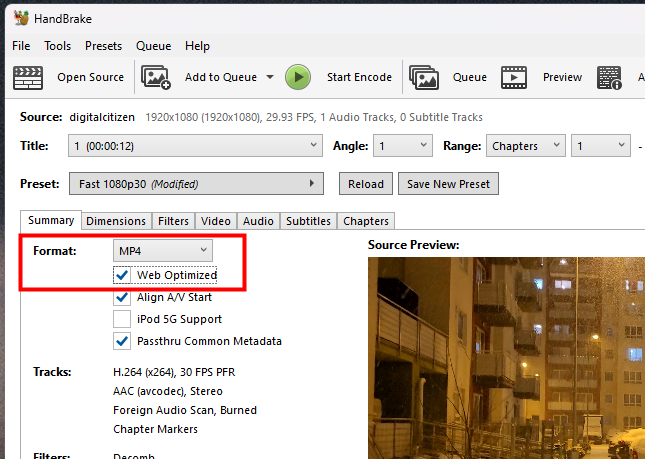
 Choosing the MP4 Web Optimized format
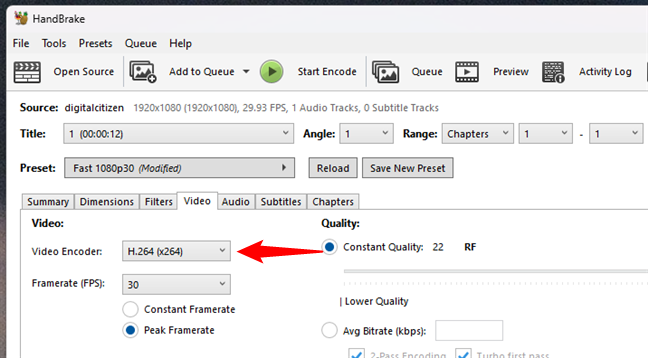
Select the Video tab and choose H.264 as the Video Encoder.
Choosing the MP4 Web Optimized format
Select the Video tab and choose H.264 as the Video Encoder.
 Choosing to use the H.264 video encoder
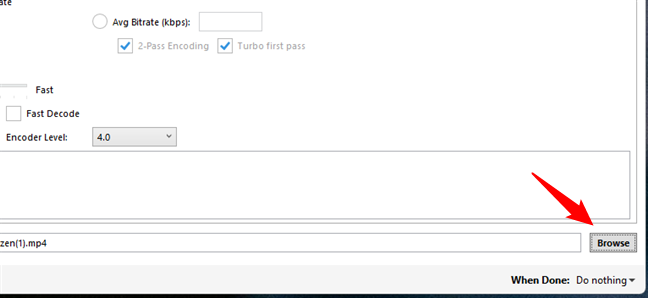
At the bottom-right corner of the window, click or tap on Browse.
Choosing to use the H.264 video encoder
At the bottom-right corner of the window, click or tap on Browse.
 The Browse button from HandBrake
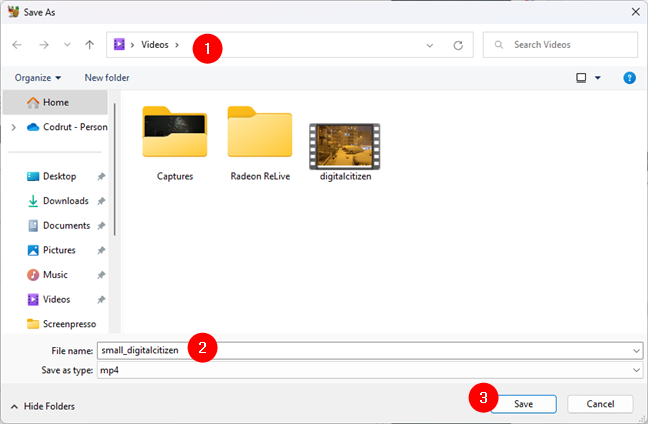
Navigate through your Windows PC and select the location where you want to save the smaller video file. Also, choose a name for it. Then, press Save.
The Browse button from HandBrake
Navigate through your Windows PC and select the location where you want to save the smaller video file. Also, choose a name for it. Then, press Save.
 Choosing where to save the smaller video file
Back in the HandBrake window, click or tap on the Start Encode button from the ribbon at the top.
Choosing where to save the smaller video file
Back in the HandBrake window, click or tap on the Start Encode button from the ribbon at the top.
 The Start Encode button from HandBrake
HandBrake starts to encode the video file and shows you the progress at the bottom of the window. Wait for it to end, and then you can close the HandBrake app.
The Start Encode button from HandBrake
HandBrake starts to encode the video file and shows you the progress at the bottom of the window. Wait for it to end, and then you can close the HandBrake app.
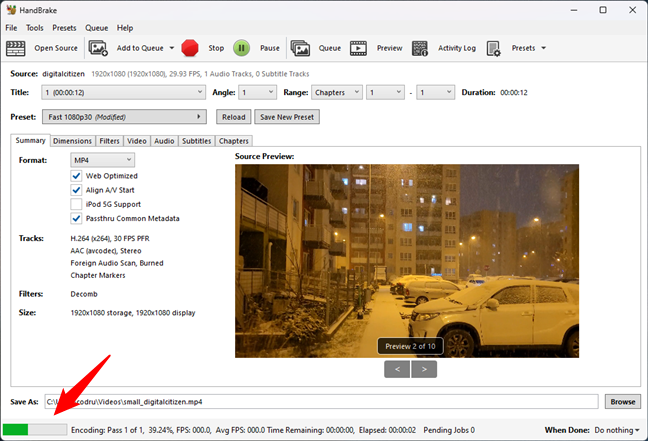 Waiting for HandBrake to encode the video file
You can now find the smaller video where you chose to save it earlier. As you can see in the screenshot below, using the settings I’ve told you about, I managed to shrink a video of 26 MB into one that’s about 23 MB in size. While not a huge difference, it’s now small enough to be emailed to others.
Waiting for HandBrake to encode the video file
You can now find the smaller video where you chose to save it earlier. As you can see in the screenshot below, using the settings I’ve told you about, I managed to shrink a video of 26 MB into one that’s about 23 MB in size. While not a huge difference, it’s now small enough to be emailed to others.
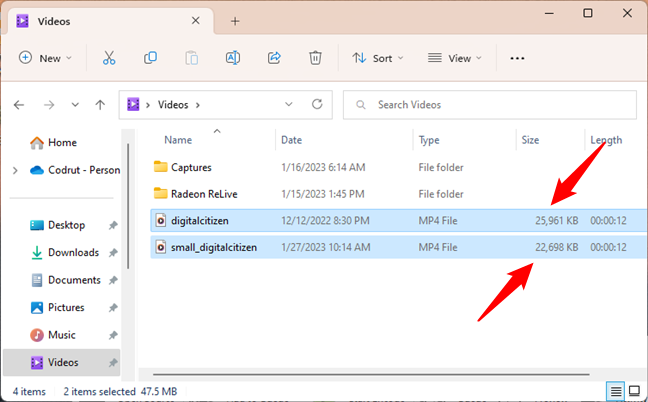 The converted video file is smaller than the original
HandBrake has many other options and settings that you can use for converting and compressing videos, but for the main purpose of making videos smaller, the ones I’ve shown you should do the trick. If you want to learn more about using HandBrake, check the official documentation.
The converted video file is smaller than the original
HandBrake has many other options and settings that you can use for converting and compressing videos, but for the main purpose of making videos smaller, the ones I’ve shown you should do the trick. If you want to learn more about using HandBrake, check the official documentation.
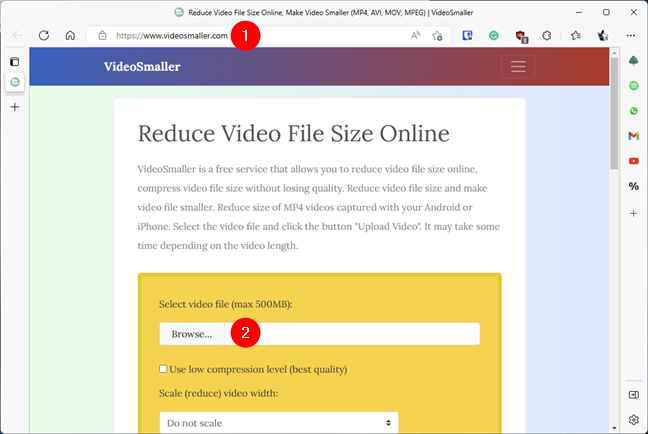
 A website that lets you reduce the video file size
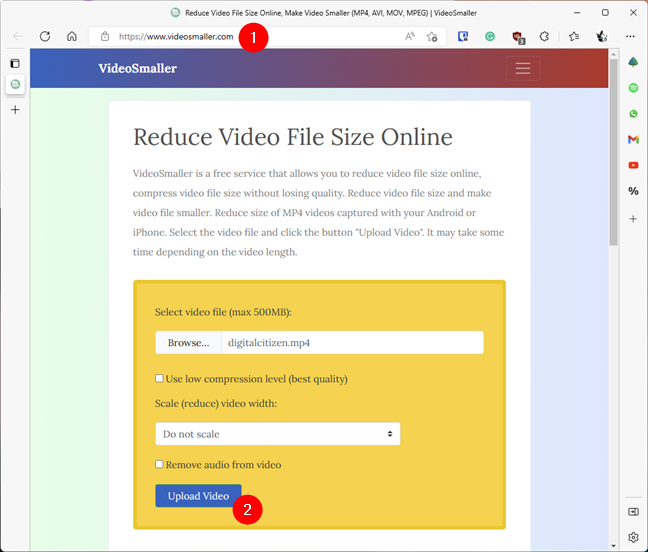
Browse through your Windows computer or device to select the video that you want to make smaller. Then, click or tap on Open.
A website that lets you reduce the video file size
Browse through your Windows computer or device to select the video that you want to make smaller. Then, click or tap on Open.
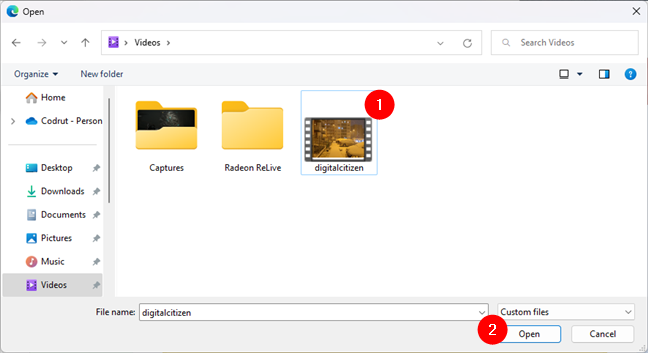
 Selecting the video file to shrink
The video file is now shown in the Browse field. Click or tap on Upload Video. If you want, you can also check the “Use low compression level (best quality)” option and/or select a value from the “Scale (reduce) video width.” The first setting gives you a converted video with better quality. Still, the decrease in size might not be as significant. The second option - scale - lowers the resolution of the video, which makes the converted video file smaller, but with a lower quality.
Selecting the video file to shrink
The video file is now shown in the Browse field. Click or tap on Upload Video. If you want, you can also check the “Use low compression level (best quality)” option and/or select a value from the “Scale (reduce) video width.” The first setting gives you a converted video with better quality. Still, the decrease in size might not be as significant. The second option - scale - lowers the resolution of the video, which makes the converted video file smaller, but with a lower quality.
 Choosing to upload the video
Wait for the video file to upload: you can check the status in the bottom-left corner of the browser.
Once the video has been uploaded and converted, you can get the shrunk version by clicking or tapping on the Download File link, which also shows the file size before and after the compression.
Choosing to upload the video
Wait for the video file to upload: you can check the status in the bottom-left corner of the browser.
Once the video has been uploaded and converted, you can get the shrunk version by clicking or tapping on the Download File link, which also shows the file size before and after the compression.
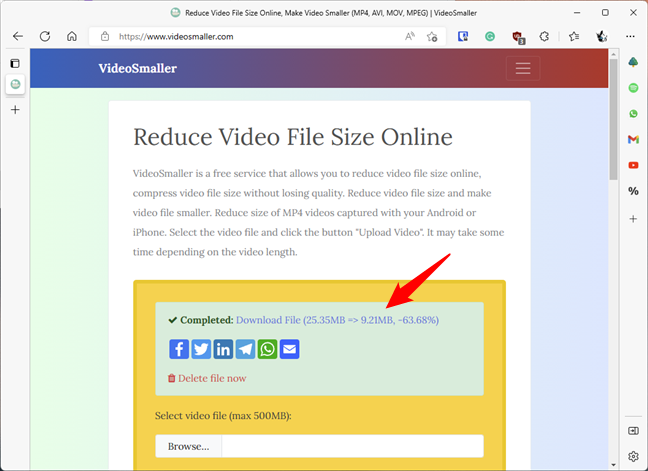
 The download link for the smaller video file
Once you’ve downloaded the smaller video file, it is a good idea to “Delete file now.”
The download link for the smaller video file
Once you’ve downloaded the smaller video file, it is a good idea to “Delete file now.”
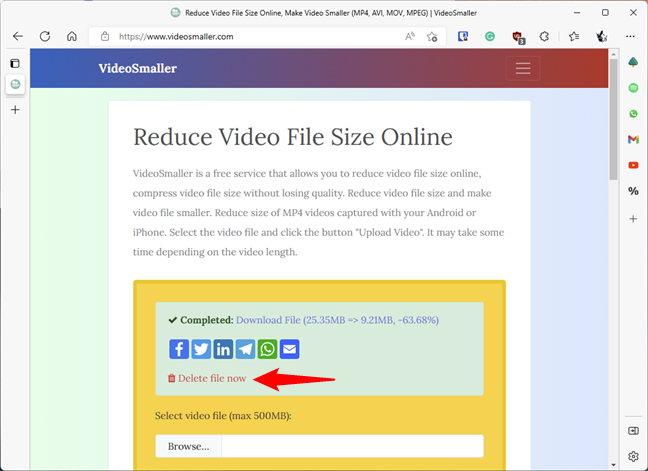 Deleting the video file from the server
Using this method, I managed to compress a video of 25 MB into one of only 9.2 MB.
Deleting the video file from the server
Using this method, I managed to compress a video of 25 MB into one of only 9.2 MB.
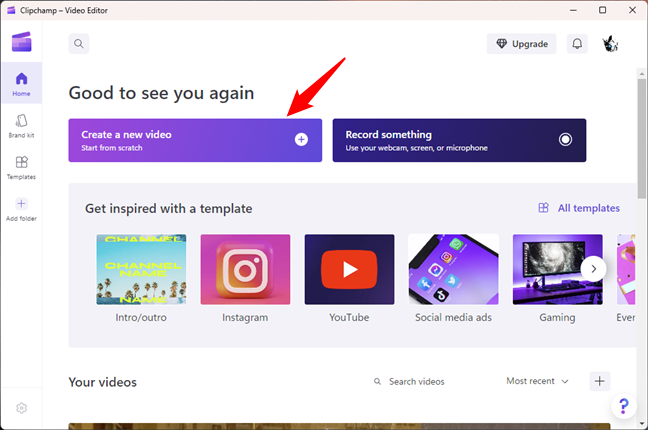
 Create a new video in Clipchamp - Video Editor
Drag and drop your video onto the Clipchamp - Video Editor window. Alternatively, you can also press the Import media button to navigate your PC and select the video.
Create a new video in Clipchamp - Video Editor
Drag and drop your video onto the Clipchamp - Video Editor window. Alternatively, you can also press the Import media button to navigate your PC and select the video.
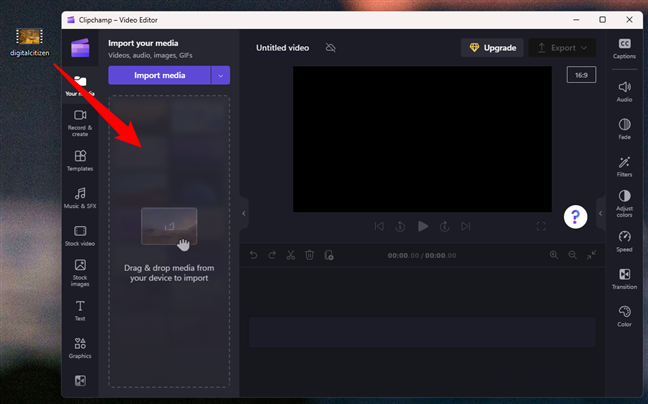
 Drag and drop the video to resize
In Clipchamp - Video Editor, drag the video and drop it onto the storyboard located at the bottom of the window.
Drag and drop the video to resize
In Clipchamp - Video Editor, drag the video and drop it onto the storyboard located at the bottom of the window.
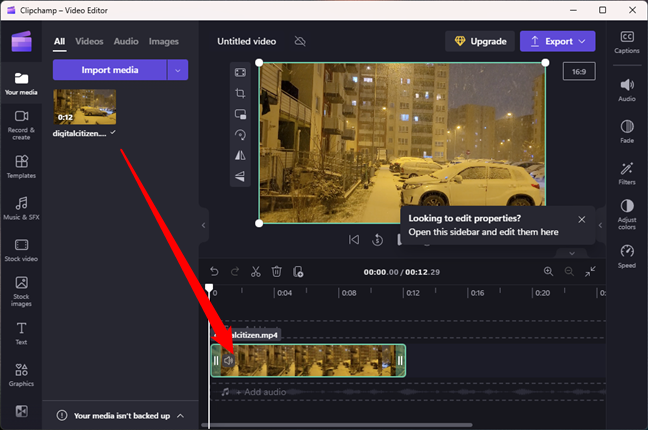 Add the video to the timeline
You could go straight to compressing the video to continue. However, first, I recommend choosing a name for it. To do that, click or tap on the Untitled video field from the top of the window and type the name you prefer.
Add the video to the timeline
You could go straight to compressing the video to continue. However, first, I recommend choosing a name for it. To do that, click or tap on the Untitled video field from the top of the window and type the name you prefer.
 Enter a name for the new video
Next, to make the video smaller, click or tap the Export button at the top-right corner of the Clipchamp - Video Editor window.
Enter a name for the new video
Next, to make the video smaller, click or tap the Export button at the top-right corner of the Clipchamp - Video Editor window.
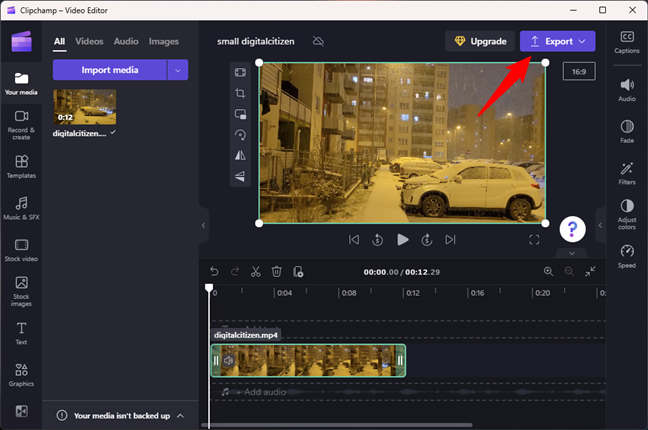 Export the video
On the menu displayed by Clipchamp - Video Editor, select the video quality you prefer. To ensure you get a small video, choose a lower resolution. I recommend 720p as 480p is too lossy in terms of image quality. If your original video is recorded in 4K or similarly high resolutions, 1080p is also a great choice to make it smaller. Note that this is also the highest setting available in Clipchamp - Video Editor.
Export the video
On the menu displayed by Clipchamp - Video Editor, select the video quality you prefer. To ensure you get a small video, choose a lower resolution. I recommend 720p as 480p is too lossy in terms of image quality. If your original video is recorded in 4K or similarly high resolutions, 1080p is also a great choice to make it smaller. Note that this is also the highest setting available in Clipchamp - Video Editor.
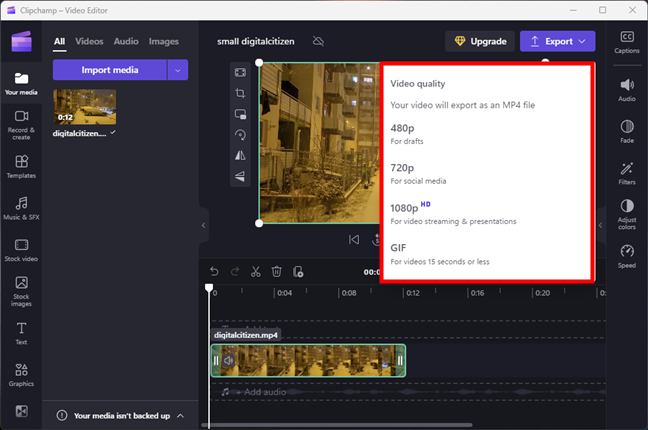 Select the video quality
After making your choice, Clipchamp - Video Editor starts encoding your video without any other notices. Just wait for it to do its job. When done, you’ll find the new and hopefully smaller video stored in your user’s Downloads folder.
Select the video quality
After making your choice, Clipchamp - Video Editor starts encoding your video without any other notices. Just wait for it to do its job. When done, you’ll find the new and hopefully smaller video stored in your user’s Downloads folder.
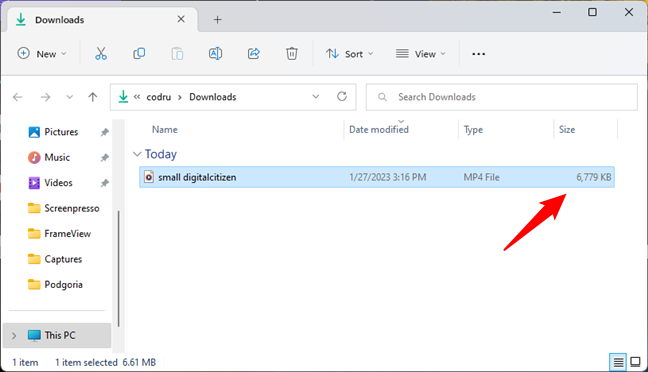
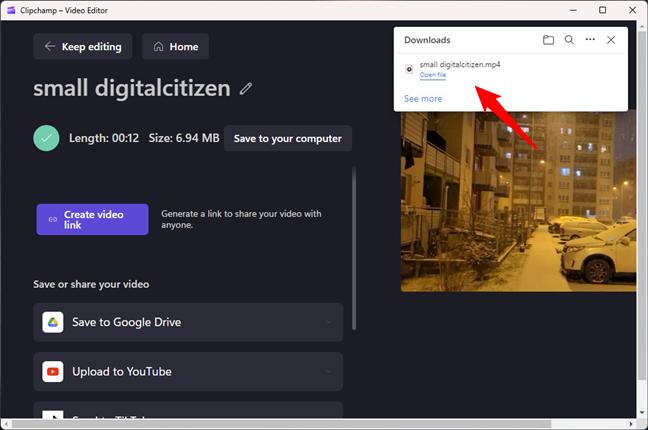 The smaller video is saved in your Downloads
Depending on the initial size and quality of the original video, the new one should be smaller. For instance, when I tested Clipchamp - Video Editor to convert a 26 MB video with the 720p setting, the resulting file I got had less than 7 MB.
The smaller video is saved in your Downloads
Depending on the initial size and quality of the original video, the new one should be smaller. For instance, when I tested Clipchamp - Video Editor to convert a 26 MB video with the 720p setting, the resulting file I got had less than 7 MB.
 Clipchamp - Video Editor can make videos smaller
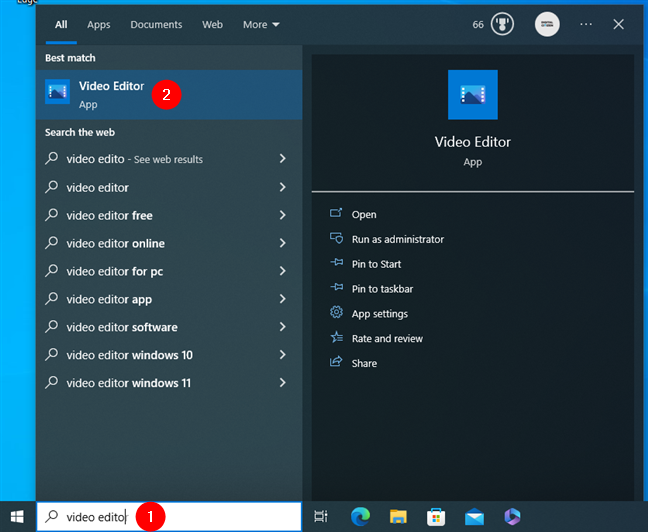
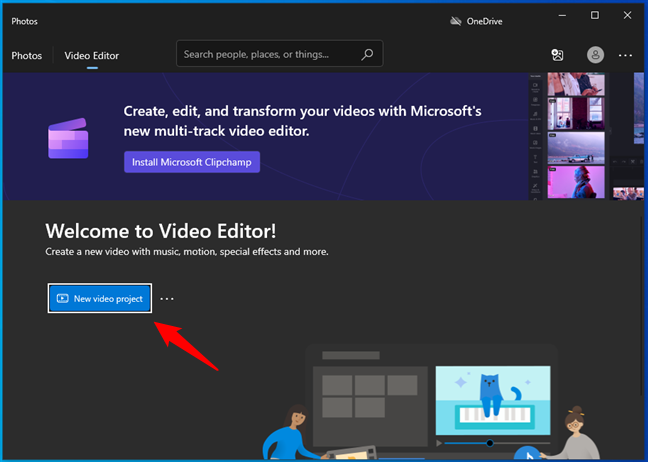
 Launching Video Editor in Windows 10
Push the “New video project” button.
Launching Video Editor in Windows 10
Push the “New video project” button.
 The New video project button
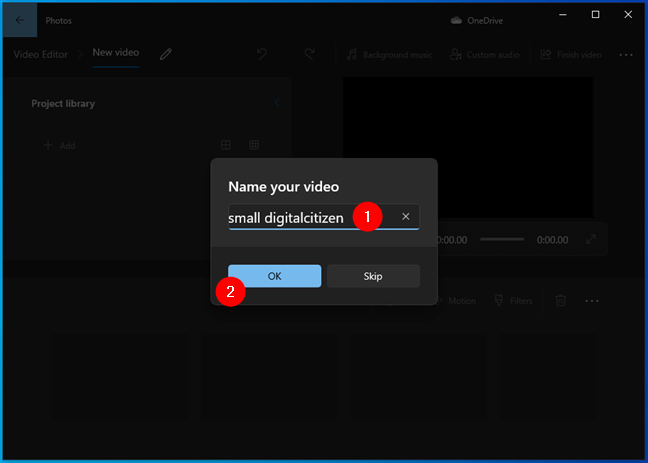
Choose a name for the new video you’re going to create, and press OK.
The New video project button
Choose a name for the new video you’re going to create, and press OK.
 Choosing a name for the video
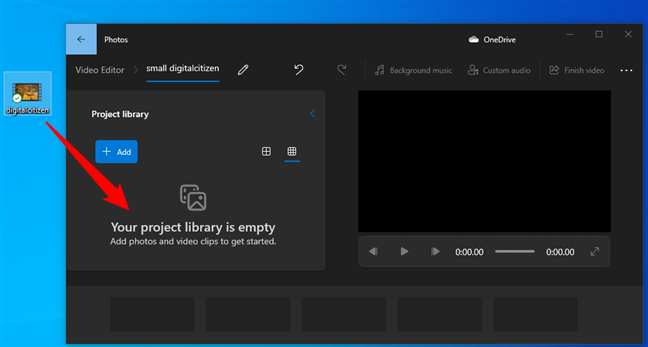
Drag and drop the video you want to resize onto the Project library pane from the Video Editor window. Alternatively, you can also press the Add button and select the video.
Choosing a name for the video
Drag and drop the video you want to resize onto the Project library pane from the Video Editor window. Alternatively, you can also press the Add button and select the video.
 Drag and drop the video onto the Video Editor window
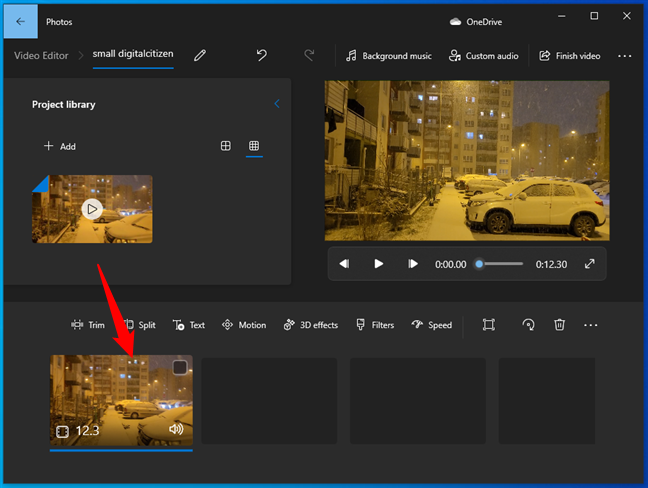
In the Video Editor window, drag the video from the Project library and drop it on the storyboard at the bottom.
Drag and drop the video onto the Video Editor window
In the Video Editor window, drag the video from the Project library and drop it on the storyboard at the bottom.
 Drag and drop the video from the Project library onto the storyboard
And now comes the essential part of the shrinking process: click or tap on the Finish video button at the top-right corner of the Video Editor window.
Drag and drop the video from the Project library onto the storyboard
And now comes the essential part of the shrinking process: click or tap on the Finish video button at the top-right corner of the Video Editor window.

 The Finish video button
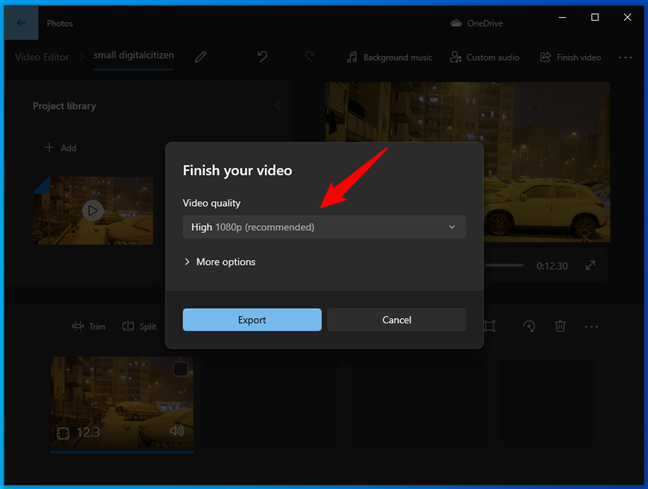
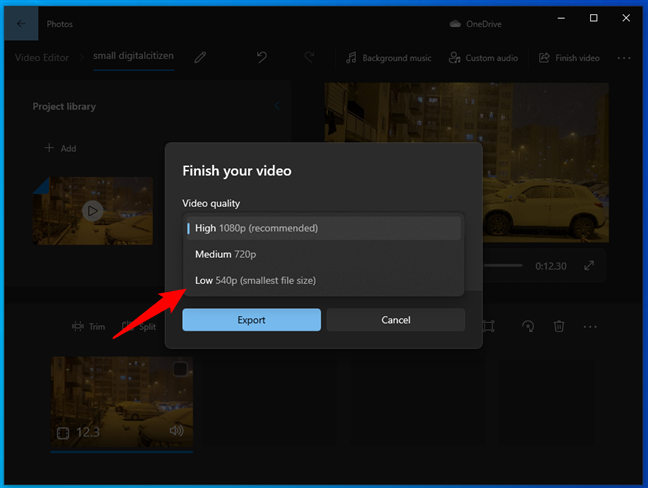
Video Editor opens a dialogue asking you about the Video quality. Click or tap on the preselected option, which should be “High 1080p (recommended).”
The Finish video button
Video Editor opens a dialogue asking you about the Video quality. Click or tap on the preselected option, which should be “High 1080p (recommended).”
 The Video quality setting
To make the video smaller, select Medium 720p or Low 540p. The Medium 720p makes the video smaller while not losing too much of its quality in the process. However, if you need the smallest video file size possible, select the Low 540p option.
The Video quality setting
To make the video smaller, select Medium 720p or Low 540p. The Medium 720p makes the video smaller while not losing too much of its quality in the process. However, if you need the smallest video file size possible, select the Low 540p option.
 Choosing a lower resolution for the video file
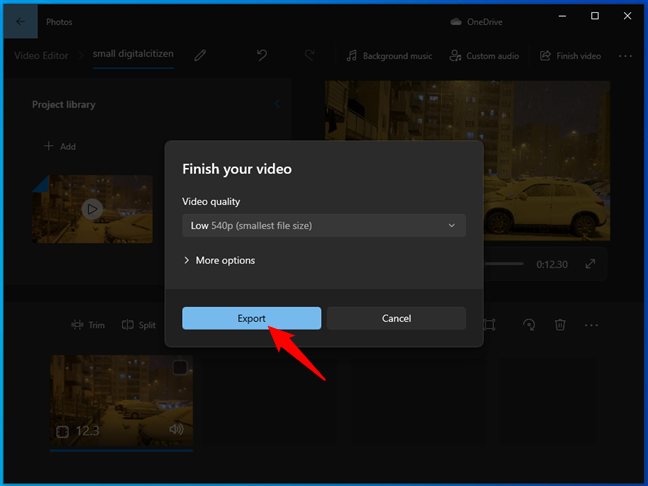
After you’ve made your choice, press the Export button and select the location where you want to save the smaller video on your Windows PC.
Choosing a lower resolution for the video file
After you’ve made your choice, press the Export button and select the location where you want to save the smaller video on your Windows PC.
 Exporting the video file
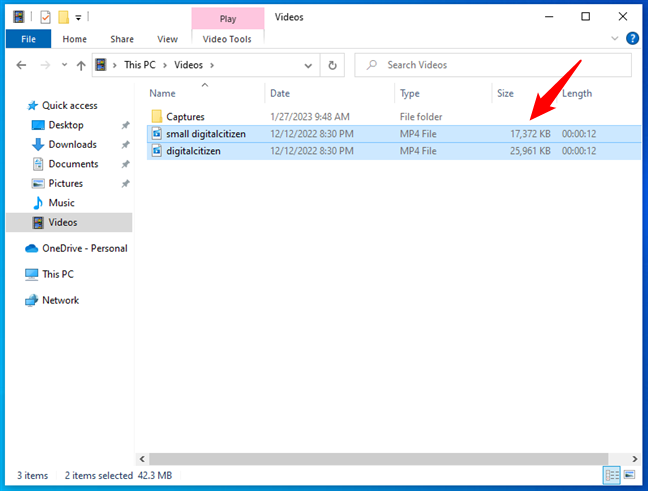
Depending on the length and initial quality of the original video, the converted video file should be significantly smaller. For example, when I used Video Editor to make a 25 MB video smaller using the Low 540p setting, the converted video file had 17 MB.
Exporting the video file
Depending on the length and initial quality of the original video, the converted video file should be significantly smaller. For example, when I used Video Editor to make a 25 MB video smaller using the Low 540p setting, the converted video file had 17 MB.
 The converted video file is smaller than the original video
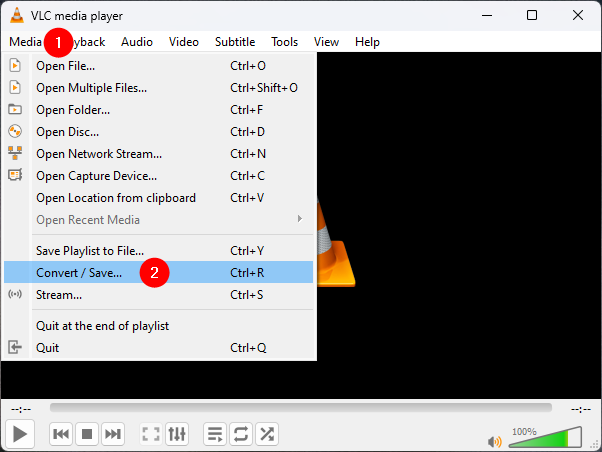
1. How to make a video smaller with VLC
VLC is one of the most popular media players in the world, thanks to its ability to play almost any video and audio files out there. However, it can do much more than just play media files, and one of the things you might not know is that VLC can compress videos to make them smaller. If you don’t already have the app on your Windows PC, you can get it from the official VideoLan VLC media player website. Once you’ve installed VLC on your PC, launch it, open its Media menu, and click or tap on Convert / Save. Alternatively, you can also simply press the Ctrl + R keys at the same time.2. How to make a video smaller with HandBrake
Another popular tool designed for converting video files is HandBrake. You can get it from its official website. Download, install, and open it. Then, drag and drop onto it the video you want to resize, or choose “File (Open a single video file.)” and browse through your Windows 10 or Windows 11 computer to select the video file.3. How to make a video smaller from a website (using online tools)
One of the easiest ways to make a video smaller is to use an online service like the one offered by the videosmaller.com website. I’m using this website to show the process, but you can use Google or your favorite search engine to find others, as there are many such tools available online. In your favorite web browser, go to videosmaller.com and click or tap on Browse.4. How to make a video smaller using Microsoft’s Clipchamp - Video Editor app
Windows 11 comes by default with a preinstalled app called Clipchamp - Video Editor which you can use to make your videos smaller. And you can also use it in Windows 10 if you like it, although in that case, you’ll first have to download and install it from the Microsoft Store. Either way, here’s how to use this app to decrease the size of a video: Launch Clipchamp - Video Editor and click or tap the “Create a new video” button from its dashboard.5. How to make a video smaller using the Video Editor tool included in the Microsoft Photos Legacy app
Windows 10 and early versions of Windows 11 bundle, in the default Photos app, a handy video editing tool, called simply Video Editor. Unfortunately, starting with Windows 11 version 22H2, Microsoft replaced it with a separate app called Clipchamp - Video Editor, covered in the previous method of this guide. However, even if the old Video Editor is not available by default on your Windows 11 PC, you can still download and install it from the Microsoft Store using this link: Microsoft Photos Legacy. So… if you’re running Windows 10 or if you installed Microsoft Photos Legacy on your Windows 11 PC, here’s how to use Video Editor to make a video smaller: Open Video Editor and load the video you want to make smaller. Click or tap on the Video Editor shortcut from the Start Menu, or look for the tool using the search from your taskbar.
Discussion (22)
Thank you very much for the info.
Gloria in excelsis Deo!
I used VLC. What an amazing software.
34,046kb –> 3,559kb
It is offline and dont collect data.
I tried first with Windows Video editor on my Windows 10 machine, but the software was unavailable and Clipchamp which was offered instead required my machine to be connected to internet….
Thank you so much for your work.
Maybe you should check the video editor and possibly revisit the article?
God bless you in Jesu name.
Which video editor do you want us to check? It’s not very clear to me. Thank you!
This was really helpful! Didn’t know VLC could be used to convert / compress videos! Many thanks!!!
We didn’t know that either until making the research for the first draft of this article. Glad we could help. 🙂
Like many others here, I tried the first method using Windows native app and it took an HOUR to ‘shrink’ and the file GREW from 300M to 1G! Safe to say never using it again.
Try the other solutions too. Some are bound to lead to better results.
Fantastic material. Make comment section more visisble so more people are tempted to leave a comment. well done and cheers
Thank you for the feedback. We will improve the comments section in the upcoming weeks.
I need to make videos smaller for social media. Instagram videos must be smaller than 15MG, Facebook videos must be smaller than 10MG and LinkedIn videos must be smaller than 5MG. Are there any settings in any video compressor that makes sure your video can get to those sizes? Thanks!
Best instructions ever!!! I used the top ones with the video editor app. Thank you for your excellent instructions.
Yer Great thanks alot found the VLC one useful
Thanks, VLC way did the job for me: a 100MB 1 minute video captured with Windows gaming became a 10MB video to send to a friend over phone !
I’m glad our guide helped. Don’t hesitate to subscribe to our email newsletter, for more useful tutorials.
I used the first method with the Windows Video Editor, and the video file got larger rather than smaller, even when using the Low 540p setting, so that doesn’t work. Then I tried the VLC method exactly as described, and it produced a video with no sound, so that doesn’t work either. 🙁
Try the other methods too. One of them should work well for you too.
Thanks this helped. I was looking for a clap or thumbs up button
I used the video converter on Windows 10, followed your instructions and in the end the mp4 wasn’t much smaller than the original AND the sound was that of playing a 78 rpm record at 33 1/3….. 🙁
tried the first method. video went from 39mb to 104mb. THAT one doesn’t work so well….
Excellent and informative article. Thank you so much
Thanks for the tips!! never know if VLC can convert video, haha.
Just download the ffmpeg based freeware Video to Video Converter. One of the easiest and best video converter around.