05.06.2020
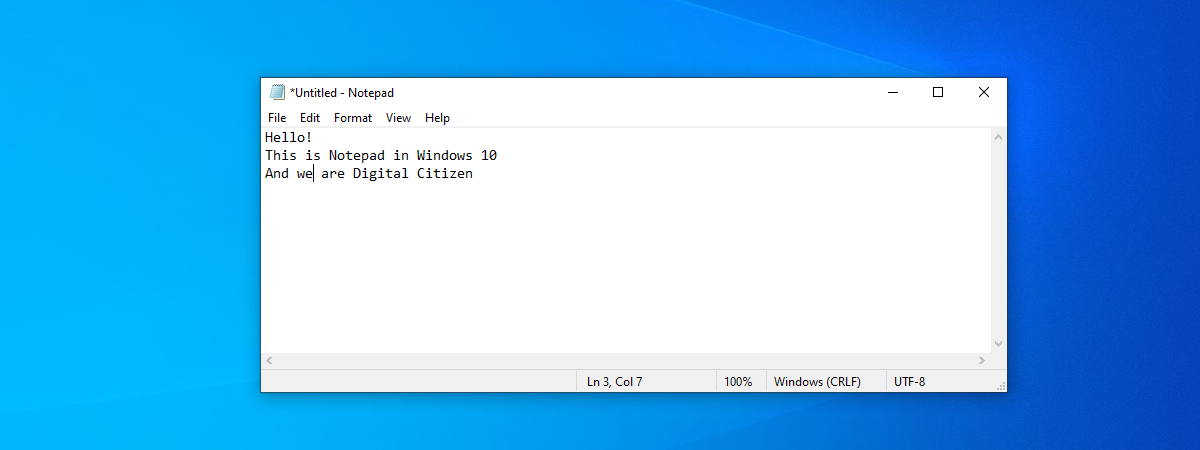
You've probably seen Notepad on your Windows computer or device. Did you wonder about what it is and what it does? This is a very old app that has been present in Windows operating systems for decades. Although it keeps mostly the same appearance in all Windows versions, lately, in Windows 10, it has received more attention from Microsoft. In this article, we're going to show you what Notepad is and how to use it. If you want to learn about it, read on:
What is Notepad? What is Notepad used for?
Notepad is a basic text editor that's built into Windows. It is excellent for writing relatively short text documents that you want to save as plain text. However, that's not all you can do with it. If you have not used Notepad much, or ever, you may be surprised by how easy it is to work with.
Notepad looks and works mostly the same in Windows 10 and older versions of Microsoft's operating systems such as Windows 7. The main differences are related to how you open the application in different operating systems, and you can learn more about that in this tutorial: 11 ways to start Notepad in Windows (all versions). When you open Notepad, you get to see this no-frills screen:
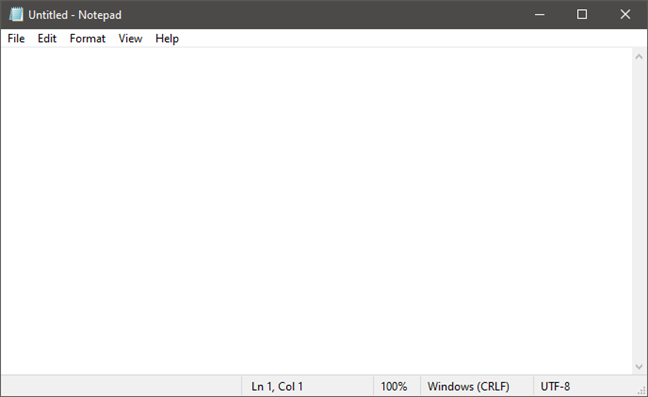
Nothing more is needed, since Notepad has a limited set of options. At the top of the window, you should see menus for File, Edit, Format, View, and Help. Let's take a look at what you can do with Notepad. Everything should be reassuringly familiar, but keep in mind that Notepad is just a text editor. If you try to paste graphics into it, it does not work.
1. Create, open, and save text files with Notepad
The choices you have in the File menu are New, New Windows, Open, Save, Save As, Page Setup, and Print. As you can see, many of these commands have keyboard shortcuts as well. You might already be familiar with some of them since they are the same in nearly every Windows application.

Creating and saving text documents in Notepad is simple: open Notepad, start typing, and then edit and format the text as you see fit. Once you are finished, use the Save As command to save your work. The default folder is the OneDrive folder in Windows 10, and the My Documents folder in Windows 7. You can change this quite easily: use the Save As command, browse to your preferred folder, and click Open. Notepad will remember your choice. Keep in mind that your files are saved with a .txt extension and in plain text.
2. Use Notepad to make simple text edits
The Edit menu offers a few choices, but again, everything on this menu should be familiar to anyone who has used Windows. All the Edit choices have associated keyboard shortcuts. Note that most of the commands are greyed out until there is text selected in the Notepad window.
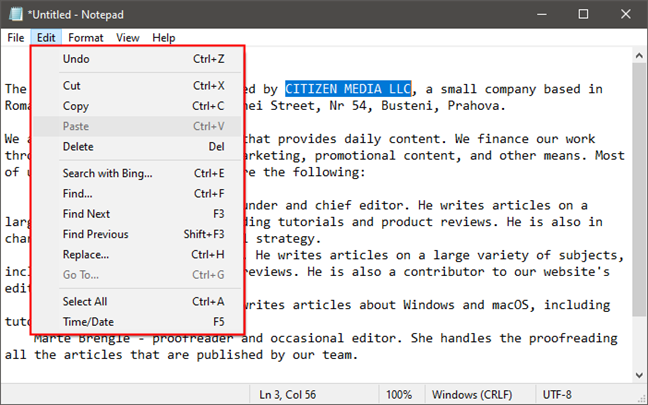
The first item on the Edit menu is Undo/Redo, which can be useful when you are editing the document. What appears in this place depends on what you have been doing. If you have just used the Undo command or pressed Ctrl + Z, you should see the Redo command at the top of the list (and its keyboard shortcut, Ctrl + Y).
The rest of the menu - Cut, Copy, Paste, Delete, Find, Find Next, Replace, Go To, Select All, and Time/Date, are standard in nearly all Windows programs that deal with documents.
3. Search and replace text in Notepad documents
Find, Find Next, and Replace are used to search and replace text in the document, while Go To can be used to navigate through it. To search for or replace a piece of text, select the Find option (keyboard shortcut Ctrl + F) or the Replace (Ctrl + H) option, depending on what you want. That makes Notepad open a box where you can type the text you're looking for in the "Find what" field. If you want to replace text, the Replace window also gives you a "Replace with" field. Either way, both Find and Replace include the same few search options:
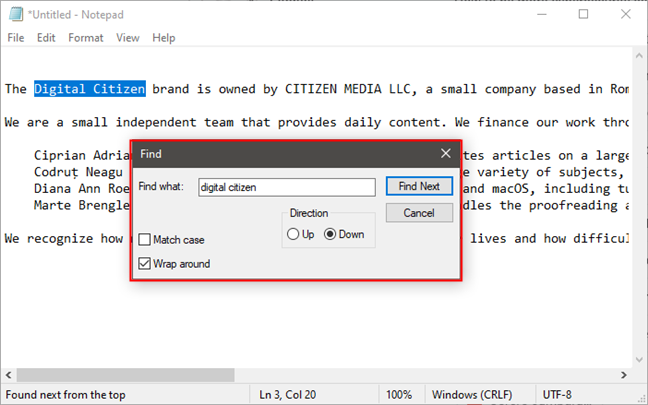
You can decide whether the search should "Match case" the text and choose the Direction to be either Down or Up. Down means that the search is made starting from where your cursor is inside the text document until the end of the document. Up, on the other hand, performs the search from the cursor's position upwards, up to the beginning of the document. Unfortunately, neither option ensures that a search is done on the entire document unless you've placed the cursor at either the start or the end of the document.
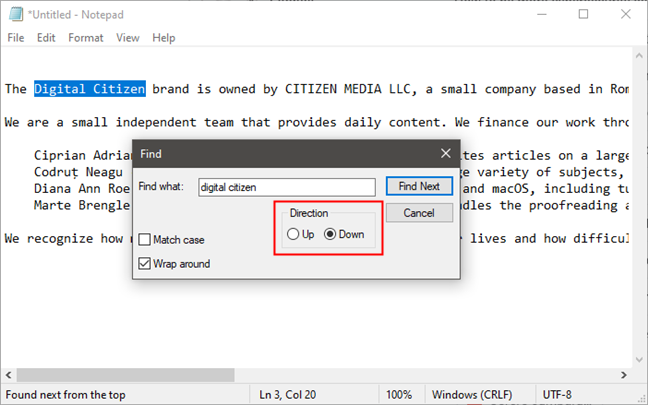
Fortunately, you can ensure that your searches are performed on the entire document, from beginning to the end, by selecting the "Wrap around" setting. When Wrap around is on, Notepad uses your other search options too. However, if the Direction is set to Down, when it reaches the end of the document, Notepad automatically continues the search from the beginning and never stops. Similarly, if you set the Direction to Up, when the search reaches the beginning of the document, Wrap around automatically continues the search from the end of the document.

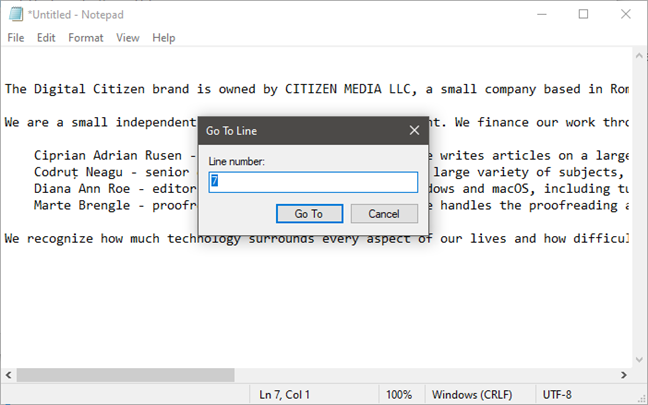
Go To is a less familiar command. You use Go To for jumping to a particular numbered line in the document. Go To only works if Word Wrap is turned off. If Word Wrap is on*, Go To* is greyed out.
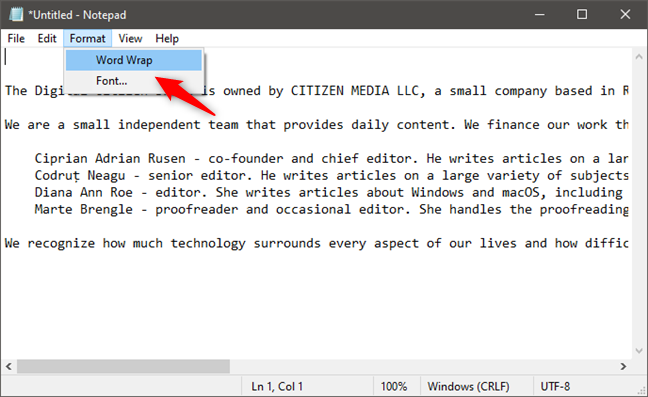
4. Turn Word Wrap on or off
The Format menu offers you only two choices: Word Wrap and Font. For some unknown reason, Notepad has always come with Word Wrap turned off. This means everything you type ends up on one long line until you press Enter, which starts another long line.
You have the option of pressing Enter when your typing approaches the right margin of the Notepad window, but that makes the lines some arbitrary length depending on the size of your window. If you would like to see what you are typing without having to scroll all the way to the right, turn Word Wrap on. Then Notepad should behave just like any other word processing program and automatically wrap the text to the next line as you approach the right margin of your window.
In Windows 7, the Status Bar (which you can enable or disable from the View menu) is also linked with Word Wrap. If Word Wrap is off, you can see a notification on the lower border of your window, showing you where the cursor is currently located in a document that is not word-wrapped. If Word Wrap is on, the lower border is blank. In Windows 10, the Status Bar is on by default and shows line and column numbers regardless of whether you're using Word Wrap or not.
5. Zoom in and zoom out in Notepad (only in Windows 10)
If you're using Windows 10 with May 2020 Update or newer, Notepad also has another nifty feature: text zooming. You can use this feature to increase or decrease the size of the text so that it's easier to see on your screen.
To zoom text, open the View menu from the top of the Notepad window, select Zoom, and click or tap on Zoom In or Zoom Out. Repeat the same steps to further increase or decrease the zoom level. To go back to the normal zoom level, select "Restore Default Zoom" from the same menu.
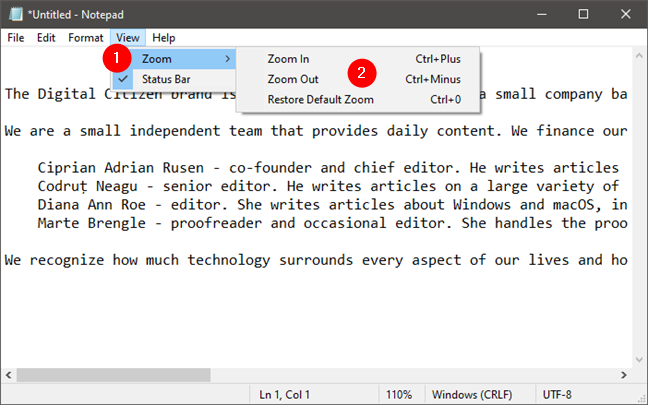
Also, for a faster experience, you might want to remember that you can also use these keyboard shortcuts for adjusting the zoom level in Notepad:
- Zoom In - Ctrl + Plus
- Zoom Out - Ctrl + Minus
- Restore Default Zoom - Ctrl + 0
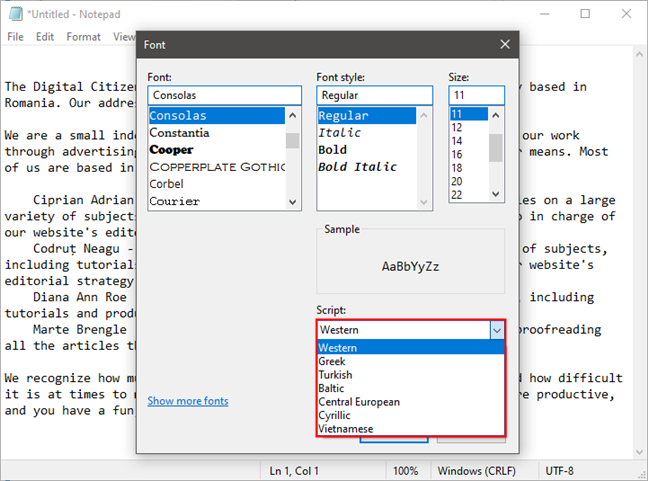
6. Change the font of the text document
The Font choice is self-explanatory: it offers you a list of all your installed fonts and the option to use bold, italic, and the like. However, unlike the way it works in programs like Microsoft Word, a change of font immediately affects the entire document. You cannot use one font in one part of the document and another font somewhere else. It is all or nothing.
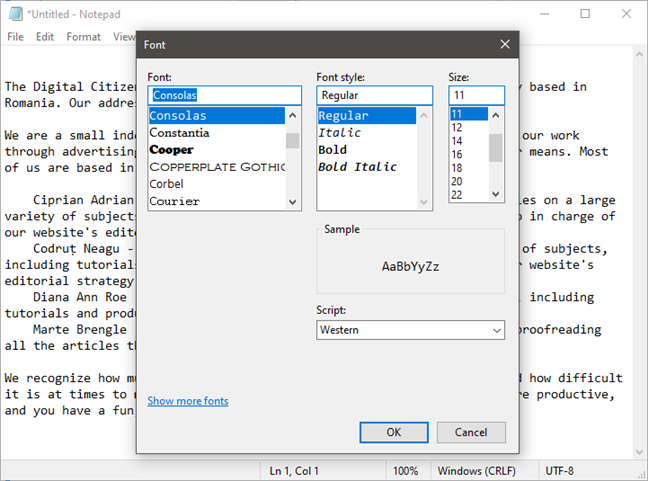
In the Font menu, there is a less familiar option available, the drop-down menu labeled Script. This lets you choose characters that are not available in the standard "Western" style fonts. The choices are Western, Greek, Turkish, Baltic (not available in Windows 7), Central European, Cyrillic, and Vietnamese (not available in Windows 7). Choose a set, and you should see some representative characters above it. The Western set is selected by default, and you need to change it to another one if necessary.
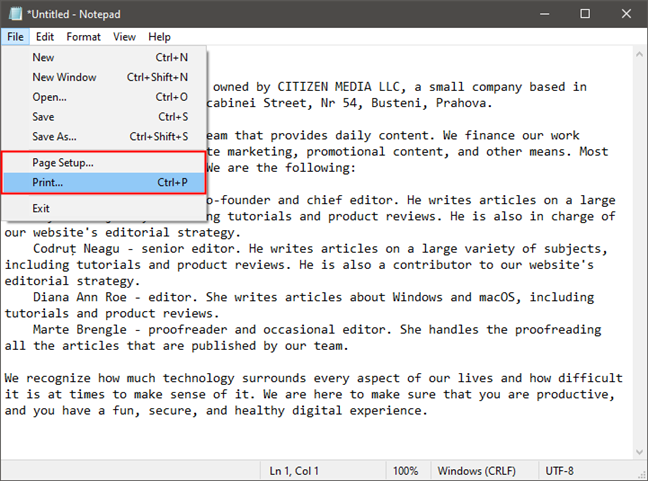
7. Print text files with Notepad
If there is nothing else that you want to customize in the document that you're printing, open the File menu, and click or tap Print. If you do want to customize the print, first click or tap on Page Setup in the File menu.
In more sophisticated programs, Page Setup offers a long list of options. In Notepad, though, your choices are simple. You can choose the paper size and where your printer keeps the paper, the page orientation, and whether to have a header and footer (and the text to include in each).
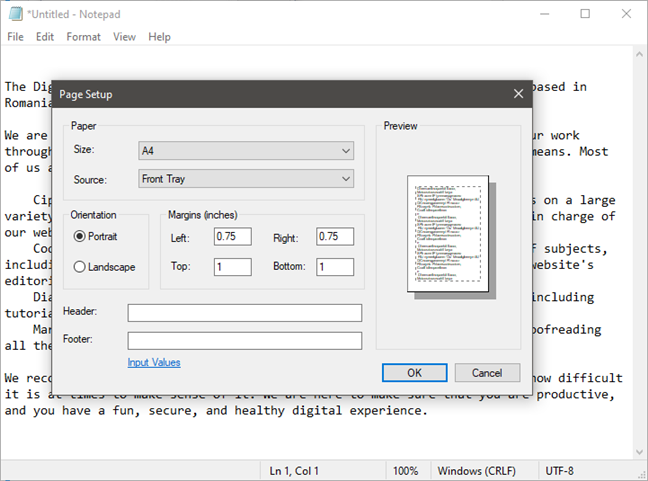
By default, in Windows 10, there's no header or footer printed. In Windows 7, the text in the header is the name of the document and the date it was printed, and the text in the footer is the page number. If you want to customize the header and footer, type the texts you want to use for them. Note that you can also use some codes for printing the current date, time, name of the document, or page numbers. To see all the codes, click or tap on the Input Values link from the Page Setup window, or visit this page: Changing Header and Footer Commands in Notepad.
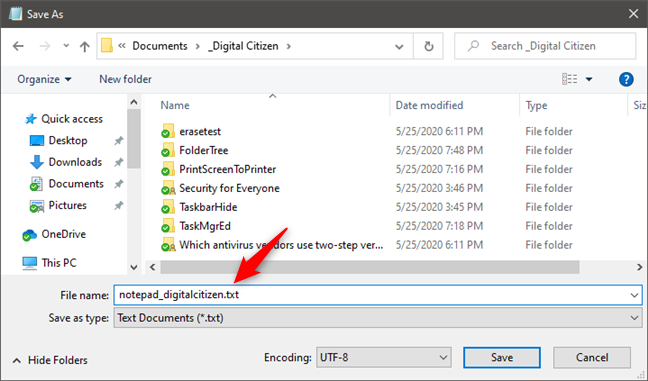
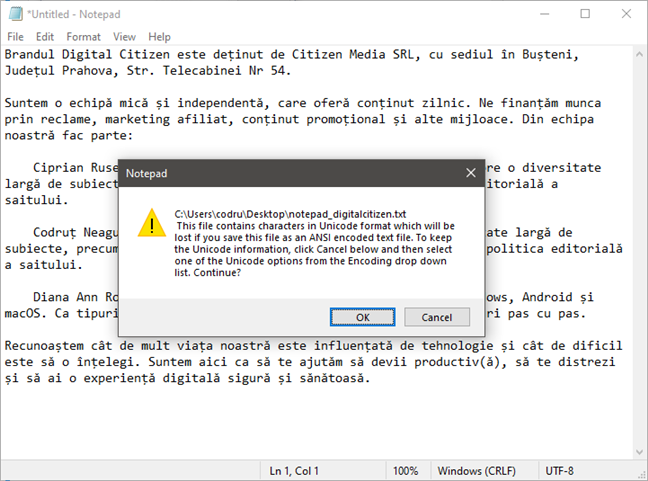
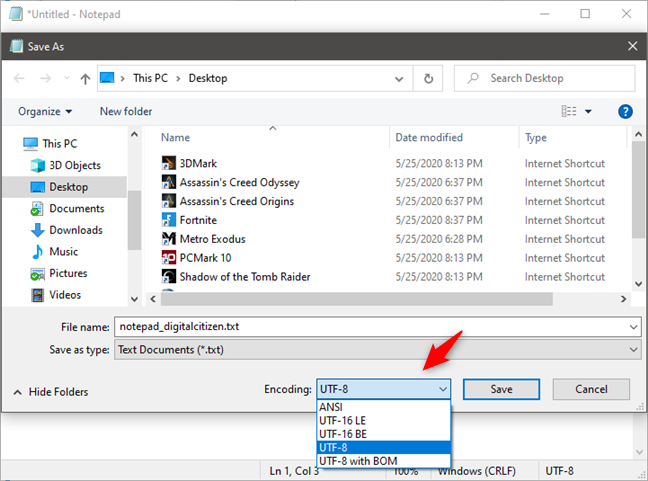
8. Save text files using different encodings
You can also use Save As to change the encoding of your file to match a particular character set. Here, a bit of text from our Romanian site digitalcitizen.ro has been cut and pasted into Notepad.
If you were to try to save this in ANSI encoding, which is the default option in the Notepad from Windows 7 and old versions of Windows 10, you would get a message that if you save it as plain text, all the formatting would be lost.
You have to choose the appropriate encoding from the drop-down list. This might take a little experimentation to get right, depending on the types of characters in the file, but starting with Unicode is a good bet. If you are not familiar with encoding, the first section of this tutorial should help explain it: Make Windows correctly display characters from languages other than English (set non-Unicode programs).
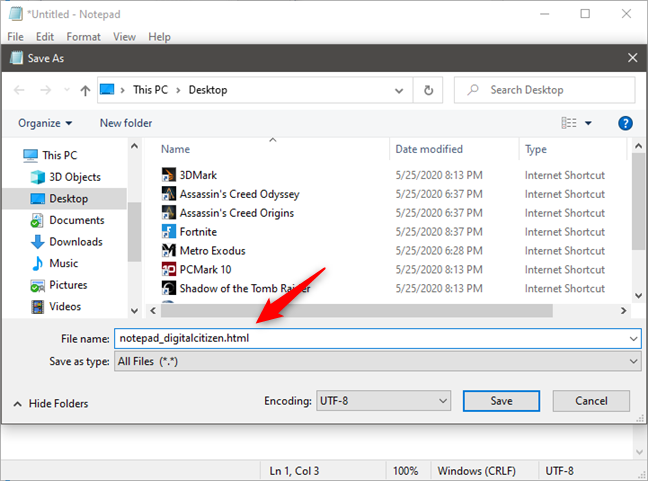
9. Save documents as HTML files
You can also use Notepad to create HTML files. Make sure that Word Wrap is turned on and type your HTML code the way you would type plain text. When it comes time to save your work, choose Save As, and select All Files from the list of choices. Then save your file with the .htm or .html extension.
Do you use Notepad for (light) text editing?
Notepad has been around for a long time and continues to be a useful desktop app for writing simple text and HTML. Sometimes, that is all you need. If you require more than just the basics, WordPad might be a better choice. It is built into all versions of Windows, too! Do you use Notepad regularly? If you do, please tell us how you find it useful in the comments below.