18.06.2020
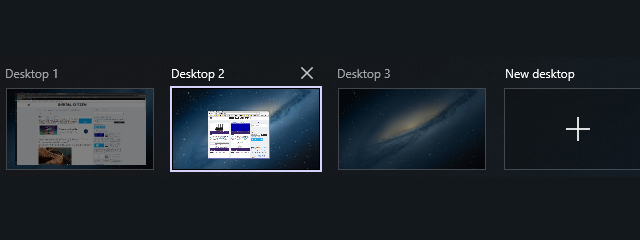
Using multiple virtual desktops in Windows 10 helps you organize your tasks better, allowing you to avoid clutter and distractions while focusing on a specific activity. You can group the apps needed for your current work project on one virtual desktop, have your mail and social media open on another, and plan your upcoming vacation on a third desktop. If you're constantly trying to find your way through too many open apps in Windows 10, multiple desktops can make your life easier, allowing you to operate several virtual workspaces on the same screen. This tutorial illustrates everything you need to know about using multiple virtual desktops in Windows 10 for easier multitasking and increased productivity:
NOTE: The features presented are available in Windows 10 May 2020 Update or newer. If you are using an older version of Windows 10, you might not have access to all the features. Check your Windows 10 build and, if necessary, get the latest Windows 10 update available.
How to access virtual desktops in Windows 10
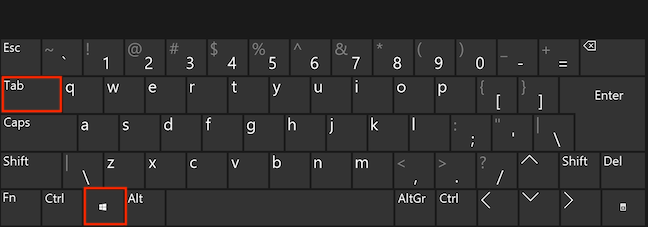
Windows 10 introduced virtual desktops as part of the Task View feature. There are multiple ways to access Task View, and we go through all of them and more in our tutorial: What is Task View in Windows 10 and how to use it. We find it easiest to use the Windows + Tab shortcut on our keyboards to open the Task View and access virtual desktops in Windows 10.
How to create a new desktop in Windows 10
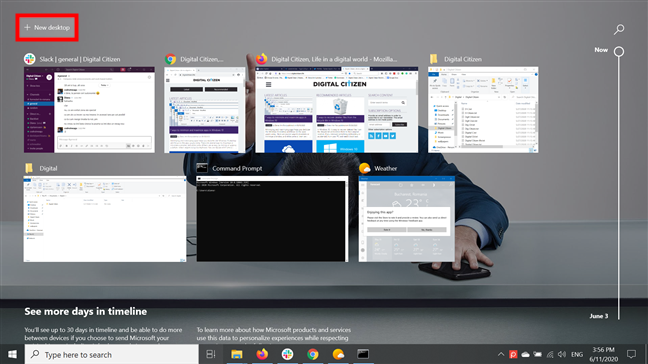
When you open Task View, the screen dims, displaying previews for all your open app windows. To create an additional desktop, click or tap the "+ New desktop" button at the top-left corner of the Task View screen.
NOTE: If you scroll down in Task View instead, you can see the Timeline - a log of your activities on all the devices connected to your Microsoft account for the last 30 days. For more details, read our tutorial about the Windows 10 Timeline.
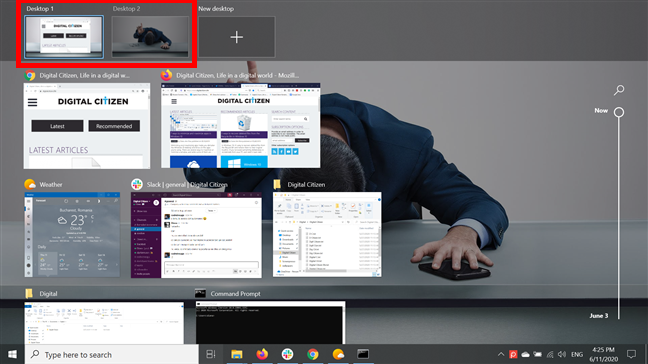
By default, when a new virtual environment is created, your current desktop with its open app windows becomes Desktop 1, and the new one is named Desktop 2. Windows 10 displays previews of all the available virtual desktops in a bar at the top of the Task View screen.
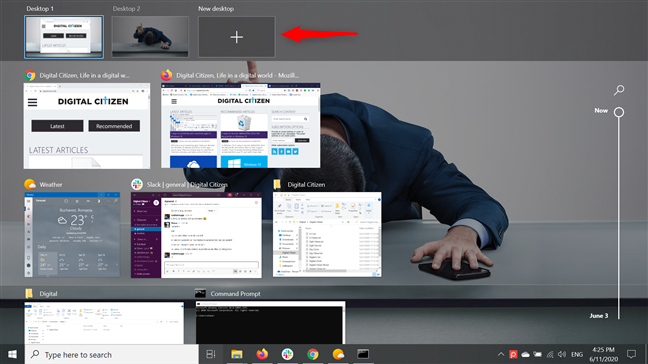
To create another virtual desktop, click or tap on the slightly different "+ New desktop" button on top. New desktops are always added to the right.
Regardless of which "+ New desktop" button is available, you can also click, and then continue to hold down the mouse button (or press-and-hold for touchscreens) on an open app window in the Task View to grab it. Drag it on top of the "+ New desktop" button and drop the app window by releasing the button (or taking your finger off the screen) when the app becomes smaller and the button is highlighted.
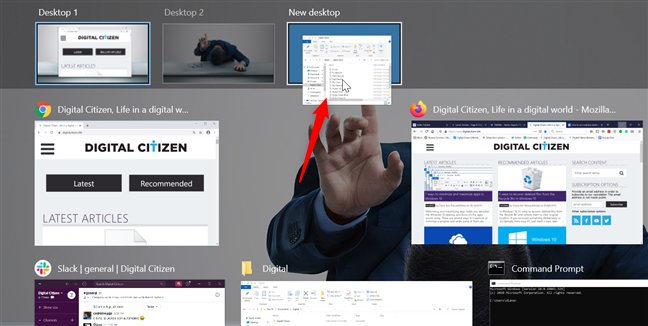
This creates a new desktop where the app you moved is the only open window. You get the same result by first right-clicking or pressing-and-holding on an app window to open a contextual menu, and then pressing Move to and New desktop.
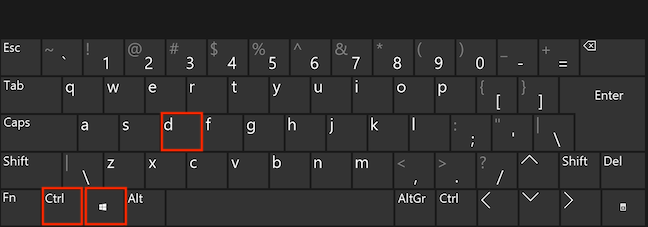
Alternatively, you can use the keyboard shortcut Ctrl + Windows + D on any screen to immediately create a new virtual desktop in Windows 10.
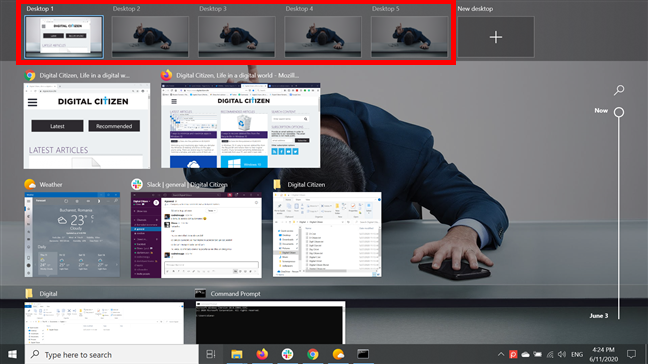
Once created, a virtual desktop is still there even after restarting your Windows 10 computer or device. You can create as many virtual desktops as you want and spread different projects with their related app windows on each of them. However, keep in mind that creating too many might defeat the purpose of making things simpler in Windows 10.
How to rename a virtual desktop in Windows 10
A recent upgrade to the Windows 10 virtual desktops is the ability to rename each of them as you see fit. This is great news as we didn't much like being stuck with the generic names Desktop 1, Desktop 2, and so on, which often made it difficult to find the desktop we were looking for.
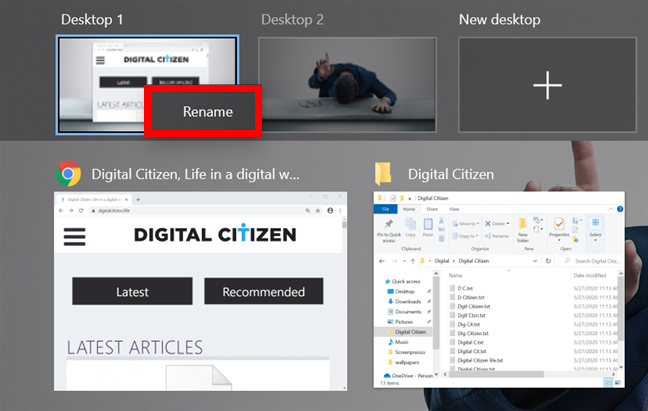
To rename a virtual desktop, it's easiest to just click or tap on its name in the Task View screen.
Alternatively, you can also right-click or press-and-hold on any virtual desktop displayed, and then choose Rename.
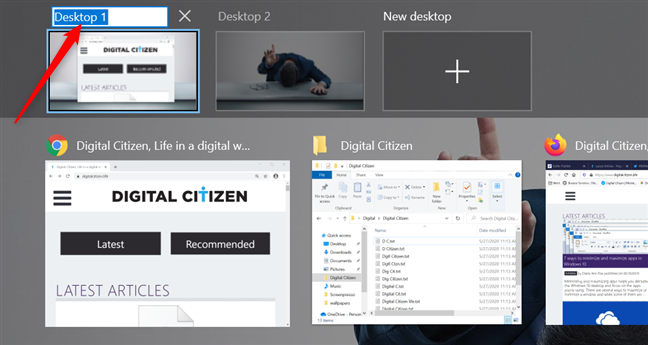
You can now edit the name field. Type in a name indicative of the activity you plan to carry on that virtual desktop. You can use up to 50 characters for a virtual desktop's name.
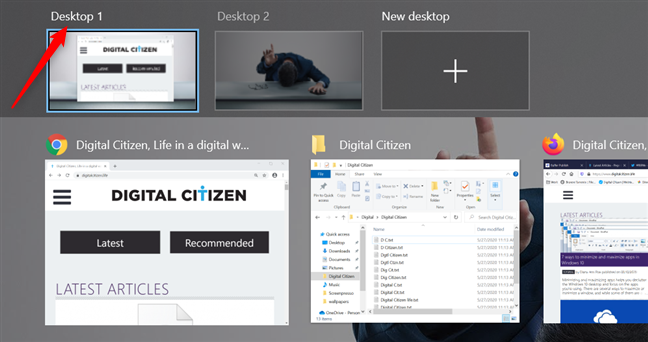
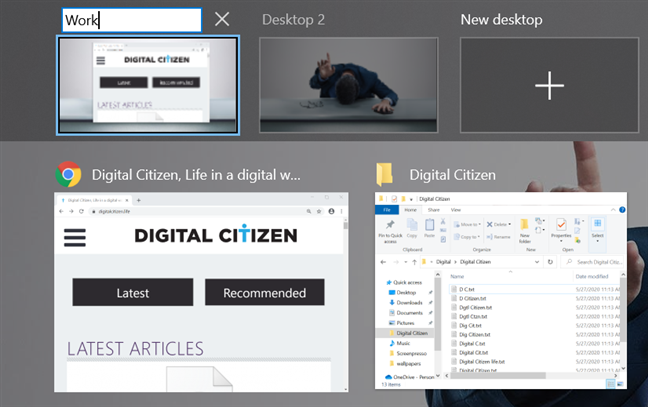
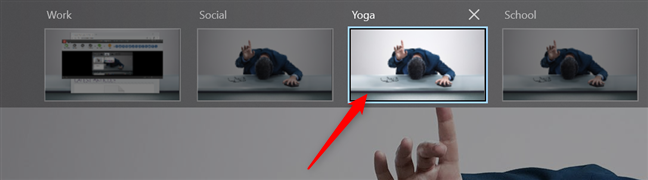
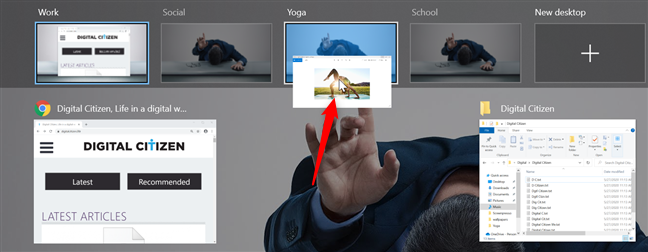
As you might have noticed, there are already a lot of Digital Citizen windows open on my first desktop, so I chose to rename it to Work. When you are done inserting the new name, press Enter or click or tap anywhere on your screen to save your changes.
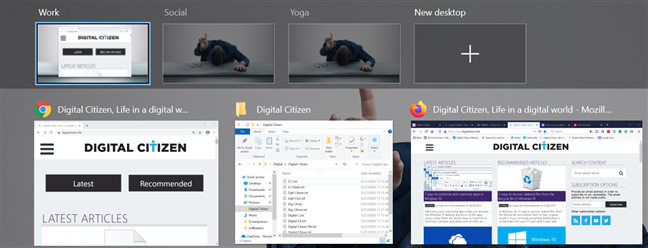
You can create multiple desktops in Windows 10 and rename each one based on the projects or apps they relate to, as seen below.
How to switch between virtual desktops in Windows 10
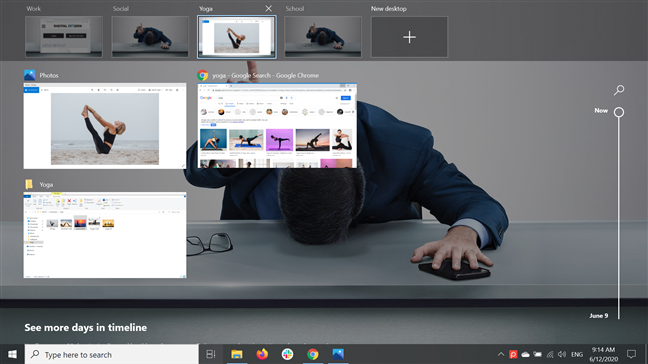
A new desktop offers a new virtual environment for any activity you want to focus on in Windows 10. In the Task View screen, click or tap on the virtual desktop you want to use to switch to it.
By default, the apps open on your first desktop are not displayed on any new ones. This way, you can start opening a new set of apps and documents related to your different tasks on each Windows 10 virtual desktop. Return to the Task View at any point and hover your mouse cursor over a virtual desktop's preview at the top to see an overview of the windows open on it.
A fast alternative to switch between desktops is to use keyboard shortcuts. To switch to the next desktop, press Ctrl + Windows + Right Arrow on your keyboard.
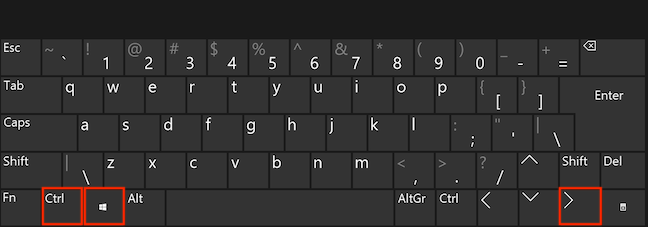
To immediately switch to the previous desktop, press Ctrl + Windows + Left Arrow.

If you are using a touchpad, you can also switch between desktops by swiping on it left or right using four fingers. This might take a few tries before you get the hang of it. However, keep in mind that, unless you're using Task View, the shortcuts to switch between multiple desktops are a bit more complicated, because you need to know which desktop you're on.
How to move windows from one virtual desktop to another
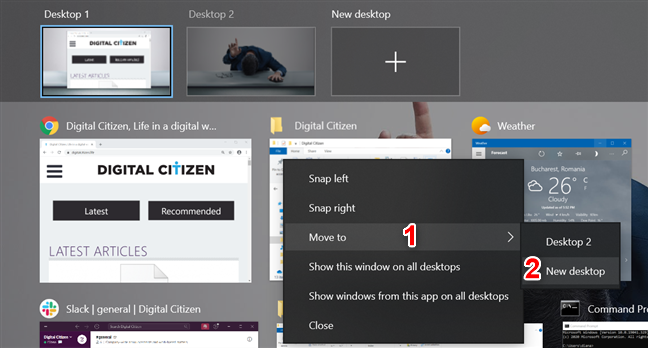
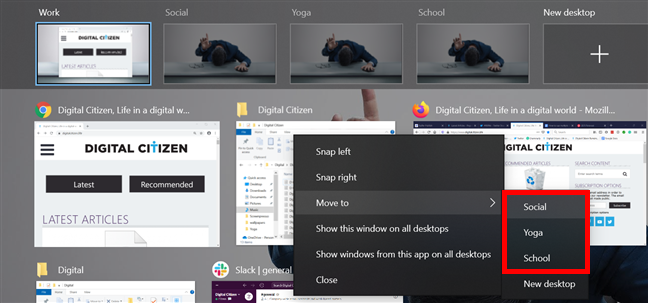
When you launch an application, it opens by default on the virtual desktop you are using at the time. However, to organize your tasks better in Windows 10, you might want to move a window from a virtual desktop to another. To do that, you need to access the Task View. Find the window you want to move and right-click or press-and-hold on it to open a contextual menu. Click or tap Move to and choose the virtual desktop where you want to use the window.
Another way to move a window from a virtual desktop to another is to drag and drop it. First, click and continue holding down the mouse button (or press-and-hold for touchscreens) on an open window to grab it. Drag it onto the virtual desktop you want to move it to. When the window becomes smaller, and the desktop is highlighted, release the button (or lift your finger off the screen) to drop the app. The window is now open on the virtual desktop of your choice.
Continue moving apps between your virtual desktops until you organize everything in a way that benefits your workflow and makes sense to you.
TIP: Moving app windows can be beneficial, but you don't always have to do it. Keep in mind that you can always copy/paste data from documents open in one desktop into apps open on another.
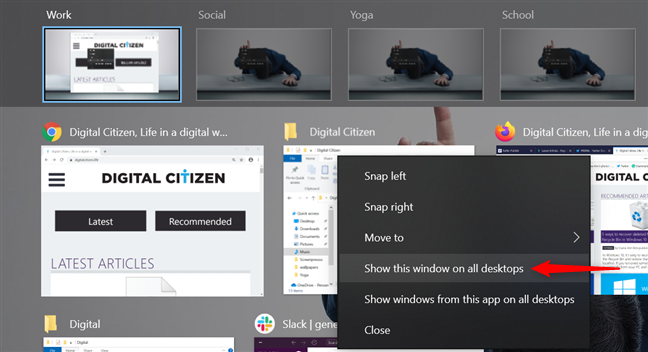
How to pin app windows on all virtual desktops
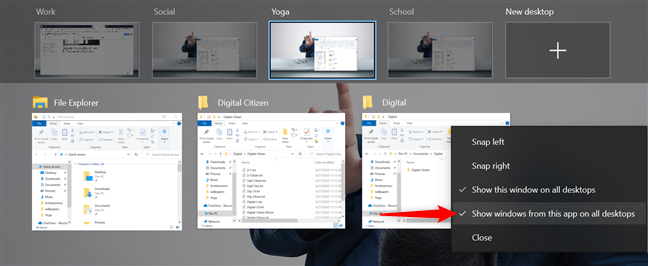
There are times when you have to monitor a particular app or window, so you want easy access to it regardless of the virtual desktop you are using. Luckily, Windows 10 lets you pin app windows on every active virtual desktop. In the Task View, right-click or press-and-hold on the window you want to pin, and then click or tap on "Show this window on all desktops."
This checks the option in the contextual menu, making the window appear on every virtual desktop in Windows 10. If you no longer need to keep an eye on that app window, open its contextual menu again and click or tap on the same option to uncheck it.
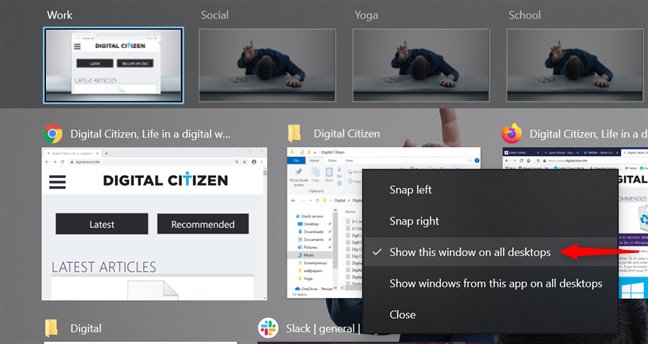
Unchecking the option makes the window's duplicates disappear from the other desktops. The window remains open only on the desktop used to uncheck it.
You can also pin all the windows of an app on every virtual environment available. Right-click or press-and-hold on an app's window, and then click or tap on the "Show windows from this app on all desktops" option.
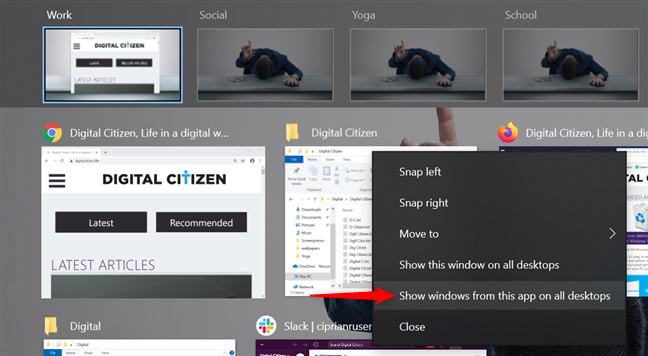
As seen above, we enabled this last option for File Explorer. This opens the app's windows on all desktops. While this option is active, new File Explorer windows open on any desktop automatically appear on every available virtual desktop, and the setting persists even after a restart. Right-clicking or pressing-and-holding on any File Explorer window in Task View opens a contextual menu, where both the "Show this window on all desktops" and the "Show windows from this app on all desktops" options are active, even if you only enabled the latter.
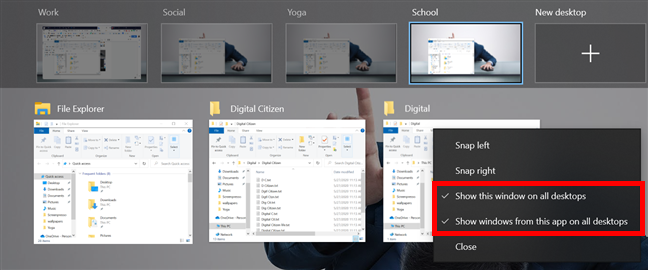
So, if you want to pin every window of an app but one, just uncheck the "Show this window on all desktops" option for that window, while leaving the second one checked. The unpinned window is then only open on the desktop you were using when you unpinned it.
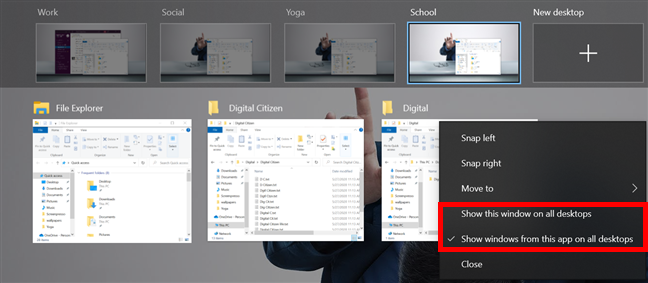
Click or tap again on the "Show windows from this app on all desktops" option to unpin all the windows of an app. This also unchecks the first option automatically, bringing all the windows of that app together on the desktop used to disable the option from the Task View screen.
How to close a virtual desktop in Windows 10
If you no longer need a desktop, you can close it any time you want. An easy way to do that is to open Task View and hover your cursor over the desktop that you want to remove. An X button is displayed on the top-right corner of the virtual desktop. Click or tap on the X button, and the virtual desktop closes immediately.

Any app windows that were open on the virtual environment you closed are immediately moved to the desktop to the left, unless you remove the first one - which moves its windows to the right. For instance, if you are closing the third virtual desktop, every window on it is automatically transferred to the second virtual desktop. However, close the first one, and it all moves to the second virtual desktop, which now becomes the primary one.
Alternatively, you can also close an active virtual desktop from any screen with the keyboard shortcut Ctrl + Windows + F4. The current virtual workspace closes, and you are relocated to the adjacent virtual desktop, together with your windows, as described above.
Virtual desktop settings in Windows 10
In Windows 10, you can make the most out of virtual desktops by tweaking their settings to access the window apps spread across multiple desktops more easily. Open Settings and click or tap on System.
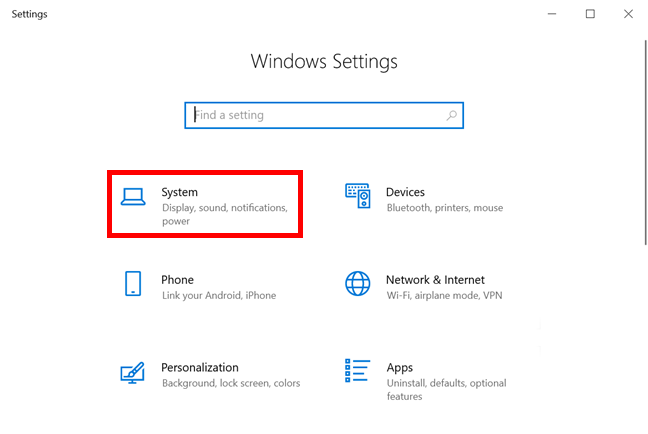
In System Settings, click or tap on the Multitasking tab on the left-hand side (scroll down if you need to). Then, on the right-hand side, you can find the Virtual desktops towards the bottom of the page.
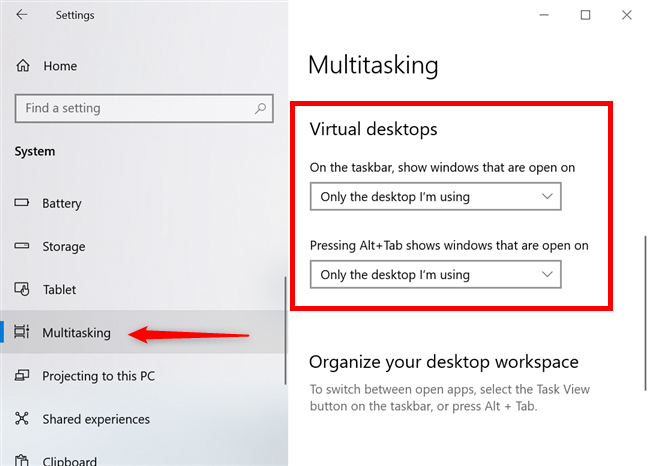
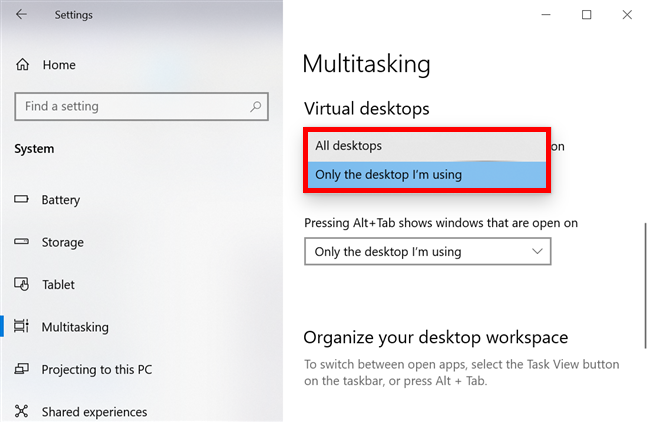
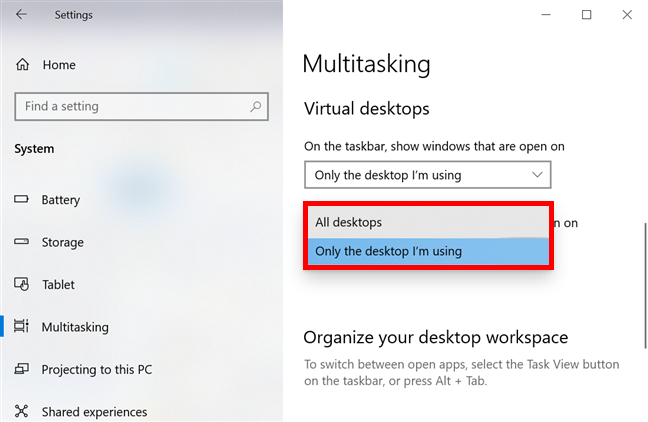
Clicking or tapping the box under the "On the taskbar, show windows that are open on" option reveals a drop-down menu. By default, the taskbar of any virtual desktop is set up to only show the open app windows for that desktop. However, you can click or tap on All desktops, if you always want the taskbar to display the icons of every window that's open on your Windows 10 device, regardless of the virtual desktop it's on.
The second option modifies the behavior of the Alt + Tab keyboard shortcut, which opens the Task switcher. By default, you can hold down the Alt key and press Tab to switch focus between the open windows on a desktop. Release the buttons when you find the app you want to access. Click or tap on the box under the "Pressing Alt+Tab shows windows that are open on" option to reveal a drow-down, where you can choose All desktops if you want the shortcut to cycle through all the window apps open on your Windows 10 device, from all your virtual desktops.
How would you improve virtual desktops in Windows 10?
While virtual desktops are more useful to power users, who need a lot of app windows open on their Windows 10 devices, the feature is also excellent if you want to keep organized and remain focused on your tasks. We can't wait to see how Microsoft improves this feature next. We are hoping for the ability to personalize virtual desktops by setting different backgrounds for each of them or changing the color scheme. Another improvement would be a discreet banner letting you know the desktop you're on when you use shortcuts to switch between virtual environments. What do you think? Are there any other features you want Microsoft to add? Don't hesitate to use the comments section below to share your thoughts on how virtual desktops should evolve in Windows 10.