

Windows has more than just a few preinstalled fonts. However, at some point, you might want more. What if you find a beautiful font online and want it on your computer? How do you install free fonts in Windows 11 and Windows 10? Moreover, how do you see what fonts are on your computer? These are a few of the questions we’re going to answer in this tutorial. So, if you want to know how to view your fonts and how to install new fonts in Windows using several methods, read on:
NOTE: This article applies to Windows 11 and Windows 10. The screenshots are from Windows 11, but the methods described below work the same for both operating systems. If you want to know what version of Windows you have on your computer, here is an article on the subject: How to tell what Windows I have (11 ways).
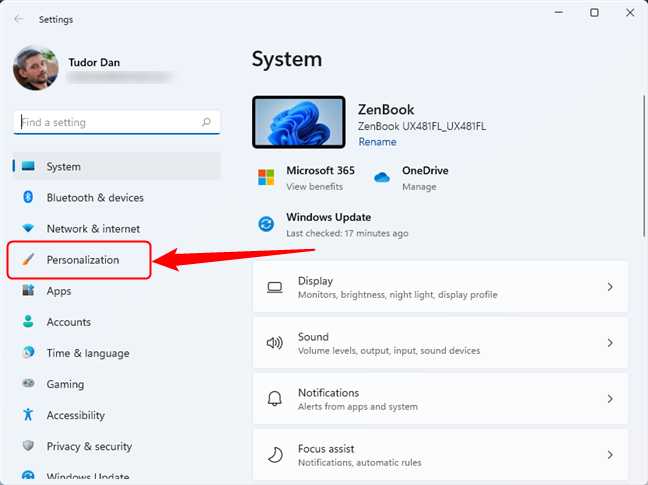
 Navigate to Personalization in Settings
Next, select Fonts. In Windows 11, the Fonts button is in the main section of the window, while in Windows 10, it’s in the left pane.
Navigate to Personalization in Settings
Next, select Fonts. In Windows 11, the Fonts button is in the main section of the window, while in Windows 10, it’s in the left pane.
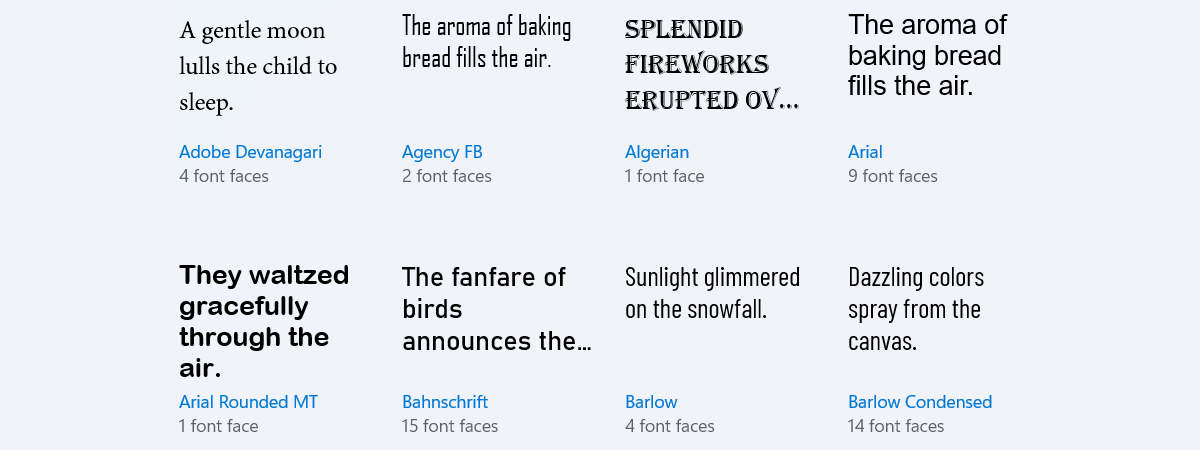
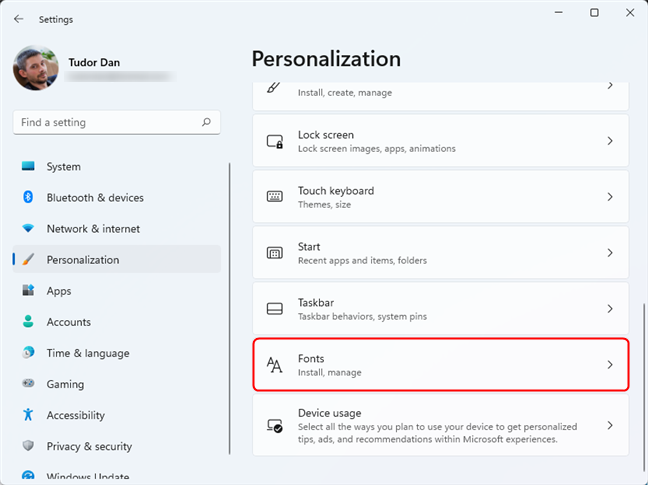 Select Fonts in Settings to see the list of Available fonts
In both operating systems, this action displays a list of available fonts. Now, let’s explain what you can do in the Fonts window.
Select Fonts in Settings to see the list of Available fonts
In both operating systems, this action displays a list of available fonts. Now, let’s explain what you can do in the Fonts window.
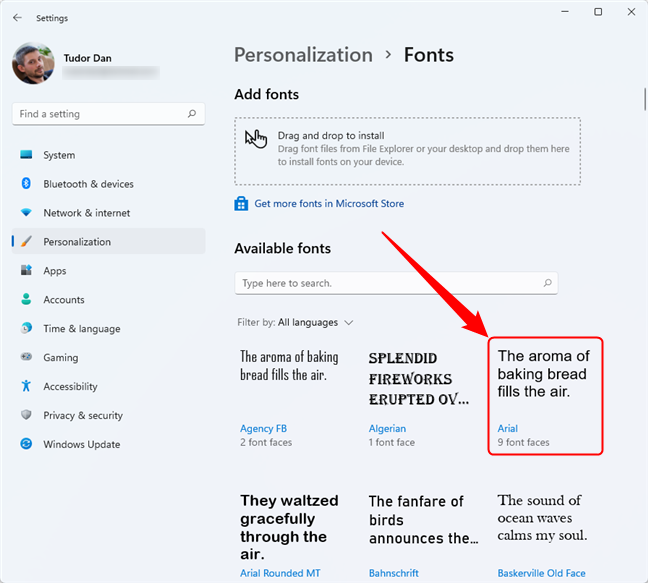
 Click or tap on a font family to see details about it
TIP: You can also use the search box at the top to type the name of the font that you want to view, and then click/tap on the appropriate search result.
When you click or tap on a font family, Windows shows you examples of text using the fonts of that font family. Furthermore, you can also enter your own text in the box at the top to see what it looks like when using the selected font(s). Moving the slider below the input field will change the size of the font.
Click or tap on a font family to see details about it
TIP: You can also use the search box at the top to type the name of the font that you want to view, and then click/tap on the appropriate search result.
When you click or tap on a font family, Windows shows you examples of text using the fonts of that font family. Furthermore, you can also enter your own text in the box at the top to see what it looks like when using the selected font(s). Moving the slider below the input field will change the size of the font.
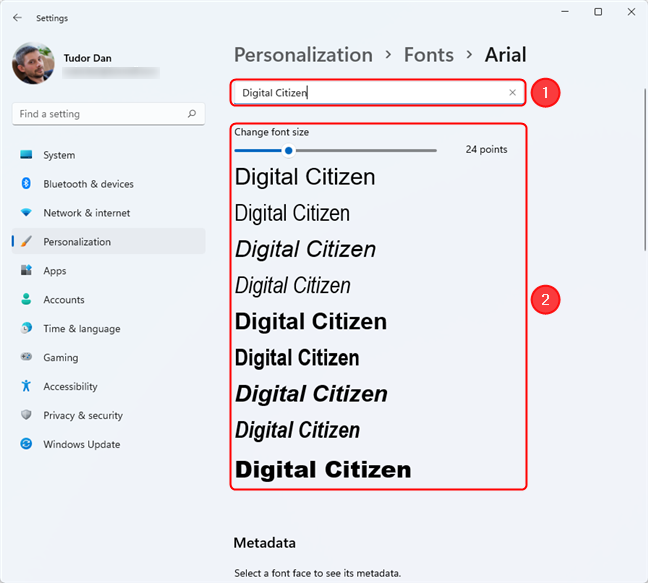 Enter a text to preview the fonts
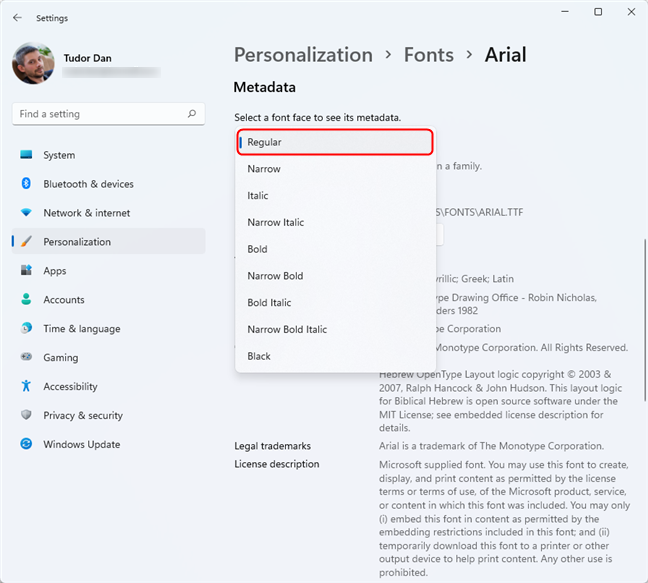
For every installed font and font family, you can check the Metadata under the preview section. However, for font families, you need first to select the font face that interests you to see its Metadata. In this case, the information updates on the font face you choose, as the metadata can differ between font faces within a family.
Enter a text to preview the fonts
For every installed font and font family, you can check the Metadata under the preview section. However, for font families, you need first to select the font face that interests you to see its Metadata. In this case, the information updates on the font face you choose, as the metadata can differ between font faces within a family.
 Font details in the Windows 11 Settings
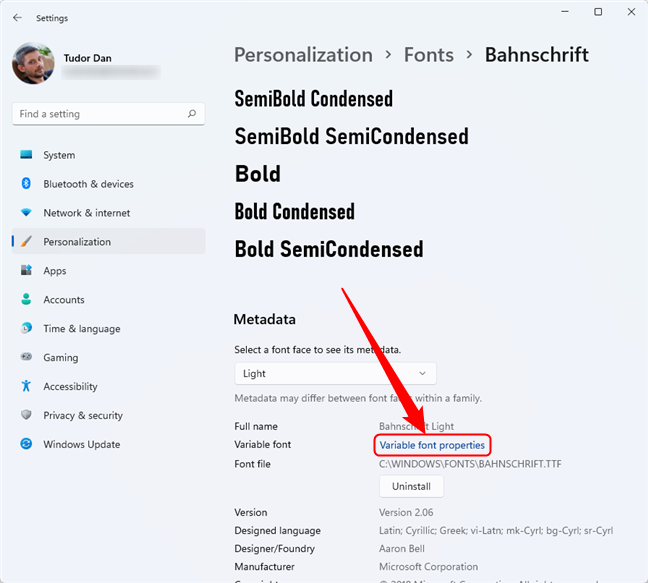
Then there are also the special “variable fonts,” which can have additional properties that you can adjust, like modifiable weight or width. If you select such a font, the Settings app will also give you a link called “Variable font properties.” Clicking or tapping on it opens a new page, where you can see additional details about that font.
Font details in the Windows 11 Settings
Then there are also the special “variable fonts,” which can have additional properties that you can adjust, like modifiable weight or width. If you select such a font, the Settings app will also give you a link called “Variable font properties.” Clicking or tapping on it opens a new page, where you can see additional details about that font.
 Opening the properties of a variable font
In the first menu - Font instances - you can select a design variation of that font (family). Then, you can choose the axis of variation, which is a fancy way of naming the different properties that a font can have. On this list, you can find and select properties such as weight and width.
Opening the properties of a variable font
In the first menu - Font instances - you can select a design variation of that font (family). Then, you can choose the axis of variation, which is a fancy way of naming the different properties that a font can have. On this list, you can find and select properties such as weight and width.
 Variable font properties in Windows 11
At the bottom of the Variable font properties page, you can preview the selected font face using your own text, just like on a font or font family’s standard page.
Variable font properties in Windows 11
At the bottom of the Variable font properties page, you can preview the selected font face using your own text, just like on a font or font family’s standard page.
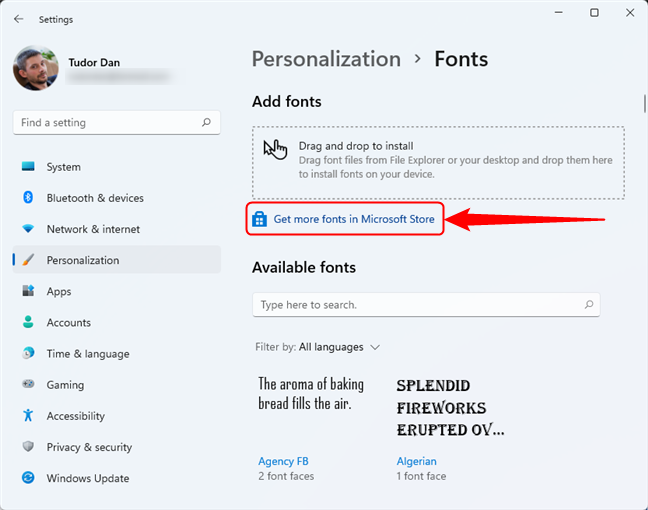
 Download and install fonts from the Microsoft Store
Following the aforementioned link opens the Microsoft Store and takes you to its Fonts section. There, you can browse and see the available fonts. Once you find a font that you want to download and install, click or tap on it.
Download and install fonts from the Microsoft Store
Following the aforementioned link opens the Microsoft Store and takes you to its Fonts section. There, you can browse and see the available fonts. Once you find a font that you want to download and install, click or tap on it.
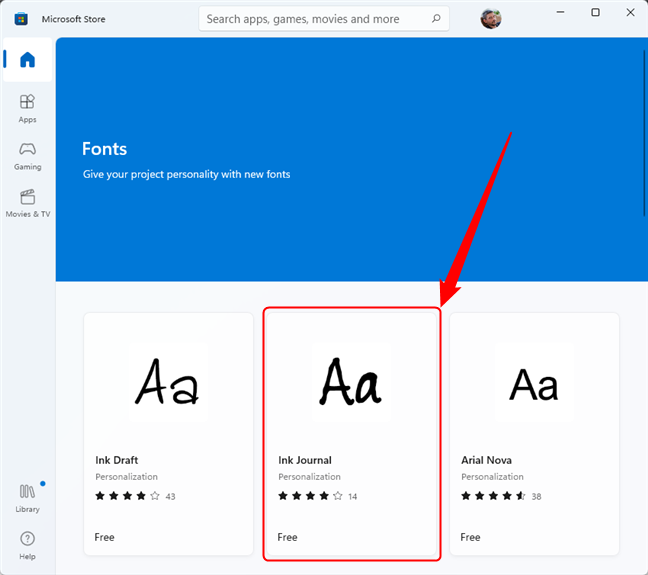
 The Fonts section in the Microsoft Store
Check the details of the font and, if you decide you want it, click or tap the Get button from the top-right corner of the window.
The Fonts section in the Microsoft Store
Check the details of the font and, if you decide you want it, click or tap the Get button from the top-right corner of the window.
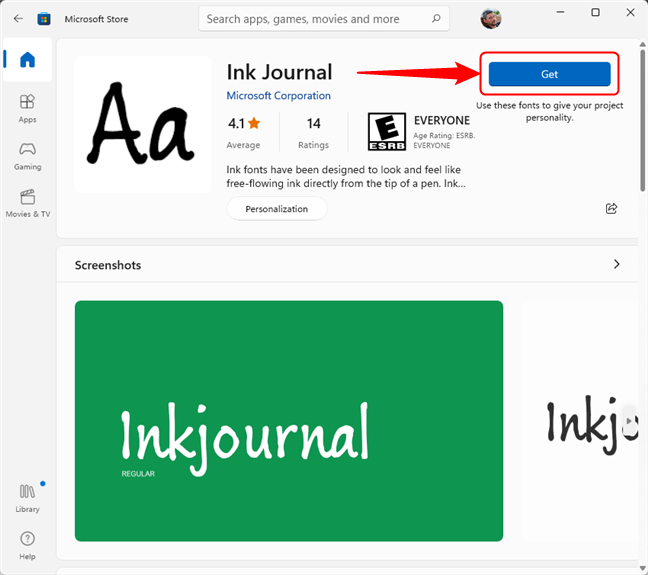 Install a font in Windows from the Microsoft Store
NOTE: If the font you want to install is a paid one, you’ll need to first buy it before being allowed to download it.
Once the installation is done, the Get button changes to an Open one. Pressing it takes you back to the Fonts page from the Settings app, where you can find the new font listed among the ones available on your PC.
Install a font in Windows from the Microsoft Store
NOTE: If the font you want to install is a paid one, you’ll need to first buy it before being allowed to download it.
Once the installation is done, the Get button changes to an Open one. Pressing it takes you back to the Fonts page from the Settings app, where you can find the new font listed among the ones available on your PC.
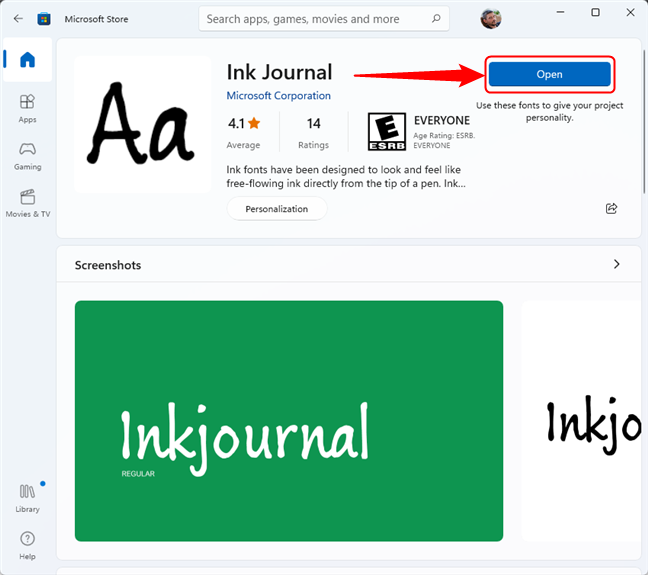 Font page for an installed font in Microsoft Store
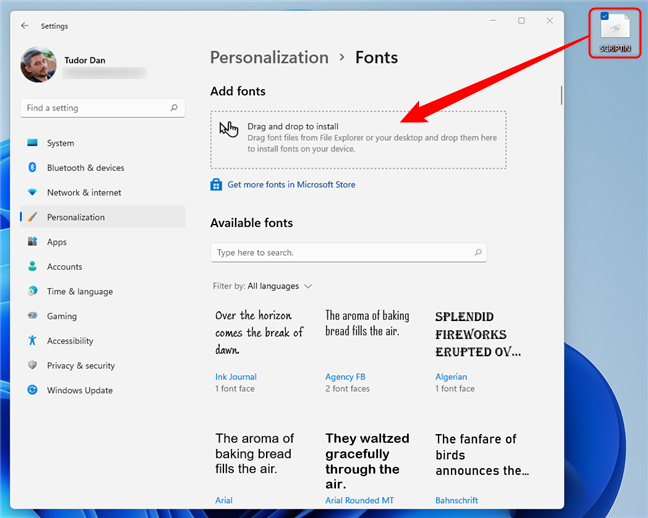
 Drag and drop a font file onto the Fonts page to install it
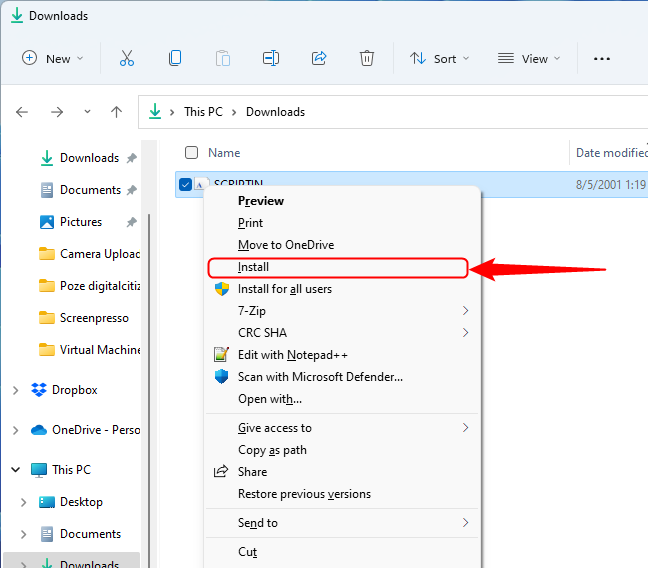
 Access the classic right-click menu in Windows 11
In the classic right-click menu, click or tap on Install.
Access the classic right-click menu in Windows 11
In the classic right-click menu, click or tap on Install.
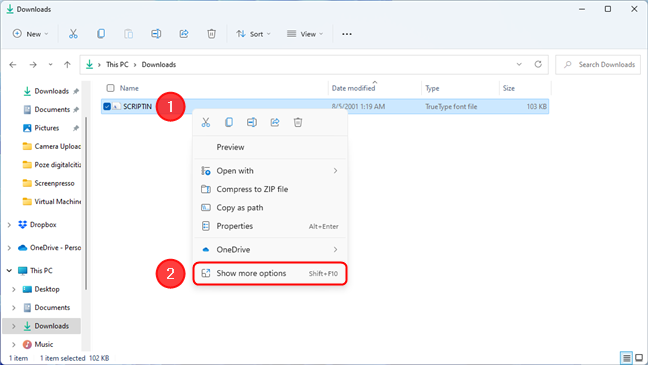
 How to install a font from the right-click menu
In Windows 10, the classic right-click menu is displayed by default, so all you need to do is right-click on the font and then click or tap on Install.
How to install a font from the right-click menu
In Windows 10, the classic right-click menu is displayed by default, so all you need to do is right-click on the font and then click or tap on Install.
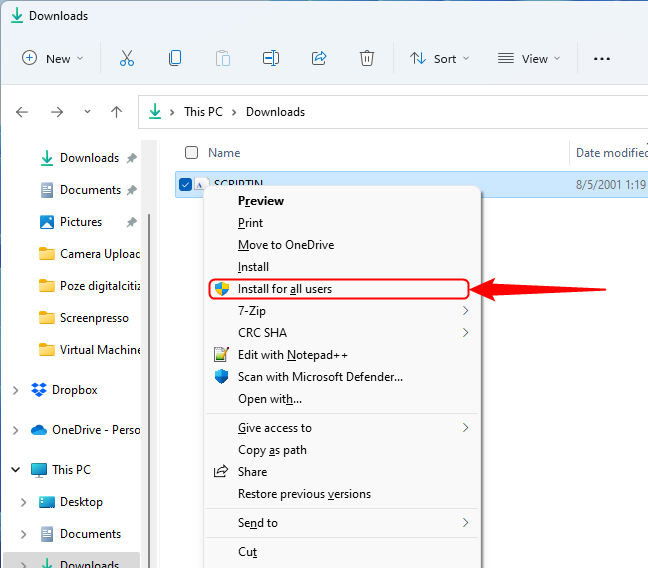 How to install a font for all users from the right-click menu
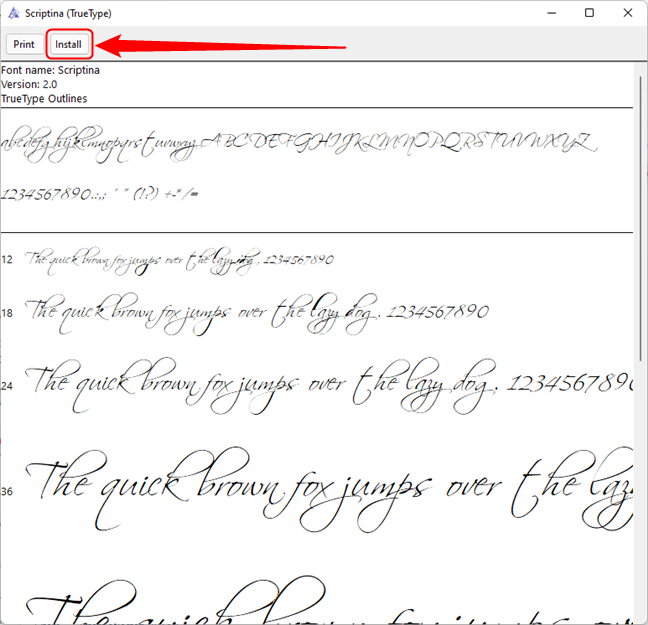
 Install a font in Windows from the font preview window
 How to install a font in Windows 10 and Windows 11 with Control Panel
 The location of the font folder in Windows 10 and Windows 11 (all users)
But you might have also installed fonts only for yourself - for your user account only. Unless you’ve followed the “install fonts for all users” method we’ve shown you, the fonts you install using the other methods go into your current user’s profile in a special folder that’s not available for the other users of your computer. You can find this folder in the following location:
The location of the font folder in Windows 10 and Windows 11 (all users)
But you might have also installed fonts only for yourself - for your user account only. Unless you’ve followed the “install fonts for all users” method we’ve shown you, the fonts you install using the other methods go into your current user’s profile in a special folder that’s not available for the other users of your computer. You can find this folder in the following location:
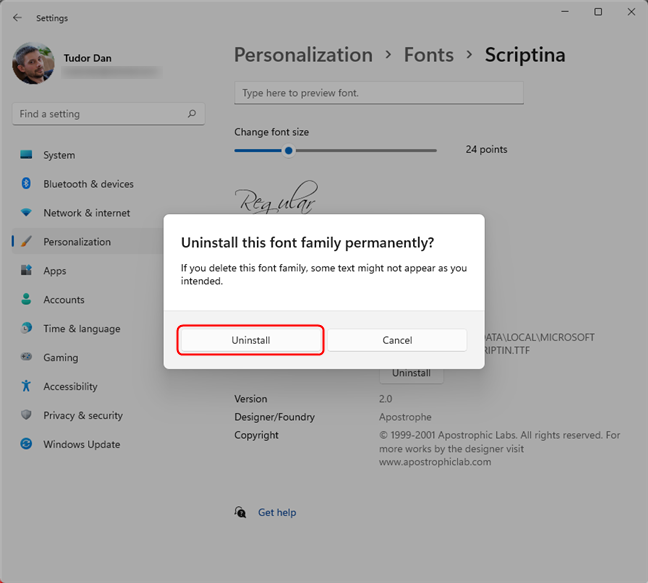
 Uninstall a font in Windows 11
Confirm the uninstall action, and the font is removed.
Uninstall a font in Windows 11
Confirm the uninstall action, and the font is removed.
 Confirm to uninstall a font in Windows 11
That’s it!
Confirm to uninstall a font in Windows 11
That’s it!
How to see what fonts are on your computer
First things first: let’s learn how to see the fonts available on your Windows computer. To find your installed fonts, you need to open the Settings app, and a quick way to do that is to press Win + I on your keyboard. Then, in the Settings window, select Personalization. In Windows 11, this setting is in the left pane, while in Windows 10 it’s in the main part of the Settings window.How to see the details of a font (family) in Windows 10 and Windows 11
If you want to see the details of a particular font or font family, click or tap on its name.How to install fonts in Windows
There are several ways to install fonts in Windows 10 and Windows 11. The fonts you install will be available throughout the operating system in every app where you write and edit text. Without further ado, here’s how to install fonts on your computer:1. How to install fonts from the Microsoft Store
One of the easiest ways to install a font in Windows is via the Microsoft Store. Open the font section from the Settings app like we’ve shown you earlier in this article: navigate to Settings > Personalization > Fonts. At the top of the page, you will find a link that says “Get more fonts in Microsoft Store.” Click or tap on it.2. How to install downloaded fonts using the Settings app
If you already downloaded a font and you want to install it on your PC, you can do so in several different ways. The simplest one is to open the Settings app, navigate to the Fonts page (Settings > Personalization > Fonts), and drag and drop the font file onto the “Drag and drop to install” section at the top.3. How to install fonts using File Explorer
You can also install a downloaded font using File Explorer. First, navigate to where you have the font file, then right-click on it. Select “Show more options” to access the old right-click menu.4. How to install fonts for all users
The previous method is also the one you should use if you want to install fonts for all users. Just follow the same steps to navigate to the font file with File Explorer and right-click on it. But, in the context menu, select “Install for all users” instead of the simple Install. The only requirement here is that you need to have administrative rights to be able to install a font for all the users on your Windows computer.5. How to install fonts from the font preview window
Another easy way to install a downloaded font is from its preview window. Double-click or double-tap on its file, and Windows will launch a preview window where it shows you what that font looks like. Additionally, it also provides you with two buttons at the top: Print and Install. Obviously, to install a font in Windows from here, you’ll have to press the Install button.6. How to install fonts from the Control Panel
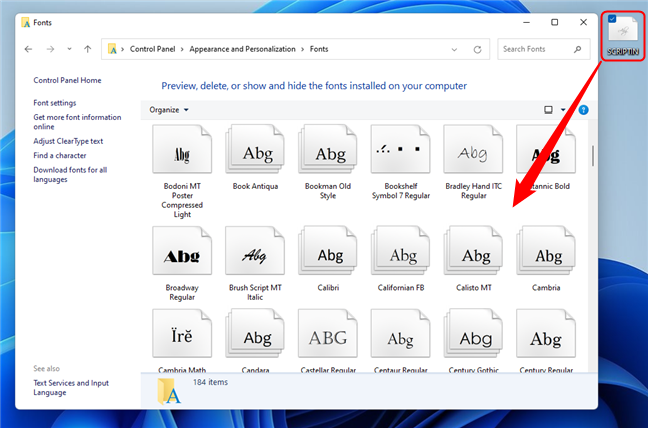
If you’re a more conservative user, the old Control Panel offers another method to install and manage fonts in Windows. Open the Control Panel and navigate to “Appearance and Personalization > Fonts.” Then, simply drag and drop the font you want to install onto the list of fonts displayed in the Control Panel.Where is the font folder in Windows?
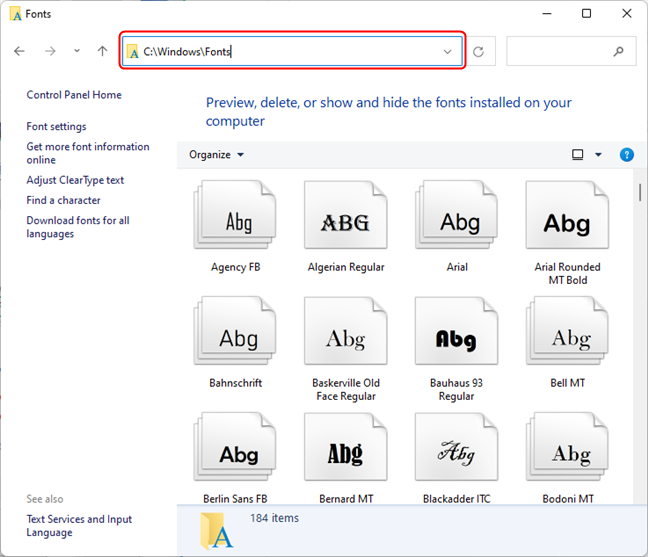
OK, so you’ve installed one or more fonts on your computer. Now, you might wonder where all the fonts go on your PC. So, where’s the font folder in Windows? Well, it depends: The default font folder in Windows that stores the system fonts and all the fonts installed for all the users of your computer isC:\Windows\Fonts
You can either navigate to this folder or simply insert the path in the Address bar.
%LOCALAPPDATA%\Microsoft\Windows\Fonts
How to uninstall fonts in Windows
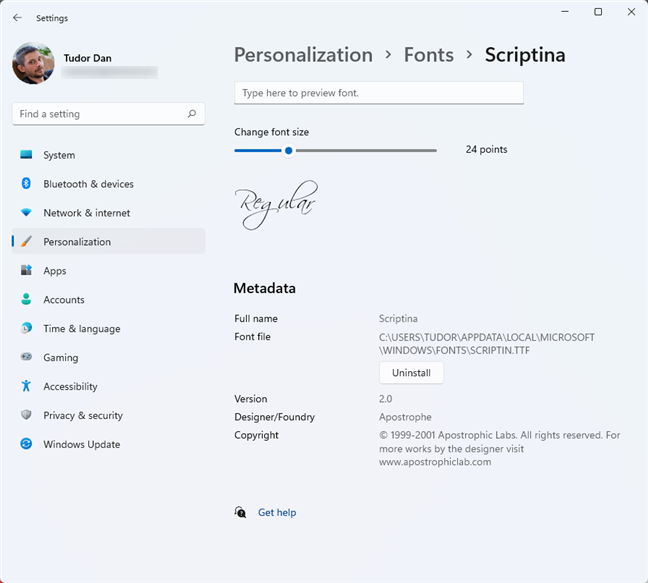
The best and easiest method to uninstall fonts from Windows is through the Settings app. Open it and get to the font management section, just like we’ve shown you at the beginning of this guide: navigate to “Settings > Personalization > Fonts.” Identify the font (family) you want to uninstall and click or tap on it. If you’ve selected a font family (which has multiple fonts bundled together), choose the one you want to uninstall from the drop-down menu. Then, click or tap the Uninstall button.
Discussion (5)
Windows 10/11 font management is awful. A huge step back from Windows 7 font management. Everything Windows 10/11 is worse.
I mean for goodness sakes, there is still Settings AND Control panel in Windows since the launch of Windows 10. Some 8/9 years !!
Linux is the only way to go these days even if it does contain the ridiculous and nonsensical KiB, MiB, GiB, TiB bulldust !
Don’t forget about the stupid Win 10 start menu that has put each alphabet letter above programs that start with that letter !?!
What a waste of space and insulting to one’s intelligence, as if we cannot tell that the list is alphabetical so we need the letters of the alphabet as headings !!
Wow, how inept and pathetic and let’s not mention Windows 11 start menu – what an unusable joke !
Look Microsoft, if you want to be Apple and provided pseudo functionality, buy the rest of the company as your Windows efforts are getting silly these days.
I am still using Windows 7. The font system is understandable and satisfies my needs.
It works well indeed.
Windows 7 was without a doubt Microsoft’s finest hour and as far I’m concerned, everything since has been incrementally worse.