09.09.2019
A long time ago, Microsoft decided to end the development of Windows Movie Maker, a program that many Windows users used for creating videos. People were asking for a new tool and, although it took some time, in the versions of Windows 10 starting with Fall Creators Update (1709), Microsoft introduced a new tool that lets users create and edit videos. It is called Video Editor, and it offers more options and features than you'd expect. Here are twelve things that you can do with the Video Editor app from Windows 10:
How to open the Video Editor from Windows 10
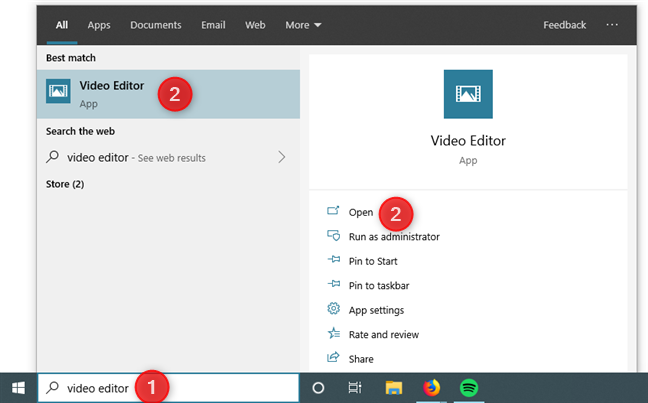
Before we show you what you can do with the Video Editor app from Windows 10, you should first know how to open it. Probably the fastest way to do it is to search for it: type "video editor" in the search box from the taskbar and then press Enter or click/tap on Video Editor.
You can also open Video Editor from other places, such as from the Start Menu or the Photos app, but it is slower.
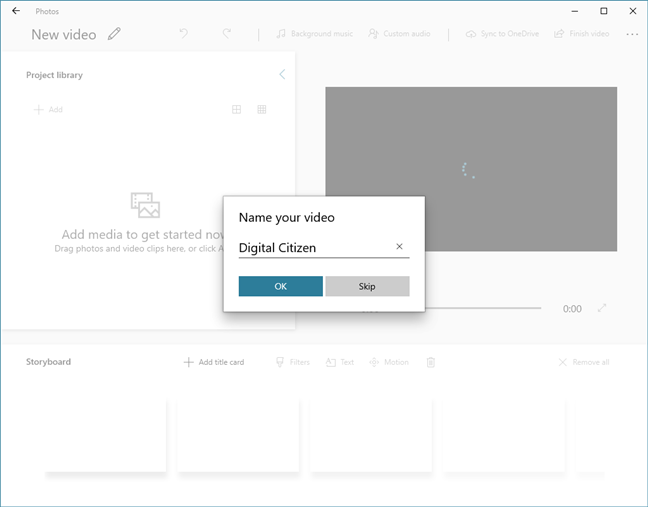
Once you've opened Video Editor, you can create a New video with a click or tap on the button with the same name, from the top side of the window. The app then asks you to choose a name for your new video project, and then you can start having fun creating and editing it.
Next, let's see which are the best things that you can do with the Video Editor from Windows 10:
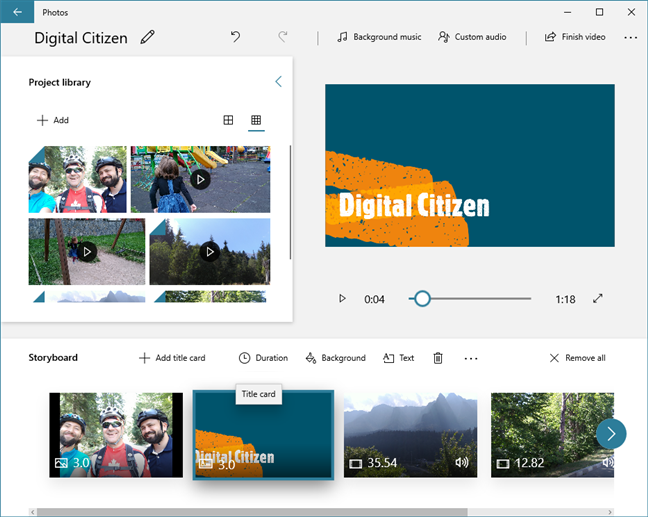
1. Add videos and images to your timeline using drag and drop or the Add button
Video Editor is designed to make the video creation experience as easy and intuitive as possible. You can see that right from the start when you have to add videos and images to your project. One way to do it is to press the Add button and select the media from your computer or the web.
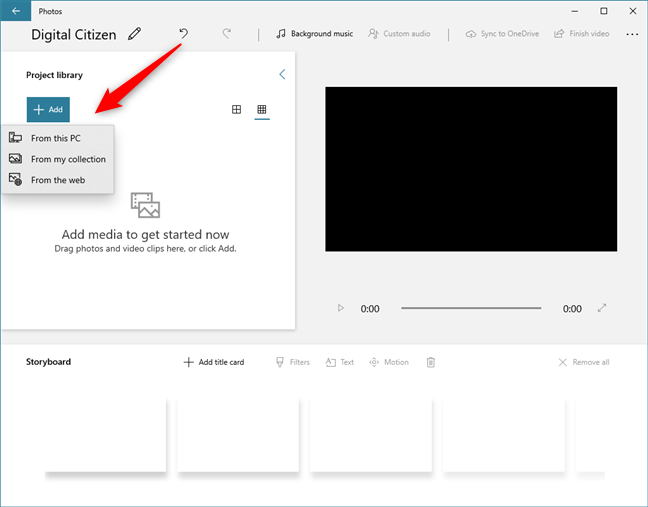
Alternatively, you can drag and drop the videos and images from File Explorer directly on the Project library section from the Video Editor.
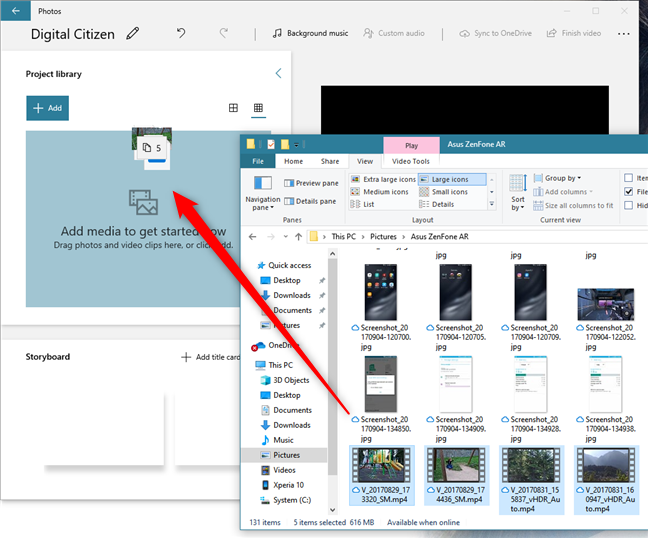
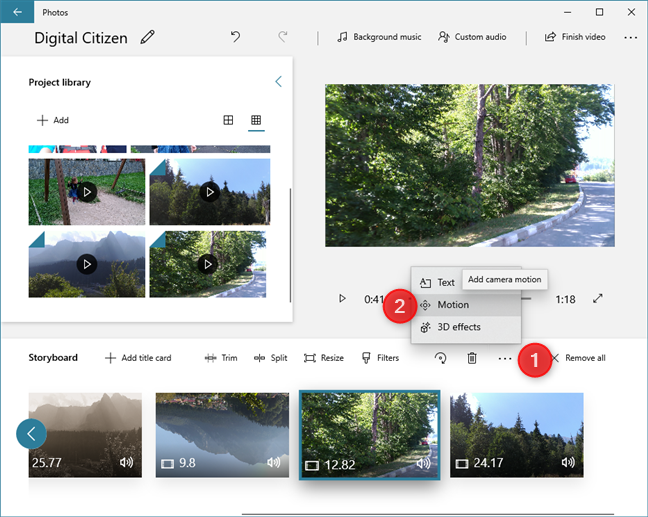
All the videos and images you add are then shown in your Project library. From there, you can drag and drop them to the Storyboard at the bottom of the window. In the timeline, you can rearrange the content as you want, as well as split videos, adjust the duration that images are shown, insert text and video effects, and so on.

2. Insert title cards into your videos
Besides adding text directly on the videos in your Storyboard, the Video Editor app also lets you insert title cards. Title cards are pieces of text displayed on the entire screen, for a duration of your choosing. Video Editor also lets you select their background colors, as well as the font used for them.
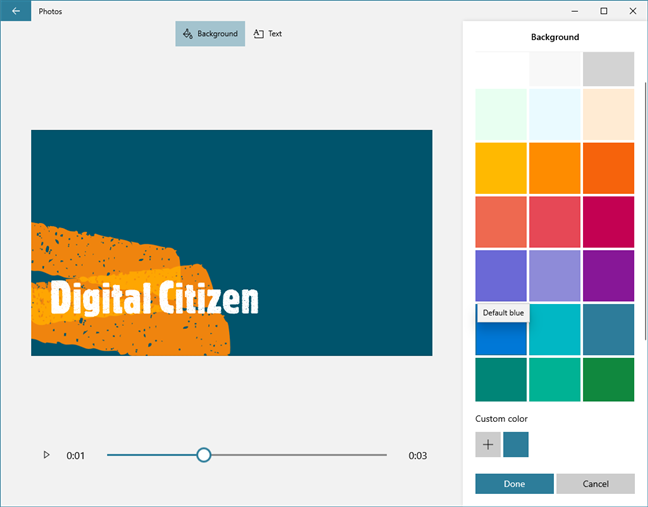
Once you create a title card, it's added to the Storyboard, and you can work with it just like with any video or image.
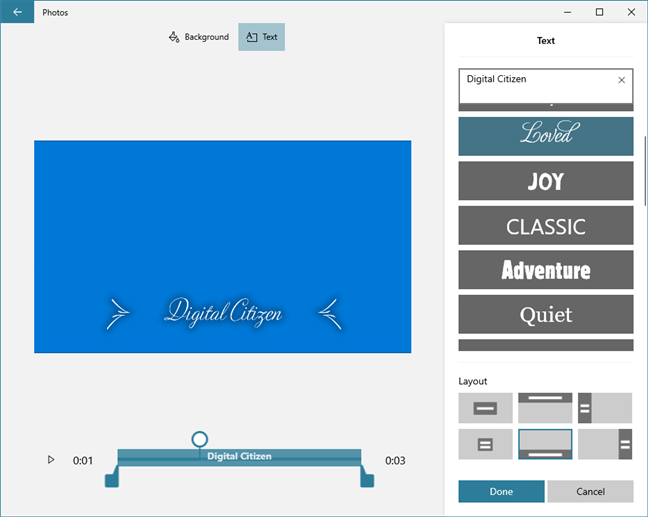
3. Change the text style used in your videos
In Video Editor, you get various options for adjusting what the text looks like. You can edit the text styles both for the regular text that you add on your videos and images, as well as for the title cards you create.
There are many different options from which you can choose, depending on what kind of video you intend to create, to match its theme: funny, serious, nostalgia, love, etc.
4. Trim or split long sections of your videos
Some of the videos you add to your Storyboard might be too long, or you might want to use just some parts from them. Video Editor also includes the essential Split and Trim options. To use them, select the video that you want to edit from the Storyboard and then click or tap on the Trim or Split button.
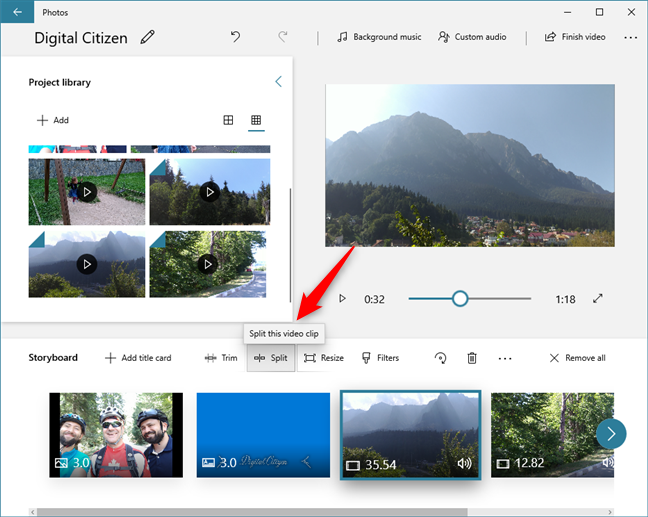
Video Editor then opens the video that you selected and lets you trim or split it as you like. Choose where you want to trim or split the video and press the Done button. The trimmed or split videos are instantly added to the Storyboard.

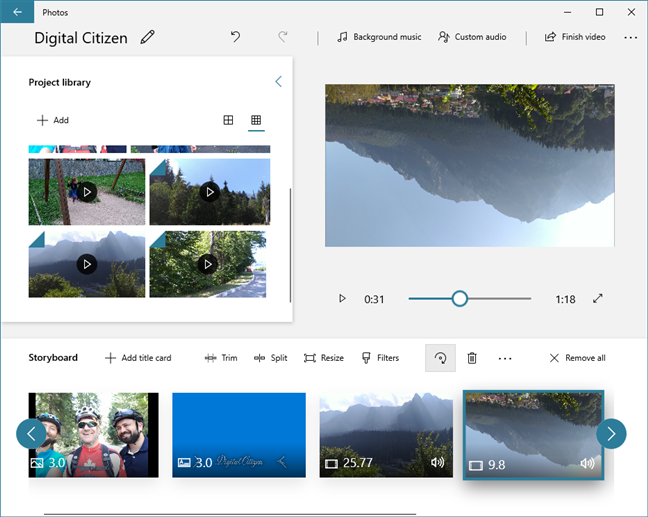
5. Rotate video sections with Video Editor
Sometimes, your videos might have the wrong orientation. This usually happens when you film videos with your smartphone. If you need to rotate a video in your project, Video Editor lets you do it easily: select that video and click or tap on the Rotate button until its orientation is the one you want.
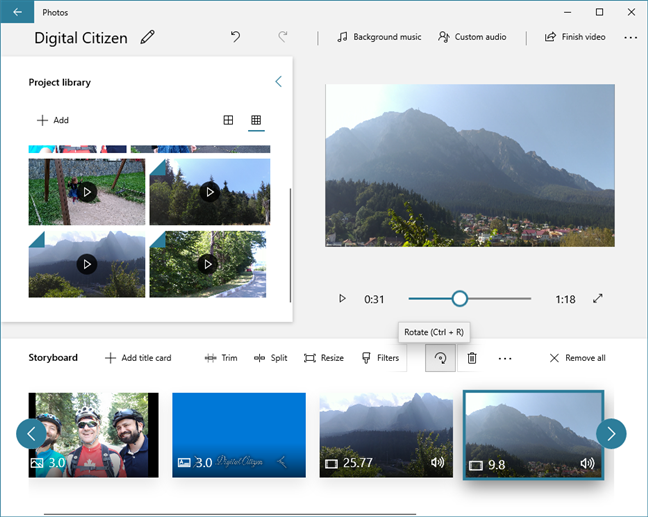
When you press the Rotate button, the selected video is rotated clockwise. Pressing four times on it brings the video back to its original orientation.
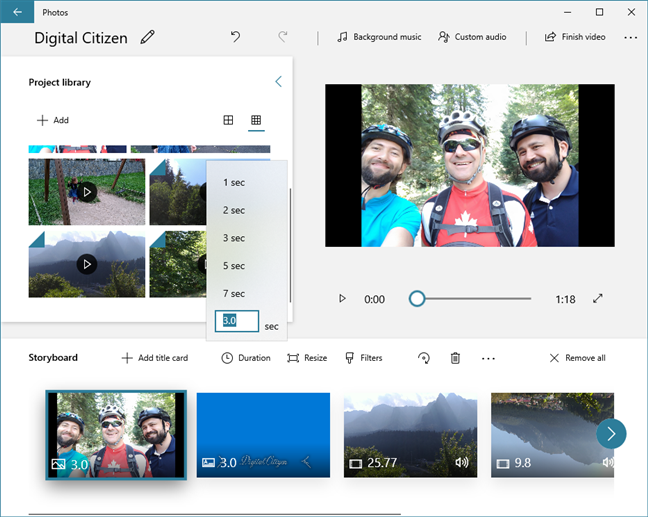
6. Adjust the duration an image or a title card appears in your video
The images and title cards that you add to a video project have a default display duration of 3 seconds. However, sometimes, you might want to display them for shorter or longer times. Video Editor lets you adjust that time: select the title card or image and click/tap on Duration. Then, choose from one of the predefined times, or type a custom time.
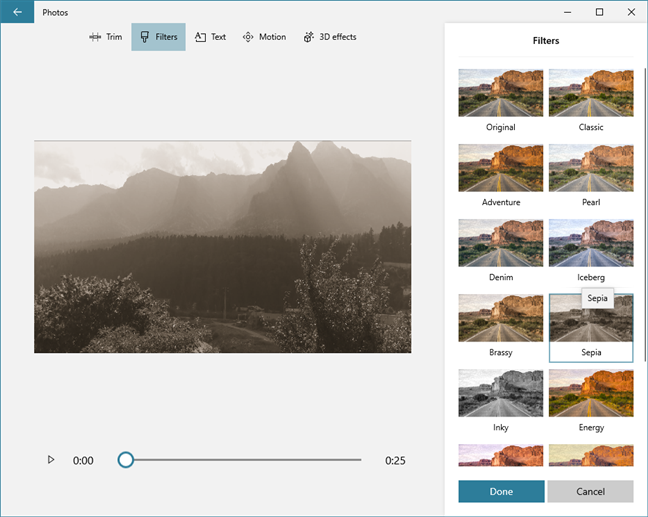
7. Add filters such as Sepia, Adventure, Inky, Arcade and more
If you are feeling creative and want to make a video that looks special, Video Editor also lets you add filters to your content. To do so, select the video or image that you want to change and click or tap on the Filter button from the Storyboard.
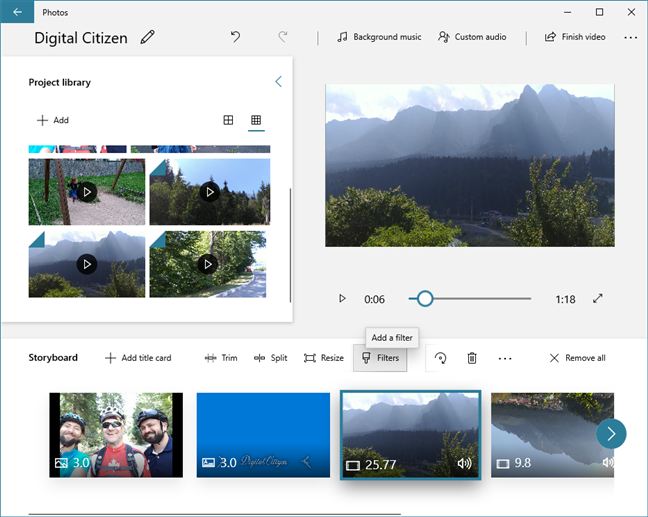
Video Editor has a series of interesting filters which you can choose to use: Classic, Adventure, Pearl, Denim, Iceberg, Brassy, Sepia, Inky, Energy, Joy, Loved, Pixel, and Arcade.
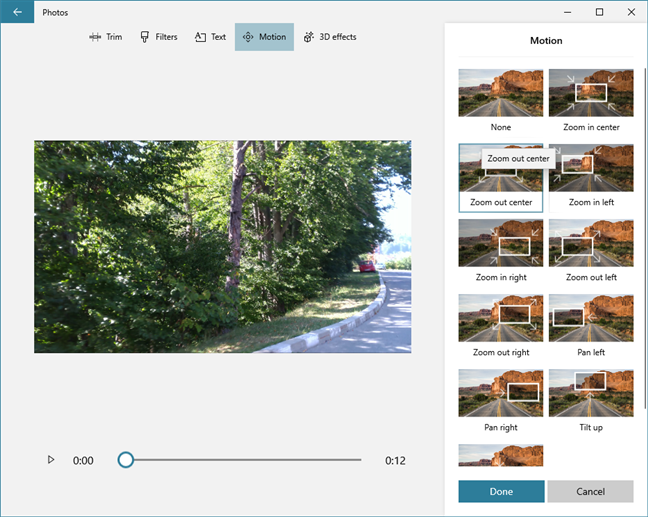
8. Apply motion effects to images and videos
Your images and videos may look better when they have a motion effect. Although some motion is automatically applied to images, Video Editor also lets you control the type of motion and the direction of the motion. It even lets you add motion to videos if you want to give them a sort of dynamic effect.
To do that, you select an image or video and click or tap the … (More) button. Then, press Motion.
Next, you get a preview of the video or image and a set of Motion settings to choose from. All you have to do is select the one you prefer and press Done.
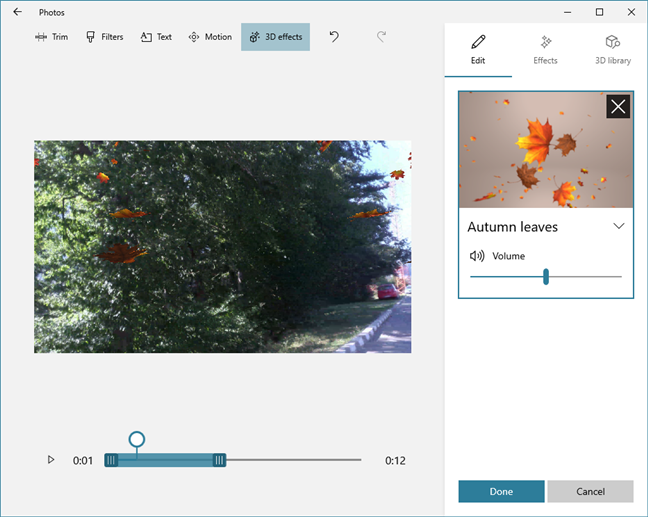
9. Insert 3D effects on videos from your timeline
Similarly, but only for videos, you can use Video Editor to add 3D Effects to your project. Once you select the video that you want to edit, click or tap on … (More) and choose 3D Effects. Then, pick one of the 3D Effects available, such as Balloons, Autumn leaves, Bubbles, Breaking news, Campfire, Confetti shower, Dust explosion, Fireworks, Windy snowflakes and so on.
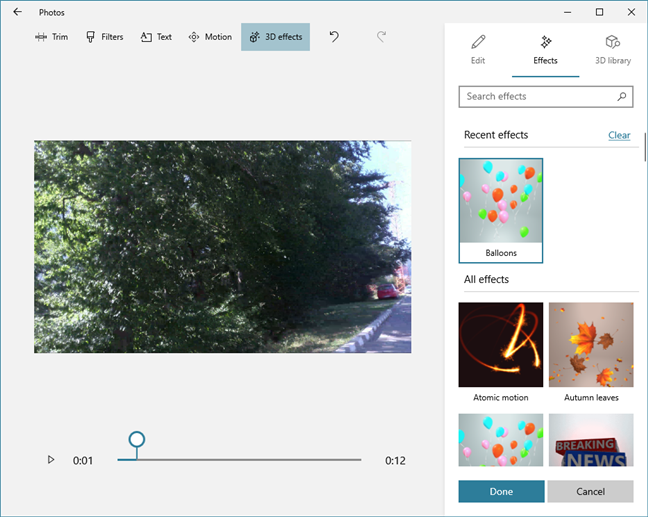
Here's a sample of what the Autumn leaves 3D effect looks like:
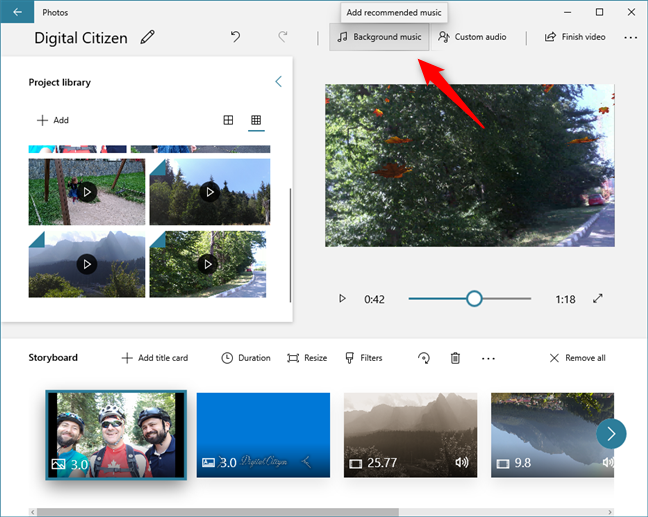
10. Add music to your videos with Video Editor
If you do not want to keep the original sound on your videos, you can use the Video Editor app to add different background music. To do so, press the Background music button from the top of the app.
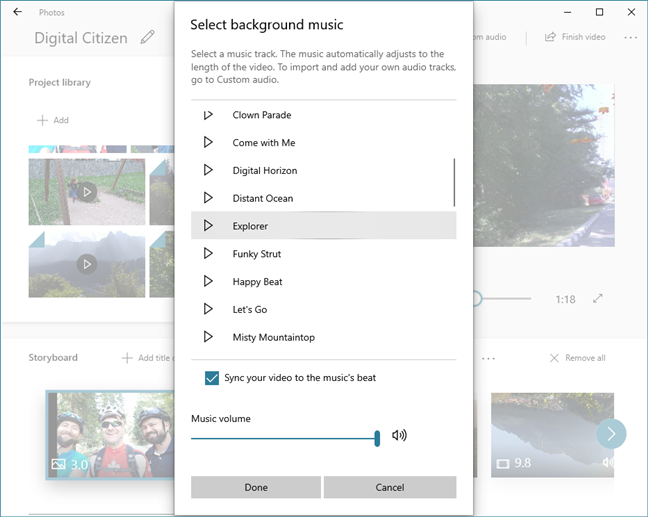
Then, Video Editor shows you a list of recommended built-in tracks you can choose from.
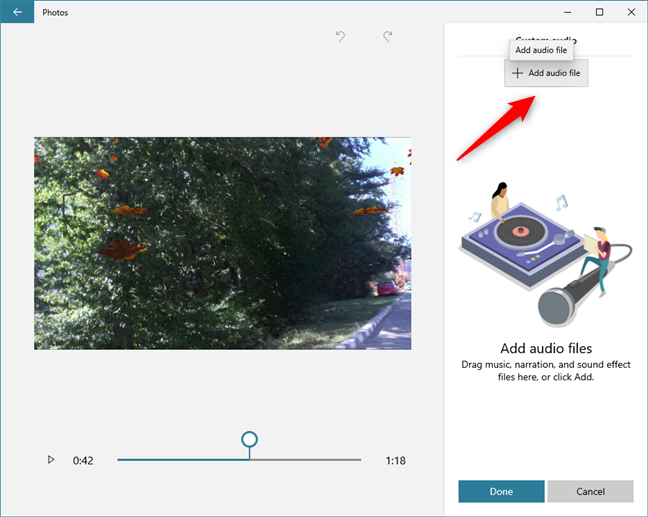
If you'd rather use your own music track for the video that you're creating, instead of pressing on the Background music button, click or tap on Custom audio at the top of Video Editor. Then, click or tap on "Add audio file" and browse through your PC to find the song that you want to use.
11. Duplicate video projects
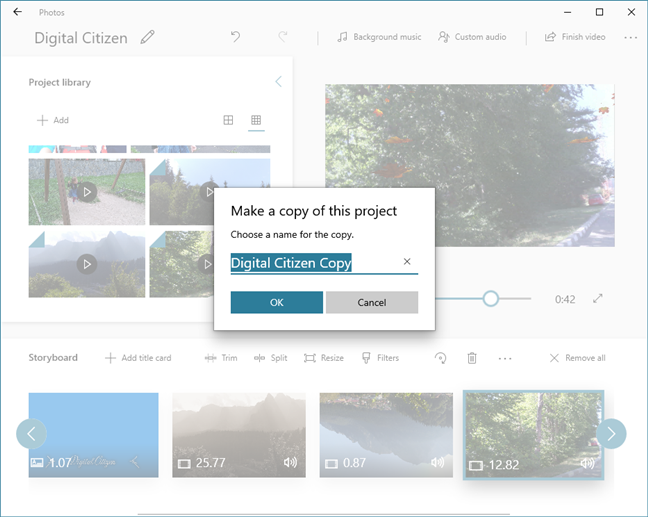
When you're creating a video with Video Editor, you might discover that you want to make different versions of it. In that case, you can, at any moment, duplicate your video project. That means that you're creating a copy of your project, on which you can later work differently. To duplicate a video project, press the … (See more) button from the top-right corner of the Video Editor window and choose Duplicate project in the menu that opens up.
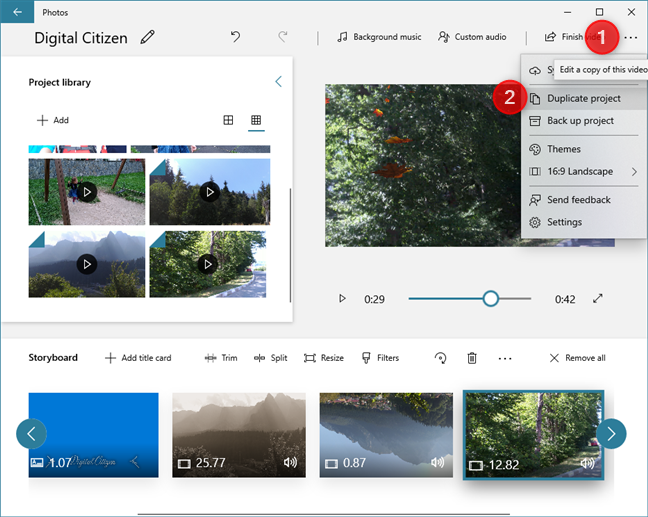
Video Editor should ask you to choose the name you want to give to your duplicated project. Type the one you want, press OK, and it is saved.
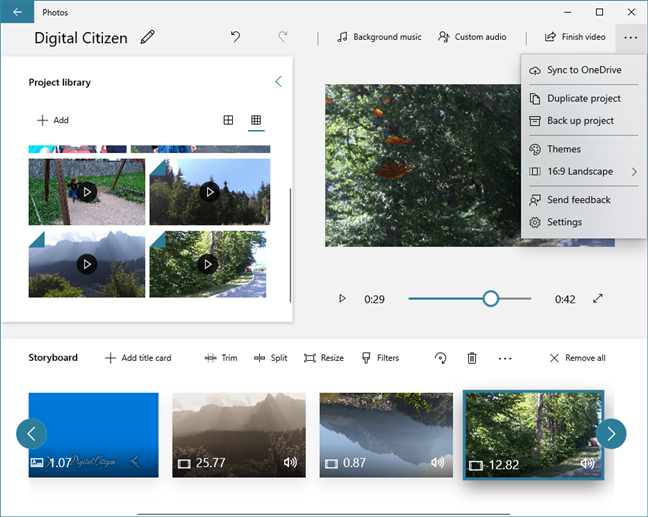
12. Sync projects to OneDrive or backup them to other media
Whether you don't have time to finish your project or if you want to continue working on another Windows 10 computer, Video Editor has you covered too. In its … (See more) menu, Video Editor has options to Sync to OneDrive and to Back up project. Sync to OneDrive saves your project in your OneDrive cloud space so that it automatically loads on all your Windows 10 computers and devices on which you are connected with the same Microsoft account. Back up project saves your project as it is, together with all the videos and images that you added to its library, on any storage drive such as a USB memory stick or a CD/DVD.
Do you like the Video Editor app from Windows 10?
The Video Editor app from Windows 10 offers plenty of customization options and enough features to help you create great home videos. It is probably better and faster than the old Windows Movie Maker, which many users all over the world loved. Before closing this tutorial, tell us your opinion about the Video Editor and whether you like it more than the old Windows Movie Maker. Comment below, and let's discuss.