

As part of its built-in security suite, both Windows 11 and Windows 10 offer a powerful firewall application named Windows Defender Firewall. Whether you want to turn off the Windows Firewall or just to make sure it is running to protect your PC, you first need to know how to access it. Without further ado, let's see all the methods to open the Windows Defender Firewall:
NOTE: This guide covers Windows 11 and Windows 10. If you do not know which version of Windows you have, read this tutorial: How to tell what Windows I have (11 ways).
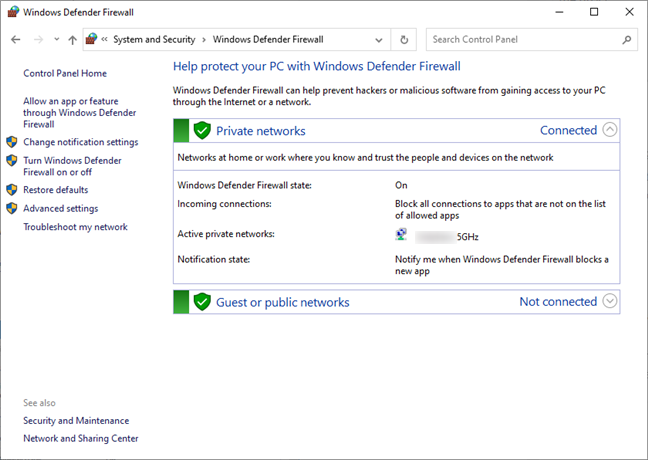
 The Windows Defender Firewall page
The easiest way to access Windows Defender Firewall is to look for it using the search feature in Windows. For Windows 11, start by pressing Windows + S on your keyboard or by clicking/tapping the magnifier icon on the taskbar, then type “firewall” in the search box, and finally click or tap the Windows Defender Firewall search result.
The Windows Defender Firewall page
The easiest way to access Windows Defender Firewall is to look for it using the search feature in Windows. For Windows 11, start by pressing Windows + S on your keyboard or by clicking/tapping the magnifier icon on the taskbar, then type “firewall” in the search box, and finally click or tap the Windows Defender Firewall search result.
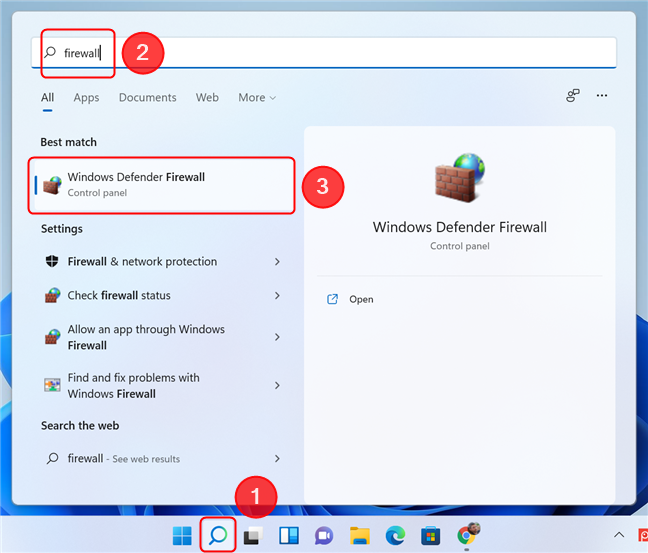
 Use Search in Windows 11 to open Windows Defender Firewall
In Windows 10, the steps are similar. Press Windows + S or just type in “firewall” in the search box located on the taskbar, then select the Windows Defender Firewall search result.
Use Search in Windows 11 to open Windows Defender Firewall
In Windows 10, the steps are similar. Press Windows + S or just type in “firewall” in the search box located on the taskbar, then select the Windows Defender Firewall search result.
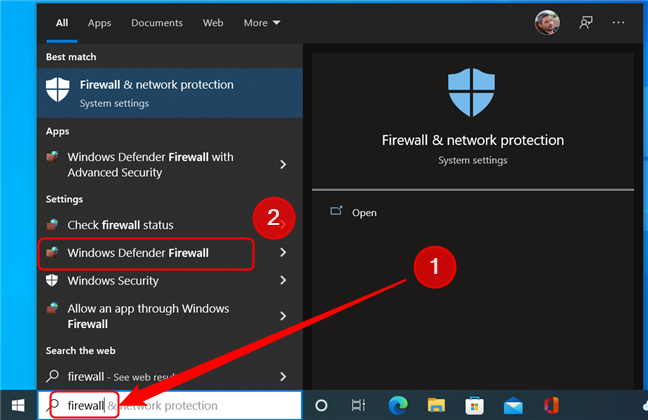
 Open Windows Defender Firewall in Windows 10 by using the Search feature
TIP: You can also use the Start Menu to initiate a search. Simply open it by pressing the Windows key or clicking the Start button on the taskbar, then start typing.
Open Windows Defender Firewall in Windows 10 by using the Search feature
TIP: You can also use the Start Menu to initiate a search. Simply open it by pressing the Windows key or clicking the Start button on the taskbar, then start typing.
 Open Windows Defender Firewall from the Control Panel
Alternatively, you can input “firewall” in the Control Panel search box located in the top-right corner of the window. Then, in the list of search results, click or tap Windows Defender Firewall.
Open Windows Defender Firewall from the Control Panel
Alternatively, you can input “firewall” in the Control Panel search box located in the top-right corner of the window. Then, in the list of search results, click or tap Windows Defender Firewall.
 Use the search box in the Control Panel to locate the Windows Defender Firewall page
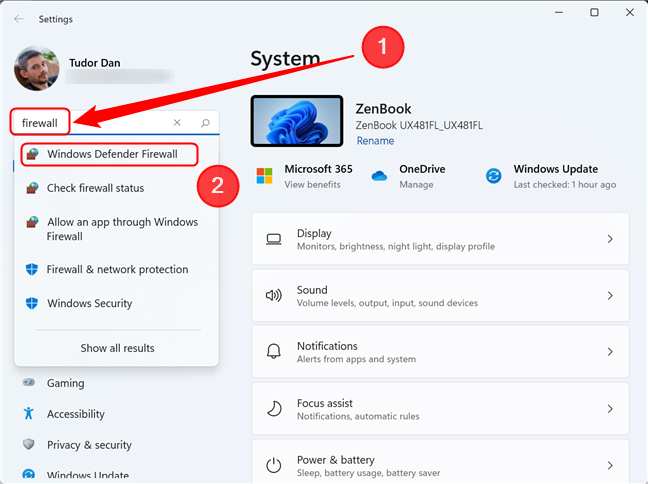
 Search for Windows Defender Firewall in the Settings app in Windows 11
In Windows 10, the steps are the same: open Settings and type “firewall” in the Search box, then click the appropriate result.
Search for Windows Defender Firewall in the Settings app in Windows 11
In Windows 10, the steps are the same: open Settings and type “firewall” in the Search box, then click the appropriate result.
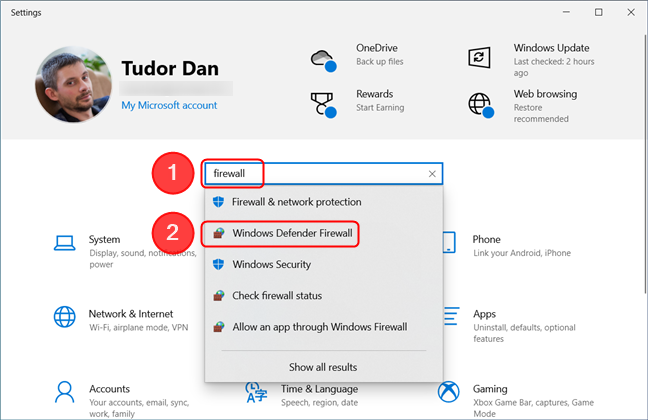 Locating the Windows Defender Firewall using the Settings app is similar in Windows 10
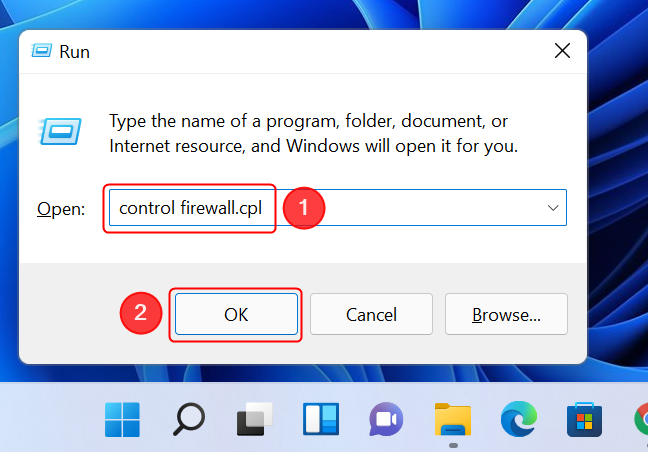
 Open Windows Defender Firewall from the Run window
TIP: Typing “control /name Microsoft.WindowsFirewall” in the Open field will yield the same result.
Open Windows Defender Firewall from the Run window
TIP: Typing “control /name Microsoft.WindowsFirewall” in the Open field will yield the same result.
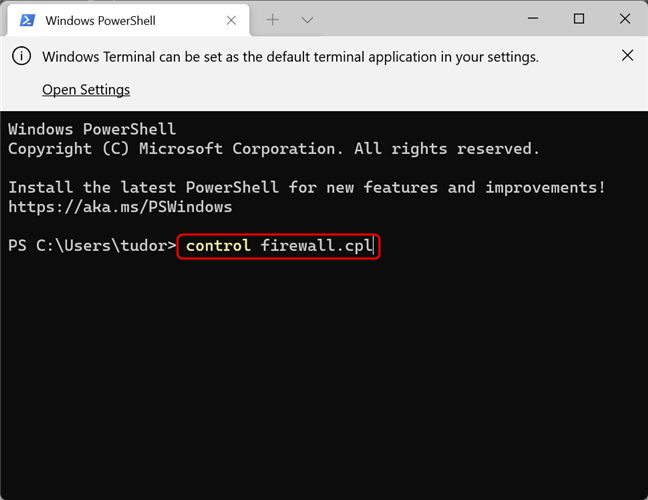
 Windows Defender Firewall can be opened by using a command-line interface
You can also use the command
Windows Defender Firewall can be opened by using a command-line interface
You can also use the command
1. Open the Windows Defender Firewall using the search
Windows Defender Firewall is a simple tool for managing incoming and outgoing connections on your Windows device. If you want to know more about the feature, read this article: Windows Defender Firewall with Advanced Security: What is it? How to open it? What can you do with it?2. Start the Windows Defender Firewall using Control Panel
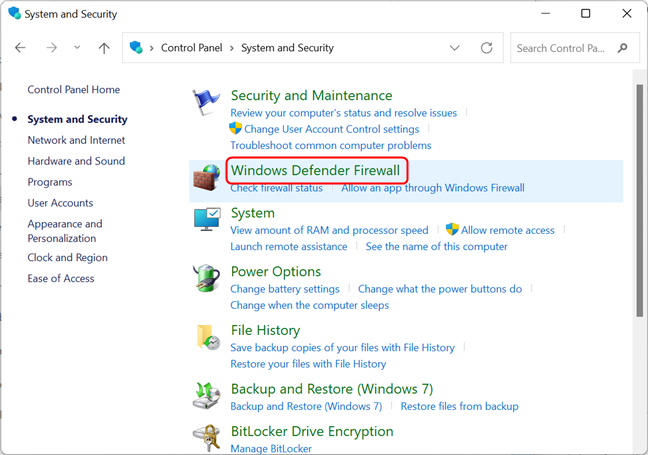
The Windows Firewall can be accessed from the Control Panel too. Open the Control Panel and go to System and Security. Next, click or tap on Windows Defender Firewall.3. Open Windows Defender Firewall using the Settings app
You can also reach the Defender Firewall page by opening the Settings app, then typing “firewall” and selecting Windows Defender Firewall in the drop-down result list. Here’s how it looks in Windows 11:4. Start the Windows Defender Firewall using the Run window
Press the Windows + R keys on your keyboard to open the Run window. Then, type “control firewall.cpl” in the Open field and hit Enter or press OK.5. Use Command Prompt, PowerShell, or Windows Terminal to open the Windows Defender Firewall
If you are a fan of the command line, you can use Command Prompt, PowerShell, or Windows Terminal to open Windows Defender Firewall. Type the same command as the one used in the Run window, followed by Enter:control firewall.cpl
This immediately opens the Windows Defender Firewall page.
control /name Microsoft.WindowsFirewall
with the same outcome.
Discussion (3)
Just Press Win + R and text “wf.msc”.
I’d love to have a shortcut on the Desktop that can activate/deactive a specific rule I’ve setup in the firewall without having to go through a dozen clicks to get into the firewalls advanced settings and the subsection rules in there.
I NEED TO RUN THE FIRE WALL