When someone is visiting for a while and needs access to your Windows computer or tablet, you should not give away your user account details. The best thing you can do is enable the Guest account in Windows and have your visitor use it. This keeps your private files and system settings safe and does not make you look like a bad person. 🙂 In this guide, we will explain what a Guest account is and how to enable it in Windows 7 and Windows 8.1, and how to turn it off when you no longer need it. We will also show you how to create a standard Visitor account with some limitations in Windows 10 because, unfortunately, this operating system does not allow you to use a limited Guest account.
What is the Guest user account from Windows?
The Guest account from Windows is a standard, local user account, with very limited permissions. The Guest account has the following restrictions:
It does not have a password, and you cannot set one for it
You cannot use it to install programs, universal apps or hardware devices
It can use only the applications that were already installed on the PC when the Guest account was enabled
It cannot change its account type, name or picture
It cannot change the settings of other user accounts
It cannot access the libraries and user folders of other user accounts
It can create files only on the desktop and in its user folders - it cannot create folders and files anywhere else on your PC
The Guest user account can be enabled or disabled only by an administrator
Sounds perfect, right? When visitors want to use your Windows computer, the Guest account allows them to browse the internet, use Facebook or watch videos on YouTube, while keeping your settings, work, and files, safe from prying eyes.
In what operating systems is the Guest user account working?
The Guest user account can be enabled and used in Windows 7 and Windows 8.1. Unfortunately, Windows 10 does not support the Guest account. Although some websites on the internet promise to show you ways to enable it, they are all wrong, as you can see in this article: You cannot enable the Guest account in Windows 10. Here's why and how others are lying.
However, if you use Windows 10, you can create a standard local user account, which has fewer permissions than administrators and can also be tweaked to resemble the Guest account, even if it is not the real thing. Scroll to the end of this guide to see how to do that.
NOTE: In Windows 7 and Windows 8.1 the steps required to enable, disable, and work with the Guest user account are the same and also look the same for the most part. Because of that, but also because we wanted to keep things as simple as possible, in the sections regarding Windows 7 and Windows 8.1, we are using screenshots taken mainly in Windows 7.
How to enable the Guest user account in Windows 7 and Windows 8.1
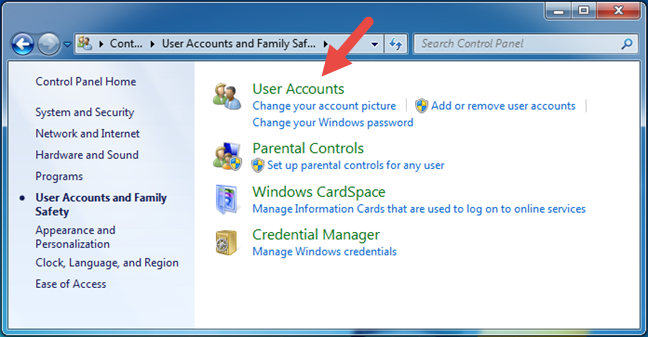
Start by logging in on your Windows PC or device, with a user account that is an administrator. Then, open the Control Panel and navigate to "User Accounts and Family Safety -> User Accounts."
Guest, Windows
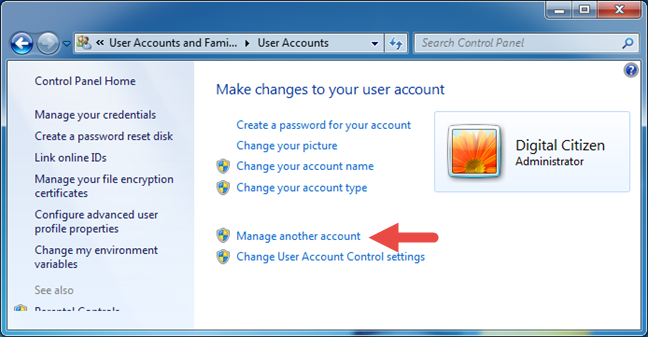
In the User Accounts window, there are lots of options available for editing your user account. To enable the Guest account, click or tap the link that says "Manage another account."
Guest, Windows
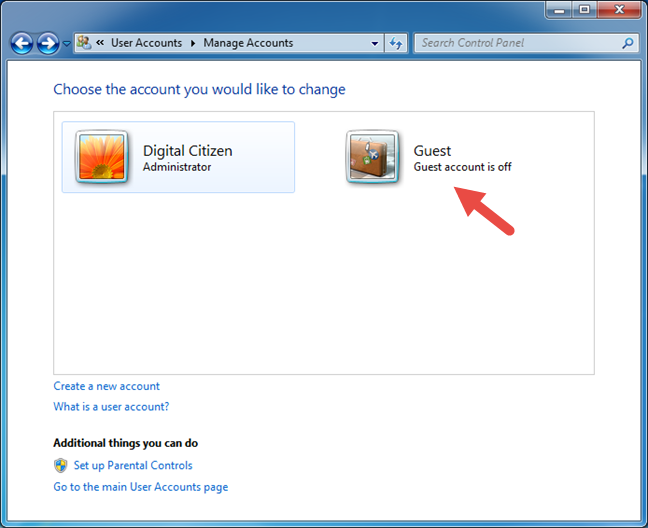
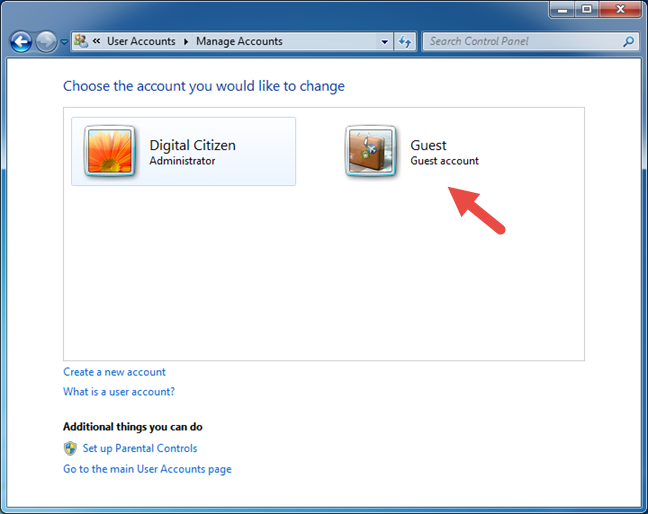
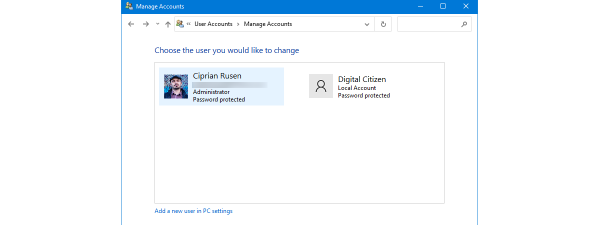
You should now see a list of all the user accounts configured on your Windows PC or device. Click or tap on the Guest user account.
Guest, Windows
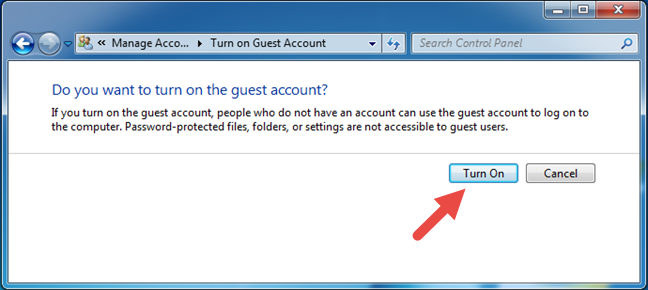
Your Windows 7 or 8.1 now asks whether you want to turn the Guest user account On. Press the Turn On button.
Guest, Windows
Windows takes you back to the Manage Accounts window, which you can close and start using the Guest account.
How to sign in and use the Guest user account in Windows 7 and Windows 8.1
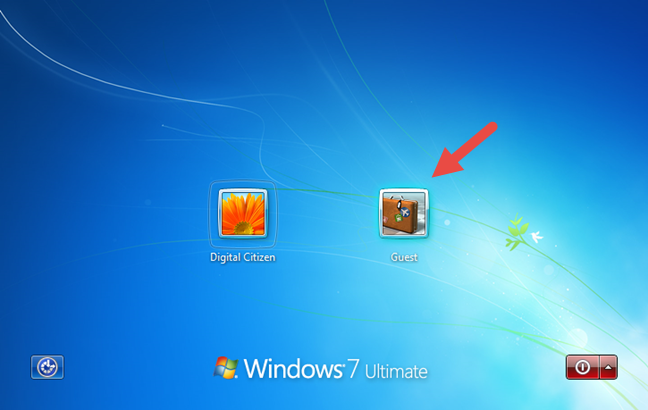
Sign out from your user account and go to the sign in screen. In Windows 7, you should see the Guest user account displayed together with all the other configured user accounts.
Guest, Windows
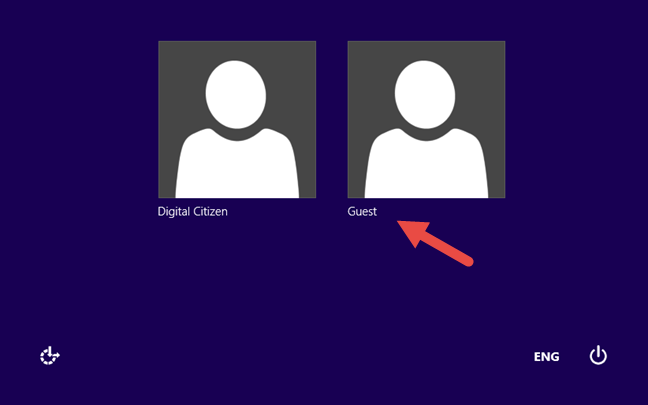
In Windows 8.1, the sign in screen looks a bit different, but the Guest user account is also listed near all the other accounts available.
Guest, Windows
In either operating system, click or tap on Guest to sign in. No password is required. When you sign in for the first time, Windows takes some time to prepare this user account, its apps, and settings. When done, you get to see the desktop or the Start screen.
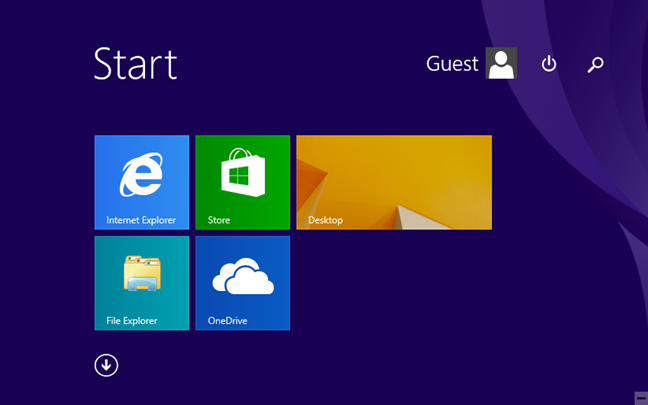
You can use the apps and desktop programs that are already installed, but you cannot install anything new. Although the desktop looks the same in both Windows versions, the Start screen in Windows 8.1 is very different for the Guest user account.
Guest, Windows
It includes only five tiles but, luckily, you can customize it and add new tiles to it, for all the available apps.
How to disable the Guest user account in Windows 7 and Windows 8.1
To disable the Guest user account, sign out from it and log in with a user account that has administrative rights on your Windows PC or device. Open Control Panel and got to "User Accounts and Family Safety -> User Accounts," click or tap on the "Manage another account" link and then on Guest.
Guest, Windows
Next, click or tap on the "Turn off the guest account" link.
Guest, Windows
The Guest account is now disabled, and all its data is deleted.
How to create a Visitor user account in Windows 10, that resembles a Guest account from Windows 7 and Windows 8.1
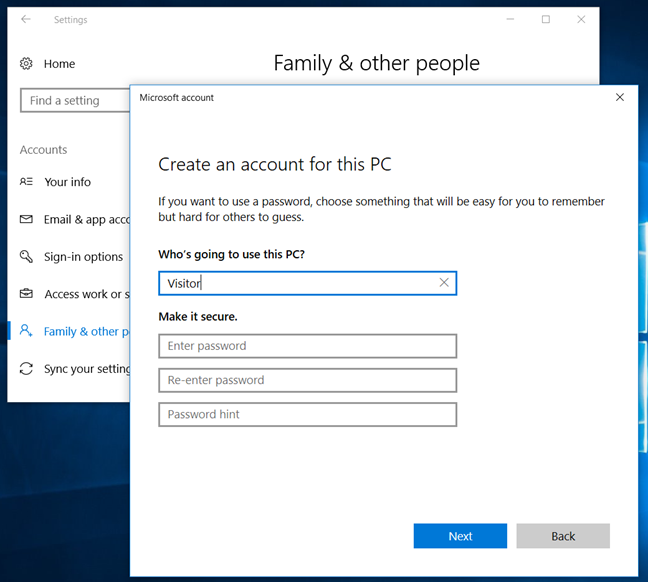
As Windows 10 does not allow you to create and enable the real Guest account, the closest alternative is for you to create a local standard user account with as many restrictions as possible. If you do not know how to create a local account in Windows 10 or how to give it standard permissions (not administrative), these guides can help you:
Note that, although you cannot use a built-in Guest account, Windows 10 still does not let you create a local account with the name Guest. We recommend you to choose an alternate name for it, such as Visitor.
Guest, Windows
Conclusion
Before you close this article, do not hesitate to experiment with using the Guest account in Windows 7 and Windows 8.1, and share your impressions in the comments section below. Do you consider it useful and, if yes, does it work well? Do you miss it in Windows 10, or do you believe creating a standard local account for your guests is enough?
Actually, you can have a guest account in Microsoft Windows 10.
You just have to set it up from the cmd promt.
David F ·
This advice is wrong. In Windows 10 you CAN create a guest account which has limited access (as in earlier editions). After creating a local account, simply move it to the Guests group. Once this is done then they wont be able to change settings (they cant run the settings app at all!), or install or uninstall apps or do any of the other things which were “banned” in the old guest account. This works on all editions (including Home) and doesn’t require group policy.
Miles Callisto ·
You can turn on the Guest account under Windows 10, by using the Local Security Policy.
Press ⊞+R to open the Run Dialog box and type in “secpol.msc”.
From there, expand “Local Policies” and click “Security Options”
Double Click “Accounts: Guest Account Status” and select enabled, then click Okay.
Reboot and the guest account should show up on the welcome screen.
Happy trails!
Miles
Anonymous ·
Nobody is truly reading what we say, and everyone’s an expert. 😐
Kehinde lawal ·
Useful content
Strikelord ·
What happens if you upgrade Windows 7 or 8.1 to Windows 10 with a Guest account active on the older OS? Will Guest still be available as a user after the upgrade?
Anonymous ·
No, it will not be available. At least not with the exact set of permissions and limitations as the previous Guest account.
Somwell ·
I read somewhere that the guest account was unsafe and so I created a Standard user account. But the default setup allows them to use File Explorer and see other users’ files. Will look up how to limit that. But what makes ‘them’ say that the guest account has risks?
Ciprian Adrian Rusen ·
The Guest account is not unsafe. It is even more limited than other user accounts. It cannot install apps on its own. It is safer than other types of user accounts. Not sure where you read that.
Somwell Kortess ·
I read somewhere that the guest account was unsafe and so I created a Standard user account. But the default setup allows them to use File Explorer and see other users’ files. Will look up how to limit that. But what makes ‘them’ say that the guest account has risks?
ARTHUR ·
I forgot my password to laptop how can i setup as a guest


Discussion (11)
Actually, you can have a guest account in Microsoft Windows 10.
You just have to set it up from the cmd promt.
This advice is wrong. In Windows 10 you CAN create a guest account which has limited access (as in earlier editions). After creating a local account, simply move it to the Guests group. Once this is done then they wont be able to change settings (they cant run the settings app at all!), or install or uninstall apps or do any of the other things which were “banned” in the old guest account. This works on all editions (including Home) and doesn’t require group policy.
You can turn on the Guest account under Windows 10, by using the Local Security Policy.
Press ⊞+R to open the Run Dialog box and type in “secpol.msc”.
From there, expand “Local Policies” and click “Security Options”
Double Click “Accounts: Guest Account Status” and select enabled, then click Okay.
Reboot and the guest account should show up on the welcome screen.
Happy trails!
Miles
Nobody is truly reading what we say, and everyone’s an expert. 😐
Useful content
What happens if you upgrade Windows 7 or 8.1 to Windows 10 with a Guest account active on the older OS? Will Guest still be available as a user after the upgrade?
No, it will not be available. At least not with the exact set of permissions and limitations as the previous Guest account.
I read somewhere that the guest account was unsafe and so I created a Standard user account. But the default setup allows them to use File Explorer and see other users’ files. Will look up how to limit that. But what makes ‘them’ say that the guest account has risks?
The Guest account is not unsafe. It is even more limited than other user accounts. It cannot install apps on its own. It is safer than other types of user accounts. Not sure where you read that.
I read somewhere that the guest account was unsafe and so I created a Standard user account. But the default setup allows them to use File Explorer and see other users’ files. Will look up how to limit that. But what makes ‘them’ say that the guest account has risks?
I forgot my password to laptop how can i setup as a guest