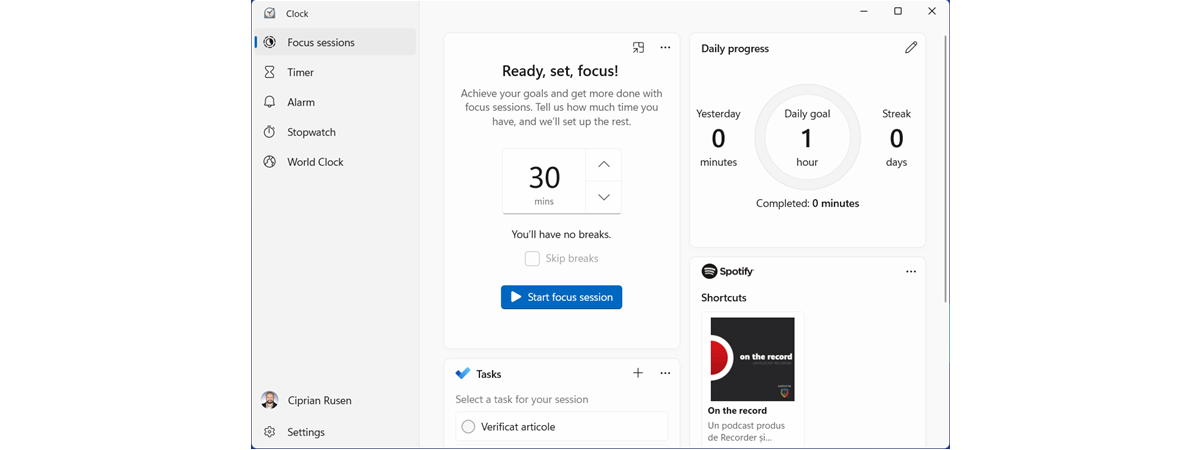
Whether it’s friends, family, or even coworkers, many of us keep in touch with people who live in completely different time zones. As such, there are times when you find yourself wondering about the time in another country before reaching out. Luckily, the Clock app, present in both Windows 10 and Windows 11, comes with a World clock tab, where you can check the time for different cities around the world. Furthermore, you can compare time zones and see at a glance the day and night areas on the map. Continue reading to learn everything about using the World clock in Windows 10 and Windows 11:
NOTE: The Clock app is identical on both operating systems, so we're only using screenshots from Windows 11 in this guide.
Access the World clock in Windows 10 and Windows 11
To get to the World clock, you first need to open the Clock app. Type clock in the taskbar Search bar in Windows 10 or in the Search window in Windows 11 (use the magnifying glass on the taskbar to open it). Then, click or tap on the Clock app search result.
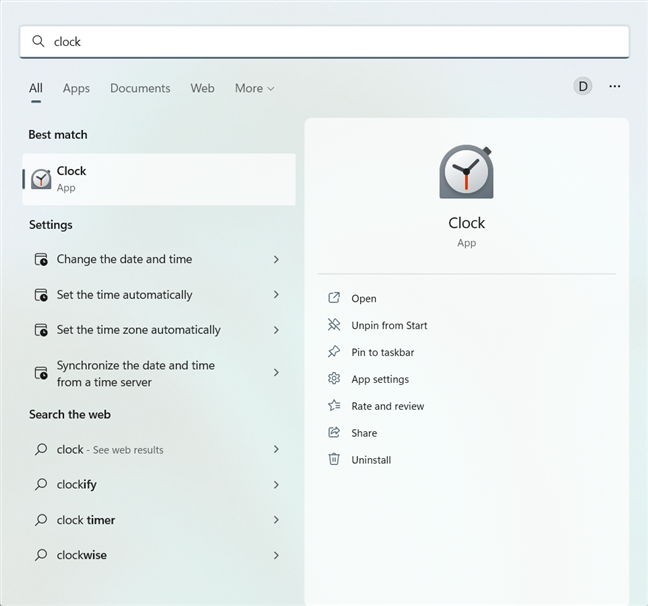
Search for the Clock app in Windows
Another way to get to it is to open the Start Menu and open the Clock shortcut in the All Apps list.
When the Clock app opens, access the World clock tab from the left panel.
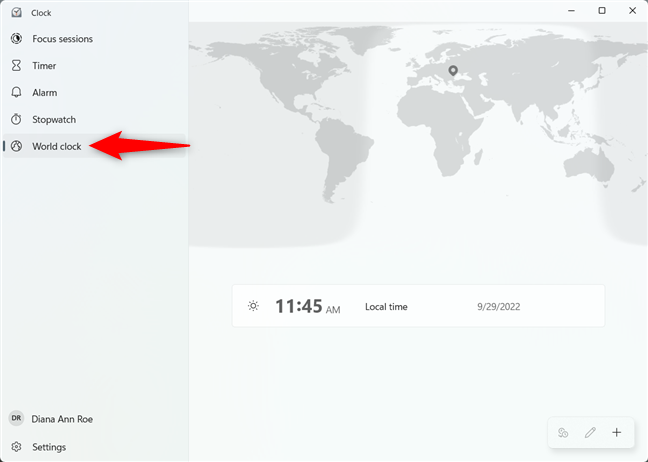
Access the World clock in Windows 10 and Windows 11
How to add and view the times in different countries with World clock in Windows
In the World clock panel, you get to see the Local time, as well as whether it’s day or night in different parts of the world - the darker areas on the map indicate nighttime. However, if you need the exact time for a location, you have to first add it in the World clock.
To begin, click or tap on the + (Add a new city) button in the lower right corner.
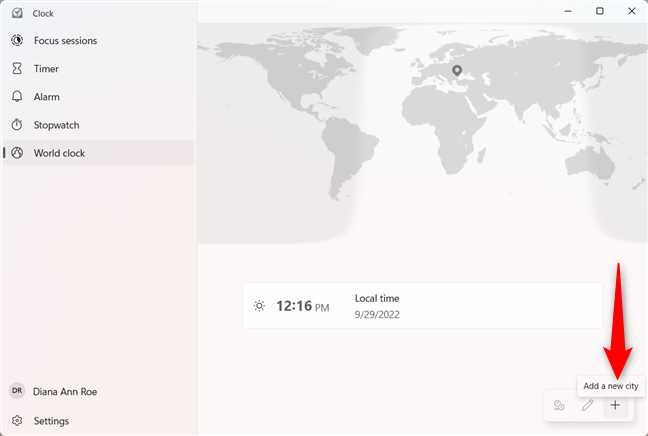
Add a new city to the World clock in Windows
This opens a pop-up window. Start typing the name of the location you want and click or tap on it when it shows up in the dropdown menu suggestions.
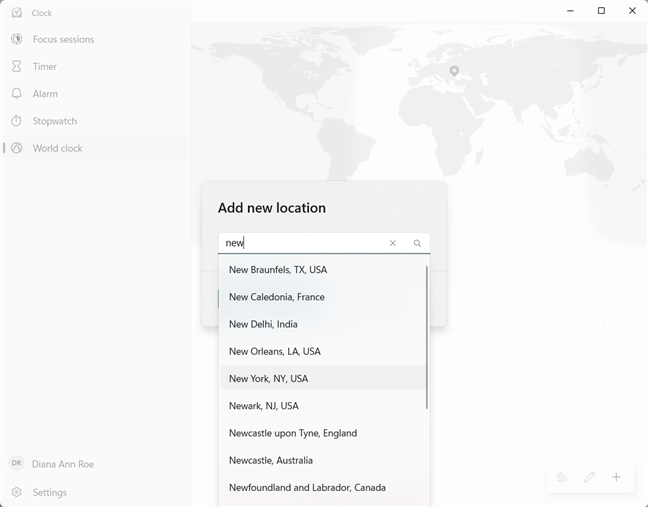
Search for the location you want to add in the World clock
When you find the location you want, click or tap on the + Add button.
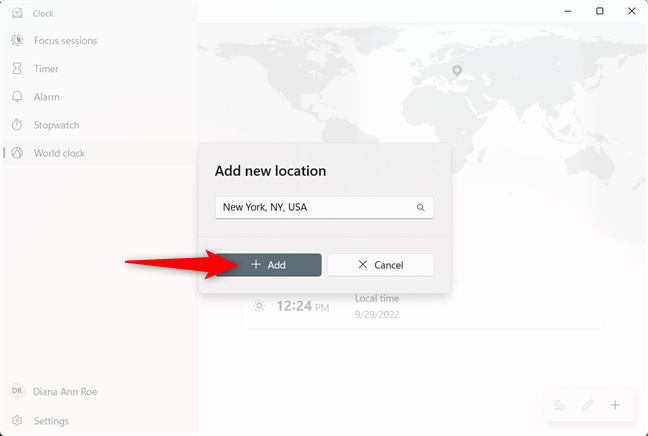
Add a new location in the World clock in Windows
The city is now added to the World clock list, meaning its time is permanently displayed in the Clock app. Furthermore, you can also see the time difference with your local time next to the current date, and an icon in front of each time zone indicates whether it’s currently day or night in that location.
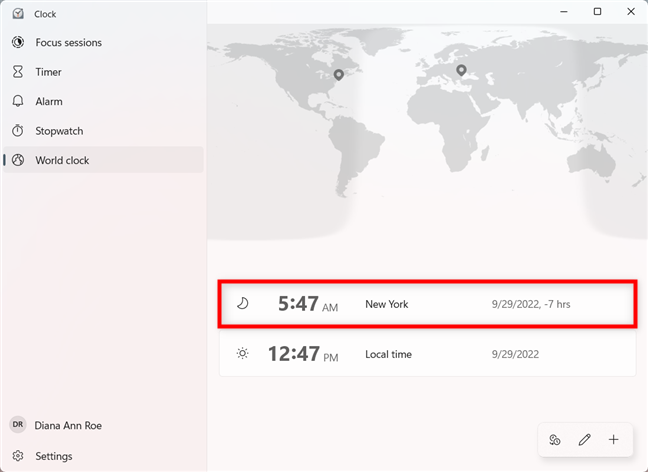
The new city is added in the Windows Clock app
When you are done, you can use the + (Add new city) button to find and include another location. However, keep in mind that you can only have a maximum of ten cities displayed in the World clock (and one of them is, by default, your Local time). Hovering over one of the location entries highlights that city on the world map.
TIP: You can also pin to your Start Menu clocks for any of the cities added in the World clock. Unfortunately, this feature only works properly for Windows 10 users.
How to compare the times in different countries with the Windows World clock
If you want to compare the time between your locations, press the Compare button from the menu bar in the bottom-right corner - its icon includes two clocks.
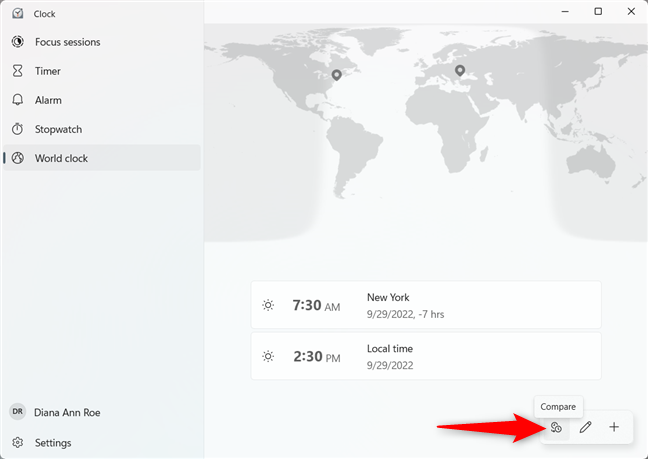
Compare the times in different countries with the Windows Clock app
You can now clearly compare the times between the cities in your list. Click or tap on the calendar data at the top to select another date. You can also click or tap on another time, scroll while hovering over any row in the chart, or use the arrows at each row’s end to compare other times.
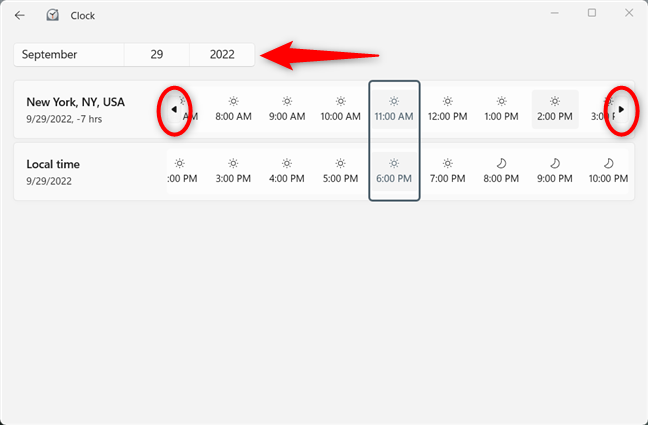
Use the available tools to compare time zones for another date and/or time
When you’re done comparing time zones, you can return to the World clock by using the Back button in the upper-left corner of the window.
TIP: If you constantly need to keep an eye on a couple of time zones, you can also add clocks to the taskbar in Windows 10 and Windows 11.
How many cities did you add in the World clock in Windows 10 and Windows 11?
The Windows World clock feature can come in handy in a variety of situations. Whether it’s for business or pleasure, some of us need to know the time in other cities every now and then. We have lots of friends and associates abroad, so, usually, our World clock is pretty crowded, sometimes going up to five cities. What about you? How many locations did you include in your World clock? What do you use them for? Let us know in a comment below.


 30.09.2022