The Timeline is one of the most useful features added in recent versions of Windows 10. It offers an excellent way to continue your work from one device and onto another. However, one of the main flaws of the Timeline was that, up until now, it was not able to work with Google Chrome. Which meant that you could pick up your web activities from where you left off, only if you used Microsoft Edge. That is no longer the case, as Microsoft released an extension for Google Chrome that makes it compatible with the Timeline. The extension is called Web Activities and, in this article, we show you how to get it and how to use it:
How to get the Web Activities extension for Google Chrome
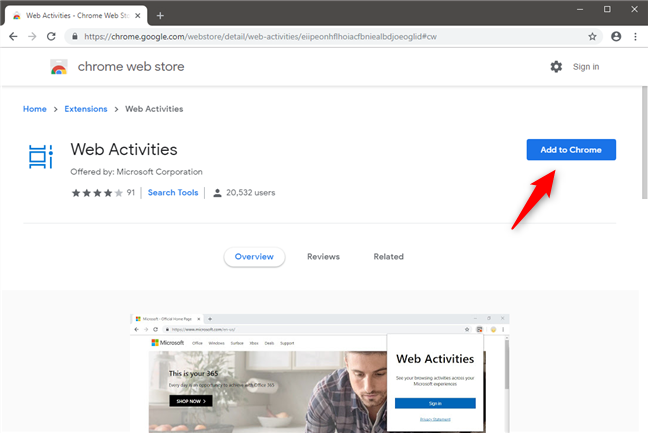
If you want to use the Timeline from Windows 10 with Google Chrome, you must first install the Chrome extension called Web Activities. It is developed by Microsoft, and it is available in the Chrome Web Store. If you do not want to search for it, open your Google Chrome browser and follow this direct link: Web Activities. On the extension's page, click or tap the "Add to Chrome" button.
The Web Activities extension page
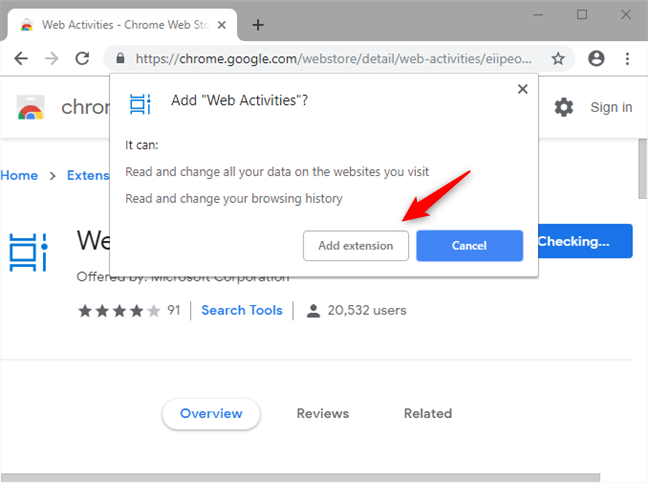
Google Chrome should ask whether you are sure that you want to "Add Web Activities." Press the "Add extension" button.
Installing the Web Activities extension in Google Chrome
Wait for a few moments so that the web extension is downloaded, installed and loaded in Google Chrome.
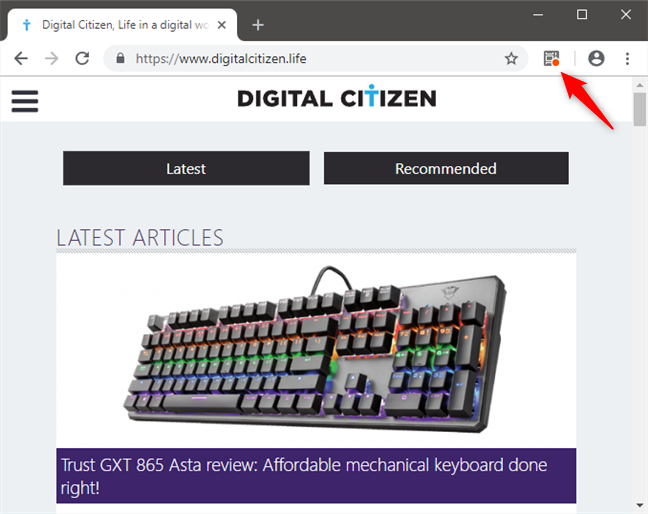
When it is done, a new button appears on the right side of Chrome's address bar. It is worth noting that its icon looks similar to the Task View icon found on the Windows 10 taskbar. Click or tap the Web Activities button.
The Web Activities button from Google Chrome
How to make Google Chrome work with the Windows 10 Timeline
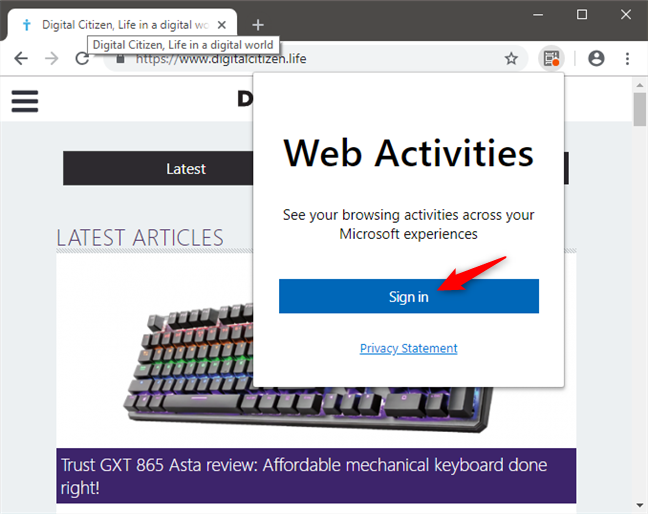
When you press the Web Activities button from Google Chrome for the first time, you only get one option: to Sign in. You need to do that so that your Timeline can sync your browsing history from Google Chrome. Click or tap Sign in.
Signing into a Microsoft Account in Web Activities
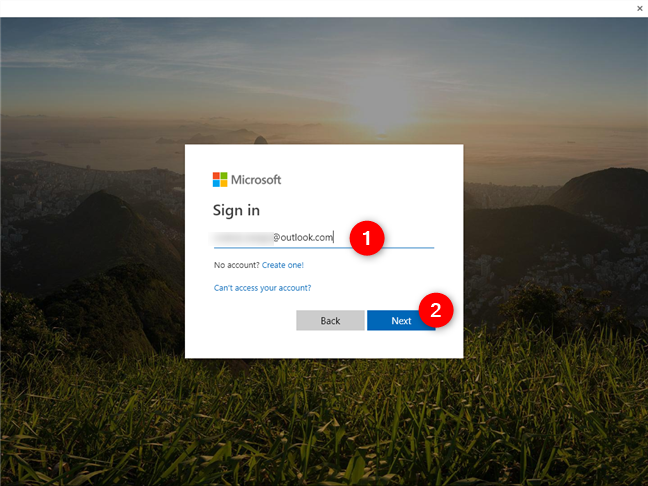
A large pop-up window opens up: type your Microsoft account, and press Next.
Entering the Microsoft account email
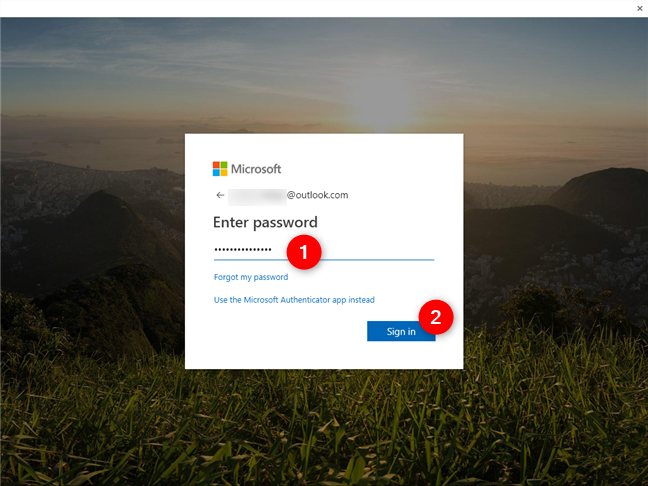
On the next step, enter your Microsoft account password and press Sign in. Additionally, if you enabled 2-factor authentication for your Microsoft account, you must also complete the secondary authentication step, which can mean that you have to do something like entering a temporary code or approve a notification on your smartphone.
Entering the Microsoft account password
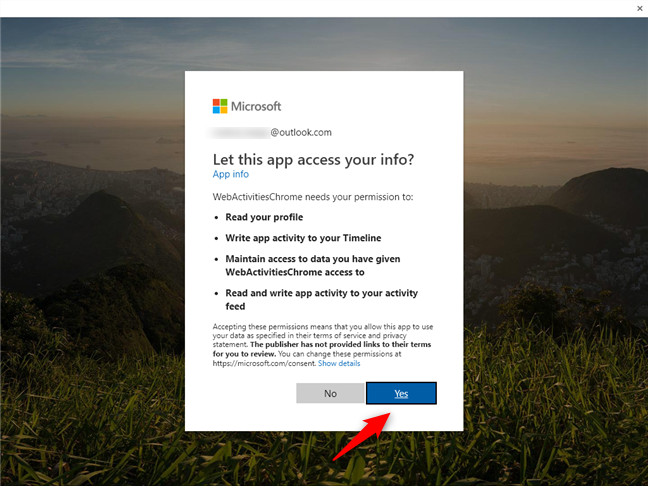
Once you have been authenticated into your Microsoft account, the Web Activities extension for Google Chrome asks you to let it access your Microsoft account information. Choose Yes to allow it; otherwise, the extension cannot work.
Allowing Web Activities to access your Microsoft account
That is all you have to do to make Google Chrome work with the Timeline from Windows 10.
How to use Windows 10's Timeline with Google Chrome
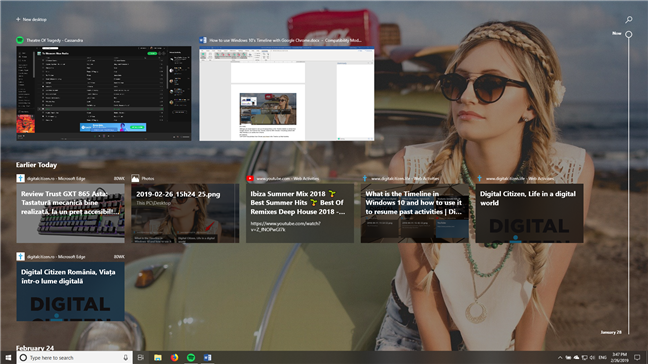
From here on, you can find your browsing history from Google Chrome in your Timeline, on every Windows 10 PC or device you enabled it on.
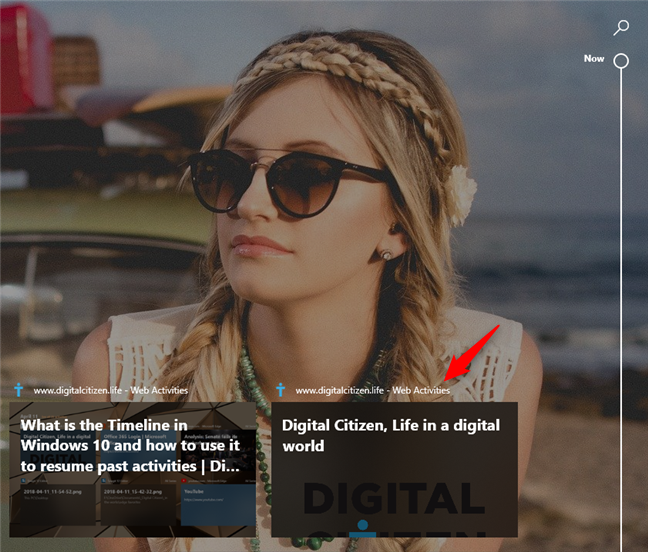
The Windows 10 Timeline showing past activities, including from Google Chrome
Although you would expect to see your browsing history in the Timeline labeled as activity from Google Chrome, do not look for that. Instead, check for Web Activities. Everything marked with Web Activities is an activity from Chrome.
Past activities from Chrome are shown in the Timeline as Web Activities
How to configure Web Activities for Google Chrome
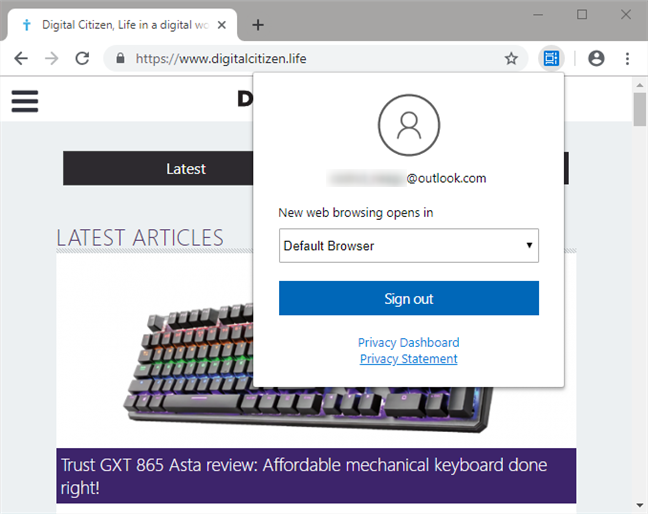
There is only one aspect that you can change about how the Web Activities extension works. If you are already signed in, when you click/tap on the extension's button near the address bar, you can change whether "New web browsing opens in" the "Default Browser" or in Microsoft Edge.
Choosing whether new web browsing opens the default browser or Microsoft Edge
If you choose "Default Browser," then any Google Chrome - Web Activities item that you click or tap on in your Timeline, opens in your default web browser. If you choose Microsoft Edge, your Chrome activities are always opened with Edge, never with another web browser, even if it is set as your default.
Do you like the Timeline better, now that it works with Google Chrome?
Many Windows Insiders wanted Microsoft to integrate the Windows 10 Timeline with Google Chrome. As you have seen, Microsoft listened and developed an extension for this web browser that makes the two work together. However, we feel that the name they chose for it is not an inspired one. Unless you know what to look for, would you think about searching for Web Activities? Why not call it Windows 10 Timeline, for instance? Before closing this tutorial, tell us what you think: do you like the Timeline better, now that it is integrated with Google Chrome?











Discussion (0)
Comments are closed.