




Getting your IIIP 3D printer ready helps you print clean, accurate models from day one. Most beginners struggle with leveling, filament loading, and slicing, so this guide removes the guesswork. You follow clear steps and run your first print without confusion.
1) Understand your IIIP 3D printer
Your IIIP printer works best when you understand its frame, build plate, extruder, and menu system. This helps you recognize issues early and set realistic expectations.
Key features and limitations
You get a compact build volume that fits simple prototypes and functional prints. The extruder supports common filaments like PLA and ABS. The printer’s open frame exposes moving parts, so you keep it on a stable, dust-free surface.
What comes in the box
You usually get the printer frame, spool holder, sample filament, power supply, hex keys, and an SD card. You confirm everything before you start assembling or calibrating.
2) Prepare the printer
You create a stable foundation for consistent prints by placing the printer on a level, vibration-free surface.
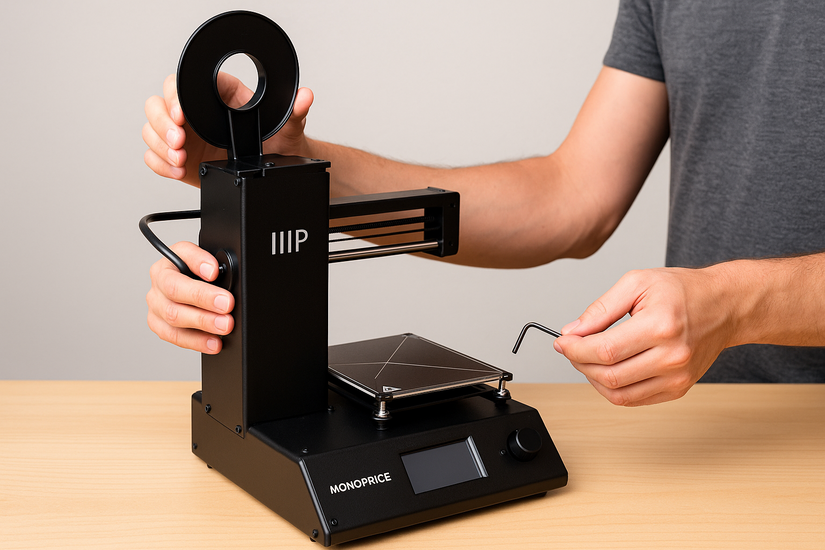
Start by attaching the spool holder, tightening any loose screws, and confirming that the bed uses all four springs evenly. This prevents wobble during movement.

Lastly, plug in the power supply, route cables away from moving parts, and check connectors. You avoid shorts and limit unexpected shutdowns.
3) Level the print bed
A level bed ensures strong first-layer adhesion and smooth prints. You redo leveling every time you change the nozzle, surface, or filament type.
To level the print bed manually, heat the bed to printing temperature so you can level under real conditions. Slide a sheet of paper under the nozzle and turn each corner knob until the paper drags lightly. Repeat at the center to confirm consistency.
Tip: Recheck leveling every two to three long prints or after transporting the machine. This keeps your first layers stable.
4) Load filament correctly
You load filament into a preheated extruder to avoid grinding, jams, and clogs. To heat the extruder, set the nozzle to the filament temperature, around 200°C for 3D PLA printing. Heating softens the filament so it feeds smoothly.
Next, cut the filament tip at a sharp angle, insert it through the guide tube, and continue until melted plastic flows cleanly from the nozzle.
5) Set up slicing software
You need slicing software to convert 3D models into instructions for the IIIP printer.
Add the IIIP profile in Cura
Choose Add Printer and create a custom profile using the printer’s build volume. This ensures accurate movement and scaling.
Choose recommended print settings
Start with 0.2 mm layers, 20 percent infill, and automatic supports. PLA works best for beginners and offers predictable results.
6) Start your first print
You run your first print through the SD card slot or USB. Simple calibration models confirm your setup.
To select a test model, use a small cube or leveling print. These models reveal adhesion problems quickly.

Watch the first two layers directly. You confirm the bead sticks, spread evenly, and form a flat, clean surface. Stop the print if the nozzle scrapes or filament bunches.
7) Troubleshoot common problems
- Poor bed adhesion: Raise the nozzle slightly, increase bed temperature, or clean the surface with isopropyl alcohol. You can add painter’s tape if your surface loses grip.
- Under-extrusion or clogged nozzle: Increase nozzle temperature slightly, check filament tension, and clean the nozzle tip. You also inspect the spool for knots or moisture.
- Layer shifting or ringing: Tighten belts, reduce print speed, and check for obstructions on the rods. This stabilizes each layer and stops wobbling.
Tips: Maintain and upgrade your IIIP printer
- Clean the nozzle and bed
- Lubricate Z-rod and check belts
- Store filament properly
- Firmware updates
- Bed surface upgrades
- Improved cooling or extruder mods
Summary
- Learn your IIIP 3D printer’s components before you begin.
- Prepare and secure the printer on a stable surface.
- Level the print bed carefully for strong first layers.
- Heat and load filament the right way to avoid clogs.
- Configure slicing software with the proper IIIP profile.
- Run a simple test model and monitor the initial layers.
Conclusion
Your IIIP 3D printer becomes far easier to use once you follow a clear setup routine and maintain consistent calibration. You control print quality by leveling often, loading filament correctly, and choosing the right slicer settings. With regular tuning and basic maintenance, your printer handles large projects confidently and produces reliable results every time.


Discussion (0)
Be the first to comment.