




If you want to install Linux, the first step is to create Ubuntu bootable USB. A bootable USB allows your computer to start Ubuntu and begin the installation process.
The process is simple. You download the Ubuntu file, use a tool to copy it to a USB drive, and make it bootable. This guide explains everything clearly for Windows 11 users.
What Is a Bootable USB?
A bootable USB is a flash drive that contains an operating system installer. Instead of loading your current system, your PC can boot directly from the USB and run the installer.
In this case, the USB will contain Ubuntu so you can install it on your computer.
Why Create Ubuntu Bootable USB?
Creating a bootable USB is required if you want to install Ubuntu.
It allows you to:
- Install Ubuntu on your PC
- Try Ubuntu without installing
- Repair or recover a system
- Replace or dual boot with Windows
It is the most common method for installing Linux.
What You Need Before You Start
Before you create Ubuntu bootable USB, make sure you have:
- A USB drive (at least 8 GB)
- Ubuntu ISO file
- A tool like Rufus
- A Windows PC
Also note that the USB drive will be formatted, so back up any important files.
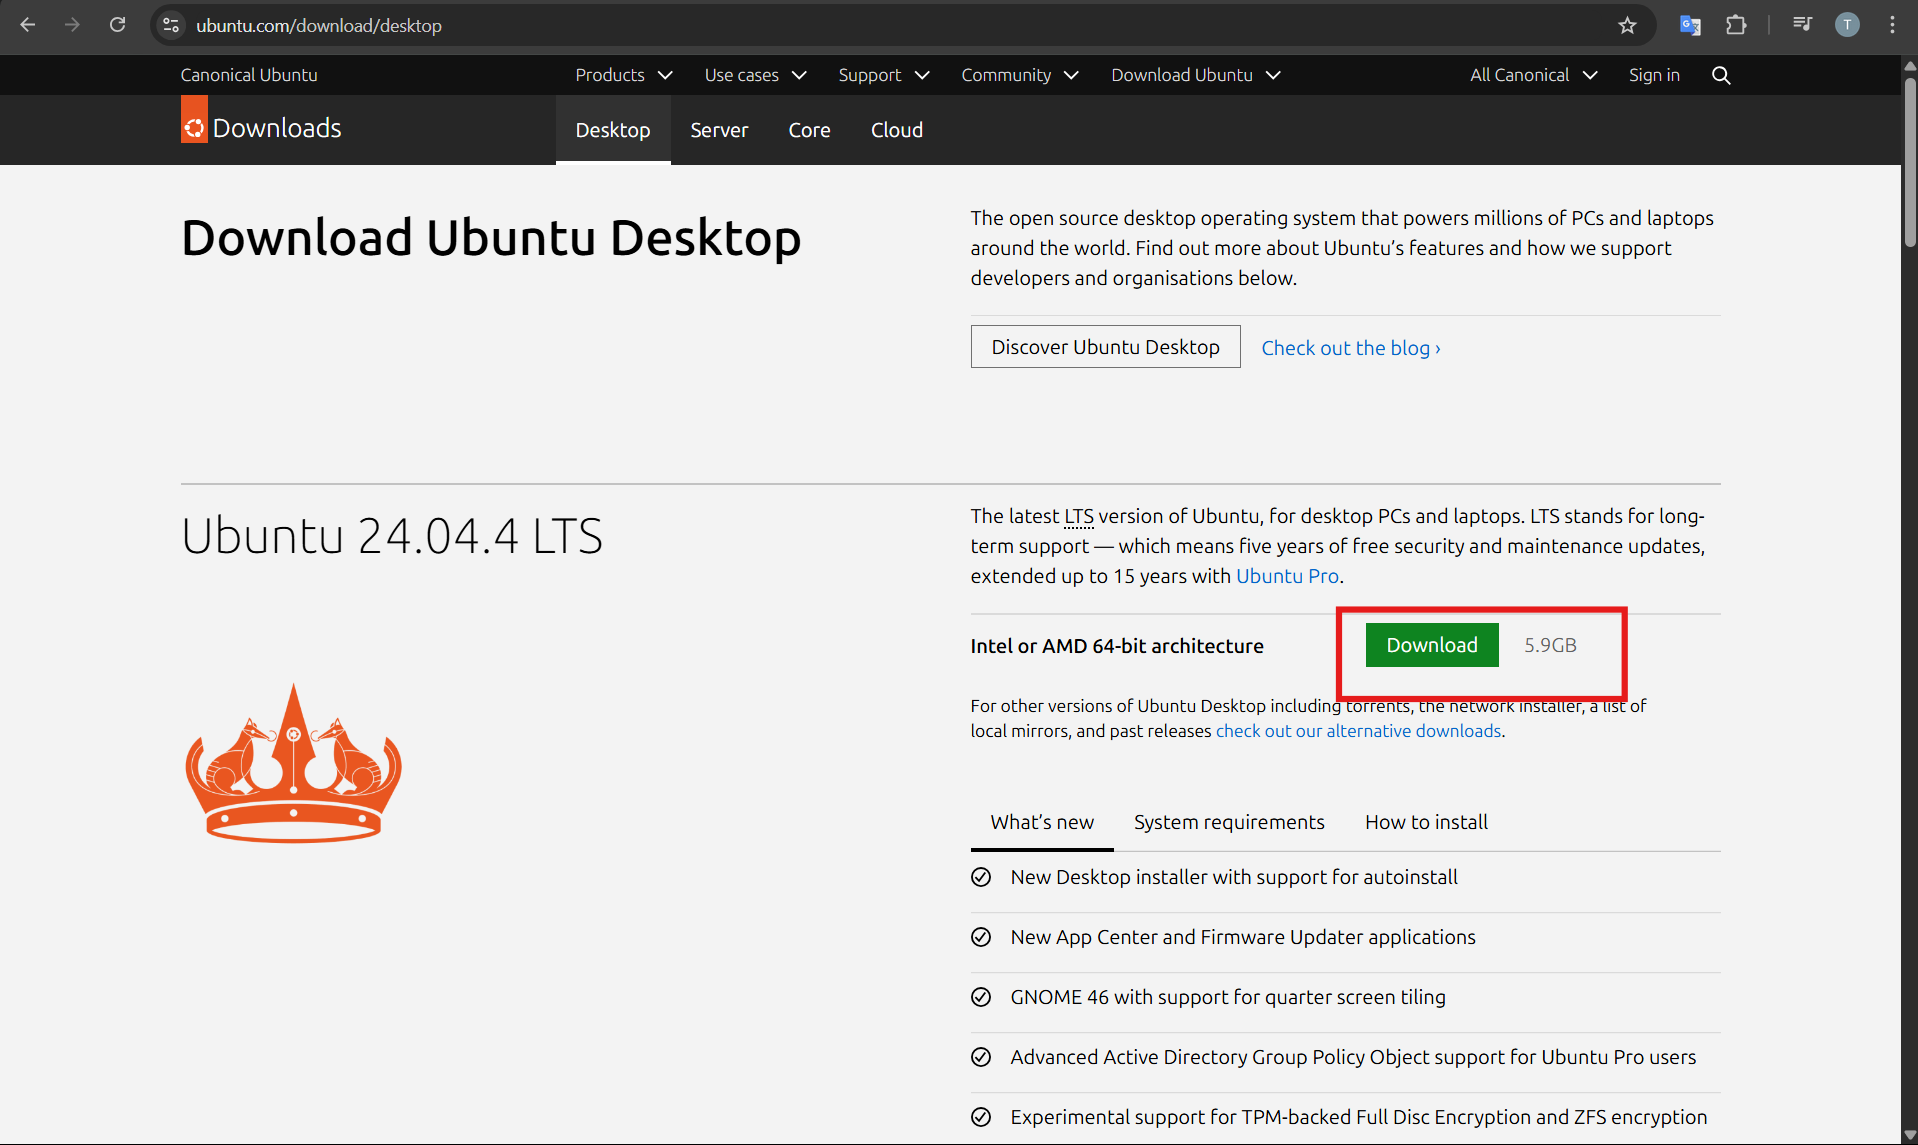
Step 1: Download Ubuntu ISO File
First, download the official Ubuntu installer.
- Open your browser
- Go to the Ubuntu official website
- Download the Ubuntu Desktop ISO file
This file will be used to create the bootable USB.
Step 2: Download Rufus
Rufus is one of the easiest tools to create bootable USB drives.
- Go to the Rufus website
- Download the latest version
- Open Rufus (no installation required)
Step 3: Insert USB Drive
Plug your USB drive into your computer.
Make sure:
- It has at least 8 GB space
- Important data is backed up
Rufus will detect the USB automatically.
Step 4: Create Ubuntu Bootable USB
Now you can create the bootable USB.
- Open Rufus
- Select your USB drive
- Click Select and choose the Ubuntu ISO file
- Leave default settings (recommended)
- Click Start
Rufus will begin copying files and making the USB bootable.
This process may take a few minutes.
Step 5: Wait for Completion
Once the process finishes:
- You will see a Ready status
- Safely remove the USB drive
Your Ubuntu bootable USB is now ready.
How to Use the Bootable USB
After creating the USB, you can use it to install Ubuntu.
Steps:
- Insert the USB into your PC
- Restart the computer
- Open the boot menu (usually F12, ESC, or Delete)
- Select the USB drive
Ubuntu will start, and you can choose to install or try it.
Tips for Best Results
To avoid issues, keep these tips in mind:
- Use a reliable USB drive
- Do not interrupt the process
- Keep your laptop plugged in
- Use the latest Ubuntu version
These small steps help ensure a smooth setup.
Final Thoughts
Learning how to create Ubuntu bootable USB is the first step toward installing Linux on your PC. The process is quick and does not require advanced technical skills.
Once your USB is ready, you can install Ubuntu, try it without installation, or use it for system recovery. It is a simple but powerful tool for managing your system.
FAQs
What is a Ubuntu bootable USB?
It is a USB drive that contains the Ubuntu installer and can be used to boot your PC.
Which tool is best to create bootable USB?
Rufus is one of the easiest and most popular tools for Windows users.
Will creating a bootable USB delete my data?
Yes. The USB drive will be formatted during the process.
Can I use the USB to try Ubuntu without installing?
Yes. You can choose the “Try Ubuntu” option after booting from the USB.


Discussion (0)
Be the first to comment.