




The Logitech Unifying Receiver lets you connect up to six compatible wireless mice, keyboards, or trackballs using a single USB dongle. It’s a compact solution that keeps your desk free of clutter, but connection issues can happen if the process isn’t followed correctly. This guide explains how to connect your Unifying Receiver on Windows, macOS, and other systems, plus tips to fix common pairing problems.
1) Check if your device supports the Unifying Receiver
Before setting up, confirm that your Logitech device supports the Unifying Receiver. Look for the orange Unifying logo on both the device and the receiver. If it’s missing, your device may use a different wireless system, such as Logitech Bolt or Bluetooth.
This step prevents wasted time troubleshooting incompatible devices. You can also check compatibility using Logitech’s official compatibility list or inside your device’s specifications page.
2) Download and install Logitech Unifying Software
Logitech Unifying software is the easiest way to connect and manage compatible devices. Go to the official website, select your OS, and click the Download button. Next, follow the onscreen instructions to install the app for Windows 10, Windows 11, or macOS.

Make sure to grant it admin privileges when prompted. After the installation is complete, open the Start menu on Windows and navigate to the Logitech folder. Select Logitech Unifying Software and right-click to choose Run as administrator.

This ensures the program has full USB access to detect your receiver and devices.
3) Pair a new mouse or keyboard
Connect the Logitech Unifying Receiver to your computer's USB port. Turn your mouse or keyboard off and back on, or press its Connect button if it has one. The app will automatically detect the device and confirm pairing on-screen.
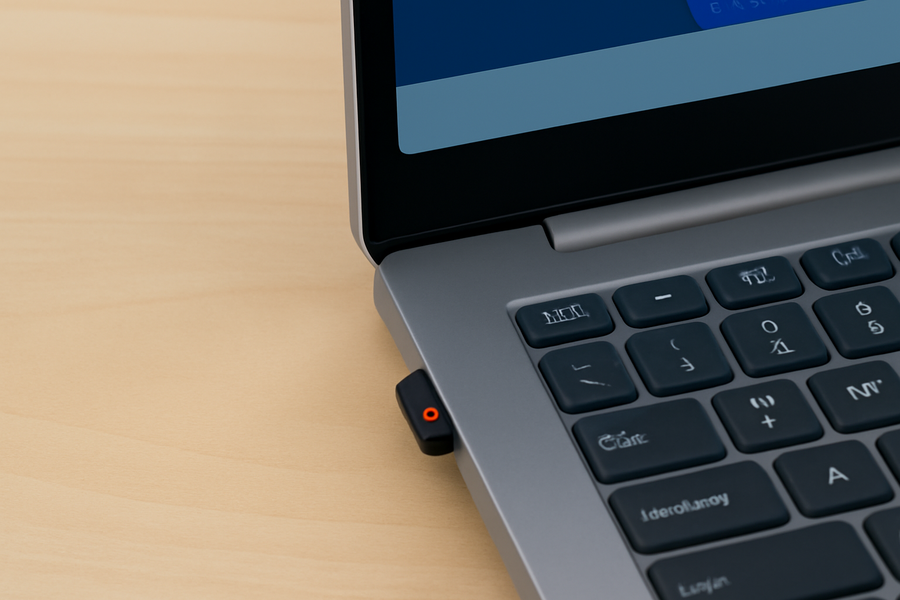
If successful, test the device immediately to verify the connection. Repeat the steps if it fails or times out. However, if the device doesn't show up on the app, move the device closer to the receiver and use a direct USB port instead of a hub.
Also, replace low batteries, close and reopen the Unifying Software, or restart your PC. Most detection problems come from weak signals or USB power management.
4) Connect multiple devices to one Receiver
The Logitech Unifying Receiver supports up to six wireless devices at once. To add more, reopen the Logitech Unifying Software with the Receiver plugged in. Restart your mouse or Keyboard, and the Software should detect and connect it to the Receiver automatically.

Using one receiver for all your gear keeps USB ports free and reduces interference between devices.
5) Move the Receiver to another computer
You can easily move your Unifying Receiver between computers without re-pairing. Unplug it from the first PC and insert it into the second. If the same devices were previously paired, they’ll reconnect automatically.
If you switch frequently between machines, keep the Unifying Software installed on both so you can manage connections or troubleshoot quickly.
6) Use the Receiver without installing Software (Work PCs)
If your office PC blocks app installations, pair your devices on a personal computer first using the Unifying Software. Once paired, plug the receiver into your work machine - it will remember the connections and work immediately.
This method is perfect for restricted environments where you can’t install or update third-party utilities.
7) Pair on macOS, Linux, or ChromeOS
On macOS, you can use Logitech Options+ or the Unifying Software to add new devices. For Linux systems, try an open-source utility like Solaar. ChromeOS typically supports plug-and-play if your receiver is already paired.
Cross-platform users can keep the same receiver when switching operating systems, as the pairing is stored inside the dongle - not the computer.
Troubleshooting common connection problems
- Receiver not recognized by Windows: Open Device Manager → expand Universal Serial Bus controllers → right-click your Logitech receiver → choose Update driver and follow the prompts or Uninstall device, then restart your PC. Windows will reinstall it automatically.
- Device connects but doesn’t work: Check batteries, ensure the device is within three feet of the receiver, and remove nearby 2.4 GHz interference (Wi-Fi routers, cordless phones). Try another USB port or restart the Unifying Software.
- Limit of six devices reached: If the software says Too many devices connected, remove one. Open Unifying Software → select the old device → click Unpair. Then add your new one.
Tips for reliable performance
- Plug the receiver directly into a front USB 2.0 port instead of a hub.
- Keep your mouse or keyboard within three feet for best signal strength.
- Update device firmware regularly via Unifying Software.
- Label your receivers if you use more than one across multiple PCs.
FAQs
Can I use a Logitech Bolt Receiver instead? No. Logitech Bolt and Unifying receivers use different wireless technologies and are not interchangeable.
How many devices can connect at once? You can pair up to six compatible Logitech devices to a single Unifying Receiver.
Can I pair devices from different receivers together? Yes. First, remove the device from its original receiver using Unifying Software, then pair it with the new one.
Is the receiver plug-and-play? If your device was previously paired, yes. Otherwise, you’ll need the Unifying Software or Logitech Options+ to complete setup.
Summary
- Verify that your Logitech device supports the Unifying logo.
- Install the Logitech Unifying Software.
- Use the Add Device option to pair each accessory.
- Keep devices close and use direct USB ports.
- Follow the troubleshooting steps if detection fails.
Conclusion
Connecting your Logitech Unifying Receiver is quick once you confirm compatibility and install the right software. With up to six devices supported and simple pairing steps, it’s an efficient way to streamline your wireless setup. Keeping your firmware updated and using direct USB ports will ensure stable, lag-free performance for the long run.
Discussion (0)
Be the first to comment.