


If the date or time looks wrong on your iPhone or iPad, apps can break, messages may fail, and updates can stall. Apple lets you fix this quickly using automatic network time or manual controls when needed. The steps stay almost identical on iPhone and iPad.
Table of contents
How to change date and time automatically on iPhone and iPad
Automatic time uses Apple’s servers and your location to keep everything accurate. This option works best for most users and prevents clock drift.
Turn on Set Automatically
Use this when you want the correct time without manual adjustments.
- Open Settings.
- Tap General.
- Tap Date & Time.
- Turn on Set Automatically.


Your device updates the date, time, and time zone within seconds.
Change the time zone while using automatic time
Automatic time still allows manual time zone selection in some cases.
- Open Settings → General → Date & Time.
- Leave Set Automatically enabled.
- Tap Time Zone.

- Search and select the correct city.
This helps when location detection fails during travel.
How to change date and time manually on iPhone and iPad
Manual changes help in testing, offline use, or troubleshooting specific apps. Apple locks this option until you disable automatic time.
Disable Set Automatically
You must complete this step before editing the time.
- Open Settings → General → Date & Time.
- Turn off Set Automatically.
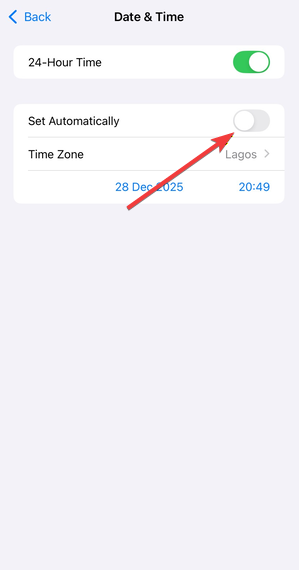

- Confirm the change if prompted.
The date and time fields become editable immediately.
Set a custom date and time
Use this carefully, since incorrect time can affect calls, messages, and certificates.
- Tap the Date field to select a new date.
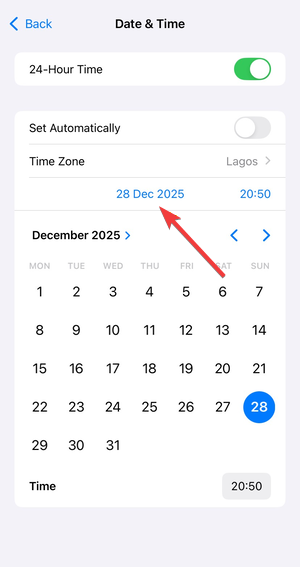

- Tap the Time field to adjust hours and minutes.
- Exit Settings to save changes automatically.
The system applies the new time across all apps.
iPhone vs iPad - are the steps different?
Both devices follow the same menu path and options. iPads may show a wider layout, but the settings and labels stay identical.
Why Set Automatically is greyed out
A locked toggle usually points to restrictions or management settings. Fixing the cause restores manual control.
Screen Time restrictions
Screen Time can block date and time changes.
- Open Settings → Screen Time.
- Tap Content & Privacy Restrictions.


- Select Location Services.
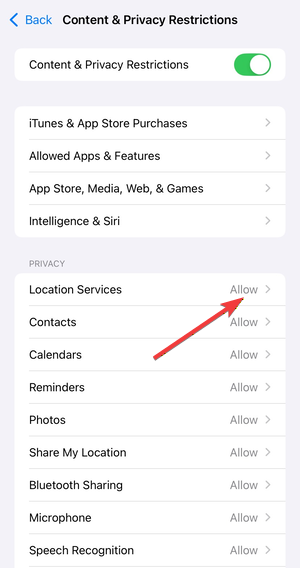

- Set it to Allow Changes.
Return to Date & Time and try again.
Work or school device restrictions
Managed devices often block manual time changes. Only the administrator can remove these limits.
Carrier or region-related limitations
Some carriers enforce network time when a SIM stays active. Removing the SIM temporarily can unlock manual controls.
Fix incorrect date or time on iPhone and iPad
Use these steps when the time stays wrong even with automatic settings enabled.
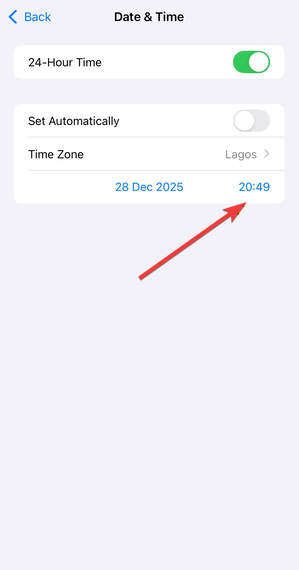
Restart and re-sync time settings
A restart forces the system to reload time data.
- Restart your iPhone or iPad.
- Go to Settings → General → Date & Time.
- Toggle Set Automatically off, then on again.
Check location services for time zone
Time zone detection depends on location access.
- Open Settings → Privacy & Security → Location Services.
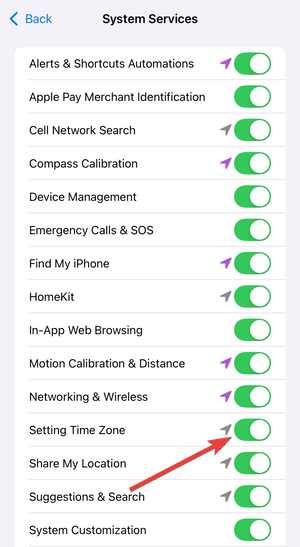
- Tap System Services.
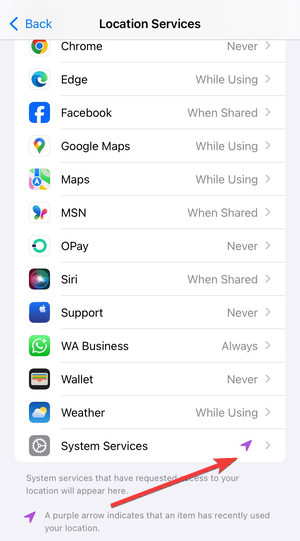

- Turn on Setting Time Zone.

Update iOS or iPadOS
Outdated software can cause time sync bugs.
- Open Settings → General → Software Update.
- Install any available update.
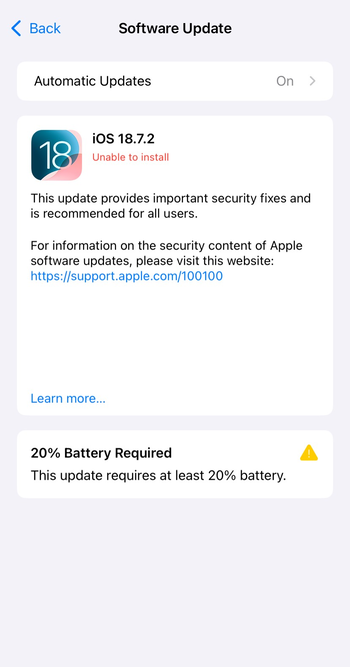
- Restart after installation.
Tips to keep date and time accurate
- Keep Set Automatically enabled whenever possible.
- Allow location access for system services.
- Update iOS or iPadOS regularly.
- Avoid manual time changes unless required.
FAQs
Can changing the date affect apps?
Yes. Banking, messaging, and security apps rely on correct system time.
Why does my time change back automatically?
Your carrier or management profile may enforce network time.
Does airplane mode affect date and time?
Yes. Automatic time may pause until you reconnect to a network.
Summary
- Use Set Automatically for the most accurate time.
- Disable it only when manual control is required.
- Fix greyed-out options through Screen Time or device management.
- Restart and update the device to resolve syncing issues.
Keeping the correct date and time ensures apps, messages, and updates work properly. If problems continue after these steps, reset network settings or contact Apple Support for deeper account or carrier checks.


Discussion (0)
Be the first to comment.