



Don't you hate it when you accidentally delete a file, only to realize later that you need it? If it went to the Recycle Bin, it is easy to restore. But what if you permanently deleted it, with a Shift + Delete keyboard combination? Maybe you had those files on a memory card or USB memory stick, like the photos from your vacation. Or maybe you formatted the wrong external drive and now it just shows empty space. Luckily, it is usually possible to recover deleted files. Many tools can help you do it, and one of the best is called Recuva, made by a company named Piriform. In this tutorial, we show you how to use Recuva to recover deleted files in Windows:
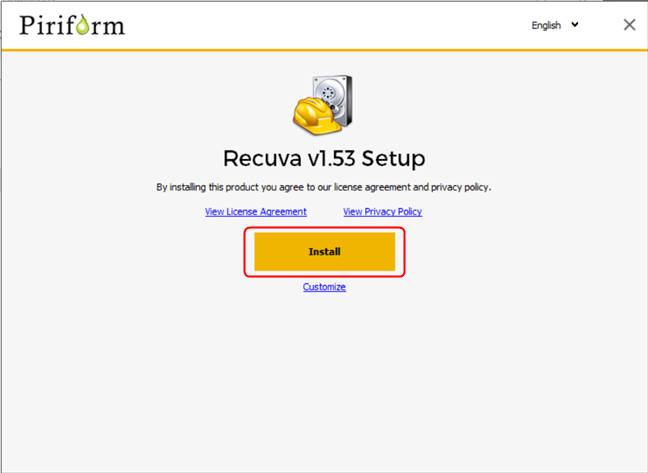
 Press Install to use the default settings
If you want to change the settings, click or tap on Customize instead. If you want to install the program in a different folder than the default one, press More to access this setting. After you finish customizing the process, press Install.
Press Install to use the default settings
If you want to change the settings, click or tap on Customize instead. If you want to install the program in a different folder than the default one, press More to access this setting. After you finish customizing the process, press Install.
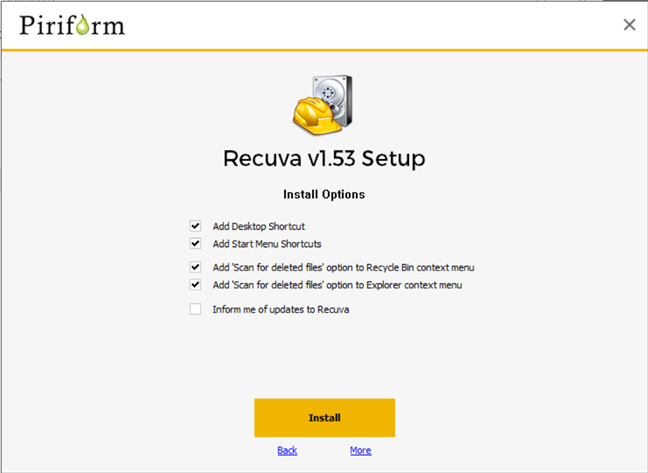 Customize the installation, then press Install
The installation only takes a couple of seconds. To complete the installation process, click or tap on Run Recuva. Make sure to uncheck the box below the button if you don’t want to view the release notes.
Customize the installation, then press Install
The installation only takes a couple of seconds. To complete the installation process, click or tap on Run Recuva. Make sure to uncheck the box below the button if you don’t want to view the release notes.
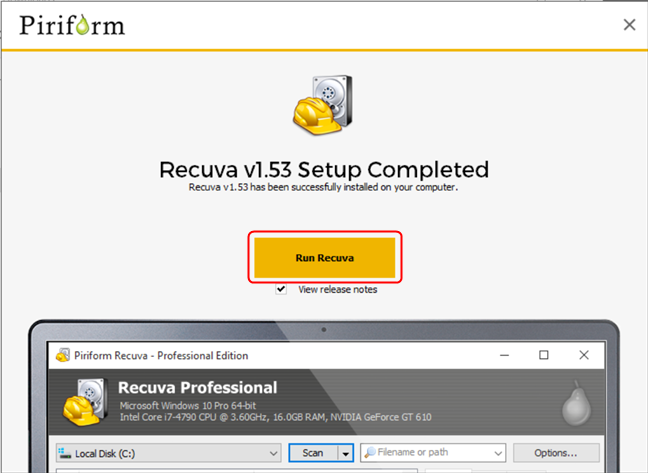 Run Recuva after installation
If you want to run the app later, click or tap on its desktop icon or on its entry in the Start Menu.
Run Recuva after installation
If you want to run the app later, click or tap on its desktop icon or on its entry in the Start Menu.
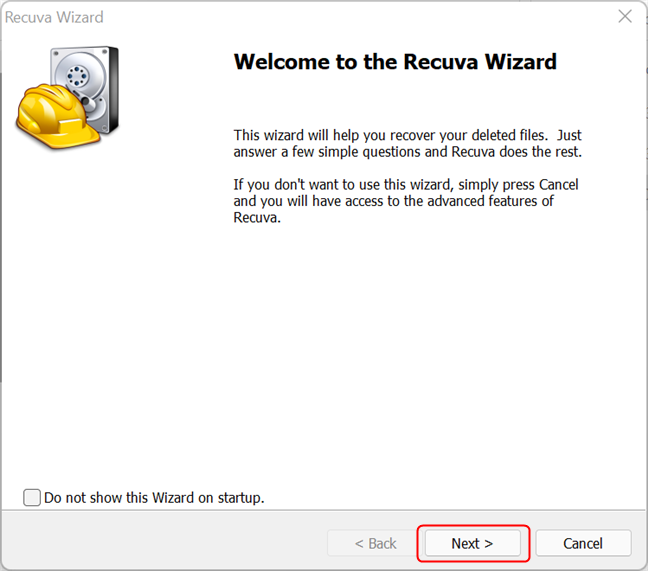
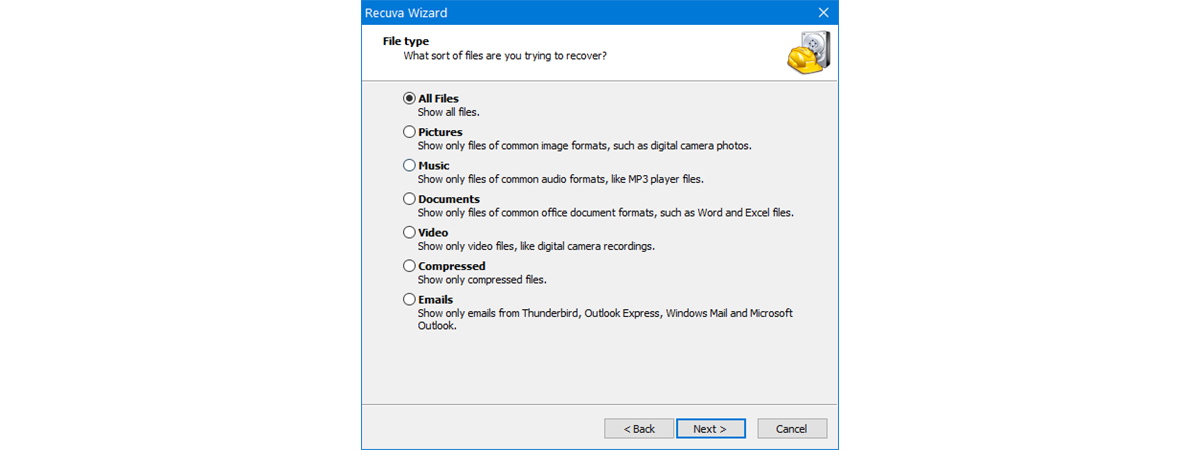
 The Recuva Recovery Wizard
Now, choose the type of data that you have removed and then click or tap the Next button. In this example, we are searching for some pictures that we accidentally deleted, so we selected the Pictures option.
The Recuva Recovery Wizard
Now, choose the type of data that you have removed and then click or tap the Next button. In this example, we are searching for some pictures that we accidentally deleted, so we selected the Pictures option.
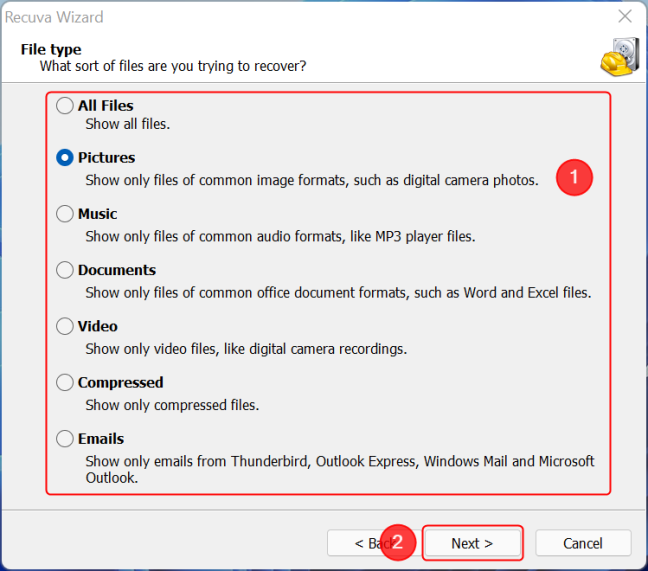 Select the file type you want to recover
Then you can choose where to look for the deleted files. For example, we know that the files we accidentally deleted were stored in a folder called "Photos to print," found on our test computer's D: drive (a removable USB stick).
If you know where you deleted the files from, you should be as specific as possible, since this decreases the search time by a lot. When you do not know, you can choose “I'm not sure,” but you have to realize that the recovery process takes a lot longer.
Select the file type you want to recover
Then you can choose where to look for the deleted files. For example, we know that the files we accidentally deleted were stored in a folder called "Photos to print," found on our test computer's D: drive (a removable USB stick).
If you know where you deleted the files from, you should be as specific as possible, since this decreases the search time by a lot. When you do not know, you can choose “I'm not sure,” but you have to realize that the recovery process takes a lot longer.
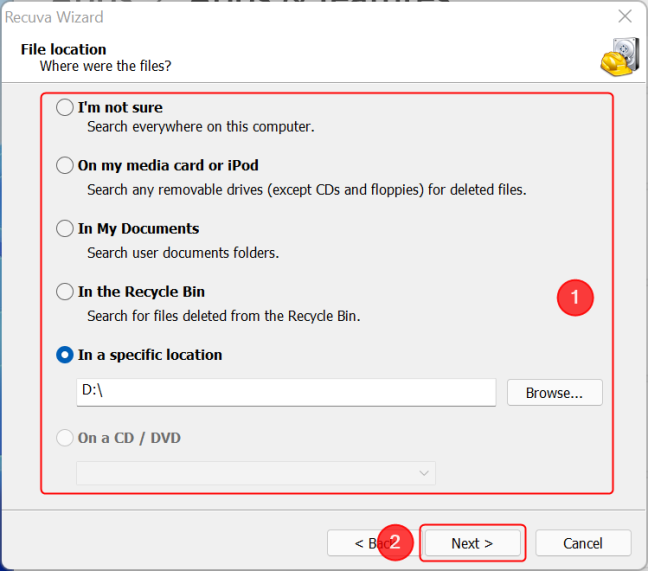 Choose the location where you want Recuva to look for the files
Now you get to a screen from which you can start the scan for deleted files. There is a tickbox to enable "Deep Scan," which by default is unticked.
The first time you run Recuva, we recommend that you do the standard scan. Most of the time it should find your files just fine. If it does not, you can always run the scan a second time around, this time with "Enable Deep Scan" checked. It takes a lot longer, but it returns better results for files that were deleted a long time ago. Click or tap Start and sit back to watch the magic happen.
Choose the location where you want Recuva to look for the files
Now you get to a screen from which you can start the scan for deleted files. There is a tickbox to enable "Deep Scan," which by default is unticked.
The first time you run Recuva, we recommend that you do the standard scan. Most of the time it should find your files just fine. If it does not, you can always run the scan a second time around, this time with "Enable Deep Scan" checked. It takes a lot longer, but it returns better results for files that were deleted a long time ago. Click or tap Start and sit back to watch the magic happen.
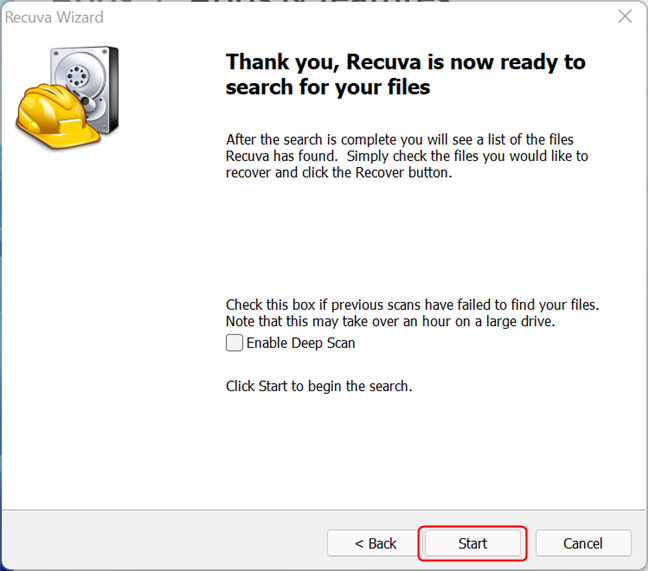 Press Start to continue
When the search process is done, the deleted files that can be recovered are displayed in a list. Select the files you want to recover and then press the Recover button.
Press Start to continue
When the search process is done, the deleted files that can be recovered are displayed in a list. Select the files you want to recover and then press the Recover button.
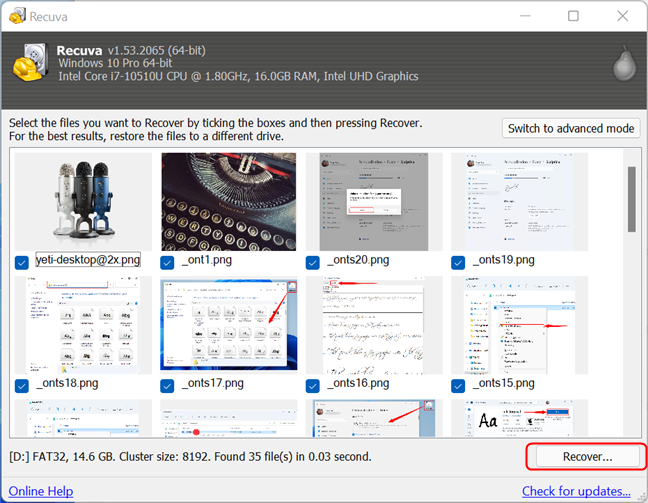
 Select the files you want to restore and click or tap on Recover
Remember to save the files to another medium than the drive or partition you recover them from. For example, because we wanted to recover files from a USB memory stick, we recovered them to the local SSD.
Select the files you want to restore and click or tap on Recover
Remember to save the files to another medium than the drive or partition you recover them from. For example, because we wanted to recover files from a USB memory stick, we recovered them to the local SSD.
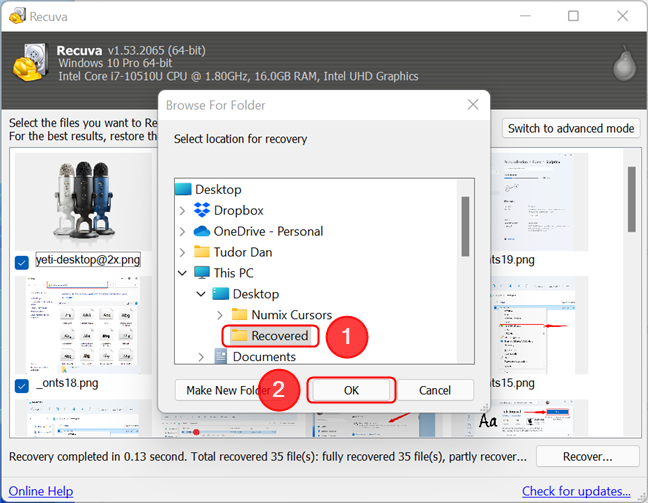 Pick a location for the recovered files
After completing the process, the program displays a confirmation window, which you can dismiss by pressing OK.
Pick a location for the recovered files
After completing the process, the program displays a confirmation window, which you can dismiss by pressing OK.
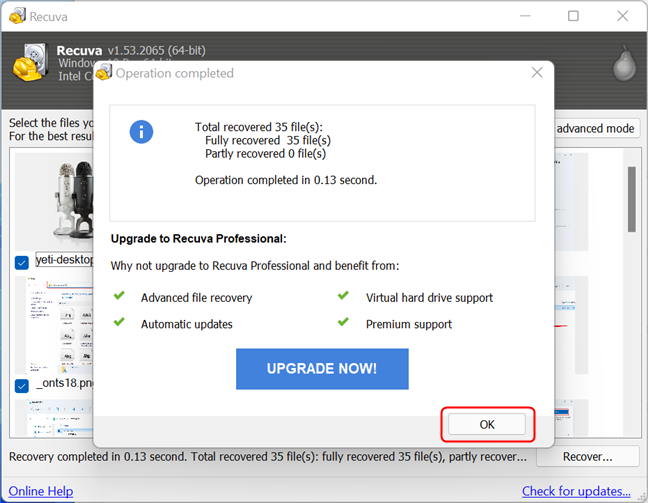 The confirmation window shows the number of recovered files
When you have got all your files recovered, you can close Recuva. The files should now be available in the folder you indicated.
The confirmation window shows the number of recovered files
When you have got all your files recovered, you can close Recuva. The files should now be available in the folder you indicated.
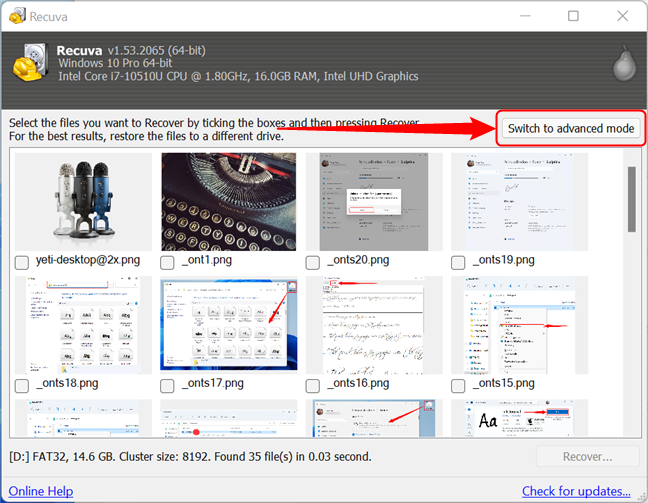 Switch to Advanced mode in Recuva
This makes the files appear in a list that displays the path of their original location, as well as other useful info. On the right side of the window, you also get three tabs where you can preview files and see more details about them, like their size, state, and creation time. Also, you can see their header coded in hexadecimal. Go ahead and select the files you want to recover. If you want to recover all the files found, you can tick the box before Filename, which selects all the files from the list. Press Recover to start the process.
Switch to Advanced mode in Recuva
This makes the files appear in a list that displays the path of their original location, as well as other useful info. On the right side of the window, you also get three tabs where you can preview files and see more details about them, like their size, state, and creation time. Also, you can see their header coded in hexadecimal. Go ahead and select the files you want to recover. If you want to recover all the files found, you can tick the box before Filename, which selects all the files from the list. Press Recover to start the process.
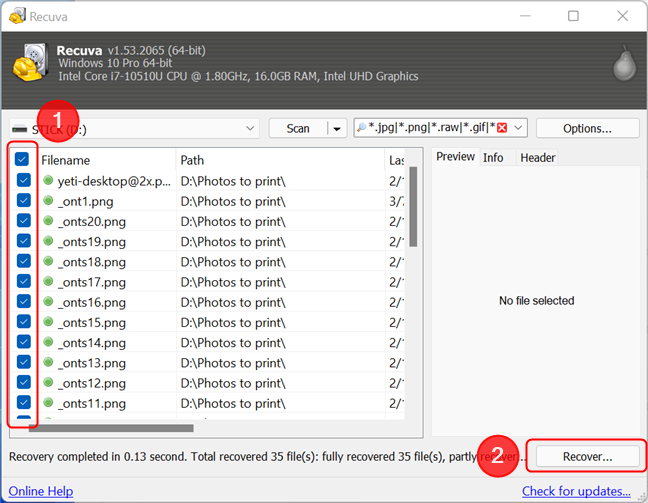 Select the files you want to restore, then press Recover
If you want to initiate another recovery process from the Advanced view, use the drop-down lists in the upper part of the window to set the location, the scan type, and the file type. Finally, to change the app settings, click or tap on the Options button.
Select the files you want to restore, then press Recover
If you want to initiate another recovery process from the Advanced view, use the drop-down lists in the upper part of the window to set the location, the scan type, and the file type. Finally, to change the app settings, click or tap on the Options button.
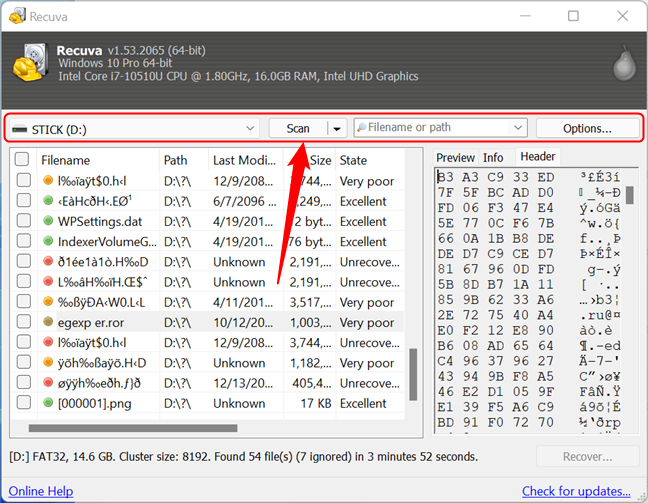 Initiate a new scan in Recuva using Advanced mode
Before you begin
When you try to recover deleted files, it is essential to use as little as possible the partition or device where the deleted files were found. That is because when a file has been deleted, the reference to it has been taken away, but the file itself is still there. If new files are created on the drive, partition, or folder where the deleted files were stored, there is a high risk that these new files will overwrite the existing data, making it impossible for you to recover the old files. So when you want to recover a file from a partition, it is best to avoid installing a program or a game, downloading a movie, etc. on the same partition. This also means that, if you want to recover files from your "C:" drive, you should not install Recuva on that drive.Where to download and install Recuva
Recuva has two versions. Recuva Standard is free, while the Professional version (which includes automatic updating and virtual hard drive support), costs 19.95 USD. Recuva was previously available both in an installer and a portable version, but this is no longer the case. At the time of publishing, the latest installer version was 1.53. You can download the free version of Recuva from here. After downloading it, go to the download location and run the installer. If you get a UAC warning, press Yes. In the install wizard, click or tap on Install if you want to use the default settings.How to recover deleted files with Recuva
By default, Recuva runs the recovery wizard when you launch the app. You can disable this behavior in the app settings later or just check the box in the lower-left corner of the window. For now, let’s use the wizard. Press Next.How to work with Recuva in advanced mode for in-depth file recovery
Once the scan is done, and you are shown the results, you can also switch to the so-called advanced mode by pressing the corresponding button.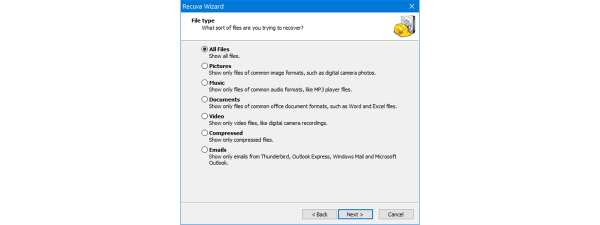
Discussion (10)
Used Recuva for the first time, all went well until I hit the recover button.The folder I sent the recovered files to has701 video loads totalling 416GB, some are named correctly while others are not and some recovered only 1kb of a file which would not play and I get “The file exists, but does not seem to have any video”. Also many videos are correct, name, date, time, length. Finally the most recent videos I thought was 283 but only 202 were found and all were 1kb.Any ideas? What am I doing wrong?
Thanks
Robert
Free tools for lost or deleted data recovery is now in demand and a very large number of people search for free tools instead of paid ones. Recuva, Stellar are some best recommendations for free data recovery.
Respected Sir,
I successfully recovered the damaged file from my Pen Drive but after restoring to hard drive its not opening. what should I Do?
The file might be corrupted. Repeat the recovery process and see if it helps. If it doesn’t, the file is lost, i’m afraid.
Hey! What a great topic! This is comparable to datarecoverysoftware on which I am currently using right now. I work at the IT dept.
Recuva is a really good Data recovery software, free and easy to use. I’d also recommend Acethinker Disk Recovery which I have been using for many years. Free as well, and it works on computer, SD card, USB drive and many other devices. Share it here as an alternative to Recuva.
My problem is i when i browse on spesific folder and click at the phone the task shiw the folder cant be used choose another folder. Can you help me plz.
OK Deep Scan completed, I retained file structure in my scan. Now moving all found files to new clean drive, total of 466 GBs to recover to new drive. Now I know some of these are left overs from web pages & plain junk, I don’t need. Question What is the best way to compare these files with the Original file structure on the Original C drive and then merge or migrate them back together, hopefully in C drive where they started out on without added stuff I don’t need? or work not needed.
Hi, thanks so very much for these suggestions!…
Regards
i just used recuva to find half of a 2nd hard drive that was accidentally left unchecked when doing re-imaging of the c: drive. recuva found everything, the only thing i had to do was rename them back to original. this saved me months of rescanning all the images.