


Telnet was developed as a network protocol in 1969, and it was famous for many years until the rise of internet broadband and more secure alternatives. You might be surprised to learn that even today, there are still plenty of Telnet servers and resources available, including several active communities. Start with this guide if you are curious to know more about using Telnet. We will show how to install the Telnet Client in Windows, how to start and end a Telnet session, where to get information about Telnet commands, and where to find Telnet servers to connect to.
NOTE: The information we share in this tutorial applies to Windows 10, Windows 11, and older versions of Microsoft’s operating systems like Windows 7. Also, if you’d like to know more about Telnet, check this article first: What is Telnet & What can it still be used for?.
 How to install Telnet in Windows from CMD
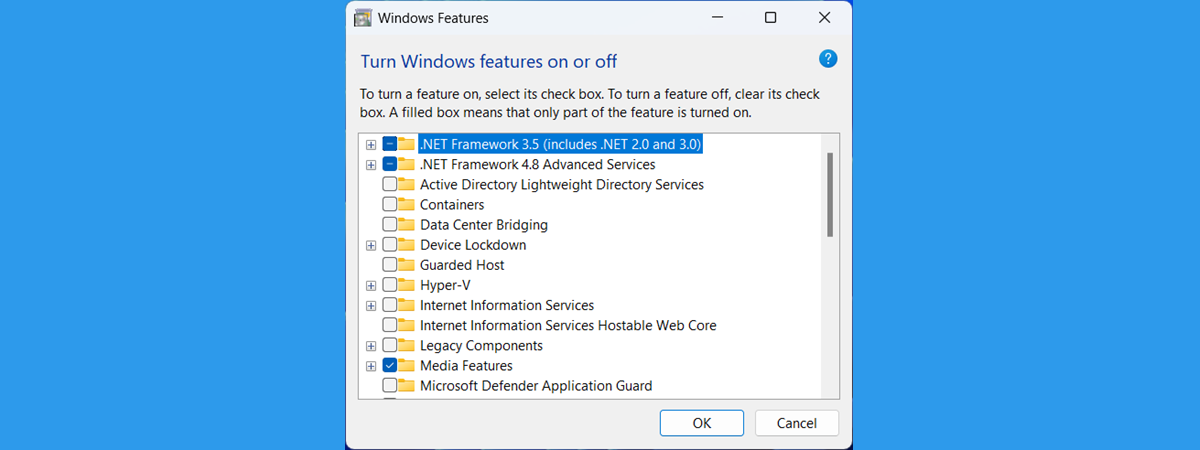
If you prefer clicking instead of running commands, use the search in Windows to find and open Windows Features.
How to install Telnet in Windows from CMD
If you prefer clicking instead of running commands, use the search in Windows to find and open Windows Features.
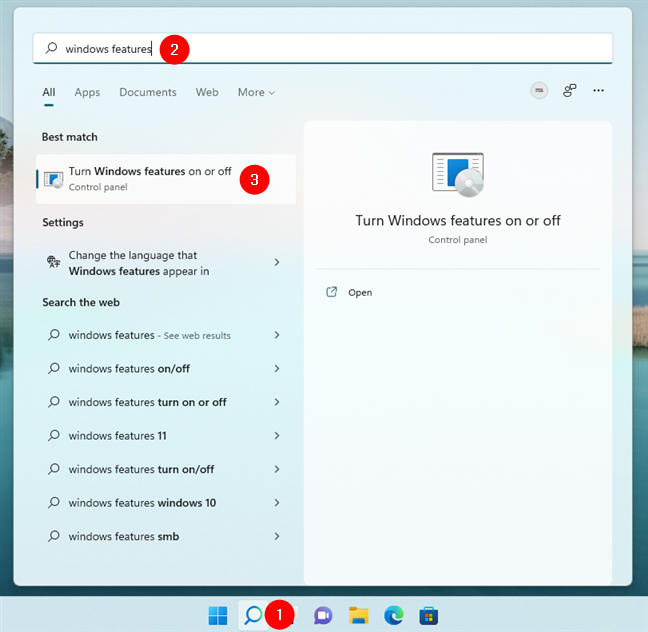
 Search and open Windows Features
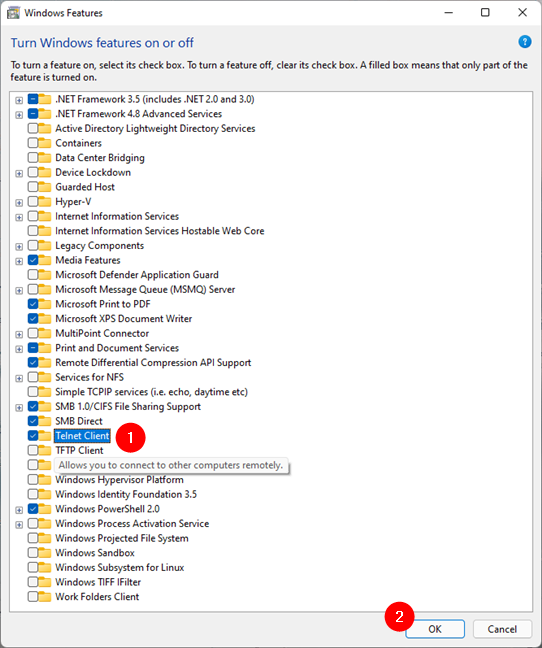
Then, check the Telnet Client option, press OK, and wait for it to be installed. When done, press Close.
Search and open Windows Features
Then, check the Telnet Client option, press OK, and wait for it to be installed. When done, press Close.
 How to activate Telnet Client in Windows
TIP: For more detailed information on installing Windows Features, read How to add or remove Windows features or components.
Regardless of how you choose to activate the Telnet Client in Windows, there is no need to restart your computer once it’s done.
How to activate Telnet Client in Windows
TIP: For more detailed information on installing Windows Features, read How to add or remove Windows features or components.
Regardless of how you choose to activate the Telnet Client in Windows, there is no need to restart your computer once it’s done.
 Start Telnet in Command Prompt
The slightly faster way to open the Telnet Client and Command Prompt at the same time is to search for the word telnet. In Windows 10, write telnet in the taskbar search box. In Windows 11, click the search button on the taskbar and type telnet. Either way, once the search results are displayed, click or tap on the Telnet shortcut.
Start Telnet in Command Prompt
The slightly faster way to open the Telnet Client and Command Prompt at the same time is to search for the word telnet. In Windows 10, write telnet in the taskbar search box. In Windows 11, click the search button on the taskbar and type telnet. Either way, once the search results are displayed, click or tap on the Telnet shortcut.
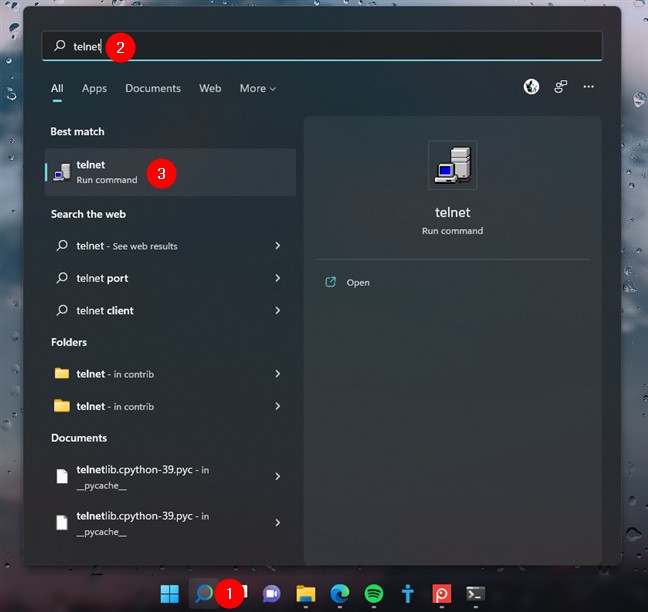
 Run Telnet from search
Then, no matter which method you chose, the end result is a Command Prompt window running a Telnet session.
Run Telnet from search
Then, no matter which method you chose, the end result is a Command Prompt window running a Telnet session.
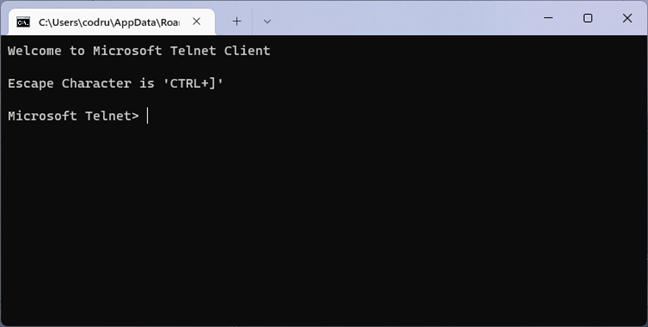 Telnet is running in CMD
 How to connect to a Telnet server
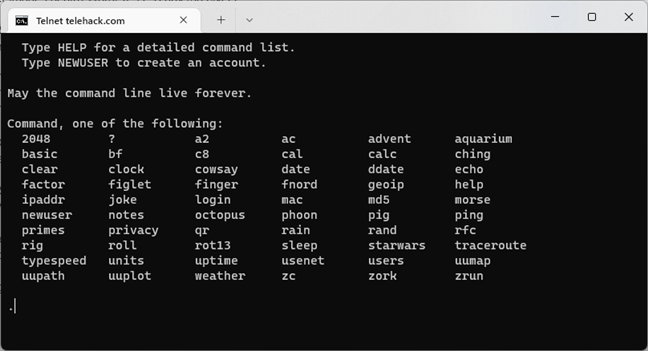
Then, once the connection to the Telnet server is established, you can use all the commands available on it to access its features, tools, and even games (if that server has some). Here’s a view of what’s available on the Telehack server we used in our example:
How to connect to a Telnet server
Then, once the connection to the Telnet server is established, you can use all the commands available on it to access its features, tools, and even games (if that server has some). Here’s a view of what’s available on the Telehack server we used in our example:
 Connection to a Telnet server
Then, you can have fun on your favorite Telnet server. 🙂
Connection to a Telnet server
Then, you can have fun on your favorite Telnet server. 🙂
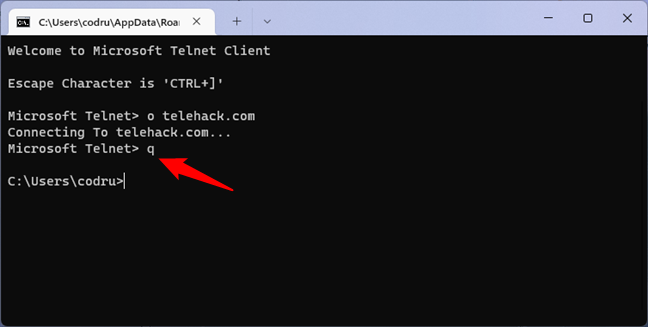 Quit a Telnet server
Then, to completely close the Telnet session, write q (from quit) and press Enter on your keyboard.
Quit a Telnet server
Then, to completely close the Telnet session, write q (from quit) and press Enter on your keyboard.

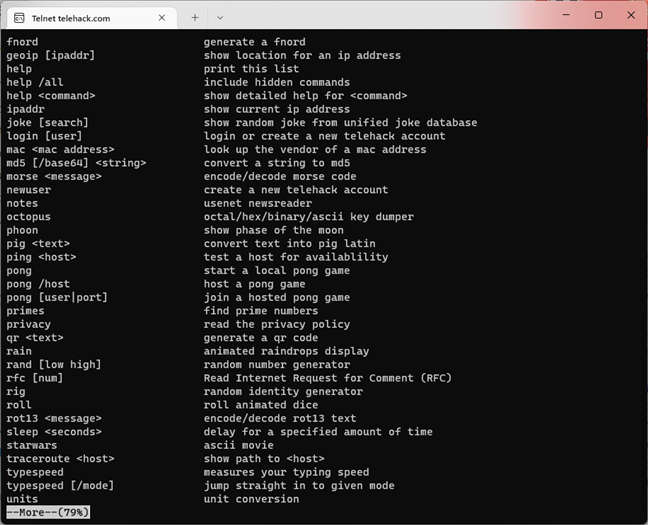
 Finding out the commands available on a Telnet server
Here’s an example of some of the commands available on the Telehack Telnet server we connected to earlier:
Finding out the commands available on a Telnet server
Here’s an example of some of the commands available on the Telehack Telnet server we connected to earlier:
 Commands on a Telnet server
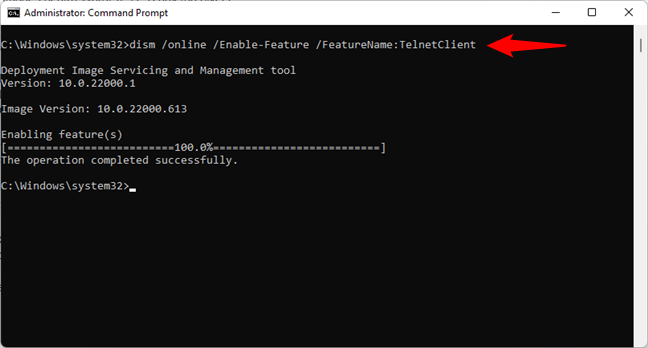
How to install the Telnet Client in Windows
To be able to connect to Telnet servers, you need the Telnet Client installed on your computer. This Windows feature is not enabled by default, so you must install it manually. You can do that using the Windows Features graphical tool in Windows, but we’re pretty certain that, if you want to use Telnet, you’ll prefer to get it from the command line. 🙂 This is also the fastest way to install the Telnet Client on any Windows computer. Open Command Prompt as an administrator and run:dism /online /Enable-Feature /FeatureName:TelnetClient
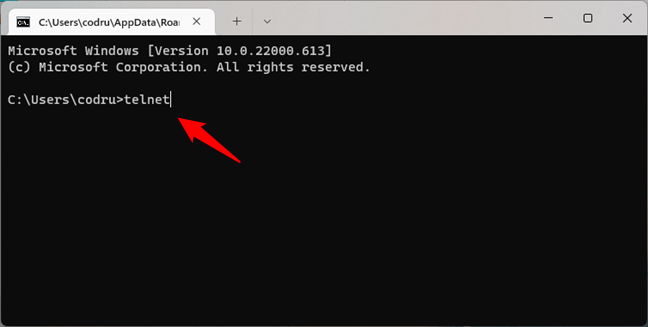
How to start the Telnet Client in Windows
Once the Telnet Client is installed, you can start it either from the Command Prompt or by using Windows' search function. If you love Telnet's text-based command line, you'll probably prefer using the Command Prompt. If that's the case, start the Command Prompt, type the command telnet inside it, and press Enter on your keyboard.How to connect to a Telnet server
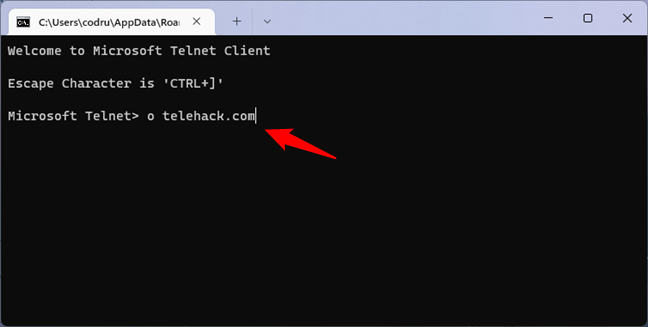
To connect to a Telnet server, you have to run the command:o servername [port]
The port argument of the command is not mandatory. If you do not enter one, the default port 23 will be used.
For example, if you’d like to connect to the Telehack Telnet server, presented by its maintainers as “a simulation of a stylized arpanet/usenet, circa 1985-1990,” this is the command you should run:
o telehack.com
How to disconnect from a Telnet server & close a Telnet session
When you want to disconnect from a Telnet server, use the "Ctrl + ]" keyboard combination.Telnet commands
If you want to know all the (few) standard Telnet commands available and to find out more about what they do, check this list from Microsoft: Telnet commands. However, note that these commands are only the default ones, used in the Telnet Client. The commands available on Telnet servers differ depending on what those servers allow. Usually, typing help on a Telnet server will give you the list and details on what the commands on it are and do.Telnet servers
If you'd like to find Telnet servers to connect to and work with, there are several good websites available that offer plenty of Telnet resources. We would like to highlight two of them:- Jumpjet.com Telnet - it has a long and well-organized list of Telnet places.
- Telnet BBS - this site has the most extensive list of Telnet-accessible bulletin board systems on the internet.
Discussion (5)
Very helpful
I bought an activate key from &&& windows 8.1 key sale&&& on bing,it working fine now, I think you may need it ,just search for it from bing,you’ll get it.
I would like to know what can i use Telnet for?
I mean, it sounds interesting and stuff…but why would I use it? This is what I did not get from this tutorial.
We will publish a mini-series of articles about Telnet. More information and explanations are yet to come.
So, did you publish additional articles?