

If you have some files and folders that you want to keep safe from prying eyes, you might want to hide them so others can’t access them easily. Luckily, Windows allows you to hide all kinds of items, using only built-in tools like File Explorer or commands run in PowerShell or Command Prompt. In this guide, I show you how to hide both files and folders in Windows 10 and Windows 11:
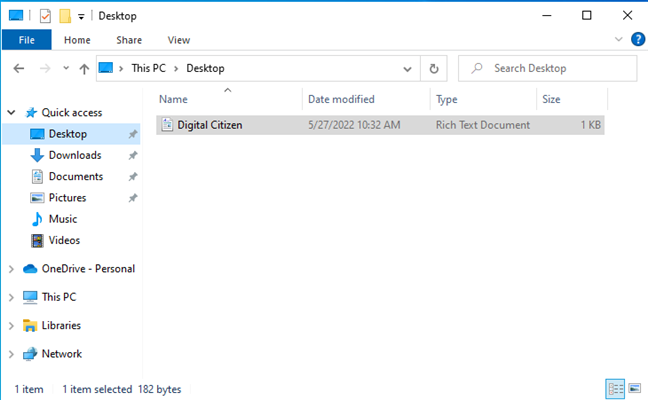
 Navigate to the file or folder you want to hide
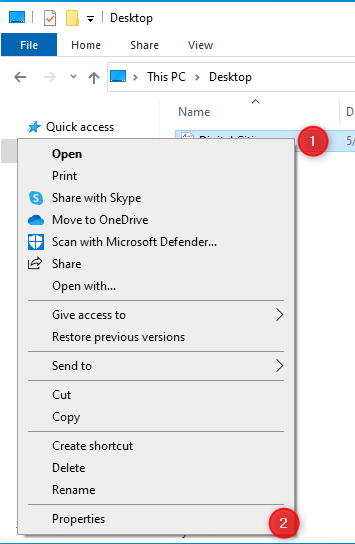
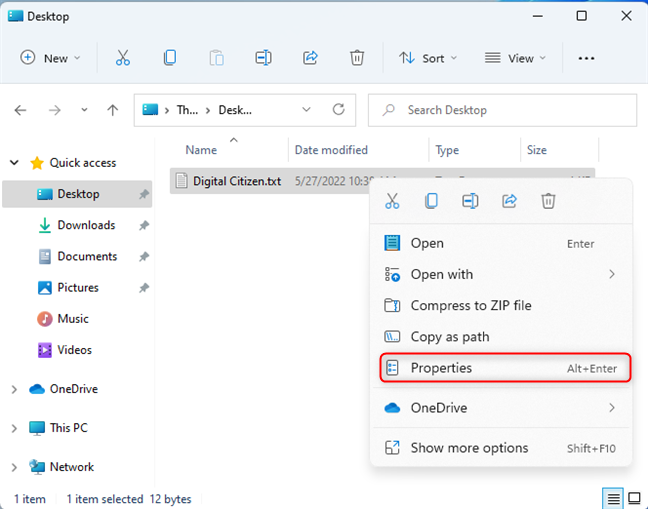
Right-click or press and hold on the file or folder and, in the menu that appears, click or tap Properties. You can also select the file/folder and press ALT + Enter on your keyboard to achieve the same result.
Navigate to the file or folder you want to hide
Right-click or press and hold on the file or folder and, in the menu that appears, click or tap Properties. You can also select the file/folder and press ALT + Enter on your keyboard to achieve the same result.
 Right-click and choose Properties
You see the Properties window for the selected file or folder. Then, in the General tab, check the Hidden box, and click or tap OK.
Right-click and choose Properties
You see the Properties window for the selected file or folder. Then, in the General tab, check the Hidden box, and click or tap OK.

 Choose Hidden and press OK
If you set a file as hidden, the change is applied immediately.
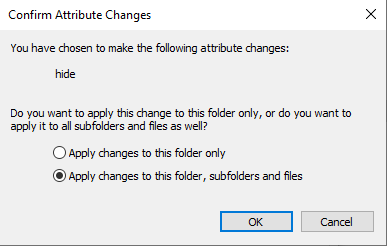
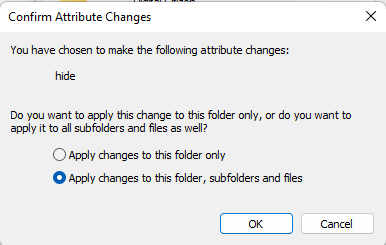
If you set a folder as hidden, you see a prompt named “Confirm Attribute Changes.” Next, you’re asked whether you want to apply the change only to the folder or also its subfolders and files. Most users will probably want the second option, “Apply changes to this folder, subfolders and files.” Select the option you prefer and press OK twice.
Choose Hidden and press OK
If you set a file as hidden, the change is applied immediately.
If you set a folder as hidden, you see a prompt named “Confirm Attribute Changes.” Next, you’re asked whether you want to apply the change only to the folder or also its subfolders and files. Most users will probably want the second option, “Apply changes to this folder, subfolders and files.” Select the option you prefer and press OK twice.
 Confirm Attribute Changes
The change is applied according to your choice. After setting the file or folder as hidden, its icon is grayed out to signal the attribute change.
Confirm Attribute Changes
The change is applied according to your choice. After setting the file or folder as hidden, its icon is grayed out to signal the attribute change.

 The selected file is marked as hidden and its icon grayed out
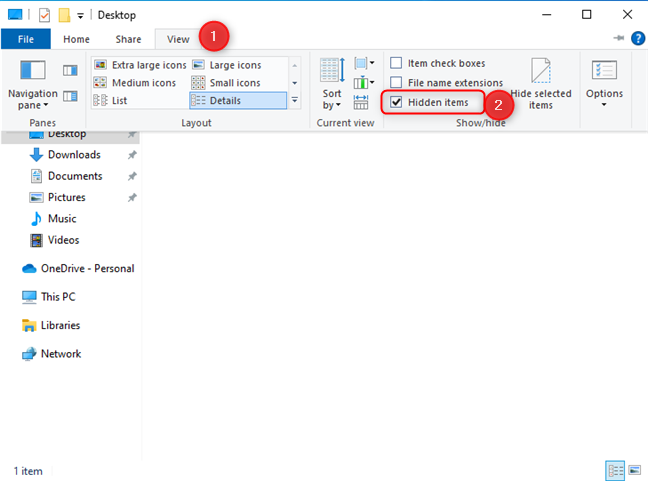
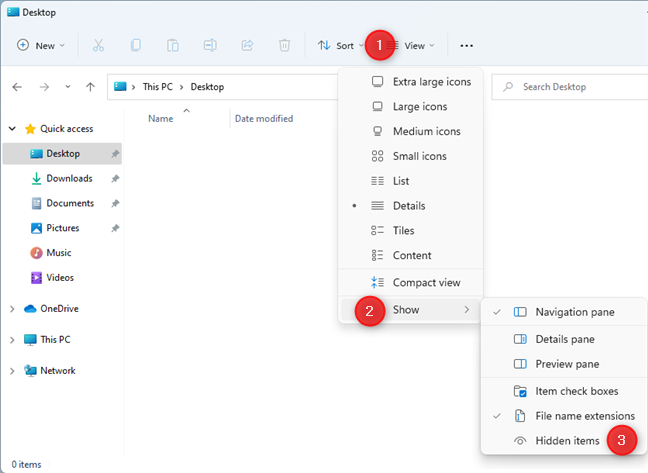
To completely hide this file from view, as well as all other hidden files or folders, click or tap the View tab in File Explorer and deselect the “Hidden items” option.
The selected file is marked as hidden and its icon grayed out
To completely hide this file from view, as well as all other hidden files or folders, click or tap the View tab in File Explorer and deselect the “Hidden items” option.
 How to stop displaying hidden items
TIP: If you want to password-protect a folder, read this guide: 8 tools to password-protect your folders in Windows.
How to stop displaying hidden items
TIP: If you want to password-protect a folder, read this guide: 8 tools to password-protect your folders in Windows.
 Right-click and choose Properties
In the Properties window of the selected file or folder, check the Hidden box in the General tab, and click or tap OK.
Right-click and choose Properties
In the Properties window of the selected file or folder, check the Hidden box in the General tab, and click or tap OK.
Set the file or folder as hidden
If you change the attributes of a folder, you’re also asked to confirm whether you want to apply the Hidden attribute to this folder only or its subfolders and files too. Most people prefer to choose “Apply changes to this folder, subfolder and files.” After making your choice, press OK twice, and you’re done.
 Confirm Attribute Changes
The selected file or folder is marked as hidden, and its icon becomes grayed out. To completely hide it from view, click or tap the View button at the top, choose Show, and then deselect the Hidden items option in the File Explorer window.
Confirm Attribute Changes
The selected file or folder is marked as hidden, and its icon becomes grayed out. To completely hide it from view, click or tap the View button at the top, choose Show, and then deselect the Hidden items option in the File Explorer window.
 Set Windows 11 to stop displaying hidden items
All hidden files and folders are no longer shown in Windows 11.
TIP: If you want to create a password-protected ZIP file that others can’t open, read this guide: 2 ways to create a password-protected ZIP file in Windows.
Set Windows 11 to stop displaying hidden items
All hidden files and folders are no longer shown in Windows 11.
TIP: If you want to create a password-protected ZIP file that others can’t open, read this guide: 2 ways to create a password-protected ZIP file in Windows.
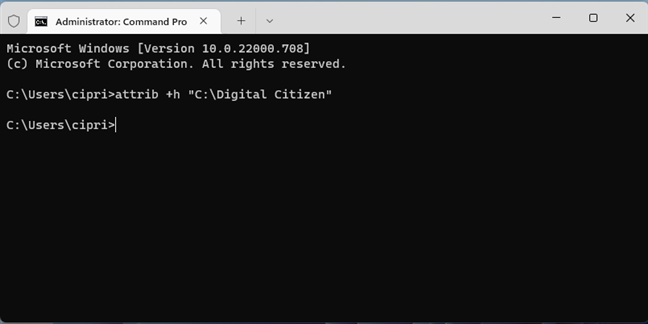
 Use the attrib +h command in CMD
After you press Enter, that file or folder is marked as hidden.
NOTE: According to other websites on the internet and Microsoft’s documentation, for the attrib command, you should add the “/s /d” parameters to the command shared earlier so that it applies to a folder, all its subfolders, and files. Unfortunately, I’ve tested this in Windows 10 and Windows 11, and it doesn’t work. If you’re using these parameters on a folder, only the folder is set as hidden. The files and subfolders inside that folder remain as they are.
Use the attrib +h command in CMD
After you press Enter, that file or folder is marked as hidden.
NOTE: According to other websites on the internet and Microsoft’s documentation, for the attrib command, you should add the “/s /d” parameters to the command shared earlier so that it applies to a folder, all its subfolders, and files. Unfortunately, I’ve tested this in Windows 10 and Windows 11, and it doesn’t work. If you’re using these parameters on a folder, only the folder is set as hidden. The files and subfolders inside that folder remain as they are.
 Set a file as hidden from PowerShell
If you want to hide a folder, the command is identical:
Set a file as hidden from PowerShell
If you want to hide a folder, the command is identical:
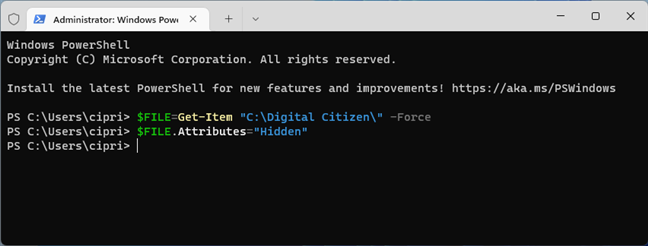
 Set a folder as hidden from PowerShell
If you also want to set all the files and subfolders inside your folder as hidden, you should also run this command alongside the previous two:
Set a folder as hidden from PowerShell
If you also want to set all the files and subfolders inside your folder as hidden, you should also run this command alongside the previous two:
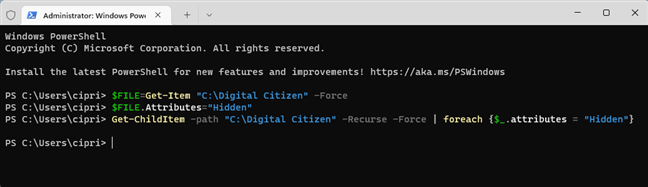
 Set a folder's subfolders and files as hidden
PowerShell runs these commands without providing any feedback. If you typed everything correctly, all the items you chose should be marked by Windows as hidden. If File Explorer is set to “Don’t show hidden files, folders, or drives,” these items should no longer be visible.
TIP: If you want to hide more than just files and folders, here’s how to hide (or unhide) any partition in Windows.
Set a folder's subfolders and files as hidden
PowerShell runs these commands without providing any feedback. If you typed everything correctly, all the items you chose should be marked by Windows as hidden. If File Explorer is set to “Don’t show hidden files, folders, or drives,” these items should no longer be visible.
TIP: If you want to hide more than just files and folders, here’s how to hide (or unhide) any partition in Windows.
How to hide files and folders in Windows 10 using File Explorer
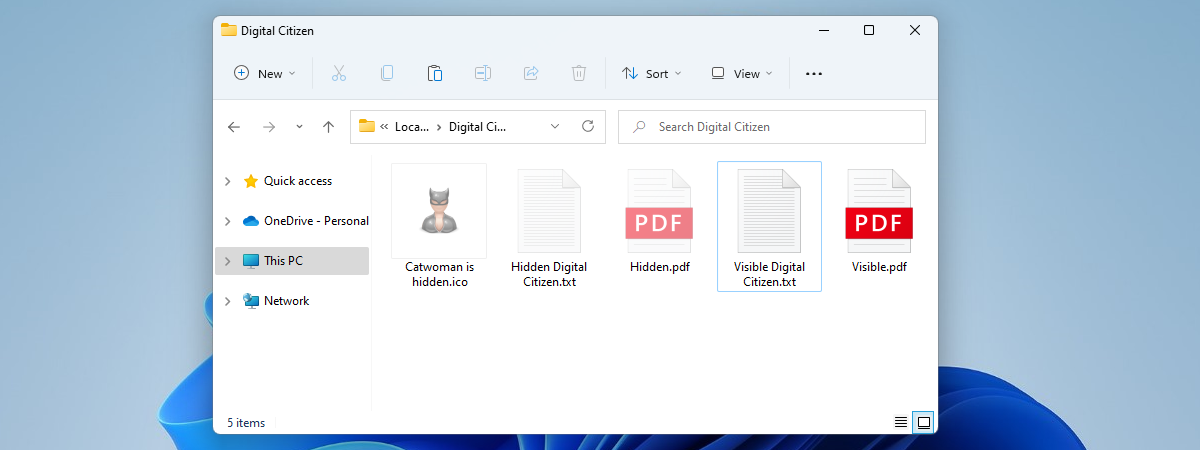
If you’re using Windows 10, open File Explorer and navigate to the file or folder you want to hide. I chose to hide a file from my desktop.How to hide files and folders in Windows 11 using File Explorer
If you’re using Windows 11, the steps are the same as the ones in Windows 10, but the File Explorer window looks different. Therefore, I think it’s best to have a dedicated section for the users of this operating system. Start by opening File Explorer (Windows + E) and navigating to the file or folder you want to hide. Next, select it and press ALT + Enter on your keyboard or right-click (or press and hold) on it and choose Properties in the context menu.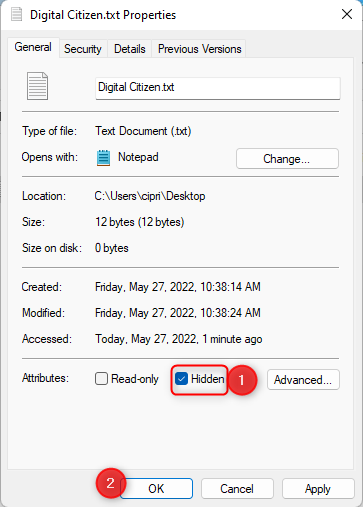
How to hide files and folders using Command Prompt
Open Command Prompt as administrator and then run this command:attrib +h “path to file or folder”
Replace “path to file or folder” with the actual path towards the file or folder you want to hide, similar to the screenshot below.
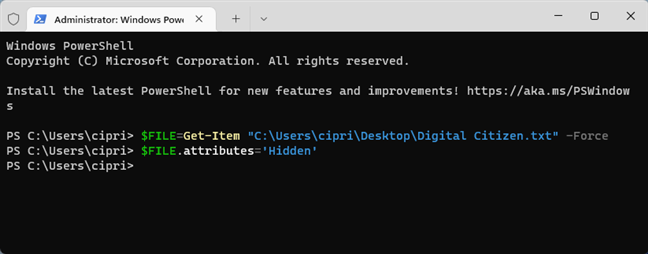
How to set a file or folder as hidden from PowerShell
You can open PowerShell as administrator or a PowerShell tab in a Windows Terminal window and set a file as hidden, using the following command:$FILE=Get-Item ”path to file\filename.extension” -Force
$FILE.attributes='Hidden'
You should replace “path to file” with the actual path to the file you want to hide and “filename.extension” with the exact name and extension of the same file, like in the screenshot below.
$FILE=Get-Item ”path to folder” -Force
$FILE.Attributes=”Hidden”
Replace ”path to folder” with the actual path towards your folder. See the screenshot below for an example.
Get-ChildItem -path “path to folder” -Recurse -Force | foreach {$_.attributes = "Hidden"}
Things should look similar to the screenshot below.

Discussion (2)
These instructions are useful as far as they go, but unfortunately they fail to answer one crucial question: how do I then access the hidden files? Without knowing that ahead of time, I’d be silly to hide my files – I’d wind up hiding them from myself too!
Hi Lary,
At the end of the article, we recommend another one, named: How to see all the hidden files on a Windows computer
You can find it here: https://www.digitalcitizen.life/view-all-hidden-files-folders-windows-10/