

If you’re having trouble seeing small text or details on your computer screen, you might want to use the Magnifier tool to zoom in on certain areas. The Magnifier is a built-in accessibility feature in Windows that allows you to enlarge part or all of your screen, making it easier to read and navigate. In this article, I’ll show you how to turn the Magnifier on, how to use it to zoom in on a Windows computer, and how to configure its settings to work the way you need:
NOTE: Magnifier is available in all editions of Windows 11 and Windows 10, and it works exactly the same in both operating systems. To keep things simple, in this guide, I’m using screenshots taken mainly in Windows 11.
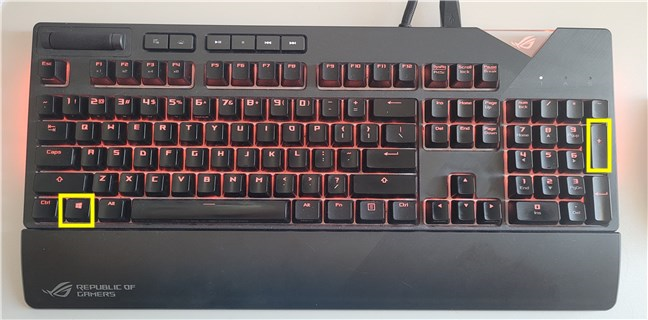
 To launch Magnifier, press the Windows key + Plus sign (+)
Press the Windows key + Esc on your keyboard to close the Magnifier.
To launch Magnifier, press the Windows key + Plus sign (+)
Press the Windows key + Esc on your keyboard to close the Magnifier.
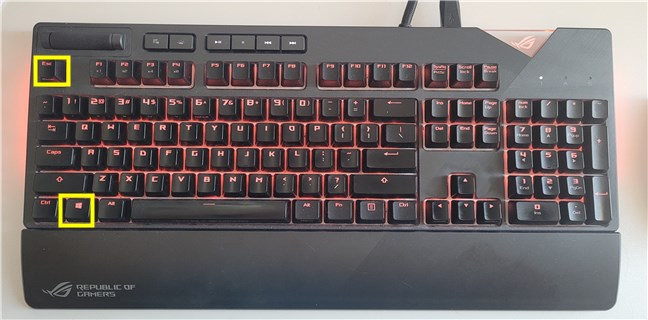 To exit Magnifier, press the Windows logo key + Esc
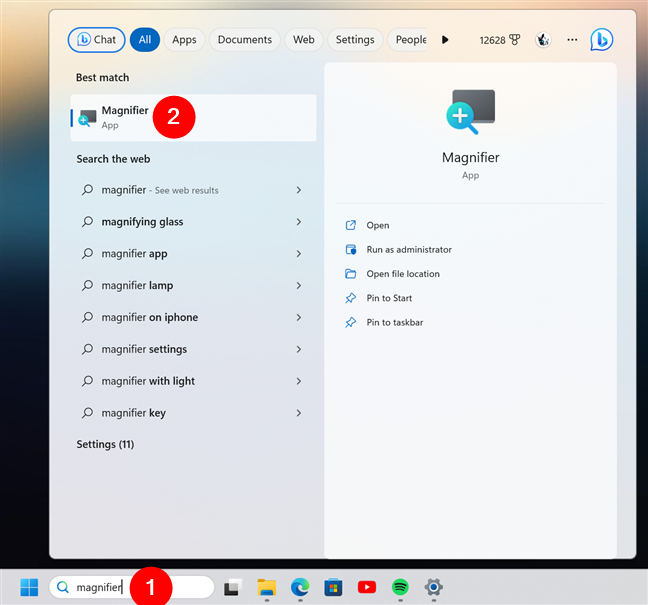
 You can open Windows' Magnifier using search
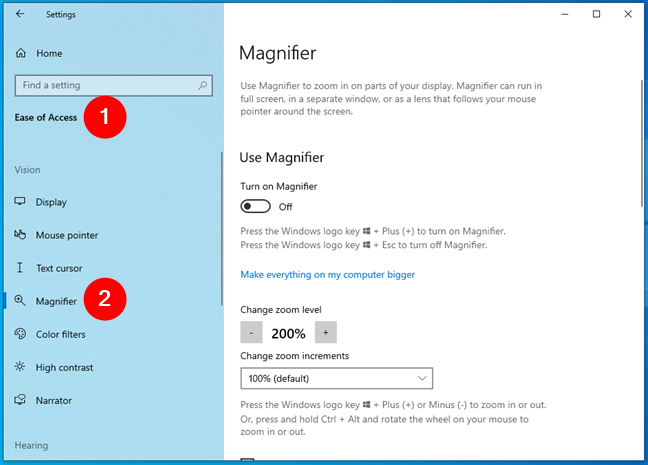
 Settings > Ease of Access is where you can find the Magnifier tool in Windows 10
On the Magnifier settings page, enable the Turn on Magnifier switch.
Settings > Ease of Access is where you can find the Magnifier tool in Windows 10
On the Magnifier settings page, enable the Turn on Magnifier switch.
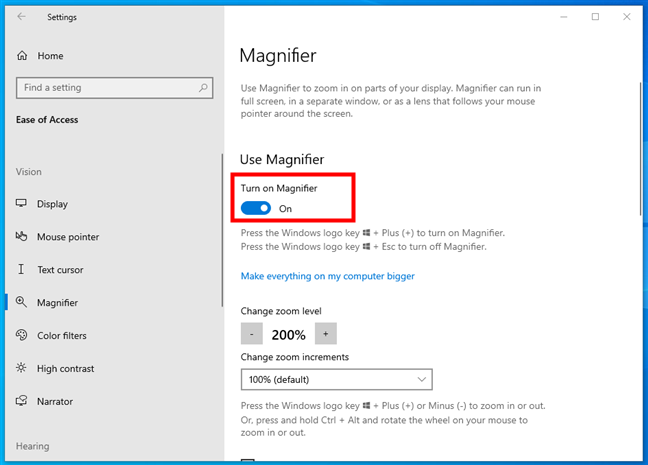 How to enable Windows' Magnifier
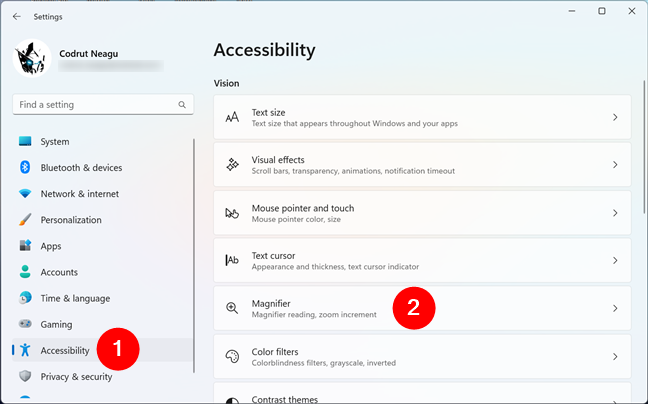
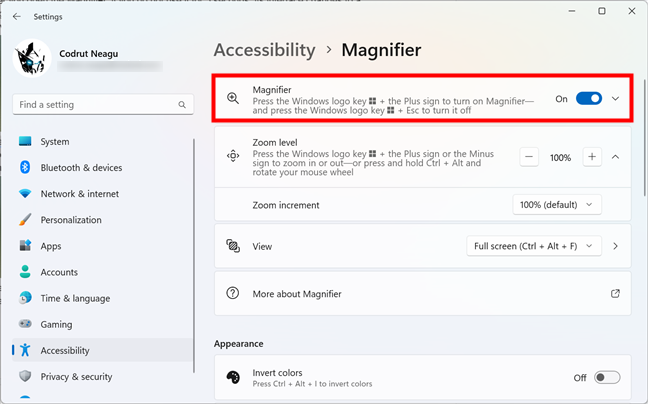
 Settings > Accessibility is where you can find the Magnifier tool in Windows 11
On the Magnifier settings page, turn on the switch next to Magnifier.
Settings > Accessibility is where you can find the Magnifier tool in Windows 11
On the Magnifier settings page, turn on the switch next to Magnifier.
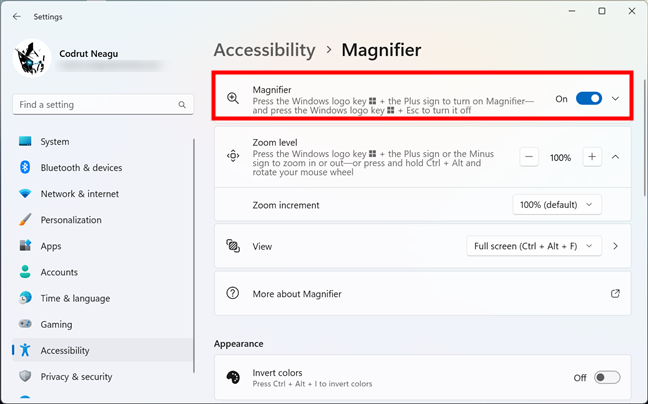 How to enable Windows' Magnifier
This page also contains a series of settings that control how the Magnifier works: I’ll get to them in the next sections of this guide. For now, let’s see…
How to enable Windows' Magnifier
This page also contains a series of settings that control how the Magnifier works: I’ll get to them in the next sections of this guide. For now, let’s see…
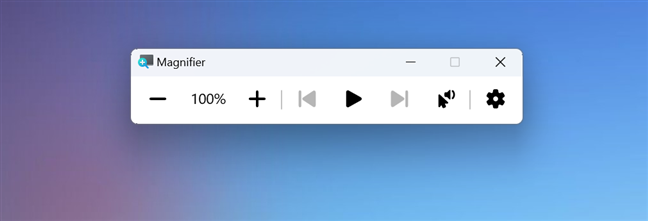
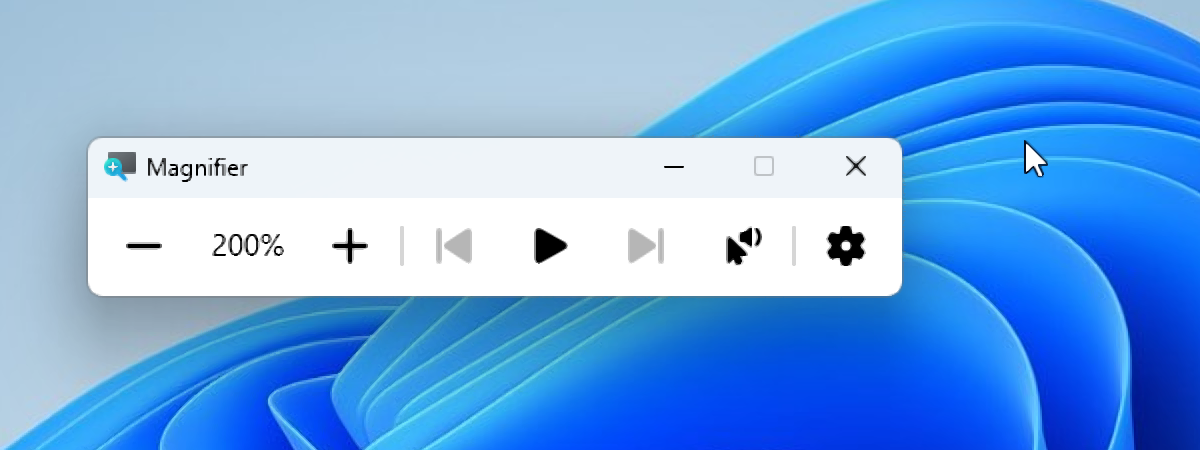
 Magnifier in Windows
You can use this window to adjust the zoom level, turn on reading mode, and access more settings. Let’s see how they all work:
Magnifier in Windows
You can use this window to adjust the zoom level, turn on reading mode, and access more settings. Let’s see how they all work:
 How to zoom in and out with Magnifier
You can also use these keyboard shortcuts to control the zoom level of the Magnifier:
How to zoom in and out with Magnifier
You can also use these keyboard shortcuts to control the zoom level of the Magnifier:
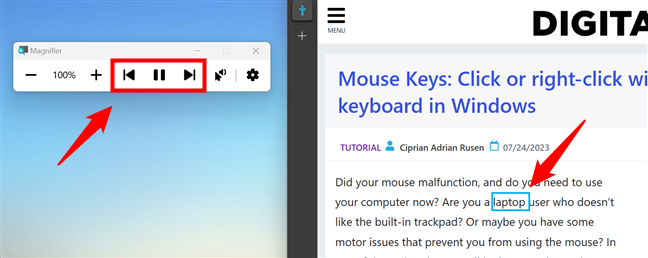
 How to read text using Magnifier
When reading text, a blue rectangle surrounds the currently spoken word. During reading, you can Pause the process if you need a break, and you can also skip to the next or previous sentence. As you can see in the next screenshot, there are three buttons in the Magnifier app that allow you to perform these actions. If you prefer, you can also use the following keyboard shortcuts:
How to read text using Magnifier
When reading text, a blue rectangle surrounds the currently spoken word. During reading, you can Pause the process if you need a break, and you can also skip to the next or previous sentence. As you can see in the next screenshot, there are three buttons in the Magnifier app that allow you to perform these actions. If you prefer, you can also use the following keyboard shortcuts:
 Pause and skip sentence buttons in Magnifier
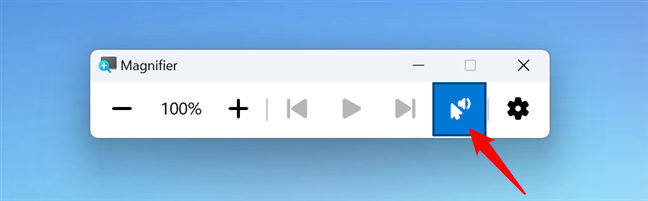
If you prefer, you can also instruct the Magnifier to start reading from where you click with your mouse. For that, press the “Read from here” button in the Magnifier app (it looks like a cursor with a speaker next to it) and click or tap the text you want it to read to you. Or you can use the Ctrl + Alt + Left mouse click shortcut to start reading from a certain location.
Pause and skip sentence buttons in Magnifier
If you prefer, you can also instruct the Magnifier to start reading from where you click with your mouse. For that, press the “Read from here” button in the Magnifier app (it looks like a cursor with a speaker next to it) and click or tap the text you want it to read to you. Or you can use the Ctrl + Alt + Left mouse click shortcut to start reading from a certain location.
 The Read from here button in Magnifier
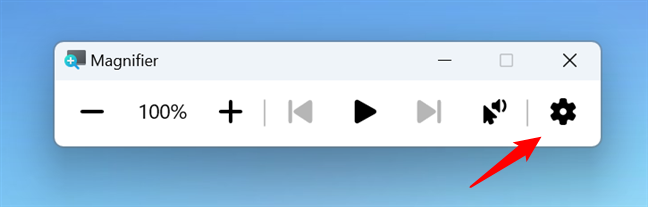
The last button from the Magnifier app, which looks like a cogwheel, allows you to customize the reading options. Click or tap on it to access them.
The Read from here button in Magnifier
The last button from the Magnifier app, which looks like a cogwheel, allows you to customize the reading options. Click or tap on it to access them.
 The reading settings button in Magnifier
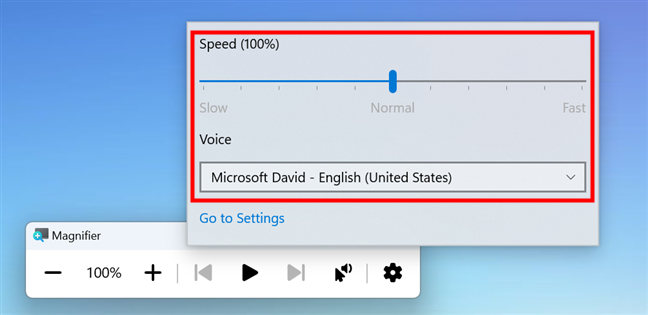
When you do that, a small window shows up with two reading options and a link to the Magnifier page from the Settings app. The options allow you to:
The reading settings button in Magnifier
When you do that, a small window shows up with two reading options and a link to the Magnifier page from the Settings app. The options allow you to:
 Reading settings available in Magnifier
That’s all there is to know on how to use the Magnifier to read text in Windows. To change all the settings available for this app, click or tap the “Go to Settings” link under Voice, or follow the steps shown in the first chapter of this guide (Settings > Accessibility > Magnifier). Then, read the next section to see what you can change about the way the Magnifier works:
TIP: Another feature that you might find useful alongside the Magnifier is Mouse Keys, which allows you to click or right-click using the keyboard instead of the mouse or trackpad.
Reading settings available in Magnifier
That’s all there is to know on how to use the Magnifier to read text in Windows. To change all the settings available for this app, click or tap the “Go to Settings” link under Voice, or follow the steps shown in the first chapter of this guide (Settings > Accessibility > Magnifier). Then, read the next section to see what you can change about the way the Magnifier works:
TIP: Another feature that you might find useful alongside the Magnifier is Mouse Keys, which allows you to click or right-click using the keyboard instead of the mouse or trackpad.
 The Magnifier main switch in Windows
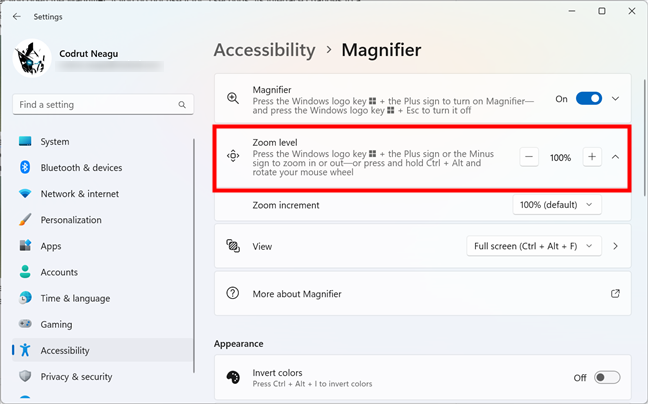
Then, you can change the Zoom level by pressing the minus (-) or plus (+) signs. They have the exact same effect as the zoom buttons shown in the Magnifier app, decreasing or increasing the zoom level.
The Magnifier main switch in Windows
Then, you can change the Zoom level by pressing the minus (-) or plus (+) signs. They have the exact same effect as the zoom buttons shown in the Magnifier app, decreasing or increasing the zoom level.
 Zoom level setting for Magnifier
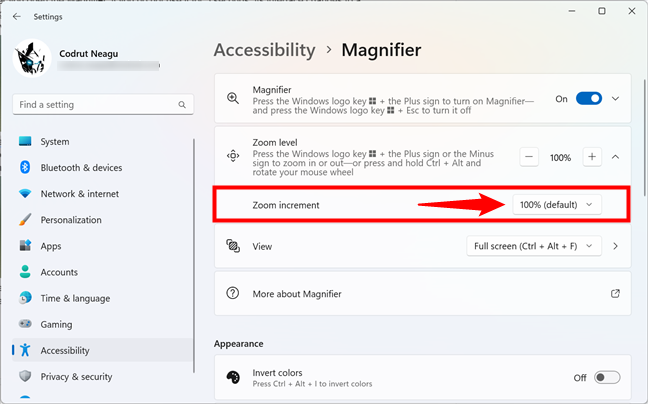
In addition to the zoom level, you can also adjust the Zoom increment. By default, it’s set to 100%, which means that a click or tap on the zoom buttons triggers a 100% increase/decrease of the zoom level. If that feels too much, you can change the Zoom increment to a smaller value (50%, 25%, 10%, or 5%). If you need an even higher zoom, you can select a value of 150%, 200%, or 400% for the Zoom increment.
Zoom level setting for Magnifier
In addition to the zoom level, you can also adjust the Zoom increment. By default, it’s set to 100%, which means that a click or tap on the zoom buttons triggers a 100% increase/decrease of the zoom level. If that feels too much, you can change the Zoom increment to a smaller value (50%, 25%, 10%, or 5%). If you need an even higher zoom, you can select a value of 150%, 200%, or 400% for the Zoom increment.
 The Zoom increment option
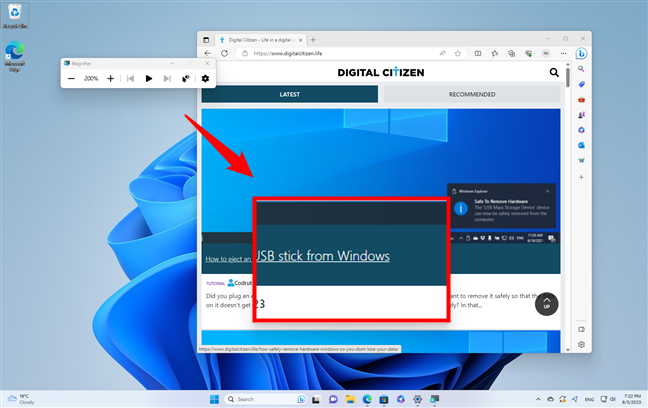
Last but not least in terms of personalizing how the Magnifier works is the way you see it. The View settings allow you to choose how the Magnifier zooms in or out. Click or tap the dropdown list next to the View entry and select the mode you prefer:
The Zoom increment option
Last but not least in terms of personalizing how the Magnifier works is the way you see it. The View settings allow you to choose how the Magnifier zooms in or out. Click or tap the dropdown list next to the View entry and select the mode you prefer:
 The Lens view of Windows' Magnifier
TIP: If you want to switch between full-screen, lens, and docked modes on the fly, press Ctrl + Alt + M while the Magnifier is open.
The Lens view of Windows' Magnifier
TIP: If you want to switch between full-screen, lens, and docked modes on the fly, press Ctrl + Alt + M while the Magnifier is open.
 Appearance settings for Magnifier
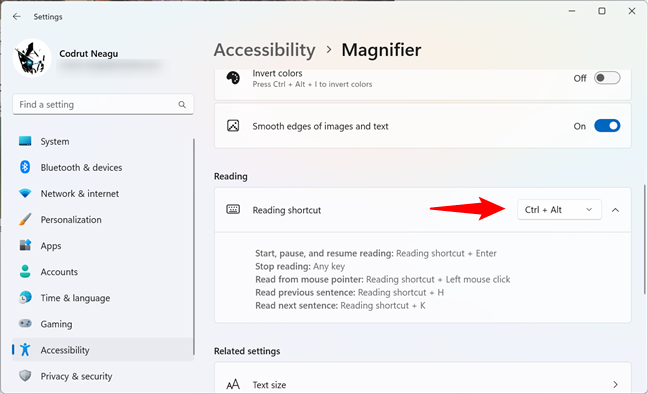 The Reading shortcut used by Magnifier
Choose the one you prefer, but remember that all the reading shortcuts I’ve mentioned throughout this tutorial will change according to your option here. For instance, while the default keyboard shortcut for starting to read is Ctrl + Alt + Enter, if you set the Reading shortcut to Caps Lock, the shortcut for starting to read will become Caps Lock + Enter.
The Reading shortcut used by Magnifier
Choose the one you prefer, but remember that all the reading shortcuts I’ve mentioned throughout this tutorial will change according to your option here. For instance, while the default keyboard shortcut for starting to read is Ctrl + Alt + Enter, if you set the Reading shortcut to Caps Lock, the shortcut for starting to read will become Caps Lock + Enter.
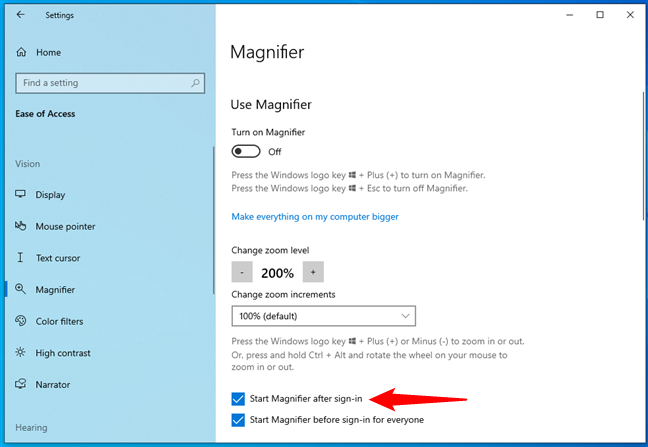
 How to start Magnifier after sign-in in Windows 10
If you want the Magnifier to automatically start for all the user accounts configured on your Windows 10 PC before they even authenticate, enable the “Start Magnifier before sign-in for everyone” setting.
How to start Magnifier after sign-in in Windows 10
If you want the Magnifier to automatically start for all the user accounts configured on your Windows 10 PC before they even authenticate, enable the “Start Magnifier before sign-in for everyone” setting.
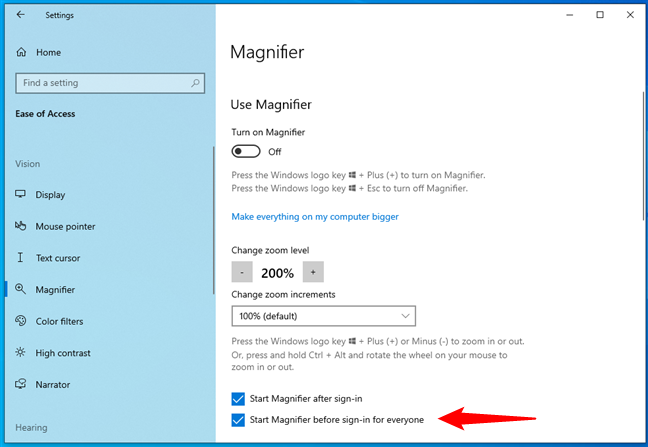 How to start Magnifier for all users in Windows 10
That’s it!
How to start Magnifier for all users in Windows 10
That’s it!
How to open the Magnifier in Windows
There are three ways to open the Magnifier tool:1. How to enable Magnifier using its keyboard shortcut
The fastest and easiest way to launch the Windows Magnifier tool is to press the Windows key + Plus sign (+) on your keyboard.2. How to turn Magnifier on using search
Alternatively, you can also open the Magnifier using search. Type magnifier in the search box on your taskbar, and then click or tap the Magnifier app in the results list.3. How to enable Magnifier using Windows 10’s Ease of Access settings
The Settings app offers another way to open Magnifier in Windows. Open Settings (Windows + I), click or tap on Ease of Access, and select Magnifier in the left sidebar.4. How to enable Magnifier using Windows 11’s Accessibility settings
Windows 11’s Settings app also allows you to open Magnifier. Launch it (Windows + I), select Accessibility on the left sidebar, and click or tap Magnifier in the right-hand pane.How to use the Magnifier in Windows
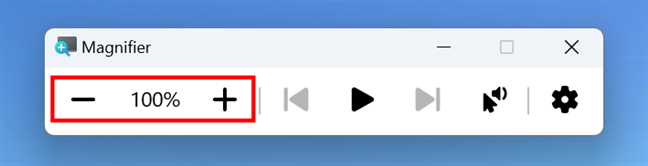
Regardless of how you open the Magnifier in Windows, once you do, your screen is automatically zoomed in by 200%. Here’s what the Magnifier looks like in both Windows 11 and Windows 10:How to zoom in and out with Magnifier
There are two buttons available to adjust the magnification: “+” for zooming in and “-” for zooming out. Adjust the zoom to fit your needs. The magnification is shown in percentages between the minus and plus buttons.- To zoom in, press the Windows key + Plus sign (+)
- To zoom out, press the Windows key + Minus sign (-)
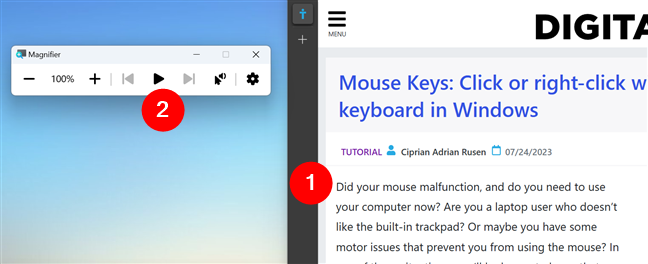
How to use Windows’ Magnifier to read text
In Windows 11 and Windows 10, the Magnifier app also includes options for reading text aloud. To start reading, click or tap where the text you want to hear begins. Then, click or tap the Play button from the Magnifier app or press Ctrl + Alt + Enter on your keyboard, and Magnifier will immediately start reading that text.- Ctrl + Alt + Enter to start reading
- Ctrl + Alt + H to skip to the previous sentence
- Ctrl + Alt + K to skip to the next sentence
- Decrease or increase the reading Speed: drag the slider to the left for a slower reading, or drag it to the right for a faster reading speed.
- Change the Voice of the reading: depending on the languages installed on your Windows computer, you get a list where you can select the Voice you prefer.
How to change Windows Magnifier’s settings
The Magnifier page from Settings lets you customize the way this tool works. Although the design is slightly different in Windows 10 compared to Windows 11, the options available are mostly the same, doing the same things. Here’s what you can adjust:Customize how the Magnifier works in Windows
It all starts with the Magnifier switch that turns the Magnifier On or Off and that we already covered earlier, in the first section of this guide.- Full screen: This mode magnifies the entire screen and follows your mouse pointer or keyboard focus as you move around. You can also enable this option on the go by pressing Ctrl + Alt + F on your keyboard.
- Lens: This mode creates a movable window that magnifies the area around your mouse pointer. You can drag the window around by moving your mouse. Also, you can instantly switch on this view by pressing Ctrl + Alt + L on your keyboard.
- Docked: This mode splits your screen horizontally and shows a magnified view of the area around your mouse pointer in the top area while leaving the original view in the bottom area. If you want to turn on this view without going into Settings, press Ctrl + Alt + D on your keyboard while the Magnifier is running.
How to customize the appearance of the Magnifier in Windows
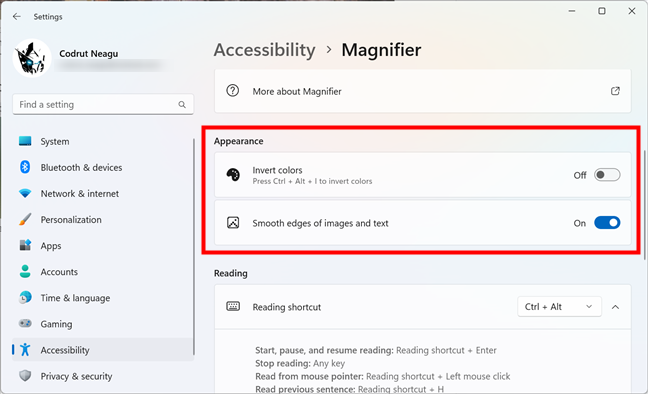
The Magnifier also lets you customize a few details regarding its aspect. On the Magnifier page of settings, scroll down until you reach the Appearance section. There, you’ll find two options:- Invert colors: if you need better contrast, you can turn this switch on, and the colors of the areas magnified are inverted. Note that you can also enable the switch directly while using the Magnifier if you press Ctrl + Alt + I on the keyboard.
- Smooth edges of images and text: this option is turned on by default, and you should leave it on, as it makes the magnified areas look better. However, you may want to experiment with turning off this switch if things don’t look great on your screen.
How to change the Reading shortcut(s) used by Windows’ Magnifier
The last thing you can adjust about the way Magnifier works in Windows is the keyboard shortcut for reading. On the Magnifier page from the Settings’ Accessibility section, scroll until you get to the Reading category. There, you’ll find a single setting: Reading shortcut. To its right, there’s a dropdown list with four choices: Ctrl + Alt (the default option), Caps Lock, Insert, and Caps Lock or Insert.How to make the Magnifier start with Windows 10
If you need to use the Magnifier on a regular basis, you can set it to run each time you log in to your Windows 10 computer. Unfortunately, this option is not available for Windows 11. To do that, on the Magnifier page from Windows 10’s Settings app, check the “Start Magnifier after sign-in” box if you want the app to launch as soon as you log in with your user account.
Discussion (7)
In Windows 8, the magnifier does not default to high-contrast. I am visually impaired and must use the magnifier everyday.
You can start the magnifier by using WIN and + as well. WIN+ESC exists the magnifier as well.
Thanks for hot keys list.. Trying to mem Ctrl-Alt-L to get back to lens from full since fast fingers launches in full too often when using Ctrl-F to Find.
thx for the article.
Oops – it just sez Magnifier on the top left, and there’s just a X top right.
Magnifier here doesn’t look like that – it’s just a rectangle, sez magnifier.exe and there are no adjustments apparently available.
Assistance?
Arieh
cool
with Windows 8.1 I could move te position of the magnifier away from the center of the screen. For some reason I cannot use the “move” tag available . How can I regain control of the magnifier position on my screen?