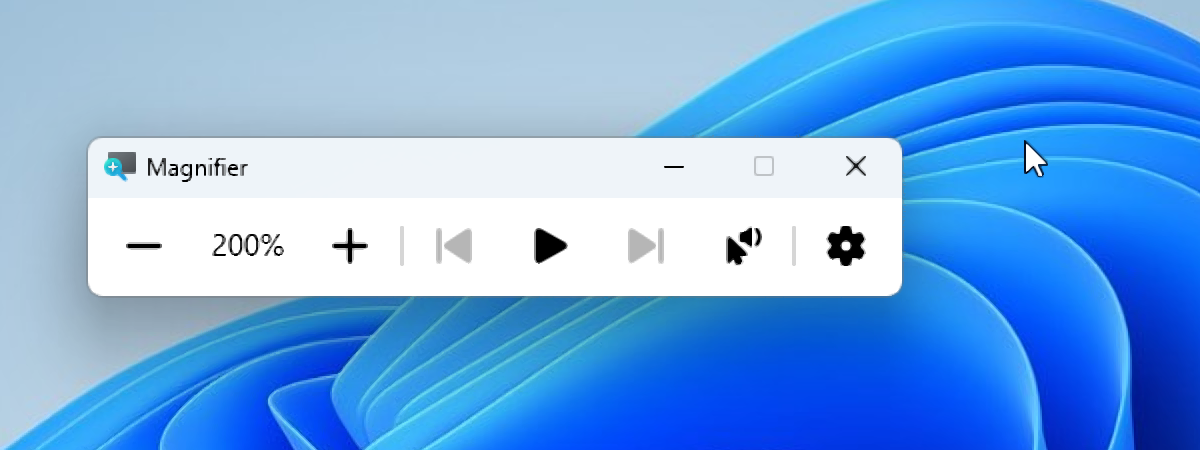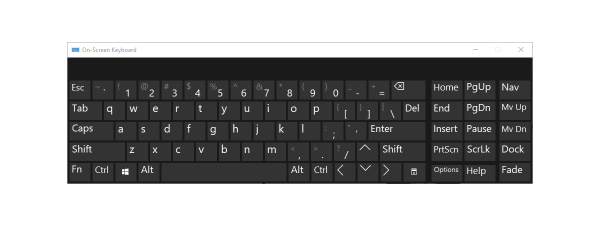
The Narrator is a built-in screen reader in Windows 10 and Windows 11, designed to read text on your computer out loud, making it easier for people with visual impairments to interact with their PC. With the Narrator, users can hear on-screen text and control their computer with voice commands and keyboard shortcuts. This guide will walk you through the setup, navigation, and customization of the Narrator, making it easier to use in your daily tasks. Let’s get started:
How to turn on Narrator, Windows’ built-in screen reader
There are several ways to turn on the Narrator, but the simplest method is by using a keyboard shortcut. To activate the Narrator instantly, press:
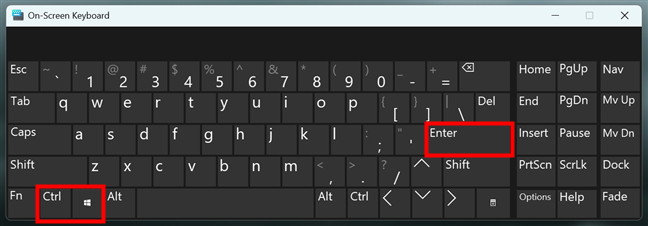
How to turn Narrator on or off using the keyboard
You can also enable Narrator through the settings or even on the login screen. For details on that, check out this guide on how to enable or turn off the Narrator in Windows.
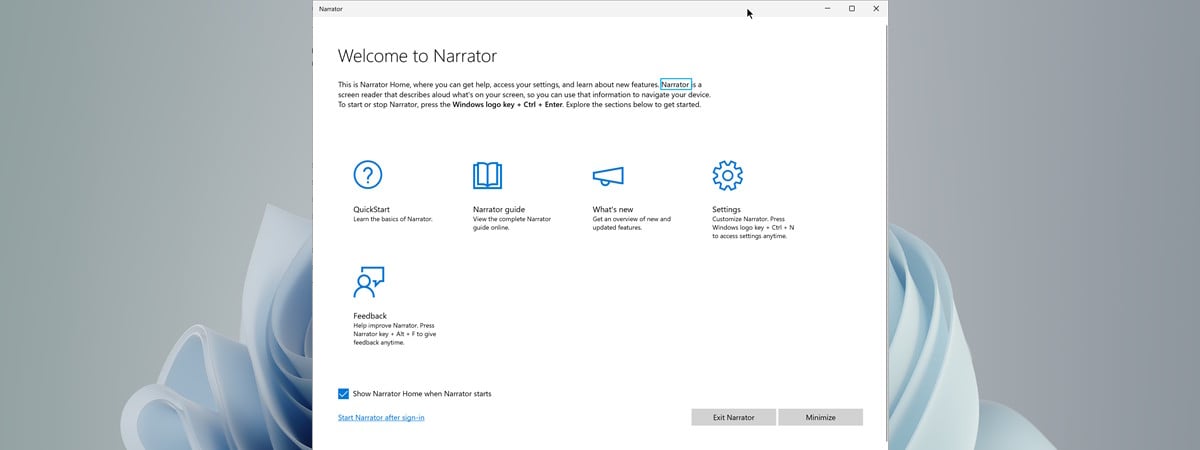
Once opened, the Narrator begins reading the text on the screen aloud, and you see the Narrator Home window, which provides information about its features, links to the complete guide on how to use the Narrator, and also quick access to its Settings. If you don’t want to see this every time, you can uncheck Show Narrator Home when Narrator starts. Then, Minimize the window to continue using the Narrator.
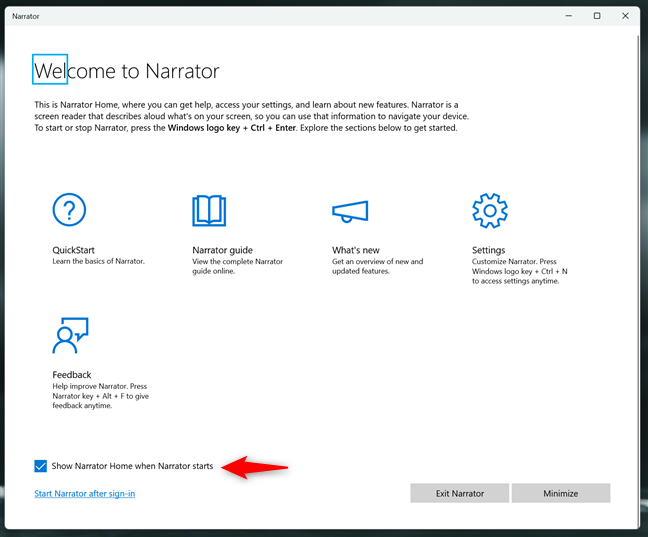
Narrator Home
In Windows 11 but not in Windows 10, after launching Narrator, a dialog box may appear, offering the option to download and install more natural voices. I’ll get back to the natural voices later in the Narrator Settings chapter of this guide. For now, it’s worth noting that you can stop this dialog from showing each time you start the Narrator by checking Don’t show this again and clicking or tapping Skip for now.
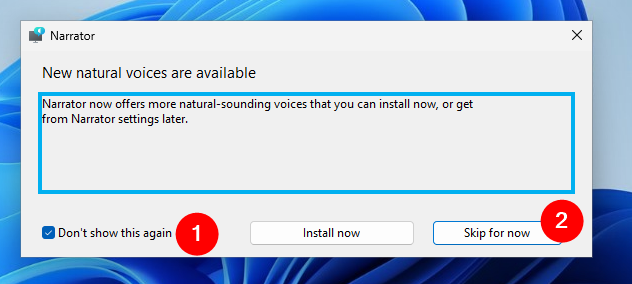
New natural voices are available in Windows 11
Now let’s see…
How to use Narrator to read what’s on the screen
Once the Narrator is enabled, you can immediately start making Windows 10 or Windows 11 read text aloud. For example, you can open any webpage, email, or document, and the Narrator starts reading the content as soon as it shows up on the screen. As the Narrator reads, you see a blue rectangle highlighting each word it reads aloud.
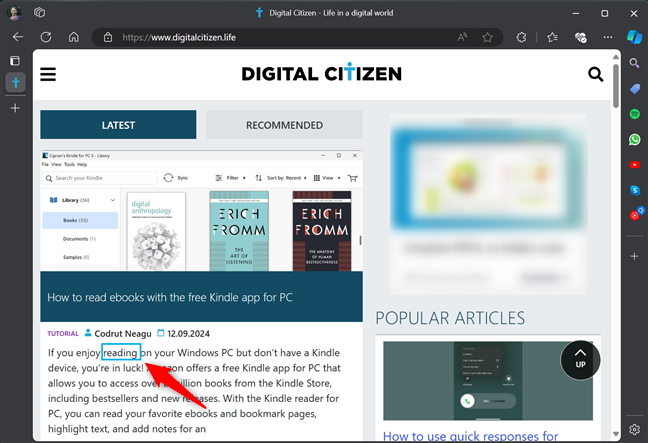
When the Narrator reads, it highlights what it reads
The Narrator comes with a feature called Scan Mode, which is enabled by default when the Narrator is turned on. Scan Mode helps you navigate text, web pages, and apps more easily. When it’s on, you can use the Up or Down arrow keys to move through items on the screen, like text, links, or buttons.

Moving through items on the screen with the arrows on your keyboard
To interact with an item, such as clicking a link or pressing a button, simply press Enter.

Pressing Enter to access a link while Narrator is reading
To toggle Scan Mode on or off, press:
When Scan Mode is off, the keyboard behaves normally, allowing you to type as usual.
If you want to read a specific section of text, you can highlight a paragraph or line with your mouse, and the Narrator begins reading that selection. This works for everything that’s shown on the screen, so you can use it to have anything read out loud, including web pages or documents.
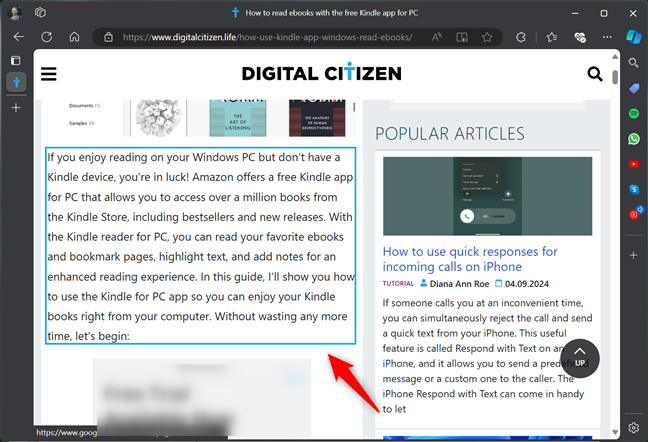
Using the mouse to ask the Narrator to read a paragraph
You’ll probably find, as you play around with this, that you’ll need to make some adjustments to the Narrator’s settings to make it work more efficiently for you. It’s worth taking the time to do this if you plan to use the Narrator.
How to configure Narrator’s settings
Both Windows 10 and Windows 11 offer various customization options for the Narrator, allowing you to adjust its behavior to your needs and preferences. Here’s what you can configure about the way Narrator works:
How to access Narrator settings
First of all, if you want to customize the way it behaves, you must open the Narrator settings. To do that quickly, use this keyboard shortcut:
This opens the Narrator Settings panel, where you can control the Narrator’s behavior, voice settings, verbosity, cursor options, and more. This is what it looks like in Windows 10:
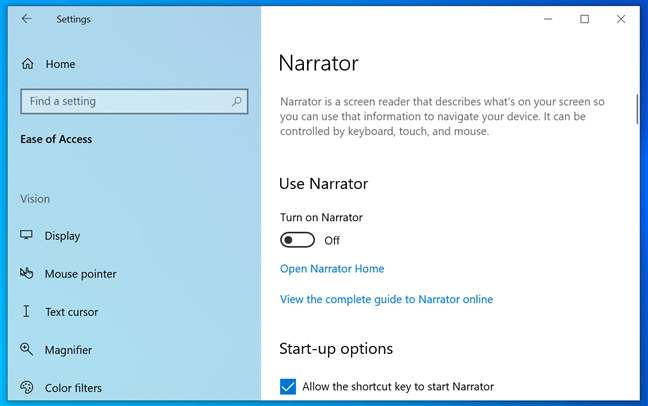
The Narrator Settings in Windows 10
And this is what the Narrator looks like in Windows 11:
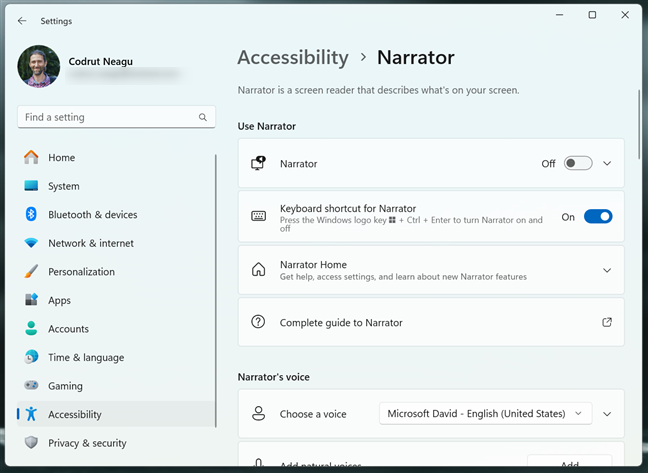
The Narrator Settings in Windows 11
Next, I’ll walk you through all the settings available for the Narrator in Windows 10 and Windows 11, one by one.
IMPORTANT: Because some of these settings can have slightly different names, the images you’ll see from here on include screenshots taken in Windows 10 on the left and screenshots from Windows 11 on the right.
How to change the basic options of the Narrator
The first option available is the main (Turn on) Narrator switch that you can toggle to either turn it on or off.
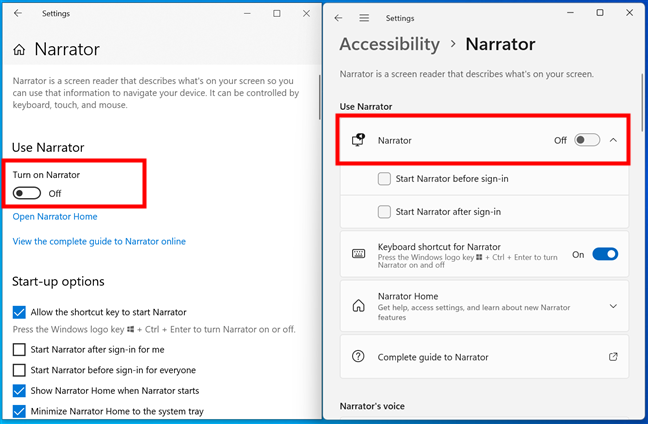
Turn the Narrator on or off
Under the Narrator switch, you also get two startup settings that you can check to activate:
- Start Narrator before sign-in (for everyone): This option sets Narrator to run before you sign in to Windows. If you need screen-reading assistance as soon as possible, you should check this setting. When choosing this option, the Narrator starts for all user accounts on your computer as soon as the sign-in screen is loaded.
- Start Narrator after sign-in (for me): This automatically launches Narrator after you sign in. This setting starts Narrator only for your user account.
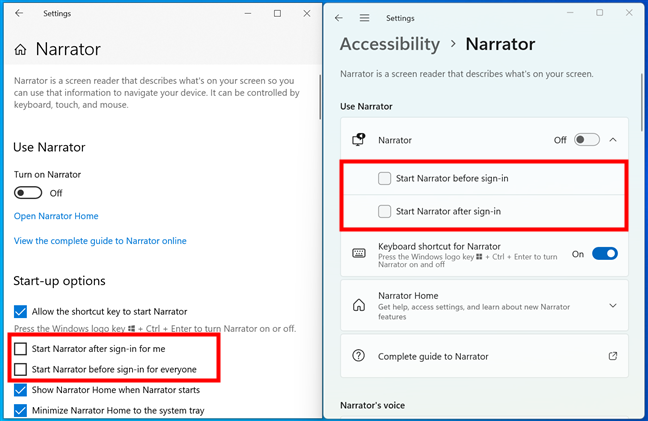
Set Narrator to start before or after sign-in
Then, you have the Allow the shortcut key to start Narrator checkbox and the Keyboard shortcut for Narrator switch. Activating or deactivating these options enables or disables the Windows + Ctrl + Enter shortcut used by default for quickly starting or stopping Narrator.
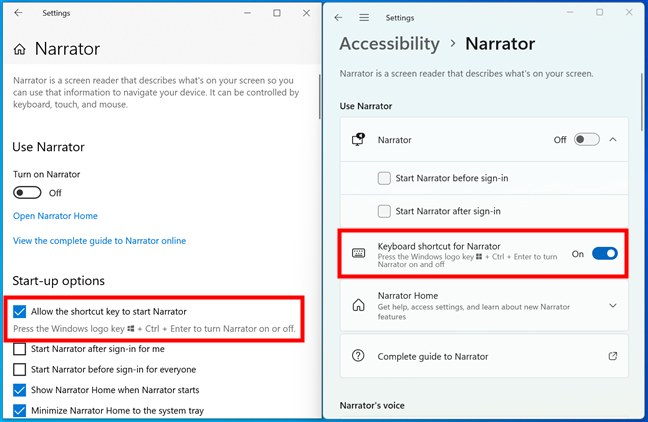
Keyboard shortcut for Narrator
The Narrator Home serves as a hub for accessing commonly used Narrator features. You can open it by clicking or tapping its link here, and you can also choose whether to show or hide the Narrator Home each time you start the Narrator. In Windows 10, you also get the option to Minimize Narrator Home to the system tray.
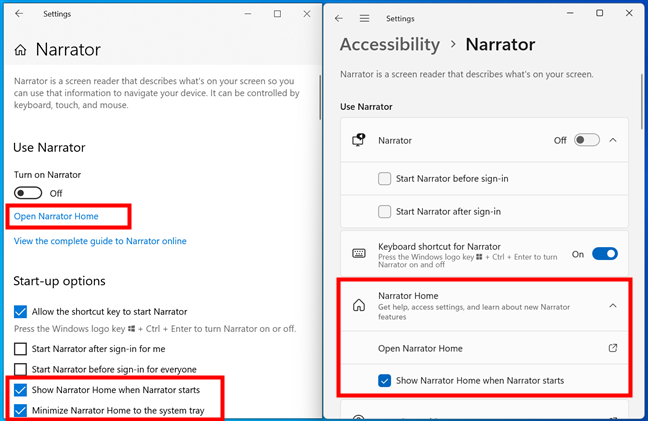
Narrator Home options
Last but not least, among the basic options available for the Narrator is a link called (View the) Complete guide to Narrator (online). Clicking or tapping it opens your default web browser and takes you to a Microsoft webpage where you find a huge amount of information regarding the Narrator and the way it works in both Windows 11 and Windows 10.
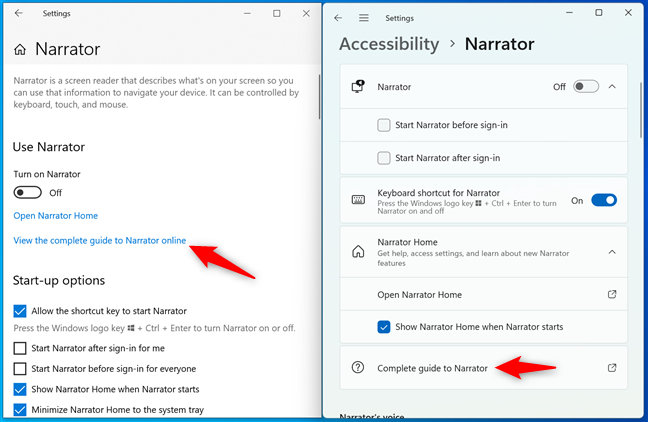
Access the Complete guide to Narrator
If you want to know everything there is to know about the Narrator, this webpage has it all, much more than I could possibly cover in this tutorial: Complete guide to Narrator.
How to customize the Narrator’s voice
Narrator provides various voices to choose from. The default ones for English are Microsoft David, Microsoft Zira, and Microsoft Mark. I recommend you to first try the ones already available on your computer. Once you select a voice, you can customize its:
- Speed: Adjust how fast the voice speaks.
- Pitch: Change the tone or frequency of the voice.
- Volume: Control how loud the Narrator is.
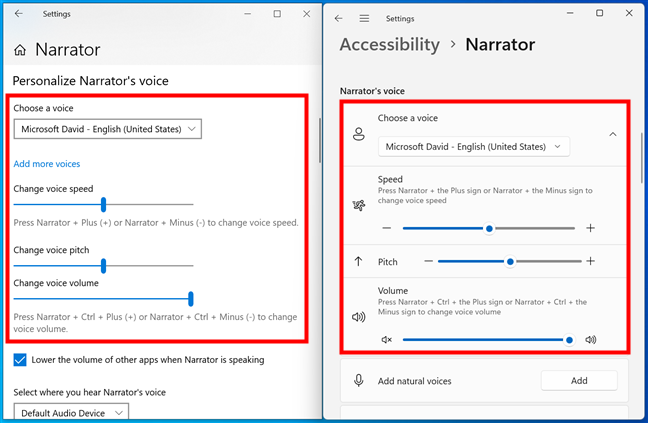
Change the voice used by the Narrator
If none of the voices installed on your Windows device is to your liking, you can download new voices.
- Add natural voices: This option is available only in Windows 11, where Narrator offers seven English natural voices: Neerja (Female, India), Prabhat (Male, India), Ryan (Male, United Kingdom), Sonia (Female, United Kingdom), Aria (Female, United States), Guy (Male, United States), and Jenny (Female, United States). These voices sound more human. To add one, click the Add button, preview the voice, then Download and Install it.
- Add more voices in Windows 10 or Add legacy voices in Windows 11: You can install additional voices. Once installed, these voices appear in your Narrator voice options.
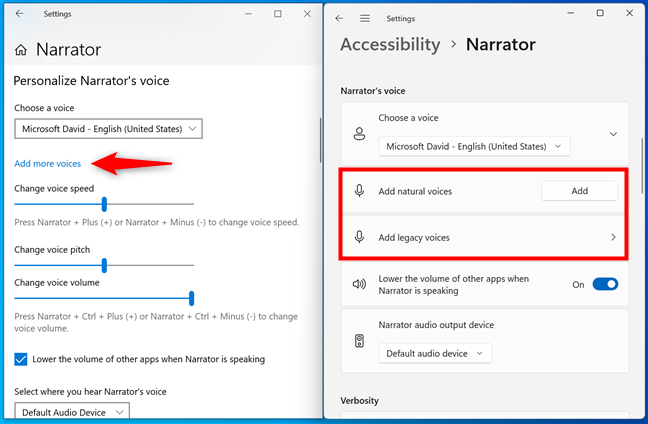
Add new voices to the Narrator
Next, you get to choose whether you want to hear the Narrator better by lowering the volume of other apps when it’s speaking. Toggle this switch depending on what you prefer.
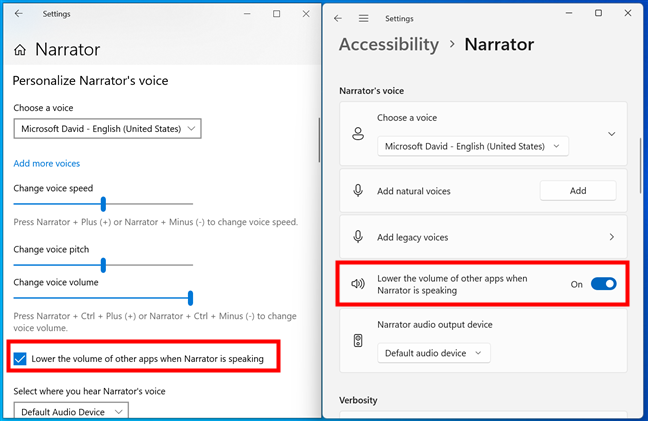
Lower the volume of other apps when Narrator is speaking
And last but not least, in terms of voice controls, Windows also lets you select a specific audio output device for the Narrator’s voice.
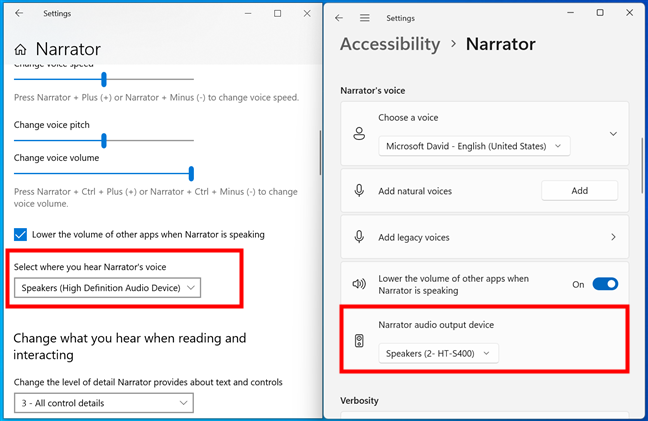
Choose the output audio device for the Narrator
This can be your external speakers, headphones, soundbar, etc., depending on what audio devices are connected and available on your computer.
How to control Narrator’s level of detail (verbosity)
Verbosity settings are the controls that instruct the Narrator regarding how much information you want about what’s on the screen. Click or tap on the Verbosity level dropdown list and you get to select from five levels, ranging from minimal text to detailed descriptions of controls and buttons: Text only, Some control details, All control details, Some text details, or All text details.
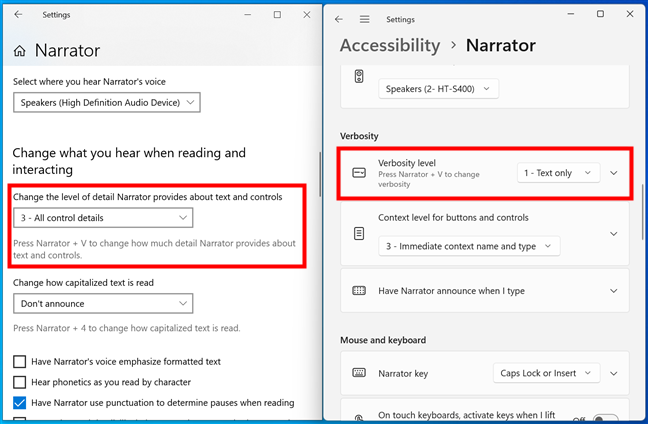
Change the level of detail provided by the Narrator (verbosity)
Additionally, you can also enable or disable other verbosity options:
- Change how capitalized text is read: Choose between Don’t announce, Increase pitch, or Say cap.
- (Have Narrator’s voice) Emphasize formatted text: Gives more emphasis on text formatting (not available for natural voices).
- Hear phonetics as you read by character in Windows 10 or Read phonetically when reading by character in Windows 11: Narrator will pronounce letters phonetically.
- Have Narrator use punctuation to determine pauses when reading in Windows 10 or Pause slightly when reading punctuation in Windows 11: Add slight pauses when reading punctuation.
- Hear advanced detail, like help text, or buttons and other controls in Windows 10 or Read advanced details, like help text, on buttons and other controls in Windows 11: Get more detailed descriptions of controls and help text.
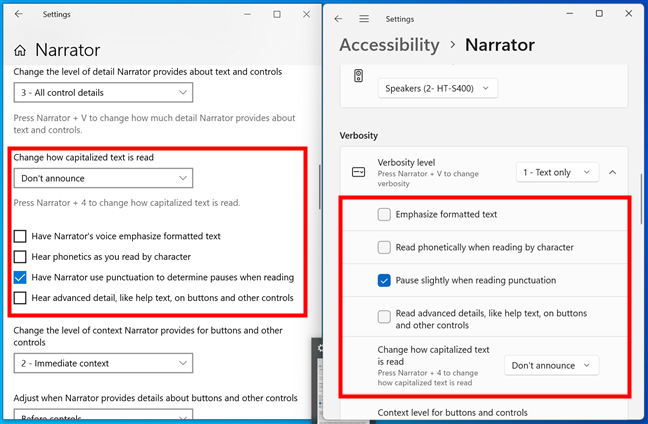
Other verbosity settings for Narrator
Next, you get to select the context level for buttons and controls, which is in charge of how much context the Narrator gives when navigating between buttons and controls. The options you have are self-explanatory and include: No context, Immediate context, Immediate context name and type, Full context of new control, and Full context of both old and new controls.
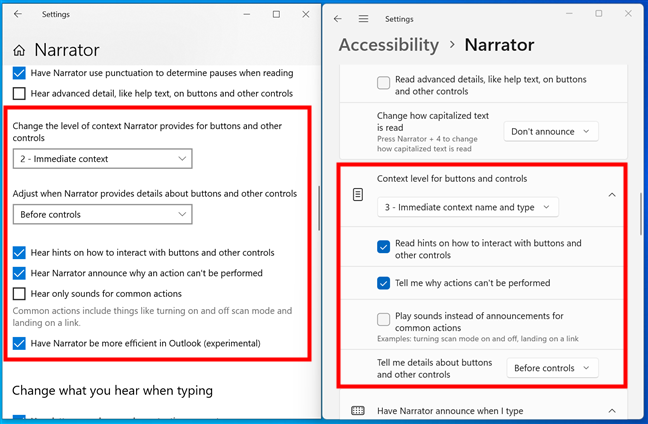
Narrator settings for the context level for buttons and controls
You can also Change what you hear when typing in Windows 10 or Have Narrator announce when I [you] type in Windows 11. By default, it’s set to do that when you start typing Letter, number, and punctuation as well as Words and Toggle keys, like Caps lock and Num lock. Additionally, you also enable announcements for Function keys, Arrow, Tab, and other navigation keys, and Shift, Alt, and other modifier keys.
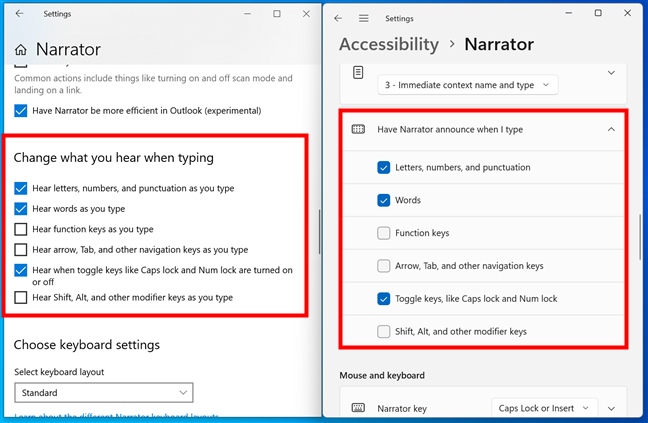
Change what you hear when you type
How to customize the mouse and keyboard settings for Narrator
By default, both the Caps Lock and Insert keys serve as the Narrator key, which you can use to send commands to the Narrator. If you want, you can lock the Narrator key by checking the Lock the Narrator key so I don’t have to press it for each command option. This makes the Narrator key stay pressed until you press it again.
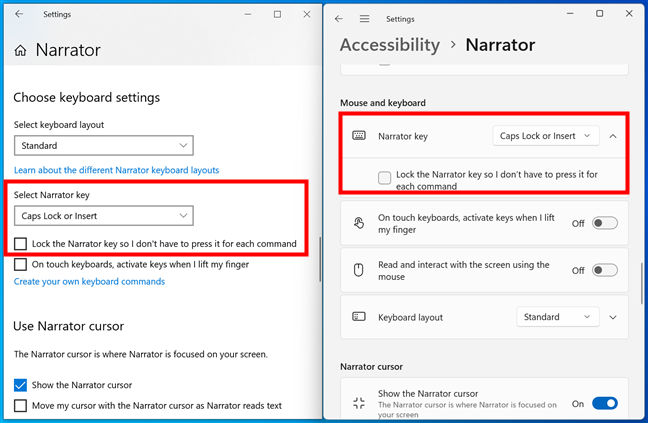
Select the Narrator key and whether it automatically locks
If you’re using a touchscreen device, a touch keyboard appears on the lower part of the screen each time you want to edit an area, like a text box where you write a message. To enter text, you double-tap on the touch keyboard the characters you want to type. If you want to make text entry more intuitive in this situation, you can configure the Narrator to activate the keys when you lift your finger from the touch keyboard instead of doing this when pressing the keys. Simply check the appropriate box (if you’re using Windows 10) or enable the switch for this setting (if you’re using Windows 11).
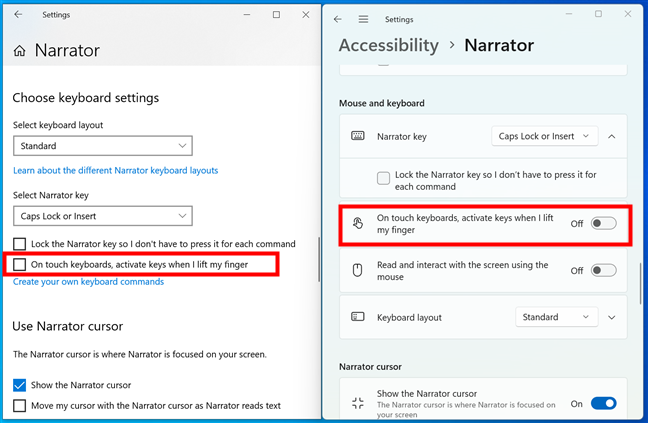
On touch keyboards, activate keys when you lift your finger
If you enable the Read and interact with the screen using the mouse switch or check the box with the same name, the Narrator reads anything you point your mouse cursor at.
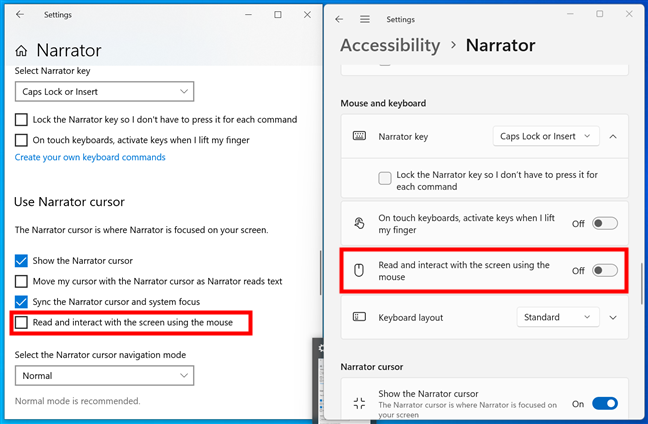
Read and interact with the screen using the mouse
Last in terms of Mouse and keyboard settings, the Narrator offers two keyboard layouts:
- Standard: More similar to other screen readers.
- Legacy: The original Narrator keyboard layout for experienced users.
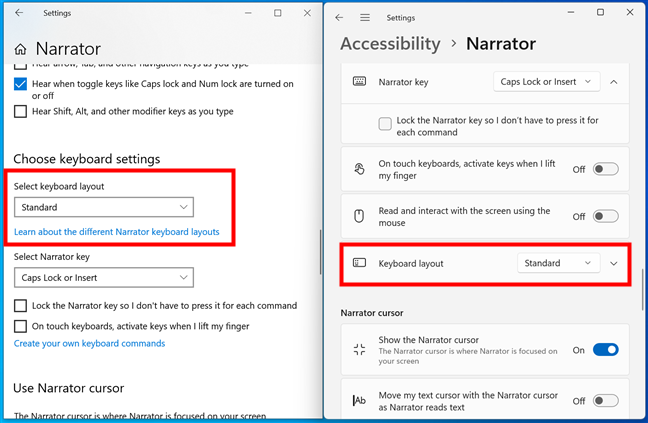
Keyboard layouts available for the Narrator
Check out this Microsoft webpage to learn what each of these layouts will give you and what commands you can use with them: Appendix B: Narrator keyboard commands and touch gestures.
How to configure the Narrator cursor
The Show the Narrator cursor switch or checkbox lets you enable or disable the highlighting used by the Narrator cursor. This is the blue focus box I’ve told you about earlier (in this guide’s second chapter).
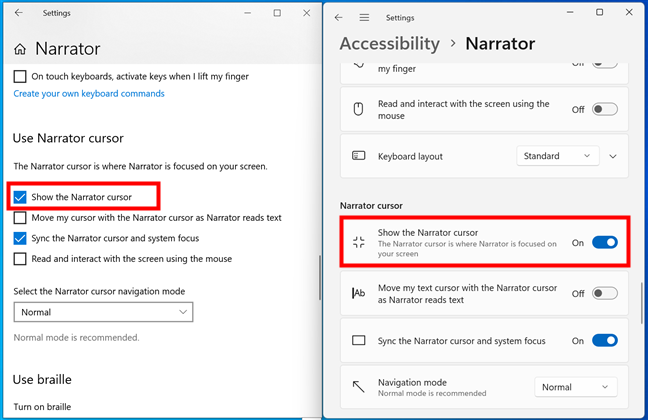
Show the Narrator cursor
While not enabled by default, you can also choose to Move my (text) cursor with the Narrator cursor as Narrator reads text.
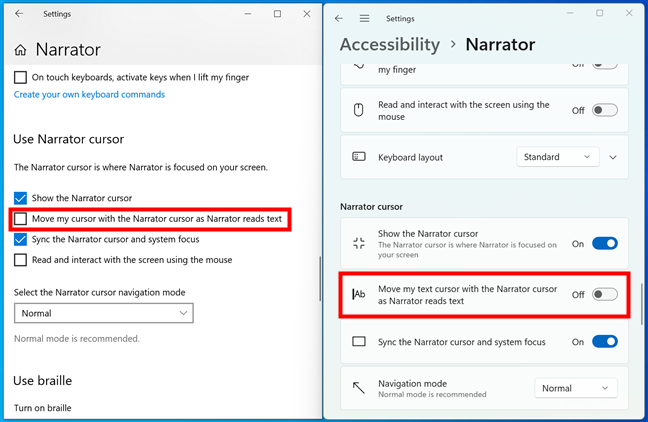
Move my text cursor with the Narrator cursor as Narrator reads text
Furthermore, Windows can Sync the Narrator cursor and system focus. This means that the Narrator cursor and the system cursor move together, which makes it easier to follow along when reading.
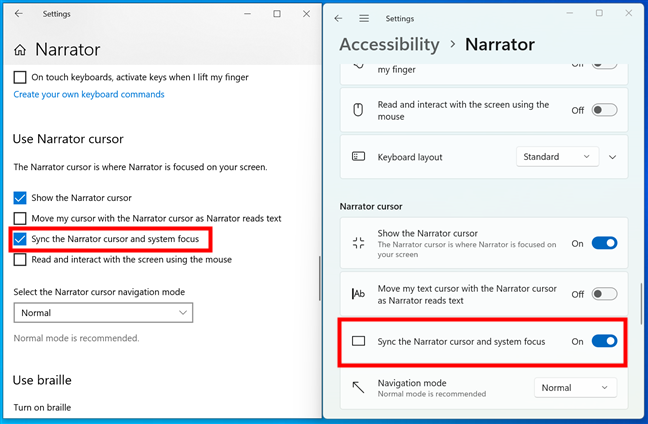
Sync the Narrator cursor and system focus
Additionally, Narrator offers two navigation modes you can choose from:
- Normal: Moves between standard screen elements like links and buttons.
- Advanced: Lets you navigate with arrow keys through the programmatic representation of an application.
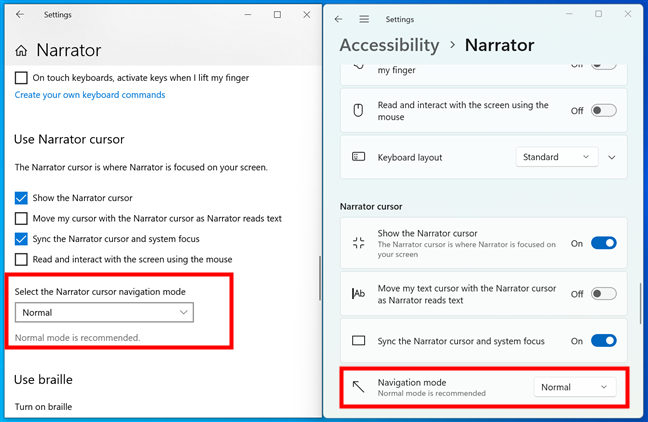
Select the Narrator cursor navigation mode
How to set Narrator for use with a braille display
If you use a braille display, you can configure the Narrator to work with it. I don’t know how to read braille and I don’t have such a monitor either, so unfortunately, I don’t have much to say about this feature.
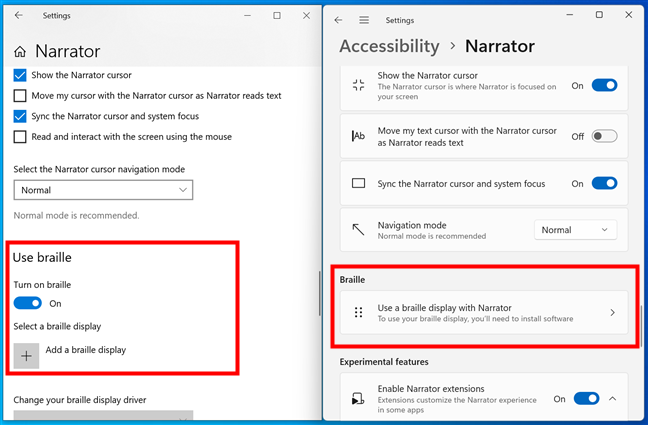
Use a braille display with Narrator
To get complete information on how to use the Narrator with a braille display, check out Microsoft’s guide: Using Narrator with braille.
How to enable Narrator extensions
In Windows 11, the Narrator also supports extensions to improve its functionality in applications. For now, only Microsoft Outlook and Excel are supported. You can enable or disable these extensions in the settings, and you can also let the Narrator Find and download new extensions on Narrator startup.
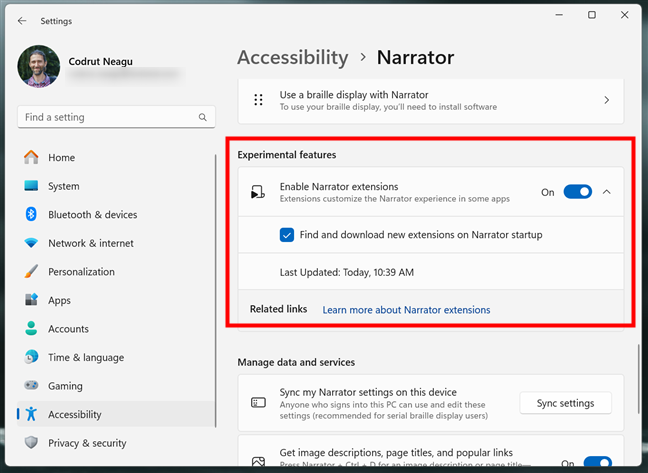
Narrator supports extensions in Windows 11
Check out these webpages for comprehensive information on how you can use the Narrator in Outlook and Excel: Appendix E: Narrator with Outlook and Appendix F: Narrator with Excel.
How to manage data and services
In the end, the Narrator page in Windows’ Settings app also includes a couple of data handling settings:
- Sync my settings in Windows 10 or Sync my Narrator settings on this device: other users on the computer will access and use the same settings for Narrator as you do.
- Get image descriptions, page titles, and popular links: pressing the Narrator key (Caps lock or Insert, by default) + Ctrl + D reads an image description or page title. Pressing Narrator key + S twice quickly gives a list of popular links.
- Help make Narrator better in Windows 10 or Automatically send diagnostic and performance data in Windows 11 is a switch disabled by default. However, if you want to send such data to Microsoft, you can enable the switch. Furthermore, if you want to send feedback, you can press the Narrator key + Alt + F.
- Privacy Statement: Learn how Microsoft uses your Narrator data by reviewing its privacy statement.
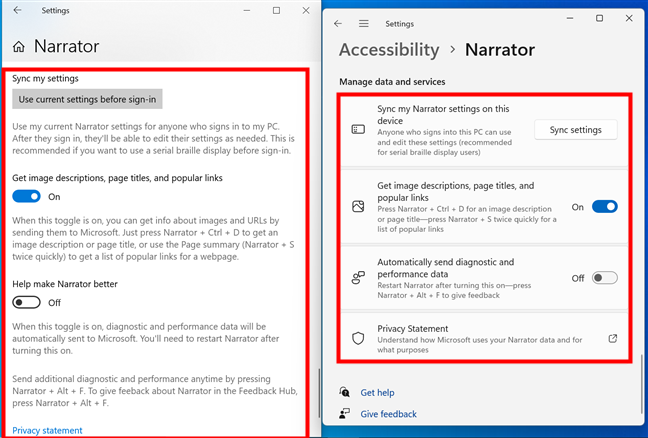
Data and services options for the Narrator
How to turn off the Narrator
When you no longer need the Narrator, you can quickly turn it off by pressing the same keyboard shortcut you used to launch it:
Alternatively, if you’re already in Settings, you can simply turn the Narrator switch Off.
Do you find the Narrator screen reader useful?
The Narrator in Windows 10 and Windows 11 is a powerful tool that can make navigating and using your computer easier, especially for users with visual impairments. With features like customizable voices, keyboard shortcuts, and a scan mode, it offers a flexible and relatively efficient way to control your computer. By following this guide, you should be able to set up, navigate, and personalize the Narrator to suit your needs. How do you find it though? Is the Narrator a useful tool for you? What improvements do you think it should get? Let me know in the comments section below.


 20.09.2024