06.08.2020
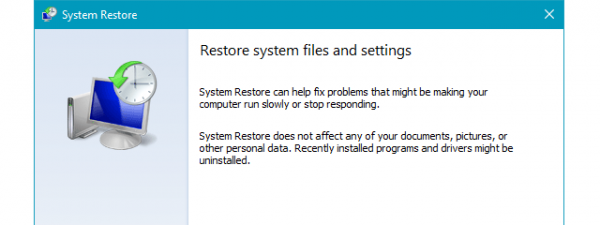
System Restore is an old feature that has been present in Windows operating systems for a long time. However, it's still useful today on modern Windows 10 operating systems. It's one of those tools that can save you a lot of time and headaches when your PC crashes, or if something on it no longer wants to work, and you can't even boot properly. System Restore is a tool designed by Microsoft to save and restore information about your PC's system files and settings. However, to be able to use it to get your computer or device to a previous working state, you must first enable it. If you don't know how to do that, read on. In this tutorial, we're going to show you two ways to enable System Restore in Windows 10, both using the graphical interface and the command line:
1. How to enable System Restore in Windows 10 from System Protection
The first step you need to take is to open the Control Panel, and one of the fastest ways to do that is to search for it. Click or tap on the search box from your taskbar, type control, and select Control Panel from the list of results.

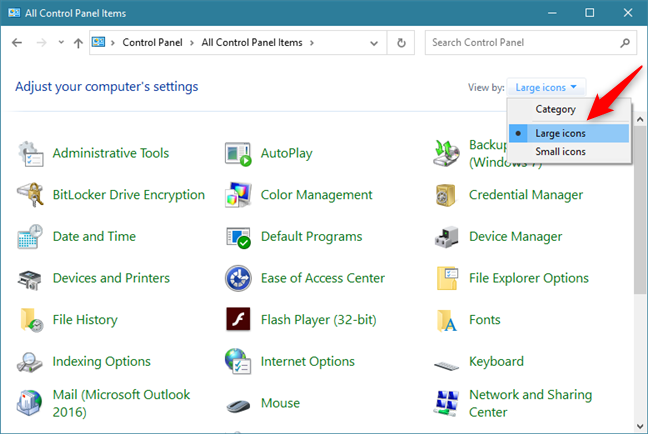
In the Control Panel, select Large icons or Small icons in the View by list from the top-right corner of the window.
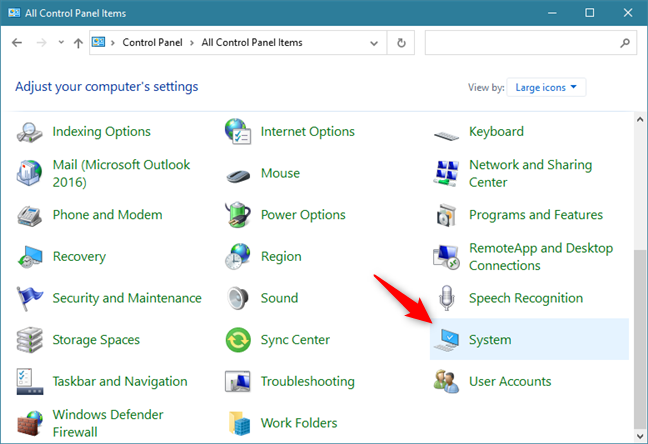
Scroll down until you see the System entry and click or tap on it. Alternatively, if you don't want to use the icons views in the Control Panel, go to "System and Security" and click or tap System.
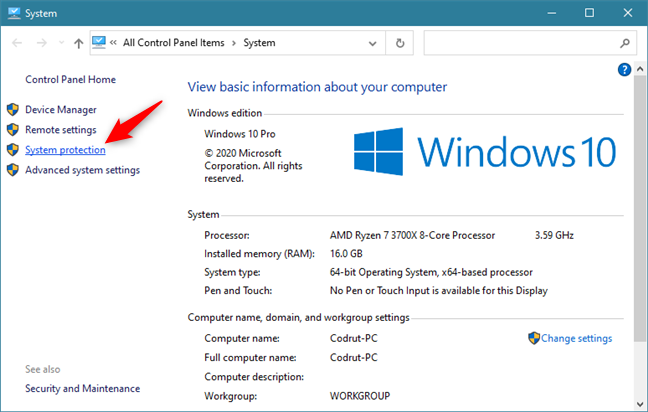
In the System window, click or tap on the System protection link from the left.
The previous action opens a new window called System Properties and automatically selects the System Protection tab.
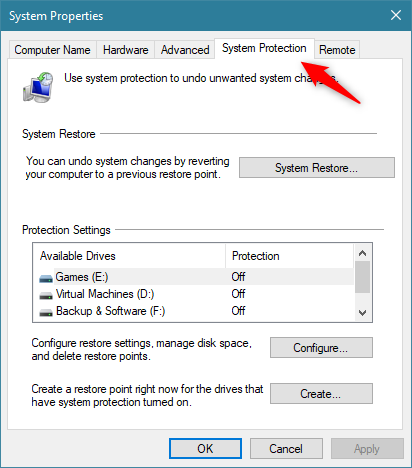
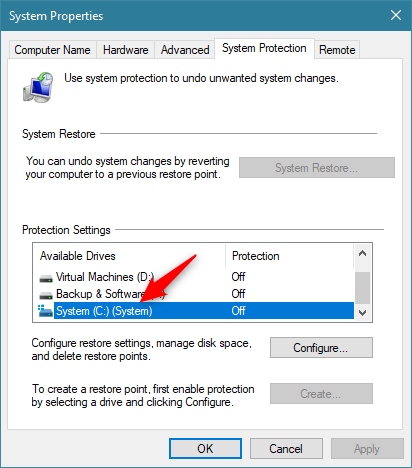
Look for the Protection Settings section and select the drive for which you want to enable System Restore.
To exemplify, we selected the C: drive, which is the one used by the Windows 10 operating system.
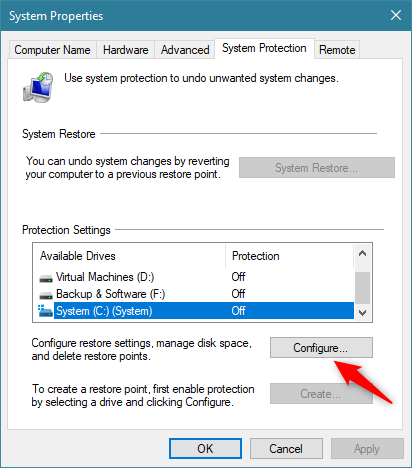
Click or tap on the Configure button beneath Protection Settings. On the left of this button, Windows 10 tells you that you can "Configure restore settings, manage disk space, and delete restore points."
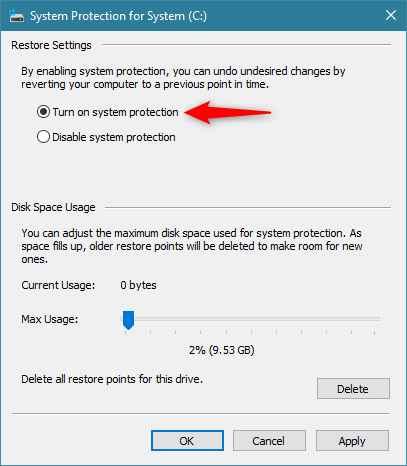
This opens a window called "System Protection for [the drive you selected]." To enable System Restore for that drive, select the "Turn on system protection" option and click or tap OK.
That's it! Now System Restore is enabled for the drive you selected. Now it's the perfect moment for you to also create the first restore point. It's an easy process that you can perform quickly if you follow the steps from this guide: 3 ways to create a restore point in Windows 10. Then, if something bad happens, you can use that restore point to take your system back in time and, hopefully, into a working state.
2. How to enable System Restore in Windows 10 from the command line using PowerShell
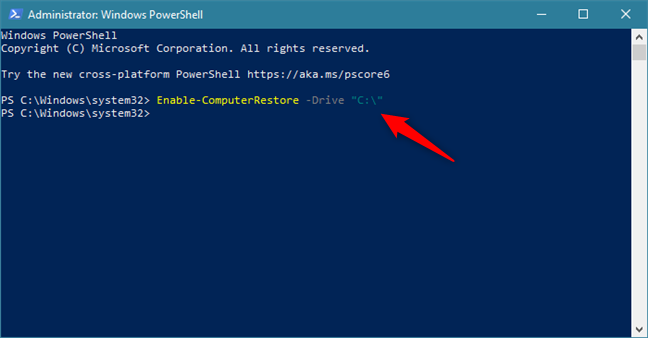
If you prefer command-line environments, you can also use PowerShell to enable System Restore on your Windows 10 PC. Open PowerShell as administrator and run the following command: Enable-ComputerRestore -Drive "[Drive Letter]:".
For example, if you want to enable System Restore on your C: drive, run Enable-ComputerRestore -Drive "C:".
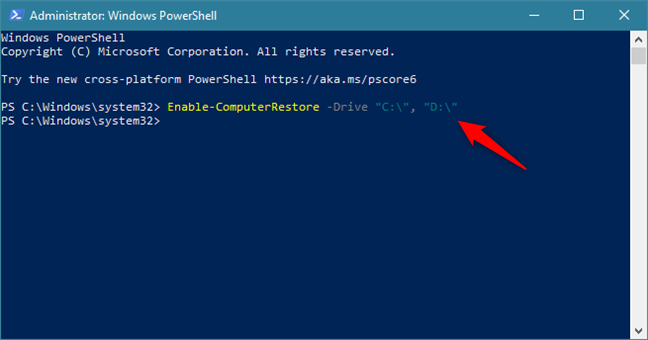
If you want to enable System Restore on more of your drives, you can simply add each of them to the command, with commas between them. For example, if you want to enable System Restore on your C: and D: drives, run Enable-ComputerRestore -Drive "C:", "D:".
Neat, right?
Do you know of other ways to enable System Restore in Windows 10?
These are the two ways we know for turning on System Restore in Windows 10. Do you know others? If you do, or if you have questions on this matter, don't hesitate to get in touch using the comments section below.