

Sometimes, you might find that your computer has some features you don’t really need, or maybe you’re missing something that could make your life a bit easier. No worries, I’ve got you covered! In this tutorial, I’ll walk you through the simple steps to add or remove optional features in Windows. First, I’ll show you how to enable optional features in Windows 10 and how to turn off the ones you no longer need. Then, I’ll tell you how to access optional features in Windows 11, how to add new ones, and how to uninstall the ones you don’t want. Without further ado, let’s begin:
 System in Windows 10's Settings
Now, select Optional features in the left sidebar.
System in Windows 10's Settings
Now, select Optional features in the left sidebar.
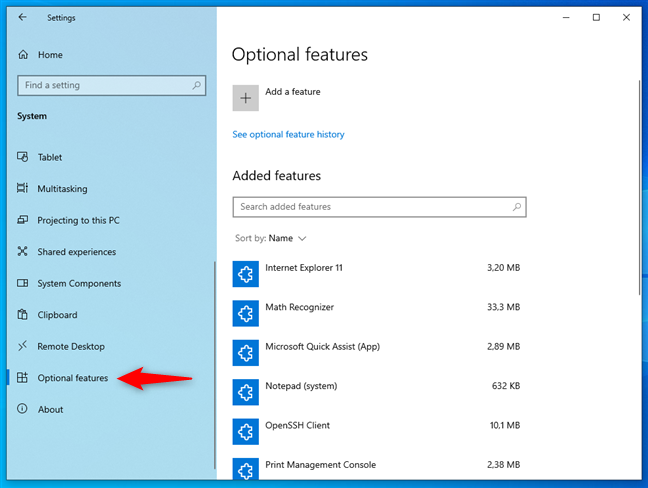
 Select Optional features in the left sidebar
On the right side of the Settings window, you’ll now see the Optional features page. There, click or tap the Add a feature button at the top.
Select Optional features in the left sidebar
On the right side of the Settings window, you’ll now see the Optional features page. There, click or tap the Add a feature button at the top.

 Add a feature to Windows 10
Windows 10 lists all the optional features available to install. The easiest way to find the one you want is to use the search at the top of the list.
Add a feature to Windows 10
Windows 10 lists all the optional features available to install. The easiest way to find the one you want is to use the search at the top of the list.
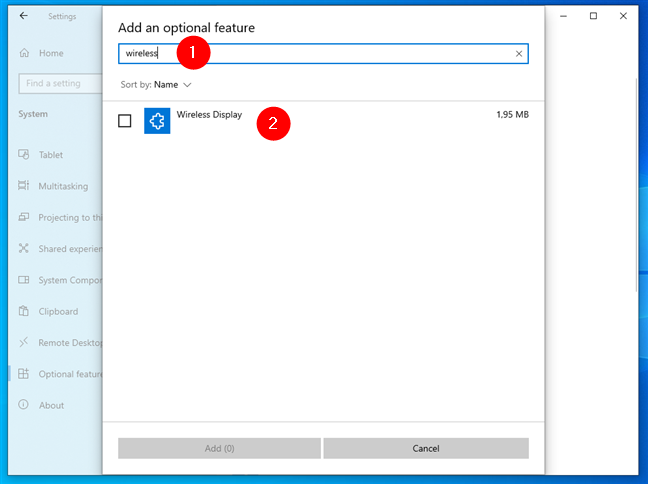
 Searching for an optional feature
TIP: To learn more about the Wireless Display optional feature in the previous screenshot, check out this guide: How to use your Windows PC as a wireless display.
Alternatively, you can scroll through the list to find the optional feature you need.
Searching for an optional feature
TIP: To learn more about the Wireless Display optional feature in the previous screenshot, check out this guide: How to use your Windows PC as a wireless display.
Alternatively, you can scroll through the list to find the optional feature you need.
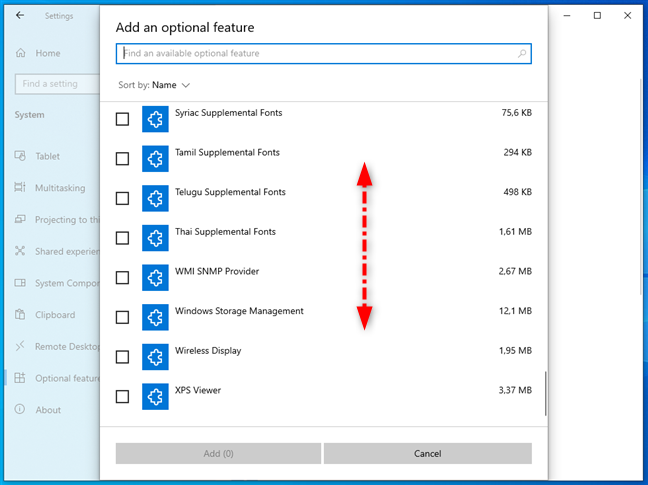
 Scroll the list of optional features
If you’d like to learn more about an optional feature, click or tap its name, and Windows 10 will display a short description of it.
Scroll the list of optional features
If you’d like to learn more about an optional feature, click or tap its name, and Windows 10 will display a short description of it.
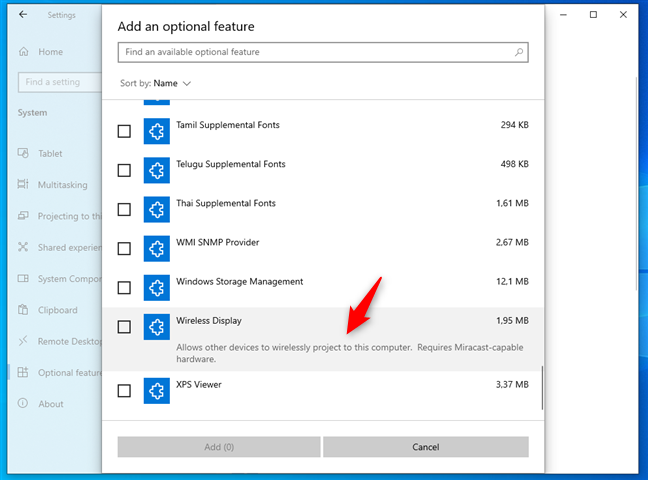
 Click or tap on an optional feature to get quick info
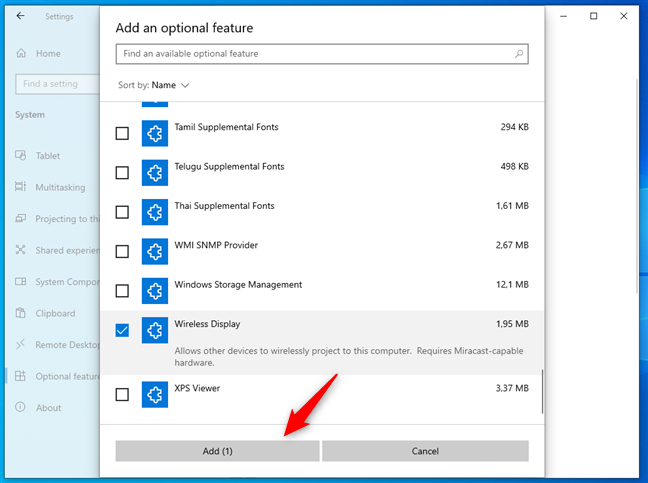
After you’ve decided you want a certain feature, click or tap the checkbox next to it to select it. Note that you can also select multiple optional features at the same time.
Click or tap on an optional feature to get quick info
After you’ve decided you want a certain feature, click or tap the checkbox next to it to select it. Note that you can also select multiple optional features at the same time.
 Select an optional feature to install
Once you’ve checked all the optional features you want to add to Windows 10, click or tap the Add button at the end of the list.
Select an optional feature to install
Once you’ve checked all the optional features you want to add to Windows 10, click or tap the Add button at the end of the list.
 Installing optional features in Windows 10
Now all you have to do is wait for Windows 10 to install all the selected optional features.
Installing optional features in Windows 10
Now all you have to do is wait for Windows 10 to install all the selected optional features.
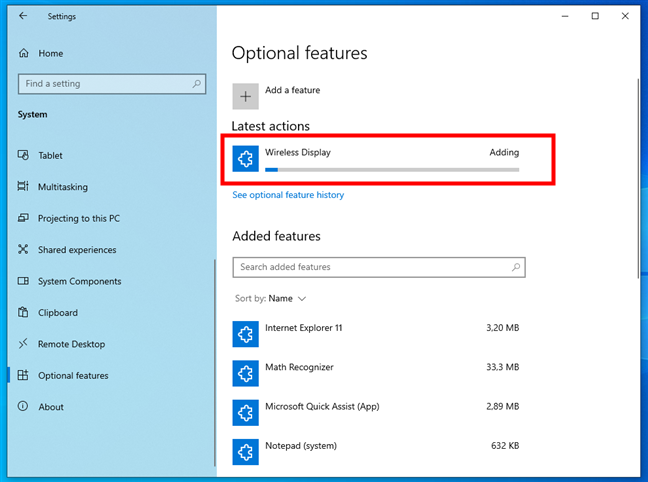
 The optional feature is installing
When this is done, the Latest actions section from the Optional features page will show the Added status next to the optional feature you’ve selected.
The optional feature is installing
When this is done, the Latest actions section from the Optional features page will show the Added status next to the optional feature you’ve selected.
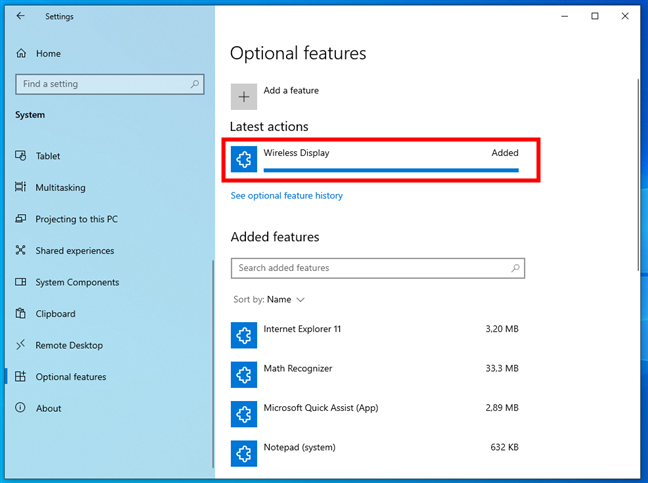 The optional feature was added to Windows 10
You can now start using the new optional feature(s) you installed. But what if you want to turn off optional features in Windows 10? Read on to see how to do that too:
TIP: There are even more features available to install in Windows than just the ones shown in the Optional features list. But you can only get them via the Control Panel. Here’s what they are and how to install or remove those other features and system components.
The optional feature was added to Windows 10
You can now start using the new optional feature(s) you installed. But what if you want to turn off optional features in Windows 10? Read on to see how to do that too:
TIP: There are even more features available to install in Windows than just the ones shown in the Optional features list. But you can only get them via the Control Panel. Here’s what they are and how to install or remove those other features and system components.
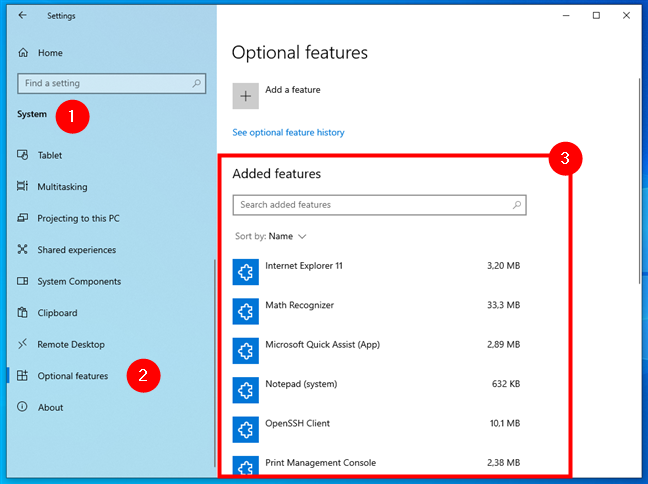 The list of optional features added to Windows 10
Use the Search added features field at the top to locate the feature you want to remove, or scroll through the list of installed features to find it. When you identify the optional feature, click or tap it to expand its options.
The list of optional features added to Windows 10
Use the Search added features field at the top to locate the feature you want to remove, or scroll through the list of installed features to find it. When you identify the optional feature, click or tap it to expand its options.
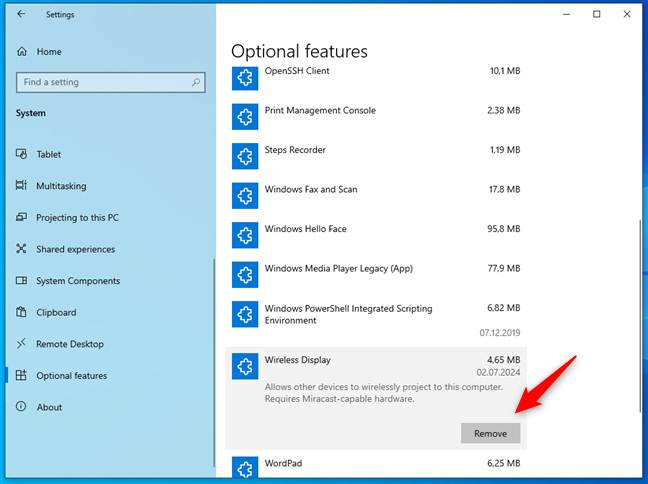
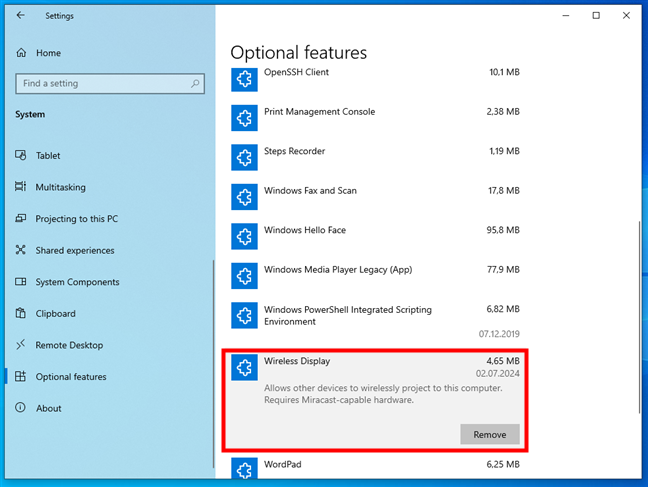 Expanding an optional feature's entry
Click or tap the Remove button, and Windows 10 will immediately start uninstalling the optional feature from your system.
Expanding an optional feature's entry
Click or tap the Remove button, and Windows 10 will immediately start uninstalling the optional feature from your system.
 Remove an optional feature from Windows 10
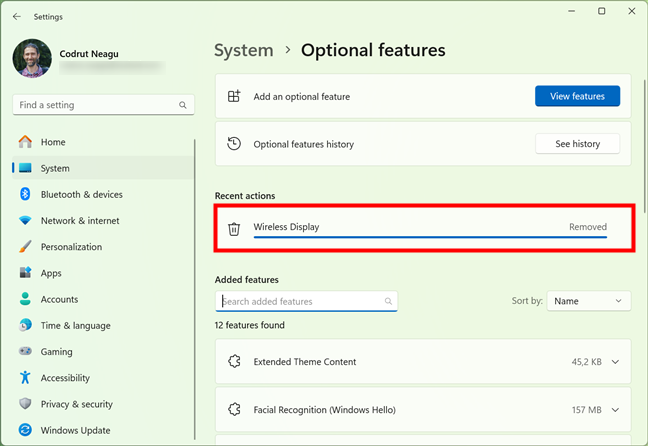
When the process is over, the Latest actions section will notify you that the optional feature has been Removed.
Remove an optional feature from Windows 10
When the process is over, the Latest actions section will notify you that the optional feature has been Removed.
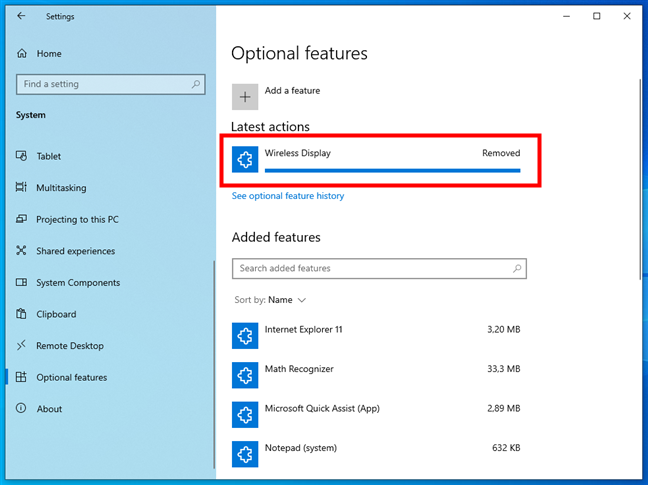 An optional feature is removed from Windows 10
That’s it! Repeat the process to remove all the optional features you don’t need on your Windows 10 computer.
An optional feature is removed from Windows 10
That’s it! Repeat the process to remove all the optional features you don’t need on your Windows 10 computer.
 System in Windows 11's Settings
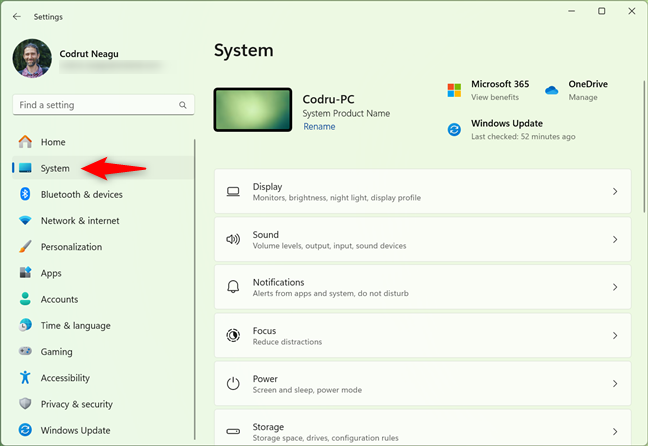
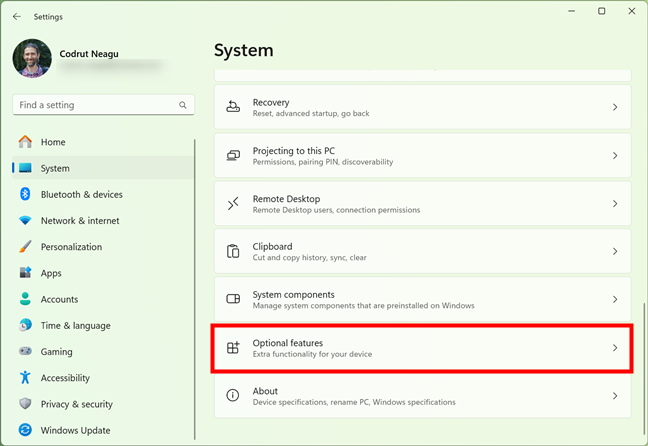
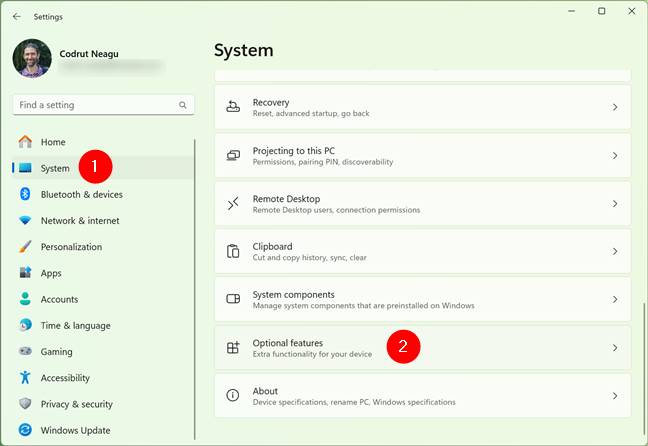
On the right side of the window, locate the Optional features entry and click or tap it.
System in Windows 11's Settings
On the right side of the window, locate the Optional features entry and click or tap it.
 Where are the Optional features in Windows 11?
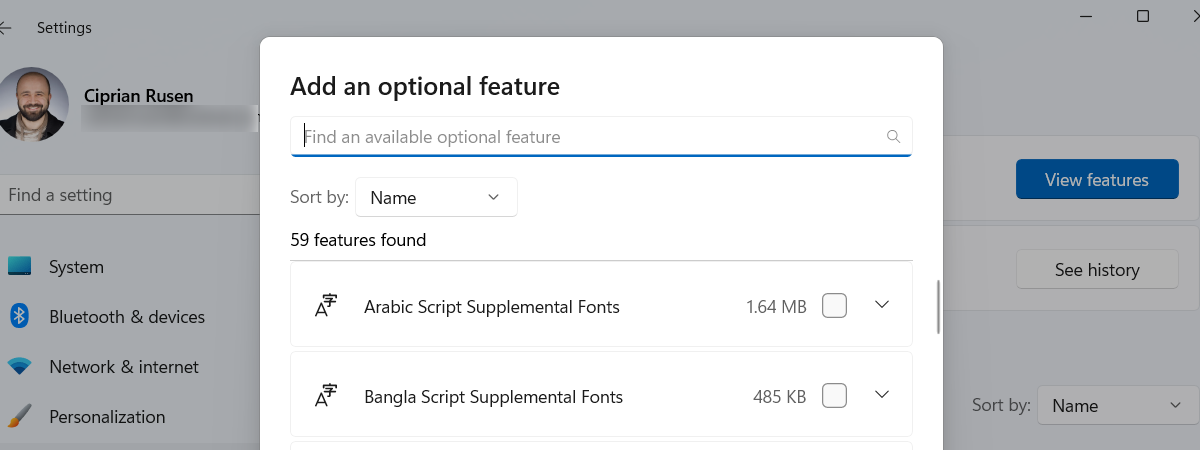
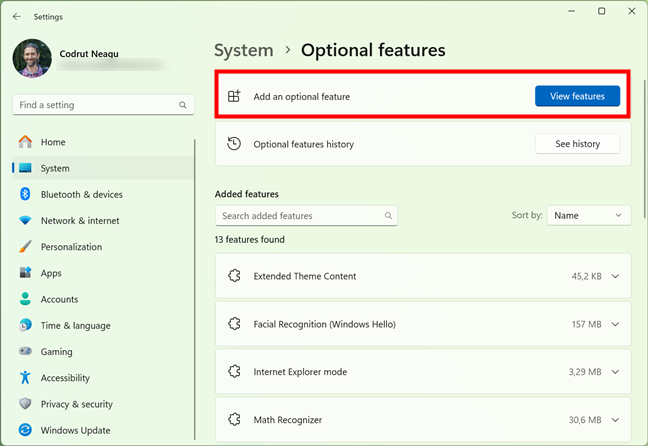
This opens the Optional features page. On it, click or tap the View features button next to Add an optional feature.
Where are the Optional features in Windows 11?
This opens the Optional features page. On it, click or tap the View features button next to Add an optional feature.
 The View features button
Now, Windows loads the list of optional features. Use the search field at the top to find the one you want to install.
The View features button
Now, Windows loads the list of optional features. Use the search field at the top to find the one you want to install.
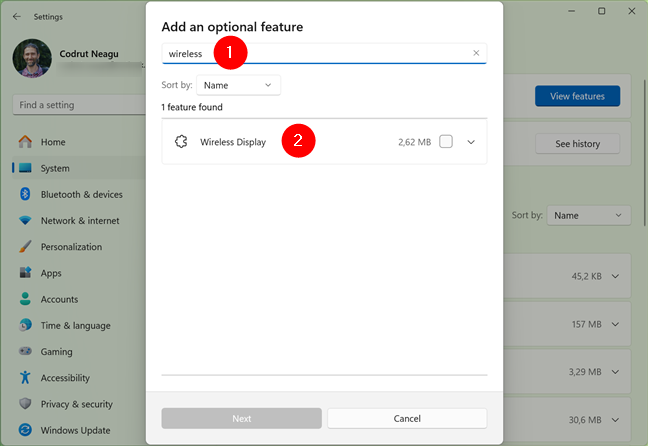 Search for an optional feature in Windows 11
Alternatively, scroll to explore the optional features available for your system.
Search for an optional feature in Windows 11
Alternatively, scroll to explore the optional features available for your system.
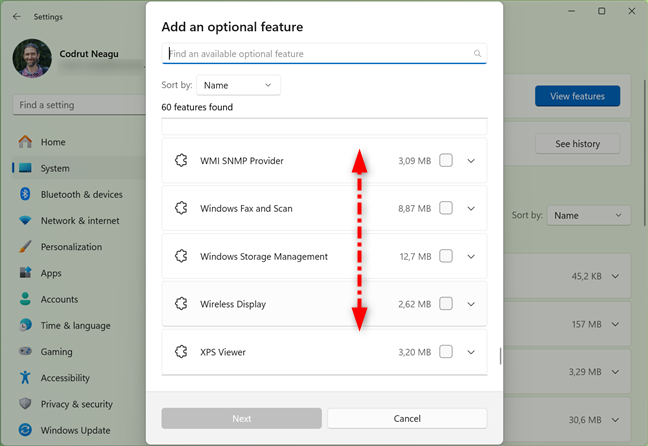 Browse the list of available optional features
If you’d like to see details about a certain feature, click or tap the small arrow button next to it.
Browse the list of available optional features
If you’d like to see details about a certain feature, click or tap the small arrow button next to it.
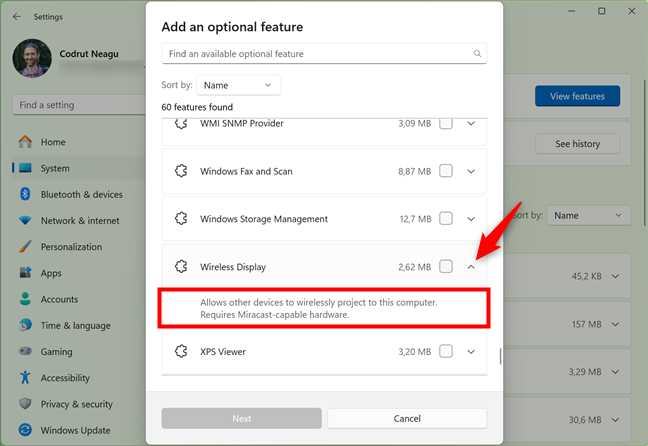 Discover details about an optional feature
Once you’ve found the optional feature you want, select it by clicking or tapping the checkbox next to it. If you want to add more than one feature, select all of them.
Discover details about an optional feature
Once you’ve found the optional feature you want, select it by clicking or tapping the checkbox next to it. If you want to add more than one feature, select all of them.
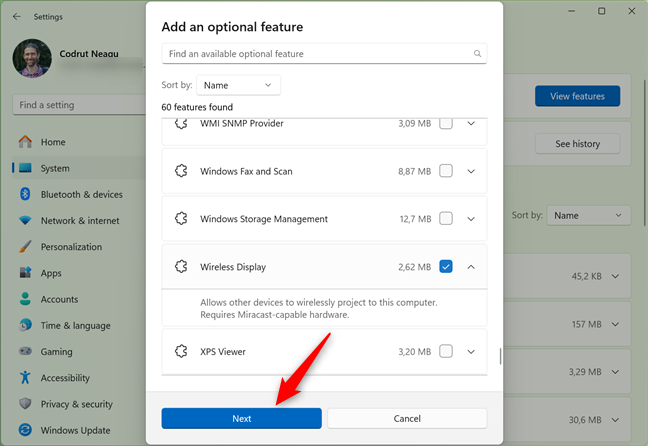
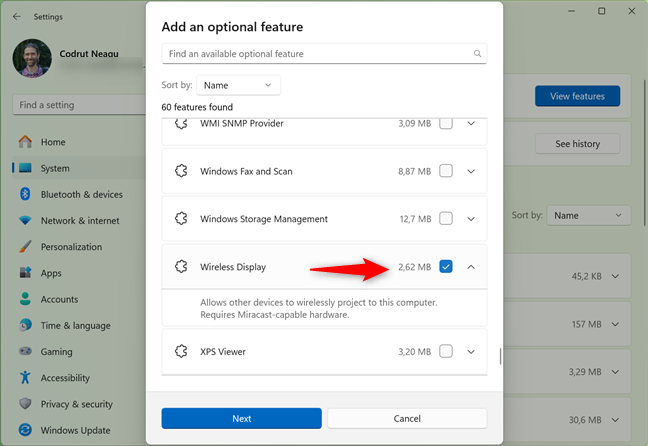 Select the optional features to install
After choosing the optional feature(s) to install, click or tap the Next button at the bottom of the list.
Select the optional features to install
After choosing the optional feature(s) to install, click or tap the Next button at the bottom of the list.
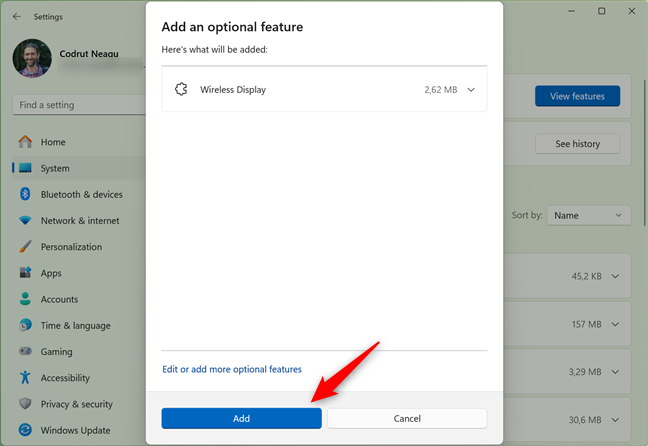
 Press Next after selecting the optional feature(s) you want
Windows then shows you a summary of the optional features you’ve chosen to install. Click or tap Add to get them on your PC.
Press Next after selecting the optional feature(s) you want
Windows then shows you a summary of the optional features you’ve chosen to install. Click or tap Add to get them on your PC.
 Install the selected optional features
Windows will then install all the optional features you’ve selected. You can see the progress in the Recent actions section of the Optional features page in Settings.
Install the selected optional features
Windows will then install all the optional features you’ve selected. You can see the progress in the Recent actions section of the Optional features page in Settings.
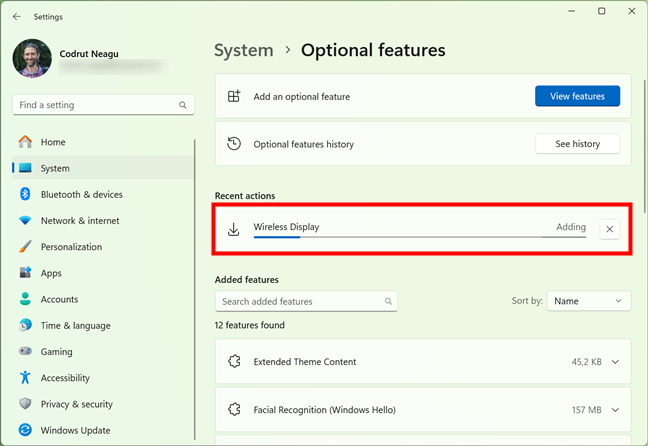 Windows 11 is adding an optional feature
When this is done, the status changes to Added. That means the optional feature(s) selected have been enabled in Windows 11.
Windows 11 is adding an optional feature
When this is done, the status changes to Added. That means the optional feature(s) selected have been enabled in Windows 11.
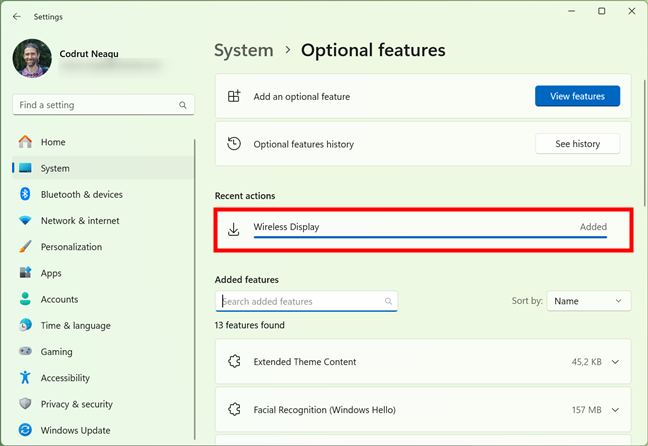 An optional feature has been added to Windows 11
You can now start using the new optional features you’ve added on your Windows 11 PC.
An optional feature has been added to Windows 11
You can now start using the new optional features you’ve added on your Windows 11 PC.
 Optional features in Windows 11
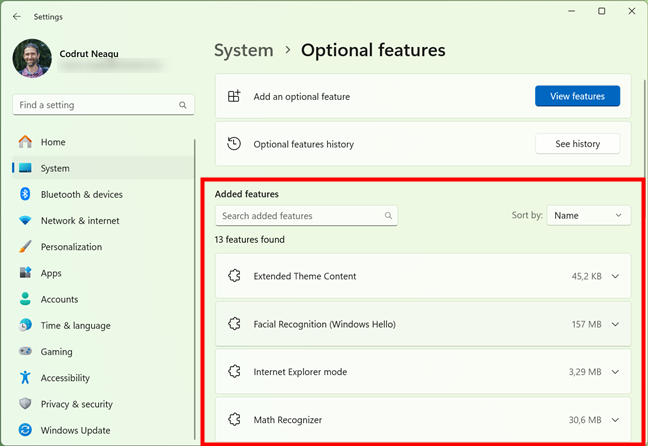
Then, on the Optional features page, head to the Added features section.
Optional features in Windows 11
Then, on the Optional features page, head to the Added features section.
 The list of optional features in Windows 11
Type the name of the feature you want to uninstall (or part of its name) in the search field at the top of the list. Alternatively, browse the list to find the feature you want to remove. When you’ve located it, click or tap the optional feature to expand it.
The list of optional features in Windows 11
Type the name of the feature you want to uninstall (or part of its name) in the search field at the top of the list. Alternatively, browse the list to find the feature you want to remove. When you’ve located it, click or tap the optional feature to expand it.
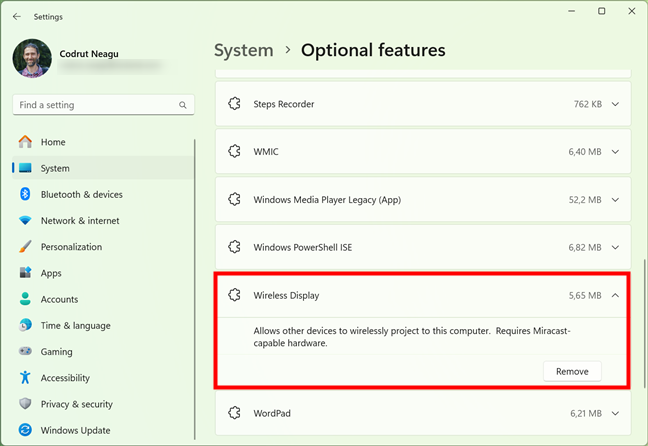 Expanding an optional feature's entry
Press the Remove button and wait for Windows to turn off that optional feature.
Expanding an optional feature's entry
Press the Remove button and wait for Windows to turn off that optional feature.
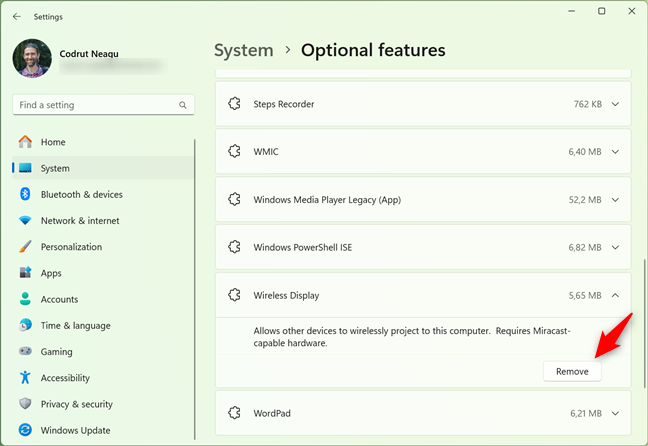 Uninstall an optional feature
You’ll then be brought back to the Optional features page in Settings. There, you can see the progress of the removal process under Recent actions. After a minute or two, the optional feature will be gone from your PC.
Uninstall an optional feature
You’ll then be brought back to the Optional features page in Settings. There, you can see the progress of the removal process under Recent actions. After a minute or two, the optional feature will be gone from your PC.
 An optional feature has been removed from Windows 11
That’s it!
An optional feature has been removed from Windows 11
That’s it!
What do Optional features mean?
Both Windows 11 and Windows 10 are complex operating systems with many built-in components. However, there are some features and tools that aren’t installed by default but can be added by the user. These are called Optional features, and you can choose whether you want them or not. While they’re not essential for the basic operation of the operating system, they provide new functions and can be useful for specific tasks or preferences. Some allow you to use legacy programs, and others are required by certain apps to run as expected. Now that you know what Optional features mean, let’s see how to change optional features in Windows 11 and Windows 10:How to add optional features to Windows 10
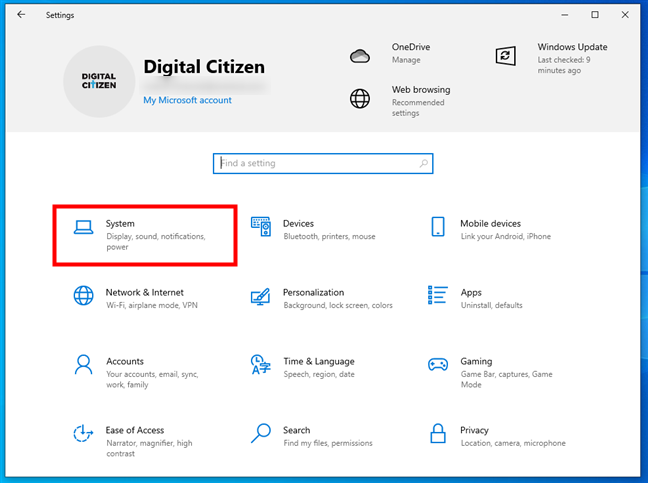
To add an optional feature to Windows 10, first, open the Settings app (Windows + I). In Settings, click or tap System.How to remove optional features from Windows 10
To remove optional features from your Windows 10 PC, the first steps are the same as the ones for installing them. Launch Settings, head to System > Optional features, and take a look at the Added features section on the right.How to add optional features to Windows 11
Windows 11 also has optional features and the first step to adding one is to open the Settings app (Windows + I). In Settings, select System in the left sidebar.How to remove optional features from Windows 11
To uninstall one or more optional features from your Windows 11 PC, take the same initial steps. Open Settings (Windows + I), select System, and click or tap Optional features.
Discussion (0)
Be the first to comment.