09.05.2011
In previous articles, we've shown how to edit a viewing template and how to apply it to any folder and its sub-folders. To complete the picture, we will show how to edit and change the viewing template used for any library in Windows 7.
Step 1: Configure the Viewing Template on a Folder
Windows Explorer has five types of viewing templates it applies to folders and libraries: General Items, Documents, Pictures, Music and Videos, each with a specific set of details shown. These viewing templates can be customized to show the contents of a folder and/or library to be the way you want to.
Unfortunately, Windows Explorer doesn't allow you to customize the template of a folder which is part of a library. That's because it applies the viewing template for the library to all the folders in it. It doesn't support each folder in the library to have its own (separate) viewing template. Therefore, before customizing the viewing template applied to a library, you need to configure it on a folder which shares the same viewing template as the library but is not necessarily part of the library. Sounds complicated? Well... to ease your life, check out this very detailed tutorial: Configure the Default Viewing Templates in Windows Explorer to be as YOU Want Them!
To help you understand better, let's also take an example: I have a library called Documents, with folders of documents inside it. For some reason, the library uses the General items viewing template and I want it to use the Documents viewing template instead. However, I want this new template to include additional columns, on top of the default ones (e.g. to show me a column with Authors information). The first step is to select another folder with documents in it, or simply a random one to which I apply this viewing template. Then, I customize the way I want to view things and apply the customized viewing template to all folders using it. Again, to learn how to do this, check out our tutorial: Configure the Default Viewing Templates in Windows Explorer to be as YOU Want Them!.
Step 2: Apply the Viewing Template to the Library
Now, the viewing template you want to use for your library is customized. It is time to apply it to the library. To do so, right click on the appropriate library. In our example it is called Documents.
Then, go to Properties.

In the Properties window, go to the 'Optimize this library for:' section. Here, select the new viewing template you want applied and press OK. In our example we selected Documents.
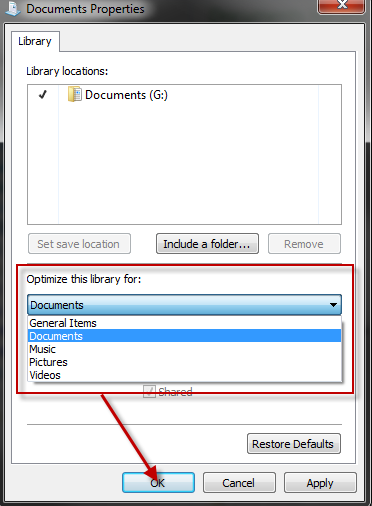
The viewing template is now applied to the selected library.
Wasn't that hard, was it?
Initially this might sound complicated but, if you think about it, it makes sense. Also, it doesn't take a whole lot of time to do it. It's harder the first time but then you do it pretty fast. For any questions, don't hesitate to leave a comment. For other useful tips, check out the articles recommended below.