Guess what Windows 8 & Windows 8.1 users: when you're using Microsoft's newest operating system you don't need to install virus protection... Oh god, we sound like those Mac elitists, don't we? Well, we aren't saying this due to an over-confidence in virus coders lack of interest in a comparatively small market share. We're saying this because Windows 8 & Windows 8.1 have a baked in antivirus that is sufficient to protect it against most malware threats. The Windows Defender you see in Windows 8 & Windows 8.1 isn't the basic malware scanner you saw in Windows 7. It is a full featured virus scanner with real-time protection. Read on and we'll show you how to use it.
How to Launch Windows Defender
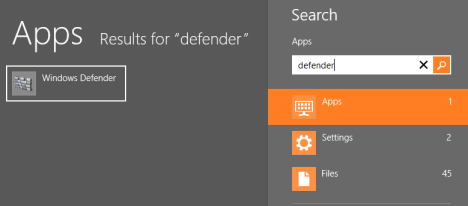
Open the Start screen and type "defender." The Search charm will open to recieve your input. Click or tap "Windows Defender" from the results window to launch the application.
Windows Defender, Windows 8, Windows 8.1, antivirus
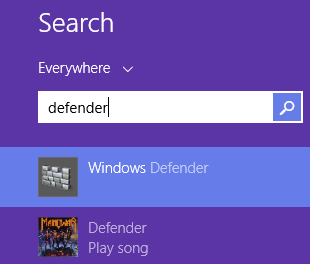
In Windows 8.1, the process works the same. The only difference is that the results are displayed in a different manner.
Windows Defender, Windows 8, Windows 8.1, antivirus
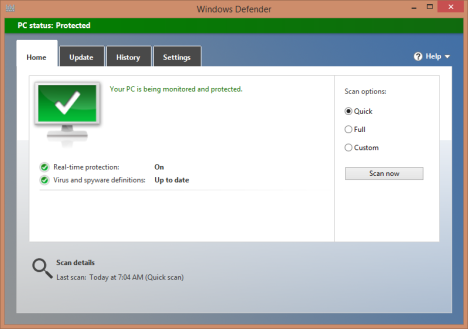
You'll notice right away that the new Windows Defender looks a lot like the Microsoft Security Essentials you may have seen in the past. That would be because the new Windows Defender is a new version of Microsoft Security Essentials. It's just that Microsoft has prefered to use a different product name.
Windows Defender, Windows 8, Windows 8.1, antivirus
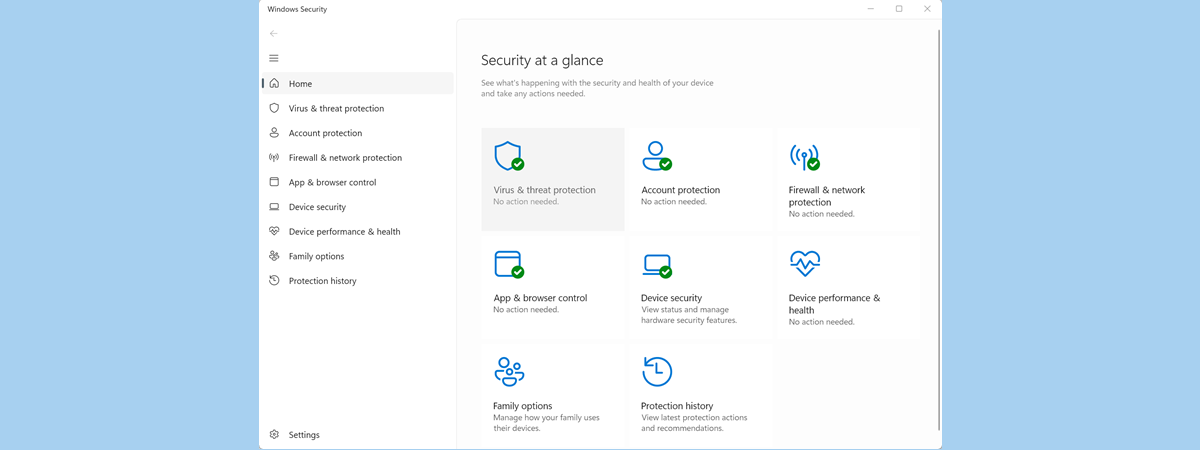
How to View your Security Status
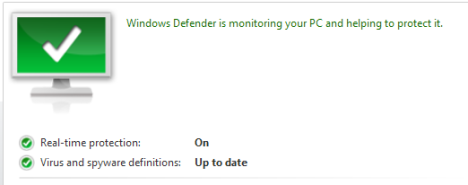
The Home tab of Windows Defender makes your computers current status very obvious. If all is well you'll see a big check mark surround by soothing green.
Windows Defender, Windows 8, Windows 8.1, antivirus
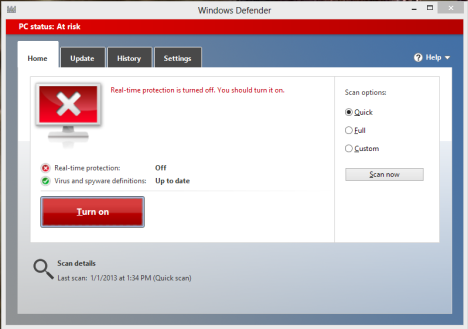
If anything is wrong - your definitions are out of date, real-time protection is disabled or a virus has been detected - you'll be seeing less soothing colors. If you see red, it means your computer is at risk and requires immediate action. You'll see this if Windows Defender is disabled or a virus has been detected.
Windows Defender, Windows 8, Windows 8.1, antivirus
If you see an orange alert, that means your computer is potentially at risk. You'll see that for outdated virus definitions or if you haven't run a scan in a long time.
How to Manually Scan your PC Using Windows Defender
Another thing you'll notice on the Home tab of Windows Defender is a quick way to start a manual virus scan. Just select your scan type and click "Scan Now."
Windows Defender, Windows 8, Windows 8.1, antivirus
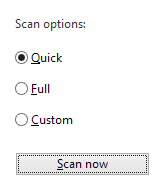
You have three choices:
Quick - A fast scan of your computer's most vulnerable areas.
Full - A slower more thorough scan of all of your computer's drives.
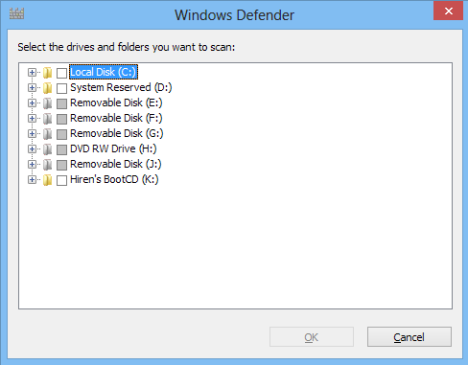
Custom - A scan of only the locations you specify.
If you choose custom you'll have to select which locations to scan.
Windows Defender, Windows 8, Windows 8.1, antivirus
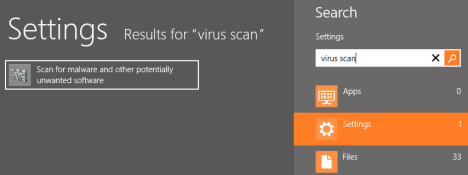
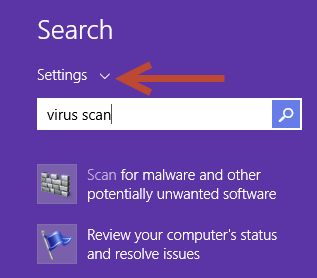
If your intent is to simply start a quick scan, you don't actually have to open the program first to do it. In Windows 8, simply type "Virus scan" into the Start screen, click or tap "Settings" and click or tap "Scan for malware and other potentially unwanted software."
Windows Defender, Windows 8, Windows 8.1, antivirus
In Windows 8.1, the process is similar and you need to filter by Settings in order to see the search results.
Windows Defender, Windows 8, Windows 8.1, antivirus
How to Manually Update Windows Defender
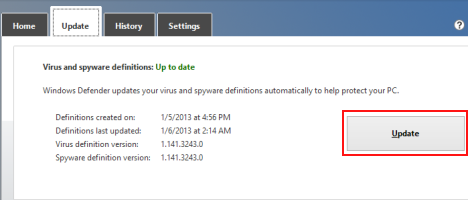
Windows Defender should automatically download new definition files whenever they become available through Windows Update. However, if an update fails and you're assaulted with the jarring red Home tab, select the Update tab and click or tap "Update."
Windows Defender, Windows 8, Windows 8.1, antivirus
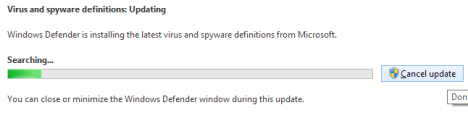
Windows Defender will check to see if there's an available update. If one's out there, it'll download and install it for you. You can click or tap "Cancel update" at any time to stop the process.
Windows Defender, Windows 8, Windows 8.1, antivirus
How to View Viruses Caught by Windows Defender
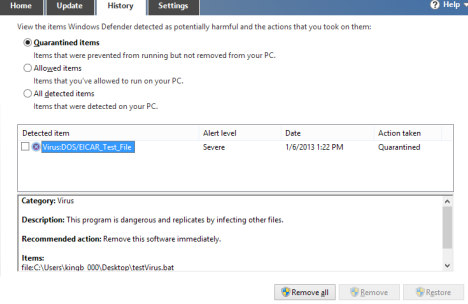
If Windows Defender has come across any malware - either during a scan or through real-time protection - it will be quarantined until you choose what to do with it. To view any files spotted by the antivirus, select the History tab. You have three options for files to look at:
Quarantined items - Suspected malware that has been contained, but not deleted.
Allowed items - Items suspected of being malware, but that you've allowed to run anyway.
All detected items - All suspected malware found by Windows Defender.
Select a category to view and you'll be shown the applicable alerts. Select a piece of malware if you want to restore it from quarantine, delete it or allow it. Simple click or tap the button on the bottom of the window to apply your chosen action.
Windows Defender, Windows 8, Windows 8.1, antivirus
How to Configure Windows Defender's Settings
Head over to the Settings tab to change the way your antivirus works.
Windows Defender, Windows 8, Windows 8.1, antivirus
Select "Real-time Protection" from the settings bar on the left side of the window to toggle it on or off. We strongly recommend that you leave this on at all times unless you're running a different antivirus application. Real-time protection is your best defense against malware as it scans and monitors all activity for potentially harmful behavior. Virus scans are helpful once your computer is already infected, real-time protection prevents infection in the first place.
Windows Defender, Windows 8, Windows 8.1, antivirus
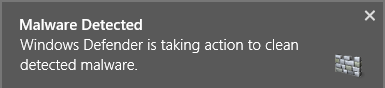
If real-time protection comes across anything, you'll get a notification alerting you to the presence of malware.
Windows Defender, Windows 8, Windows 8.1, antivirus
Defender will automatically move the potential malware to quarantine where you can choose what to do with it.
How to Exclude Files, Extensions and Processes from Virus Scans
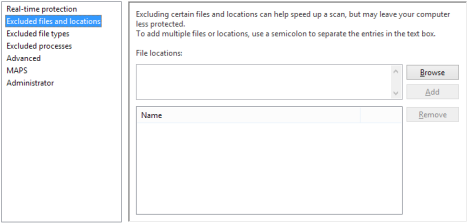
While Windows Defender is light on resources, it still makes a noticeable dent in your performance during scans. To lessen this effect, you can exclude certain files, file types or processes from your virus scans. If you know something is safe - your music collection for example - excluding it from a scan will cause the scan to finish much faster freeing up your resources for use. Be careful with this though, it'll make your scans faster, but it will also make your computer less secure.
Select "Excluded files and locations," "Excluded file types" or "Excluded Processes" from the Settings tab of Windows Defender. Click or tap "Browse" and locate the items you want to exclude from scans. Click or tap OK to add them to the top box of the window and click or tap Add to move them to the bottom box. All items in the bottom boxes will be excluded from all virus scans.
Windows Defender, Windows 8, Windows 8.1, antivirus
How to Change Windows Defender's Advanced Settings
The advanced section of the Windows Defender settings has a few tweaks you can use to increase security on your system:
Scan archive files - This forces Windows Defender to scan the contents of all compressed archive files including ZIP, RAR and CAB files.
Scan removable drives - Select this option if you want Windows Defender to scan any removable drive, such as external hard drives or flash drives, during complete scans.
Create a system restore point - This option creates a new restore point any time Windows Defender you choose to delete, run or quarantine a potential piece of malware. This means that even if you screw up and hose your system, you can recover.
Allow all users to view the full History results - Any user on your computer can open defender, but only Admins can view the History tab by default. Check this option to change that.
Remove quarantined files after - Use this option to set a time period for deleting quarantined items. Make sure that you set the time long enough that you'll notice if something you need is missing.
Windows Defender, Windows 8, Windows 8.1, antivirus
How to Change Your MAPS Membership Settings
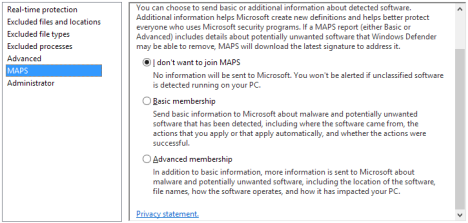
The Microsoft Active Protection Service - known as MAPS - is a service on your system that can send information to Microsoft about any malware detected on your system. Sending this info can help Microsoft to better track and deal with malware, but the idea of sending data out to Microsoft is nerve wracking to many users.
Select "MAPS" from the Settings tab to choose how much - if any - data you want to send to Microsoft about your malware hits:
I don't want to join MAPS - Select this option to opt out of MAPS and keep your malware data private.
Basic membership - Select this option to send only basic information to Microsoft including where you got the malware and whether you allowed it, quarantined it or deleted it.
Advanced Membership - Select this option to send detailed information about your detected malware to Microsoft. Additional information includes where the malware was stored on your computer, individual file names of the malware components and reports on how the malware affected your system.
Windows Defender, Windows 8, Windows 8.1, antivirus
How to Turn Windows Defender On or Off
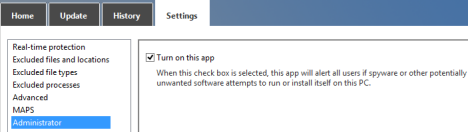
While Windows Defender is a very effective antivirus application, it isn't the only option. If you buy a computer from a retailer, it will likely have a trial of another antivirus installed and Windows Defender will be disabled. Alternatively, it may be enabled, but you want to turn it off to install something else yourself. Whatever your situation, you can easily turn Windows Defender on or off using the Settings tab.
Select Administrator and click or tap the checkbox next to "Turn on Windows Defender." Select it to turn it on, deselect it to turn it off.
Windows Defender, Windows 8, Windows 8.1, antivirus
In Windows 8.1, the same checkbox has been renamed to Turn on this app. The way it works is the same as in Windows 8.
Windows Defender, Windows 8, Windows 8.1, antivirus
What About Scheduling Scans?
Wait a minute. We've covered every inch of the Windows Defender user interface and we've seen nothing about scheduling a scan! While the obvious assumption is that Windows Defender doesn't support this basic essential feature, that isn't correct. You just have to use the Task Scheduler to configure repeating virus scans. While it isn't terribly hard to do, it's important enough to warrant its own article. Check it out to learn how to schedule a virus scan in Windows 8: How to Schedule a Virus Scan with Windows 8's Built-In Antivirus. This procedure applies also to Windows 8.1.
Conclusion
That's about all there is to know about Windows Defender. You'll notice that it's a simple solution to malware protection that is so non-intrusive that you'll hardly ever notice it's there. Take the time to set it up when you first get your new Windows 8 or Windows 8.1 device and you won't need to open it again unless it finds something. It provides the same level of protection as Microsoft Security Essentials, so you can compute with confidence.
Are you comfortable using the baked in Windows Defender? If not, what antivirus solutions do you prefer? We're curious to know your opinions.
Read this article and info. Today I am putting Microsoft to the test and trusting the Windows Defender to operate. I know nothing is 100%, even the best virus internet protection gets hacked. With that in mind I am letting go of the internet fears that all virus protection companies put in the minds of noobies and regular users such as myself. Also, I am so frustrated at the CPU usage other virus protection software uses to accommodate for security issues. So here I go, I’m jumping off the cliff of fear and going to relax, for once. If so happens I do get a virus that Windows Defender didn’t pick up, I am starting the practice of getting off my lazy butt and backing up my computer system in a cloud and implementing a restore point at least once a month or when I put in a new program that way if issues arise, I can roll back my mistake and fix it. Thank you for this enlightening article….. Tom Burke
Rck ·
Hello,
My name is Rick and I manage the sites Bookmarks4techs.com and What’s On My PC (whatsonmypc.wordpress.com). I just want to say that the information you provide to help others is awesome. I have added 7Tutorials to the Bookmarks4techs.com site.


Discussion (3)
Read this article and info. Today I am putting Microsoft to the test and trusting the Windows Defender to operate. I know nothing is 100%, even the best virus internet protection gets hacked. With that in mind I am letting go of the internet fears that all virus protection companies put in the minds of noobies and regular users such as myself. Also, I am so frustrated at the CPU usage other virus protection software uses to accommodate for security issues. So here I go, I’m jumping off the cliff of fear and going to relax, for once. If so happens I do get a virus that Windows Defender didn’t pick up, I am starting the practice of getting off my lazy butt and backing up my computer system in a cloud and implementing a restore point at least once a month or when I put in a new program that way if issues arise, I can roll back my mistake and fix it. Thank you for this enlightening article….. Tom Burke
Hello,
My name is Rick and I manage the sites Bookmarks4techs.com and What’s On My PC (whatsonmypc.wordpress.com). I just want to say that the information you provide to help others is awesome. I have added 7Tutorials to the Bookmarks4techs.com site.
Keep up the great work…
Rick
Thanks for bookmarking us.