09.09.2020
It's important to know how to sort, group, and filter files and folders in Windows 10, especially if you work with a lot of them. No matter how hard you try to organize everything, it may be difficult at times to find a specific item or set of items. That's why File Explorer includes plenty of options for sorting, grouping, and filtering files and folders, using all kinds of criteria in Windows 10. This tutorial illustrates how to sort, group, and filter folders and files in Windows 10's File Explorer, so you can be more efficient in managing items and finding what you are looking for:
How to sort files and folders in Windows 10
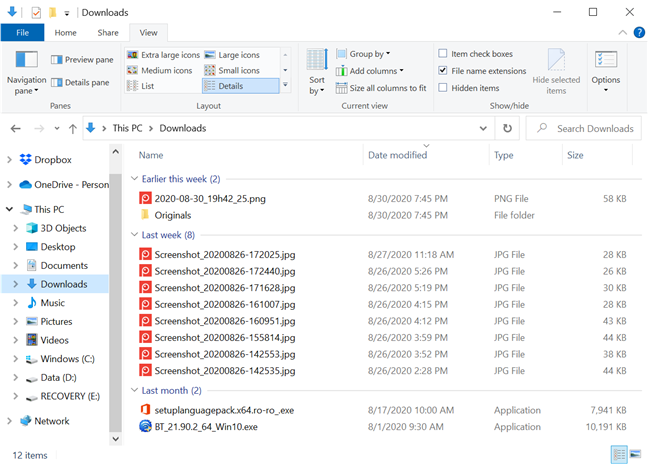
Sorting files and folders reorders them in File Explorer based on the criteria you prefer. There are over 300 criteria available, and you can apply whichever you prefer. By default, in Windows 10, your files and folders are sorted in Ascending order by Name - or alphabetically - except for the Downloads folder, which is sorted in Descending order by Date modified - newest downloads are displayed on top.
One option to begin sorting files and folders is to right-click or press-and-hold on a free area inside the folder to open a contextual menu. Then, hover or tap on Sort by to reveal the four main sorting options for that view template. Our folder uses the General items template, so we can sort it quickly by Name, Date modified, Type, and Size. Click or tap on any of the options, and the items are reordered on that basis.

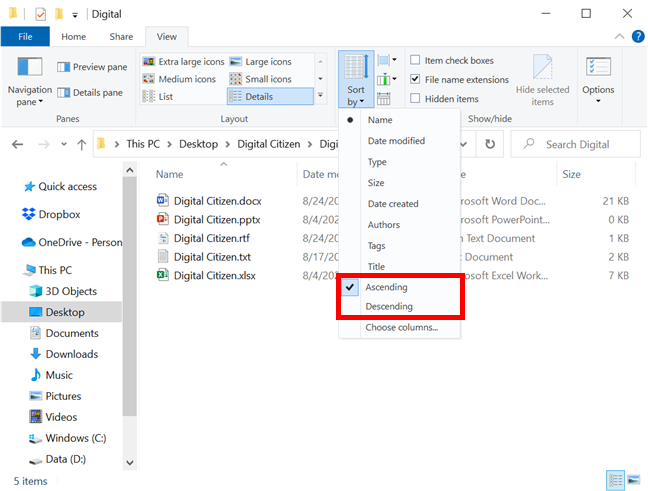
You can reveal more options from File Explorer's View tab. In the Current view section, click or tap on Sort by.
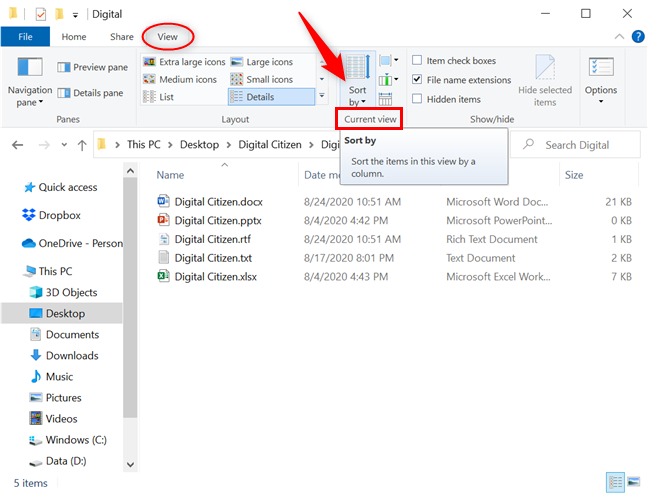
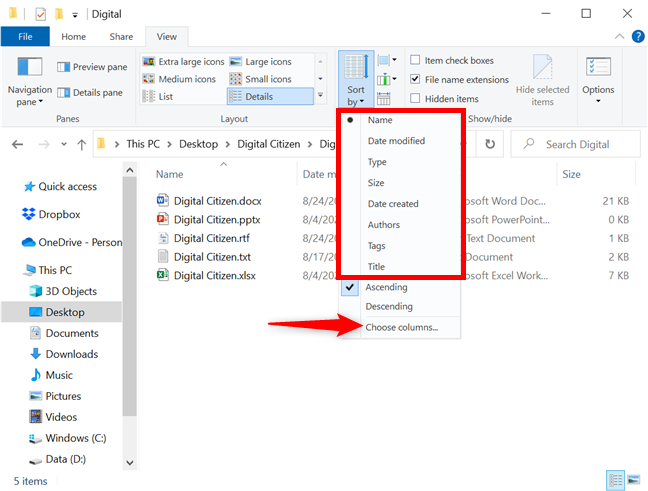
Same as before, the sorting options displayed are specific to that folder's view template. To add more criteria to the Sort by menus, click or tap Choose columns.
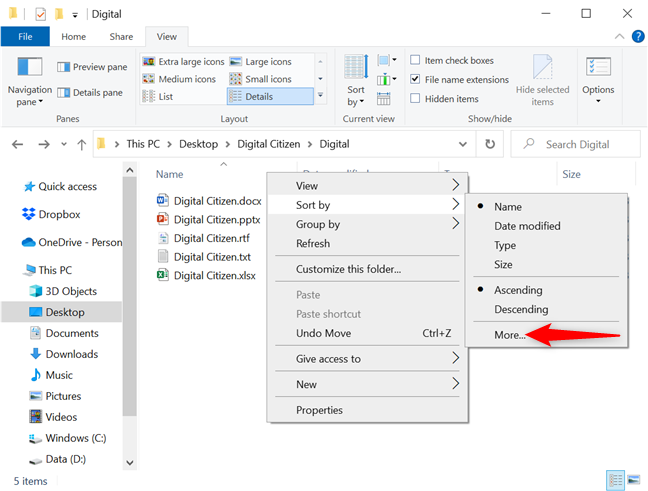
If you're using the right-click Sort by menu, click or tap on More to add extra criteria.
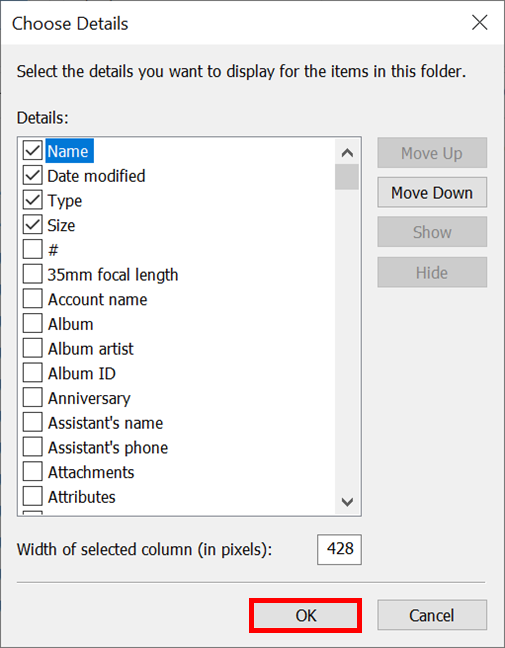
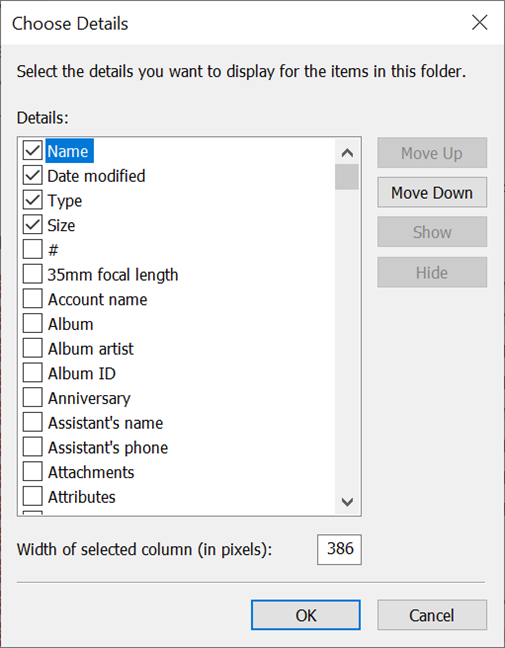
This opens the Choose Details window, where only the four main criteria are selected. Click or tap the boxes of the sorting criteria that you would like to use, or select an entry and then click or tap the Show and Hide buttons on the right to add or remove that specific sorting option.
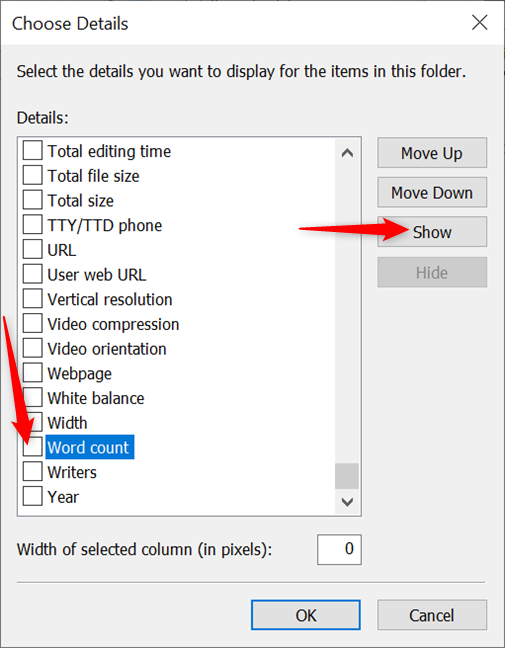
NOTE: You can also select any sorting option and then use the Move Up and Move Down buttons to reposition it in the list.
After selecting your sorting criteria, click or tap OK.

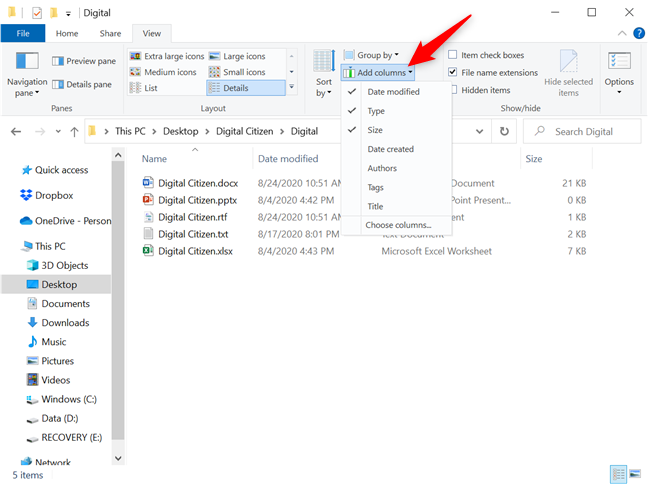
TIP: Any criteria you add to the Sort by menus are also added automatically to the Group by menu discussed in the next section. You can also use the Add columns button from the Current view section of the View tab to expand or shrink the existing list of criteria. The button is greyed out unless you're using the Details view Layout.
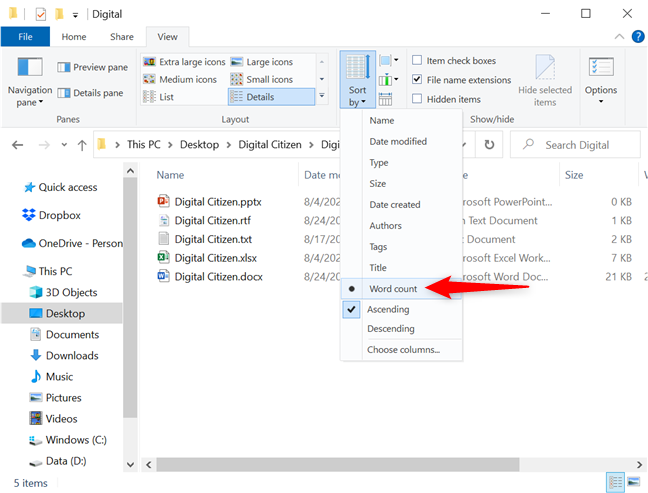
Any new sorting option is now available both at the bottom of the Sort by list, in the right-click contextual menu, and as a separate column header - if you're using the Details view Layout. Click or tap on it to reorder things on this basis.
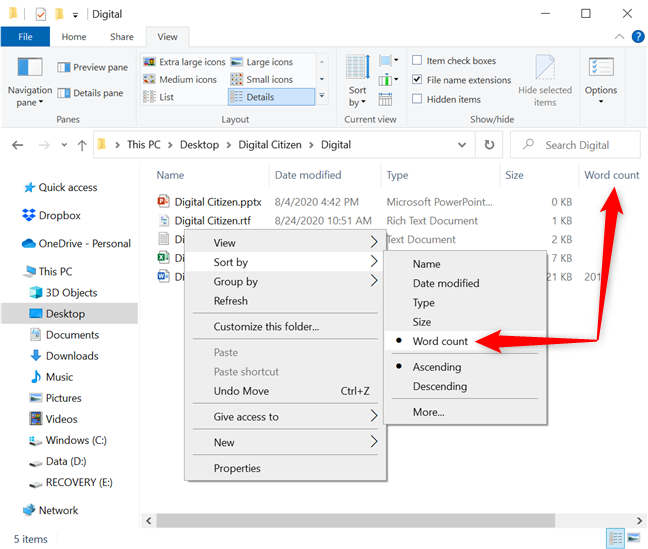
If you press the Sort by button from File Explorer's View tab, you can also find the new sorting option under the default ones. Click or tap on it, and the files are instantly rearranged based on your selection.
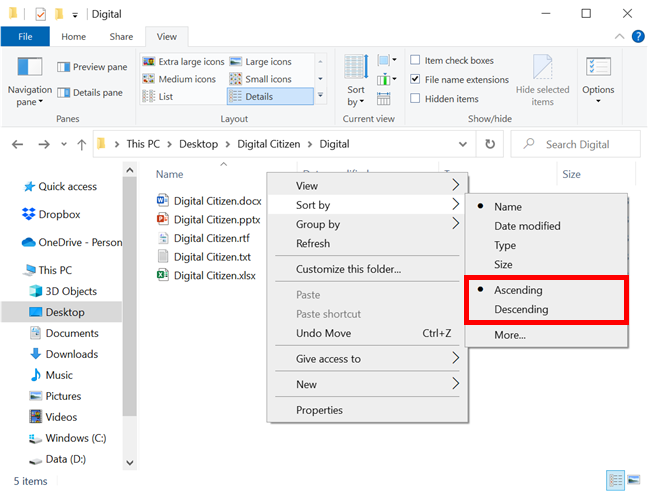
Regardless of the sorting option you're using, the sorting results can be displayed in either Ascending or Descending order. For instance, when sorting by the default Name option, Ascending means the files and folders are arranged from A to Z, while Descending sorts items from Z to A. If you want to reverse the order for your criteria, you can click or tap (again) on its column header, or check the appropriate option from the right-click Sort by menu, as seen below.
You can also choose to display items as Ascending or Descending by pressing the Sort by button and selecting the order you prefer.
Alternatively, accessing the Sort by menu and clicking or tapping on the active sorting option also reverses the order of the items.
How to group files and folders in Windows 10
You can also group files and folders using the different criteria in Windows 10's File Explorer. This organizes all the items in a folder, breaking them into separate sections, based on the detail you choose. By default, items in Windows 10 are not grouped into any category, the only exceptions being:
- Downloads - grouped in Descending order by Date modified to help you find the newest downloaded items on top.
- This PC - grouped by Type in Ascending order. This location has different sorting and grouping alternatives.
- Network - grouped in Ascending order by Category. This location also comes with different sorting and grouping options than other folders.
Right-click or press-and-hold on a free area inside the folder whose contents you want to group. In the contextual menu, hover or tap on Group by to reveal the four main grouping options for that folder. The categories shown differ based on each folder's view template. Click or tap on any of the displayed criteria to group items on that basis.

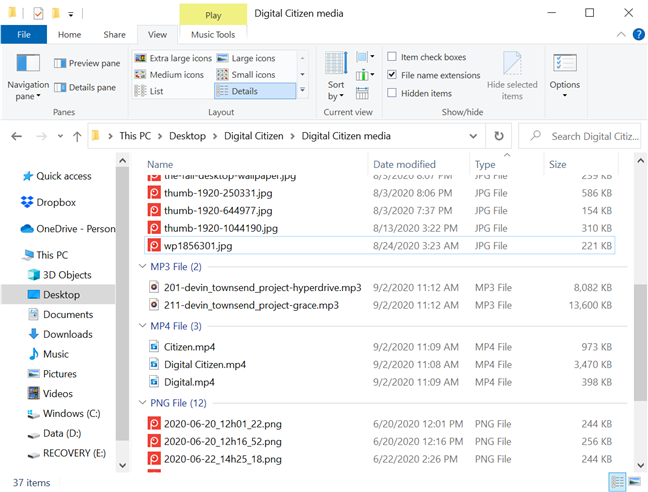
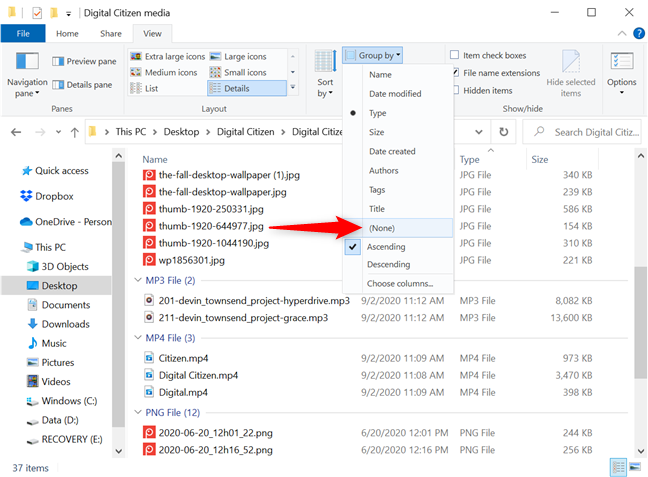
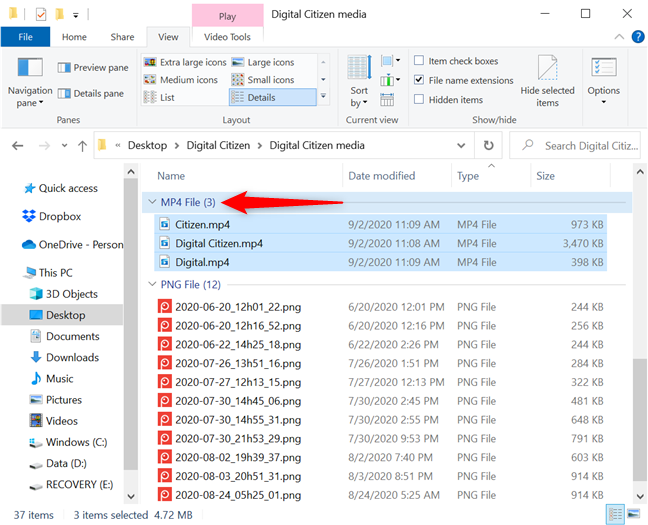
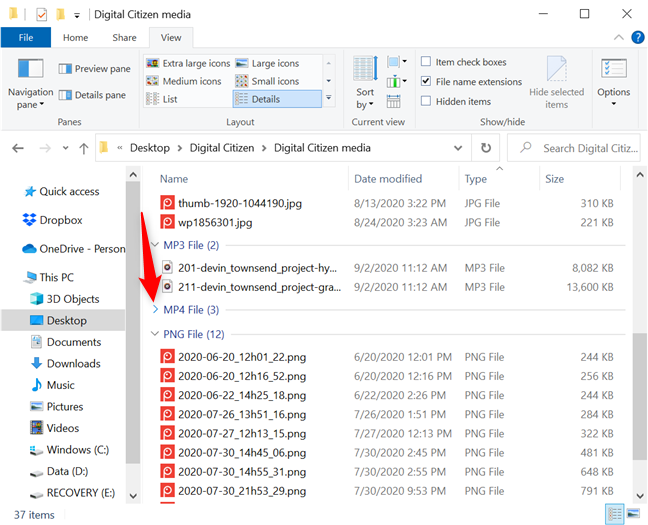
For instance, we want to group the contents of the media files folder by Type. Clicking or tapping on Type offers a different perspective over the files in our media folder, as seen below.
You can also group files and folders from the View tab in File Explorer. Click or tap on the Group by button from the Current view section.
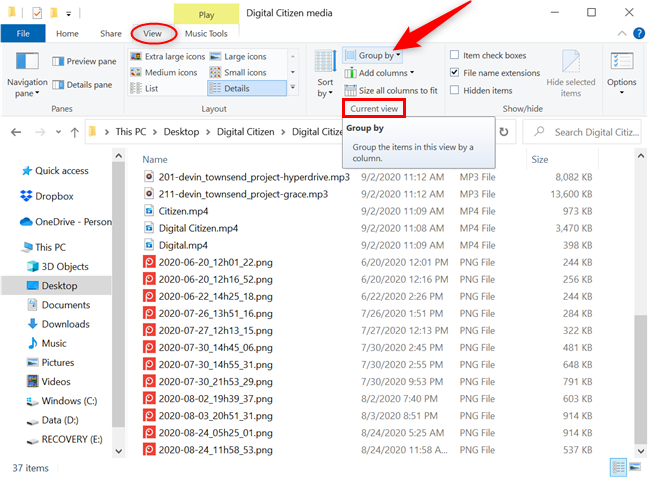
Click or tap on any of the criteria from the dropdown menu to group items on that basis. When a grouping option is selected, a new entry becomes available in the Group by menus: (None). Clicking or tapping on it cancels any grouping, and items are shown the usual way again.
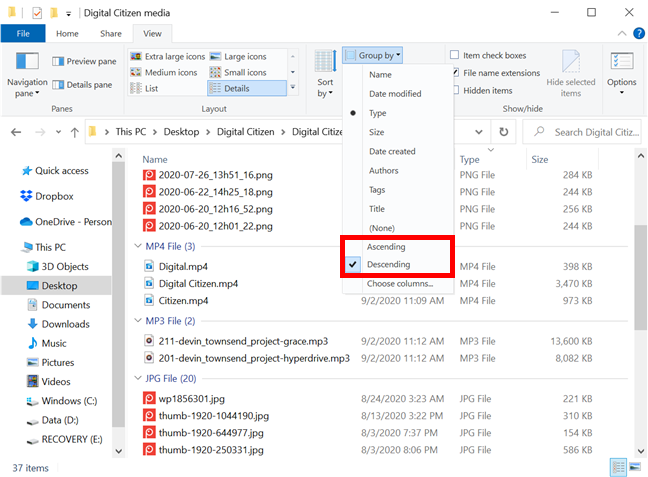
As soon as you group items, the Ascending and Descending options are no longer greyed out, and the Ascending option is enabled by default. For instance, when we grouped our media files by Type, the groups were shown in alphabetical order (JPG, MP3, MP4, and PNG). Selecting Descending reverts the order - PNG, MP4, MP3, and JPG.
The same options are also available from the right-click Group by menu. For additional grouping criteria, click or tap on More or use the Add columns button - only active in Details view.
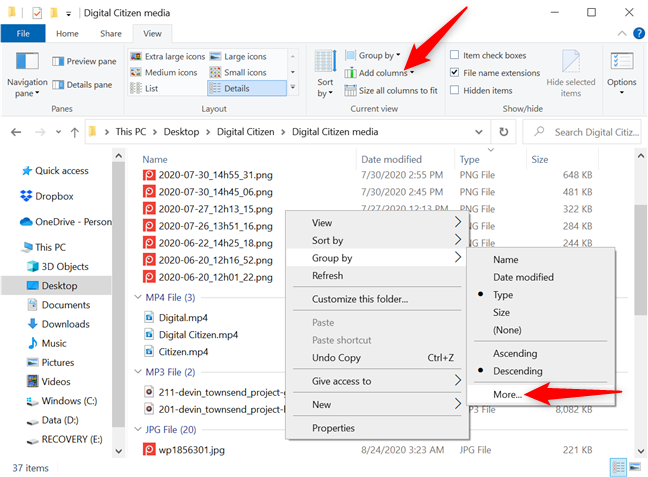
You can also use the Group by button from the View tab, and then press Choose columns.

Since any new criteria you add in the Group by menus are also added automatically to the Sort by menu, the two also share the Choose Details window discussed in the previous section. Check any of the options you want to add as grouping criteria and press OK to find them in the Group by menus.
TIP: Keep in mind that grouping items also sorts them by the same attribute automatically. However, you can first group items by one attribute, and then sort them by a different one to see them in a certain order within each grouping section.
Clicking or tapping on any group's header selects that section's entire content.
Double-clicking or double-tapping on a header toggles between collapsing or expanding the section. You can do the same thing by clicking or tapping on the arrow button next to a header.
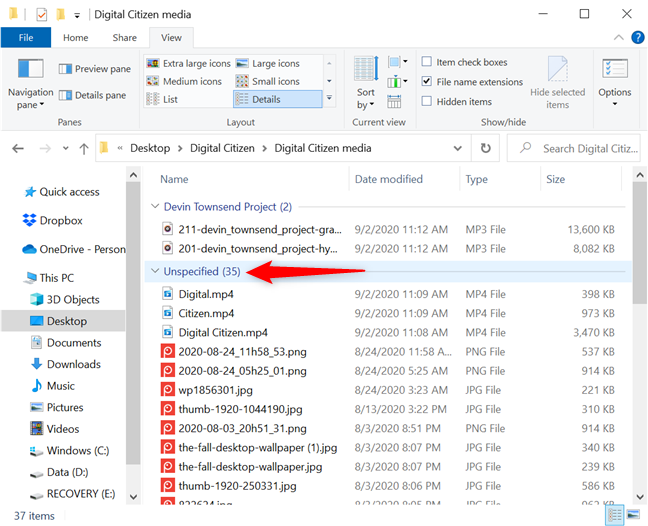
If the grouping option you select is incompatible with some of the items in your folder, they appear in a section named Unspecified. We grouped our media folder by Authors, and the files without a designated author appeared in a separate Unspecified group.
How to filter files and folders in Windows 10
In Windows 10, File Explorer can filter the contents of a folder if you're using the Details view. Similar to the grouping feature, filtering folders and files helps you narrow down the items you need by only showing the content that fits your criteria.
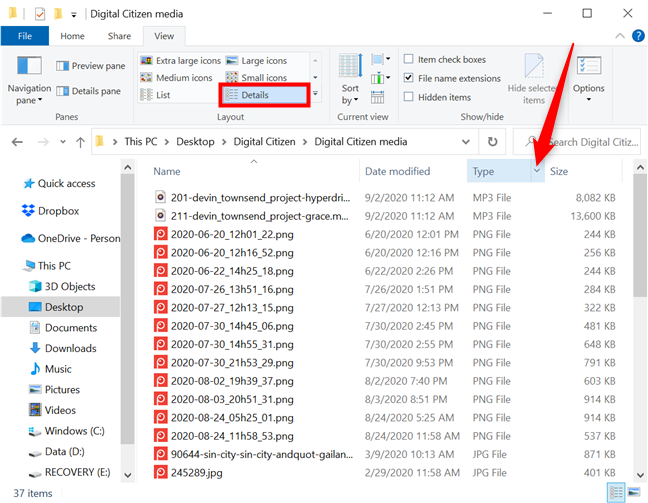
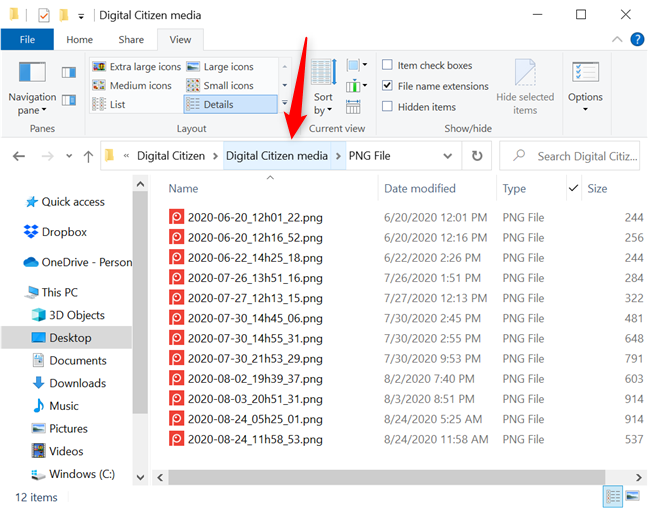
The Details view shows several columns, each displaying more information about the items in that folder (Name, Date modified, Type, Size, etc.). If you hover the cursor over a column header, you can see a small down arrow shown to its right. Click on it. For touchscreens, tap on the right side of a column's header.
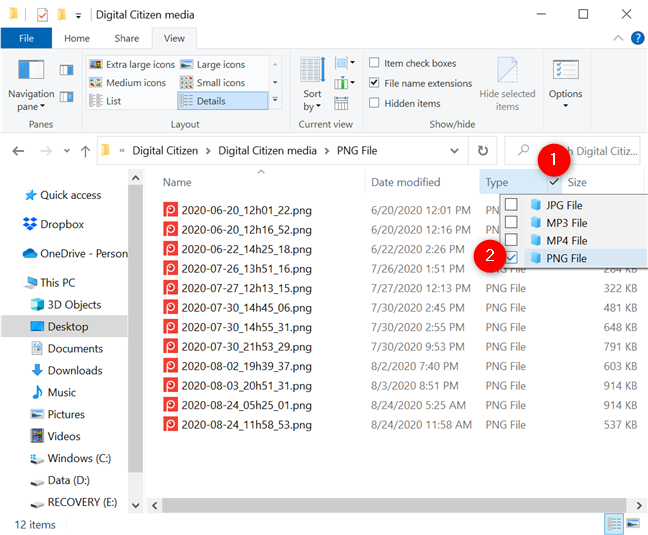
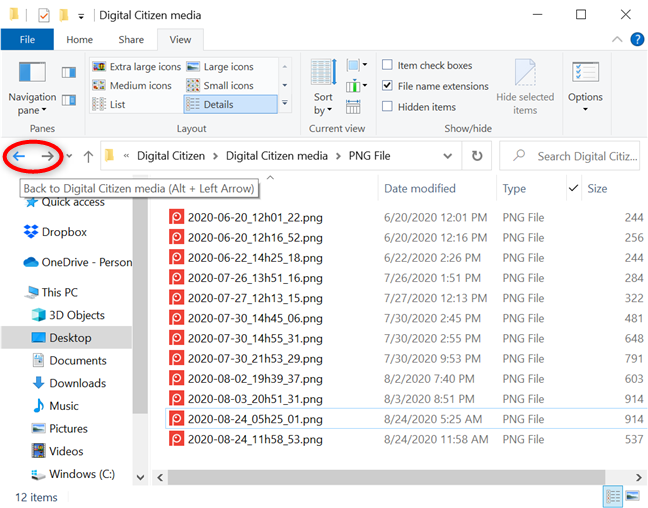
To understand filtering in File Explorer's Details view, let's see how to filter a folder to display only PNG files in Windows 10. Pressing the down arrow next to Type reveals a dropdown menu where the filtering alternatives are the type of files included in the folder. Select the items you want to see - in our case, PNG File.
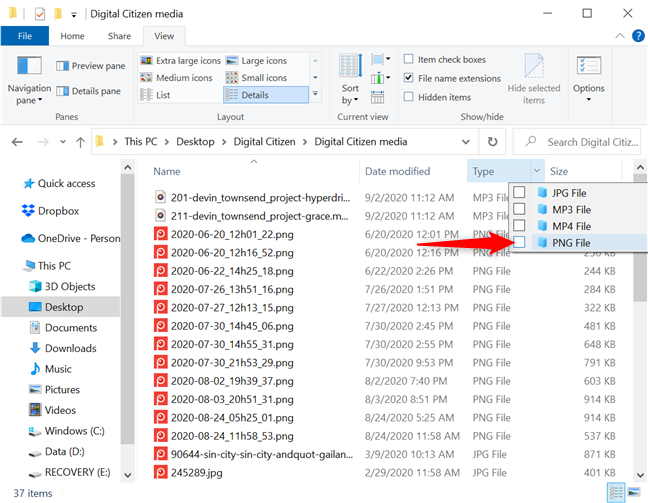
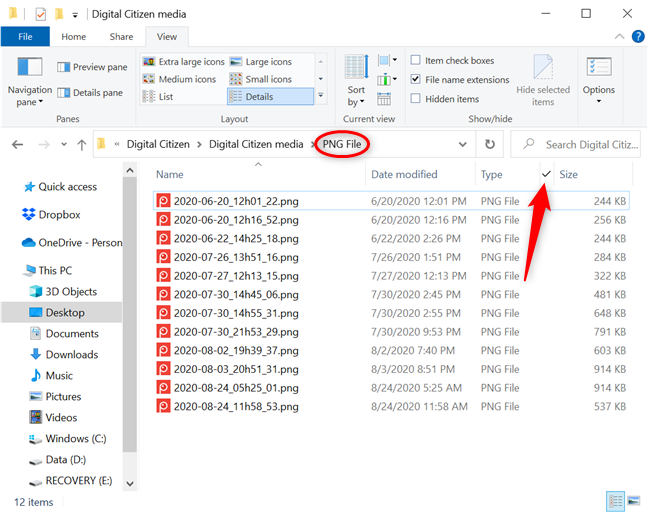
When you're done, the only contents shown are the ones that match your selection. File Explorer is now displaying the filtering criteria in the address bar, and the down arrow is replaced by a checkmark, indicating a filter is currently applied.
You can continue to apply filters using any of the Details columns, to further narrow down the files in the folder. Use the Add columns button in the Current view section from File Explorer's View tab to reveal a menu where you can check the columns you want and even Choose columns to include additional ones.
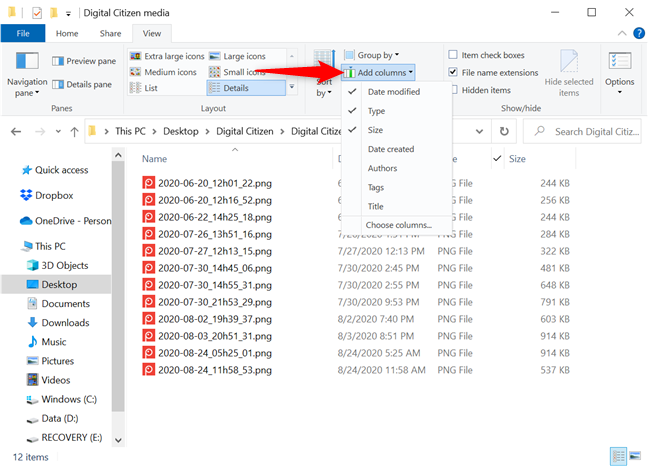
Pressing Choose columns opens the same Choose Details window discussed in the first section of this tutorial. Use it to select any other categories you want to filter by.
If you enable many Details columns, press the "Size all columns to fit" button to change their width according to their contents.
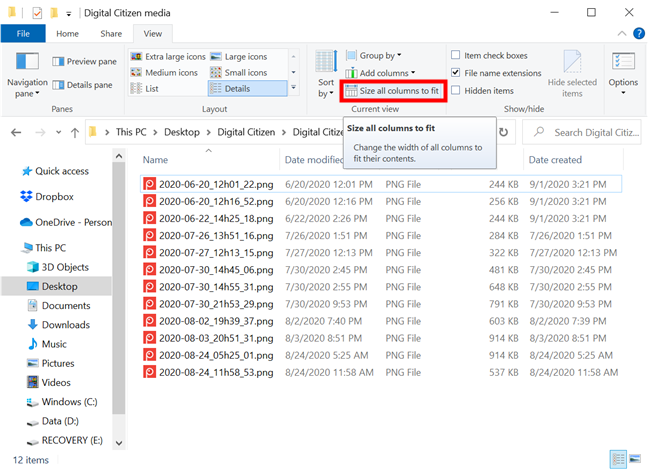
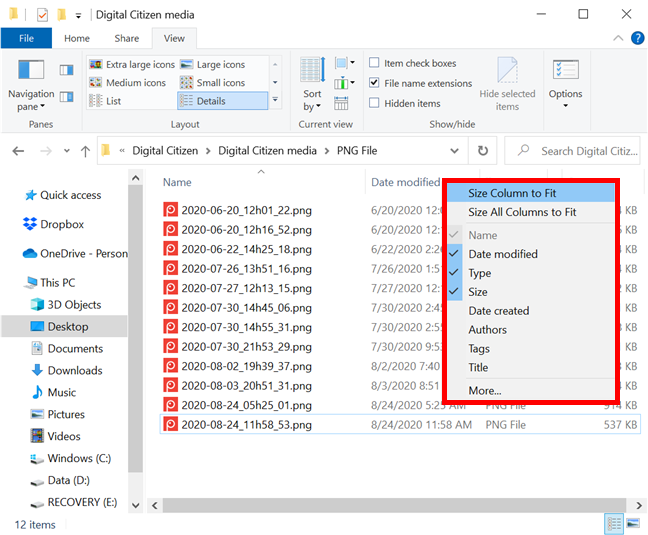
Right-click or press-and-hold on any column header to reveal the "Size Column to Fit" option. You can also add additional columns or "Size All Columns to Fit" from the same contextual menu.
There are several ways to remove filters from your folder in File Explorer. If you want to remove all the filters applied, click or tap on the folder's name in the address bar.
You can also click or tap on the checkmark to reveal the available filters, and then uncheck the box next to the filter(s) you want to remove.
Finally, press the Back button to remove the filter you added last. For multiple filters, click or tap on Back to remove each one. Press Forward to reapply a filter.
To learn more about using File Explorer efficiently, read 15 ways to improve File Explorer or Windows Explorer in Windows (all versions).
Which of the illustrated options fits you best?
As you can see, File Explorer provides some powerful tools for sorting, grouping, and filtering your files and folders. Try out the options illustrated in this tutorial to see what fits you best. You might just need to sort through a messy folder, but filtering could be required if it has more files than expected. Either way, you should be able to organize and locate files and folders a lot faster. Before you close this tutorial, let us know which of the options fits you best and why. Leave a comment below.