


Few people know that TP-Link Wi-Fi 6 routers have a VPN server feature that you can set up and use. It’s a convenient feature when you want to connect to your home network from your laptop while you’re on a business trip, for example. Or to protect your mobile devices when you connect to a public Wi-Fi you don’t trust. Here’s how to configure and use the VPN server on your TP-Link Wi-Fi 6 router:
 First configure Dynamic DNS on your TP-Link router
While your TP-Link router can work with multiple DDNS providers, you probably want it to use TP-Link’s free DDNS service. For that to work, you must also connect your TP-Link router to a TP-Link ID.
First configure Dynamic DNS on your TP-Link router
While your TP-Link router can work with multiple DDNS providers, you probably want it to use TP-Link’s free DDNS service. For that to work, you must also connect your TP-Link router to a TP-Link ID.
 Log in to your TP-Link Wi-Fi 6 router
TIP: If the TP-link firmware is not in the language you want, here’s how to change the language on your TP-Link Wi-Fi 6 router.
At first, you see the network map and some basic settings. Next, go to Advanced and choose VPN Server in the left column. By default, TP-Link opens the section for creating an OpenVPN server. However, it can also be set to use the older PPTP VPN protocol that’s widely supported by all major operating systems, from Windows to Android and iOS.
Log in to your TP-Link Wi-Fi 6 router
TIP: If the TP-link firmware is not in the language you want, here’s how to change the language on your TP-Link Wi-Fi 6 router.
At first, you see the network map and some basic settings. Next, go to Advanced and choose VPN Server in the left column. By default, TP-Link opens the section for creating an OpenVPN server. However, it can also be set to use the older PPTP VPN protocol that’s widely supported by all major operating systems, from Windows to Android and iOS.
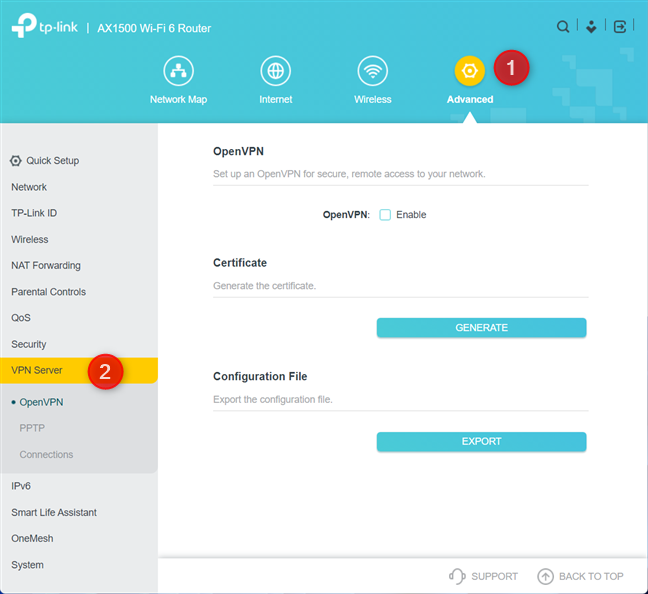 Go to Advanced > VPN Server
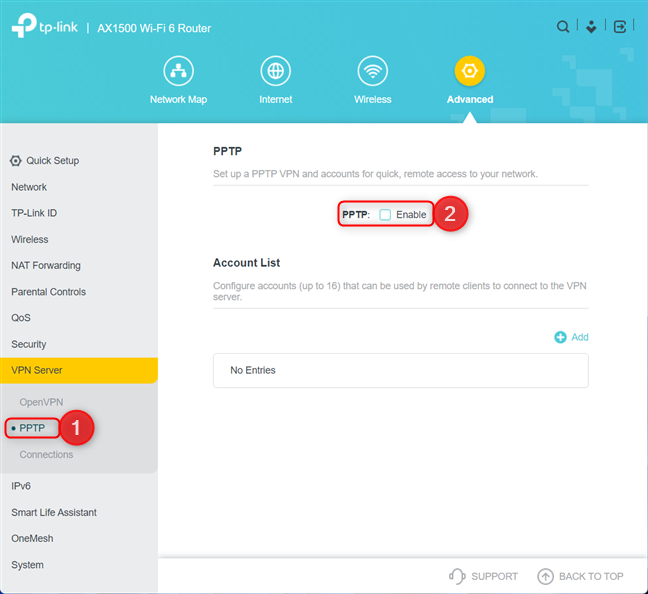 Click and enable PPTP
You see the range of client IP addresses that are going to be used by your TP-Link router for VPN clients. You can change that if you wish. Then, make sure the “Allow Unencrypted connections” option is left unchecked. You don’t want your router to establish unprotected connections. Then, click or tap Add.
Click and enable PPTP
You see the range of client IP addresses that are going to be used by your TP-Link router for VPN clients. You can change that if you wish. Then, make sure the “Allow Unencrypted connections” option is left unchecked. You don’t want your router to establish unprotected connections. Then, click or tap Add.
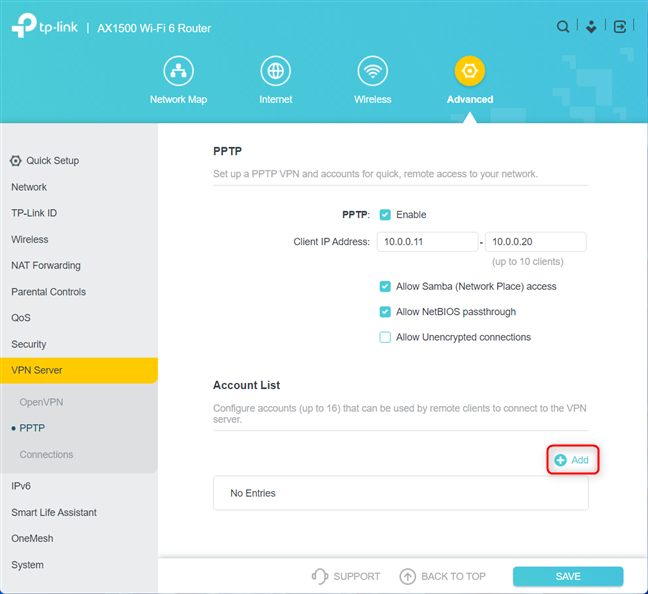 Click or tap Add to configure the username and password
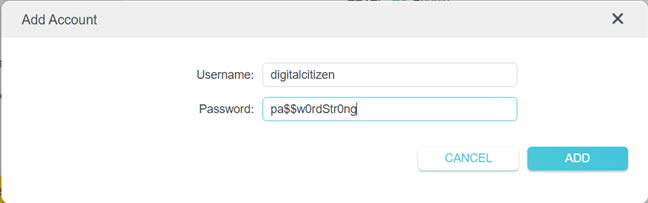
This action opens the Add Account window, where you enter the username and password that you want to use for connecting to the VPN server on your router. Then, click or tap Add to continue.
Click or tap Add to configure the username and password
This action opens the Add Account window, where you enter the username and password that you want to use for connecting to the VPN server on your router. Then, click or tap Add to continue.
 Type the user and the password for the VPN server
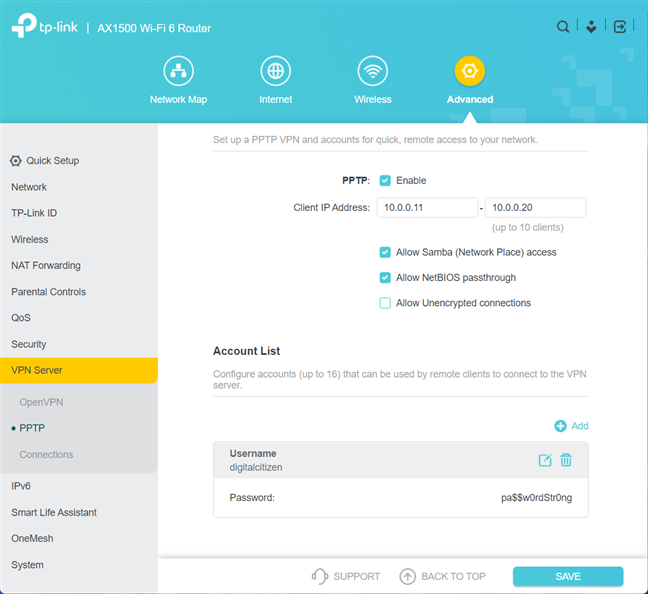
You see the username and password you just added. You can press Add and enter another username and password. However, most home users won’t need more than one.
Type the user and the password for the VPN server
You see the username and password you just added. You can press Add and enter another username and password. However, most home users won’t need more than one.
 Don't forget to press Save
When you are done setting things up, press Save. Your TP-Link router starts its VPN server service and allows your computer and devices to connect to it.
Don't forget to press Save
When you are done setting things up, press Save. Your TP-Link router starts its VPN server service and allows your computer and devices to connect to it.
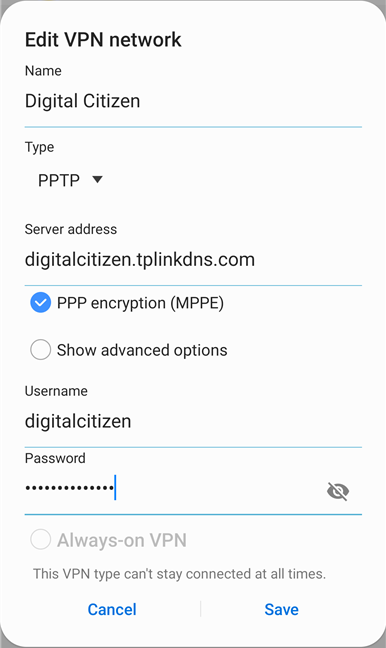
 Entering the details for the VPN connection
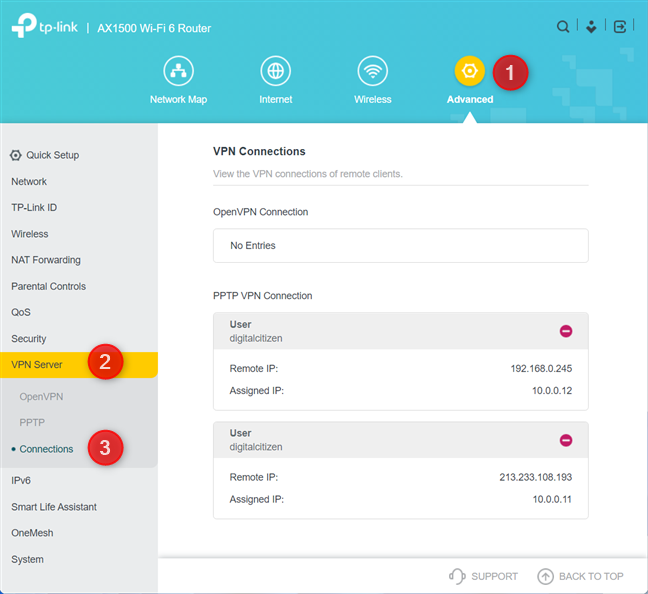 See the clients that are connected to VPN
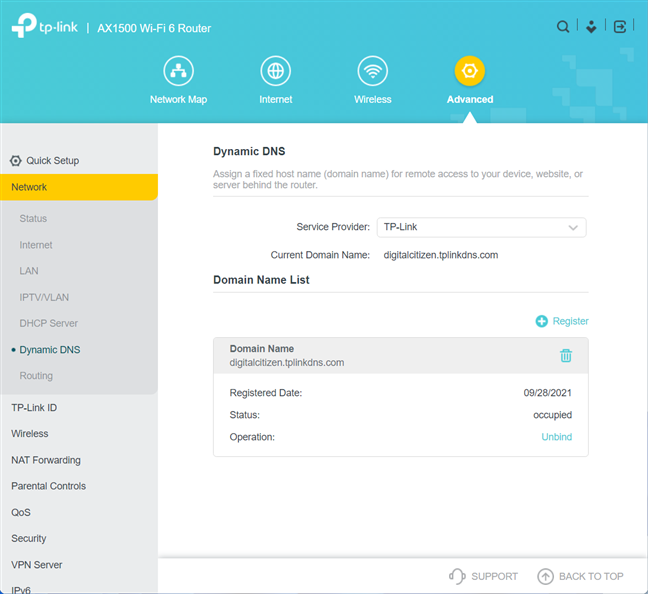
What do you need to do before turning your TP-Link Wi-Fi 6 router into a VPN server?
If you want your TP-Link Wi-Fi 6 router to be useful as a VPN server, you must be able to access it from outside your network. Your internet service provider probably doesn’t offer a static IP address for your router, so you need to enable DDNS on your TP-Link router.Where to find the VPN server settings on your TP-Link Wi-Fi 6 router
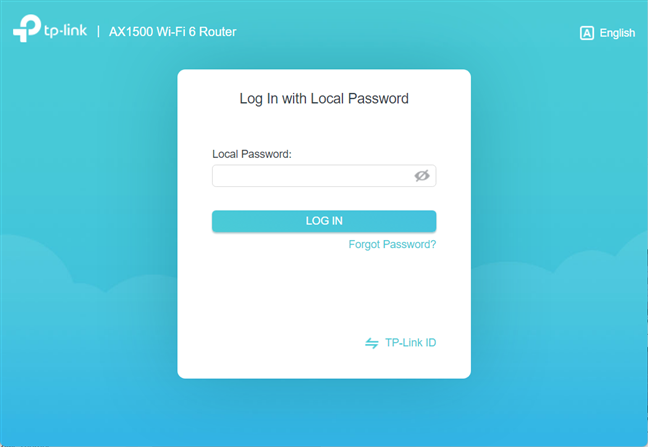
Setting up your TP-Link router to work as a VPN server can be done only from the router’s firmware and not from the Tether app. Open your favorite web browser, and navigate to tplinkwifi.net or 192.168.0.1. Next, enter the admin password of your TP-Link Wi-Fi 6 router, and press LOG IN.How to set up your TP-Link router as a PPTP VPN server
While PPTP (Point-to-Point Tunneling Protocol) is not as secure as OpenVPN, it’s simpler to set up and use because all the major operating systems have native support for it, without the need to install specialized apps to connect to your VPN server. Therefore, in this guide, I’ll share how to set up your TP-Link Wi-Fi 6 router as a PPTP VPN server: To do that, first, select PPTP in the left column, and then check the Enable box on the right.Connect your computers and devices to the VPN server on your TP-Link Wi-Fi 6 router
If you need some help connecting your computers and devices to the VPN server on your TP-Link router, read these guides:- How to add and use a VPN in Windows 10 (all you need to know)
- How do I set up and use a VPN on my Android smartphone?
- How to create, configure and use a VPN connection on an iPhone (or iPad)
- The VPN server address to use should be the DDNS domain name that you have set on your TP-Link router or the IP address of your router (if the device is inside your network, or the internet service provider assigned you a static IP address)
- Enter the username and password you set earlier in this guide to connect to your VPN server
How to see which devices are connected through VPN
On your TP-Link Wi-Fi 6 router, you can see in real time which devices are connected through VPN. To do that, in its firmware, go to Advanced -> VPN Server > Connections. On the right, you see all the connections split by VPN protocol (OpenVPN connections on the top and PPTP VPN connections on the bottom). For each device, you see its remote IP address and the address assigned by the VPN server. You can disconnect a device from your router by clicking or tapping the red stop sign from its box.

Discussion (0)
Be the first to comment.