Many people rely on using mobile platforms for working and communicating with coworkers, business partners, or loved ones. Even if it has had its share of security flaws, Zoom proved to be one of the best online meeting services. Are you using it for work, or maybe for keeping in touch with your family or friends? Did you know that Zoom allows you to schedule meetings so that you can get everyone to attend them at a date and time when they plan to be online? Here's how to schedule Zoom meetings in Windows, macOS, Android, and iOS:
1. How to schedule a Zoom meeting using the desktop app for Windows or Mac
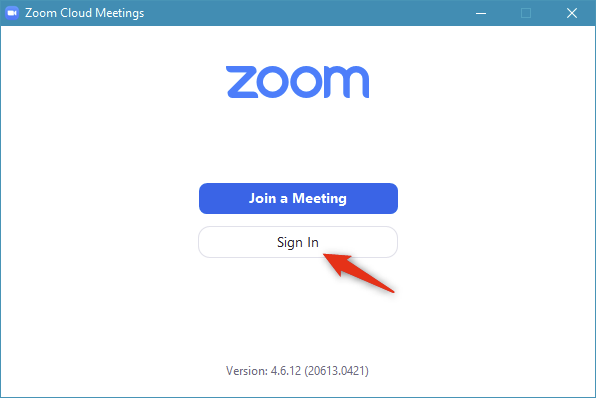
If you've installed the Zoom desktop app on your Windows 10 PC or device, or on your Mac, the app gives you the easiest way to schedule a meeting. First of all, open the Zoom app and sign in.
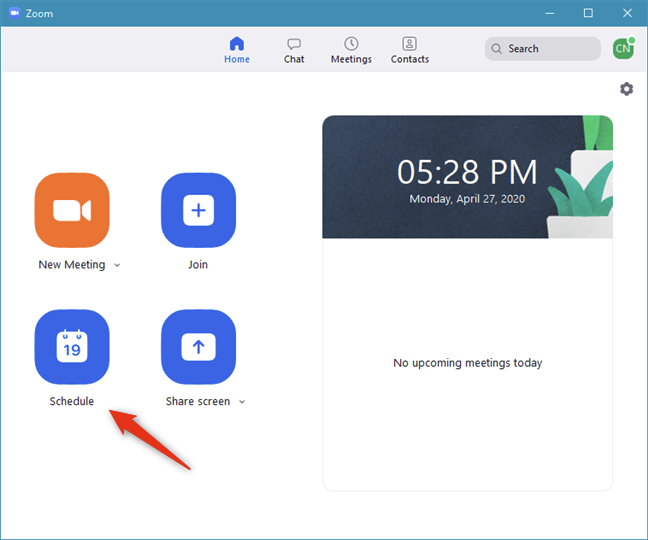
On your Zoom Home dashboard, click or tap on the Schedule button.
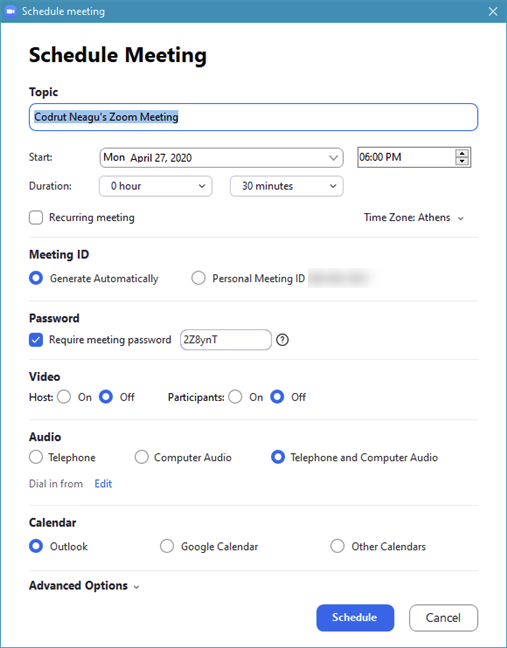
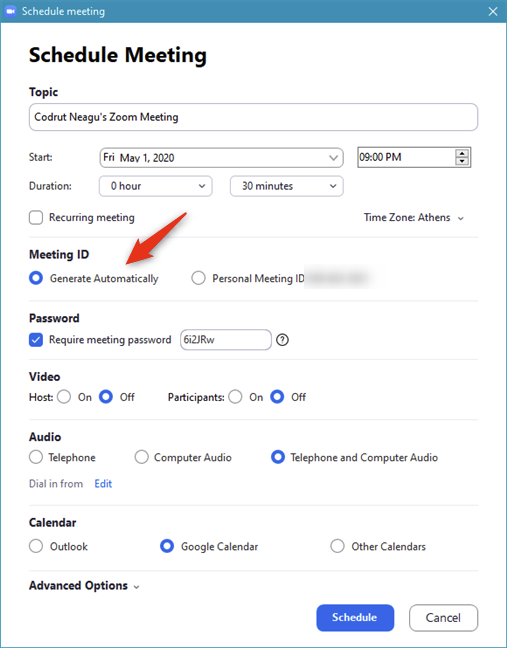
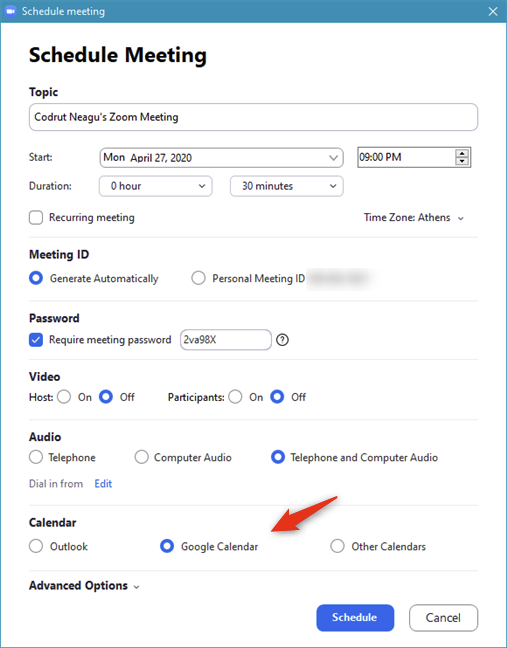
This opens a window called "Schedule Meeting," filled with details and settings.
Let's go through the options available and see what each of them is about:
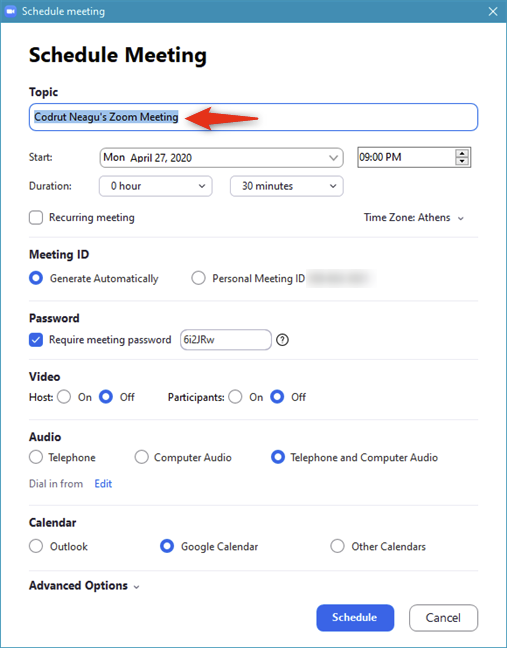
Topic lets you choose a name for the Zoom meeting so that you and the other people joining in know what it's about.
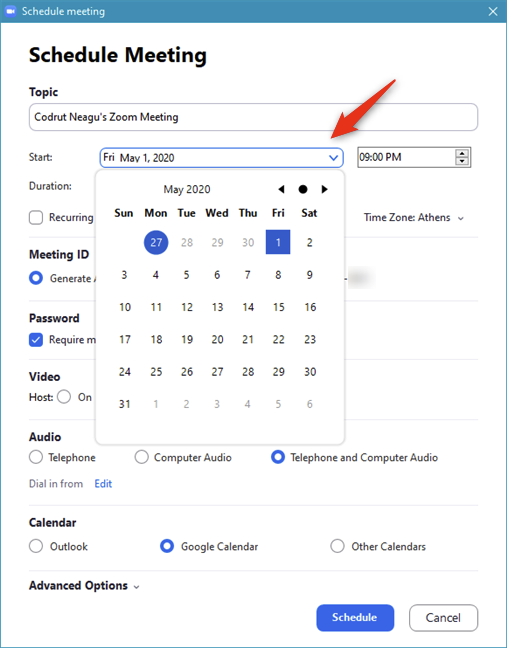
Start is the date and time when you schedule the Zoom meeting to take place.
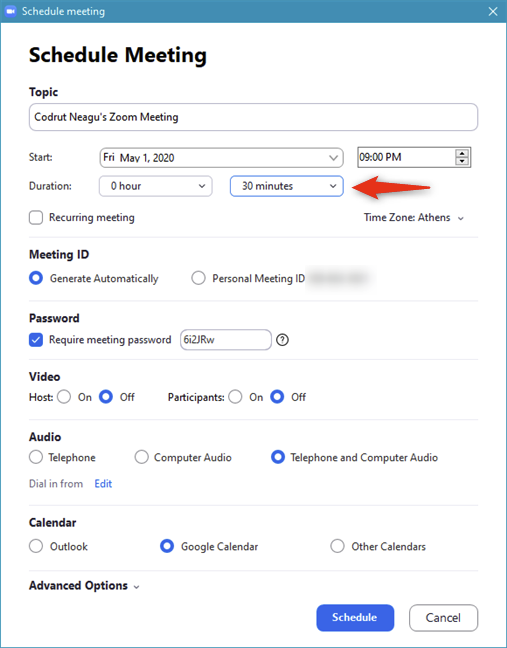
Use the Duration field to specify an approximate Zoom meeting duration, to help the people you invite get an idea for how long the meeting is going to be.
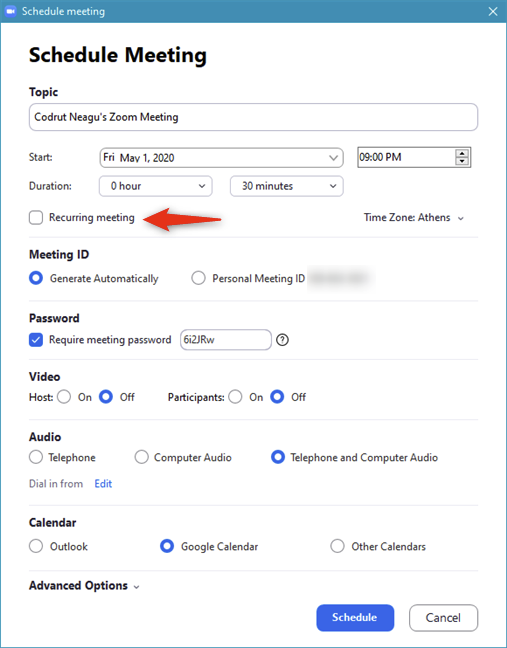
Check the Recurring meeting option if you intend to schedule the meeting to start periodically, daily, weekly, etc. If you set a recurring scheduled Zoom meeting, the ID, password, and settings remain the same for all the future meetings.
Also note that, if you choose to repeat the Zoom meeting on a schedule, Zoom asks you to open your default calendar app or service and choose when to schedule the meetings.
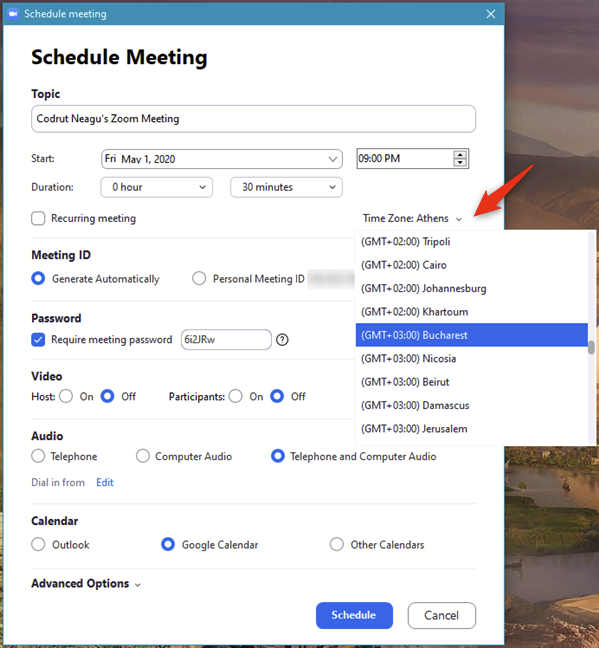
Although the Zoom desktop app automatically selects your default Time Zone, you can change it manually by selecting it from this list.
The Meeting ID can be generated automatically by Zoom, or you can use your own "Personal Meeting ID." Unless you're scheduling a Zoom meeting with family or close friends, we recommend using the option to "Generate Automatically."
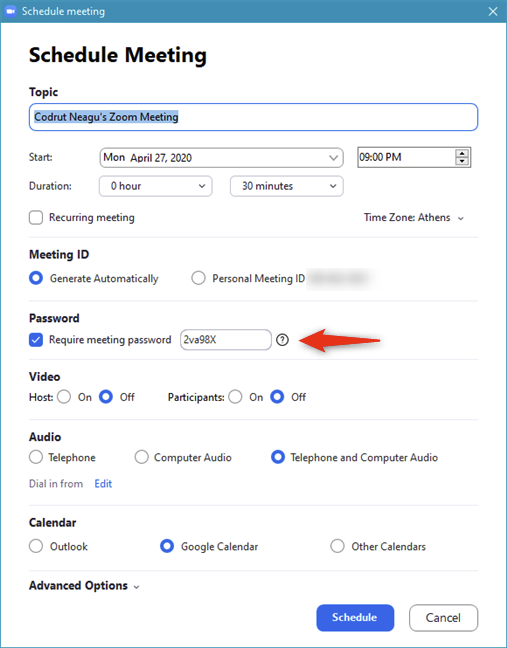
Password lets you choose whether the scheduled Zoom meeting is protected by a password or not. This setting is on by default, and a password is automatically generated by the app. If you want to change it, type a custom password of your own choosing. As a side note, we recommend you to use a password to protect your meeting from unwanted Zoom-bombers.
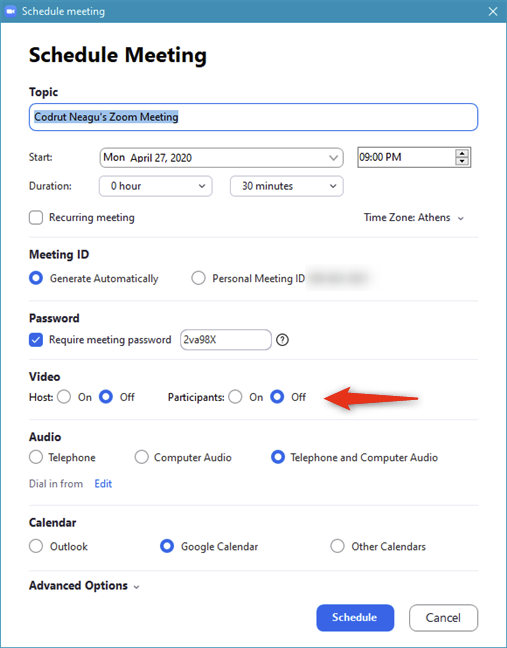
In the Video section, you can select whether you want the host (meaning you) and/or the participants to use video during the scheduled Zoom meeting. Note that this is only an invitation for using or not using video. Regardless of whether you've ticked On or Off, both the host and the participants can choose to enable or disable video during the actual meeting.
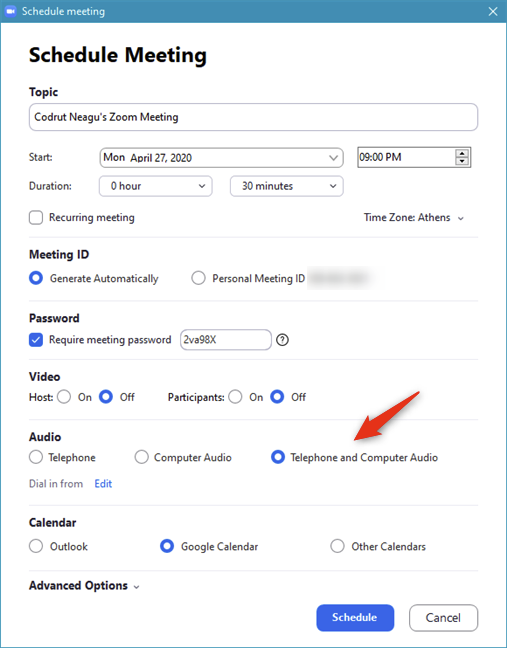
The Audio settings control how you and the other participants to the scheduled Zoom meeting can talk: using Telephone, "Computer Audio," or both. You can also click or tap on the Edit link next to "Dial in from" to choose the countries from which the participants can join your meeting via a phone call. In this case, Zoom includes a series of phone numbers in the invitation to your meeting, so that the participants know where to call. Note that this feature is available only for Zoom subscribers, but not for free users.
Calendar lets you choose between scheduling the Zoom meeting using your Outlook or Google Calendar, or using "Other Calendars." As you are scheduling a meeting, it is evident that you should use a calendar service to create the Zoom meeting and also to invite participants to it.
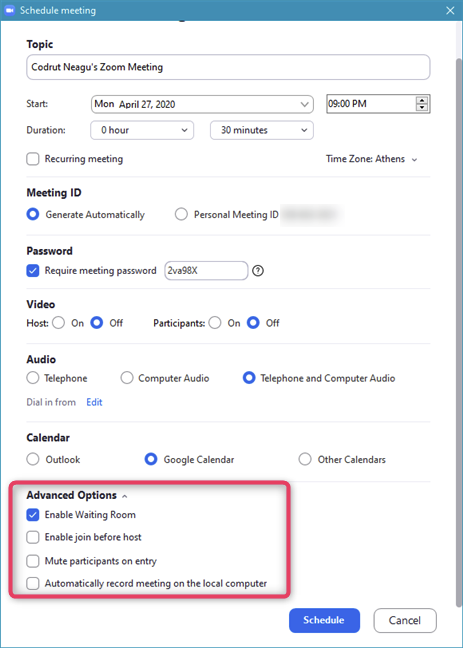
At the end of the meeting settings from the Zoom app, there are a few "Advanced Options," which you can customize if you want:
- "Enable Waiting Room" keeps the participants in a waiting mode before the start of the scheduled Zoom meeting until you accept them to join in.
- "Enable join before host" lets participants join the meeting without you, before you join.
- "Mute participants on entry" automatically silences the participants that join the meeting. However, they can enable the sound after you join the meeting.
- "Automatically record meeting on the local computer" does what it says: if you check this option, Zoom automatically records the scheduled meeting on your Windows PC or device, or on your Mac.
After you finish setting up the scheduled meeting, click or tap Schedule. Then, the Zoom app tries to automatically access the calendar service that you've selected earlier:
- If you chose Outlook, Zoom tries to launch the Microsoft Outlook app to add the scheduled meeting.
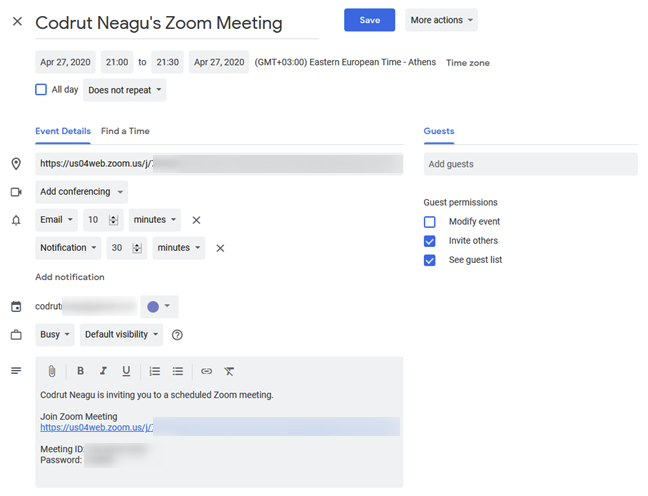
- If you chose Google Calendar, Zoom launches your default web browser and takes you to your Google Calendar, where you can customize the details of the scheduled Zoom meeting.
- If you chose "Other Calendars," Zoom lets you copy the details for the scheduled meeting (date, time, link, etc.) to paste them in any calendar service you might use.
We're Google Calendar users, so we're going to show you the next step using it. You should have similar options, even if you use another calendar service. Basically, after Zoom opens your preferred calendar service, it automatically creates a new event for the scheduled meeting, using the details you've set for it. Customize the event further if you need or want to, depending on the options offered by your calendar.
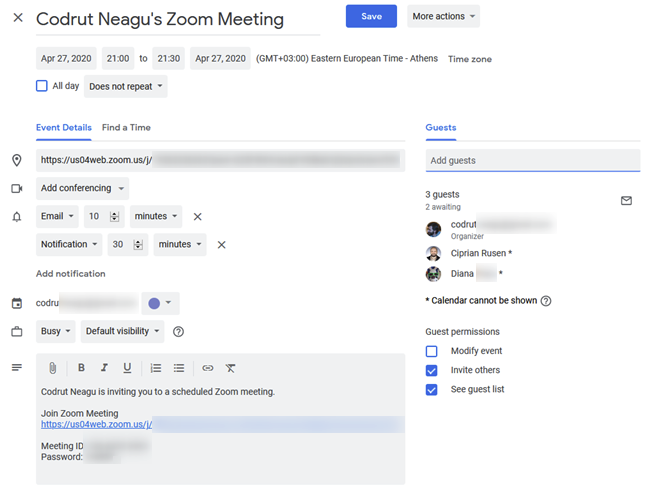
There's only one essential thing to keep in mind, though: invite participants to the scheduled Zoom meeting. In Google Calendar, look for the Guests section and add the people you want to join the meeting. To add participants, start typing their names and select them from the list of results shown. If nobody appears in the list that matches the criteria, it means that you don't have that person in your Google Contacts. In such a situation, you must type the full email address of the person you want to invite.
When you're done inviting people to the scheduled Zoom meeting, Save the event in your calendar.
2. How to schedule a Zoom meeting from a web browser
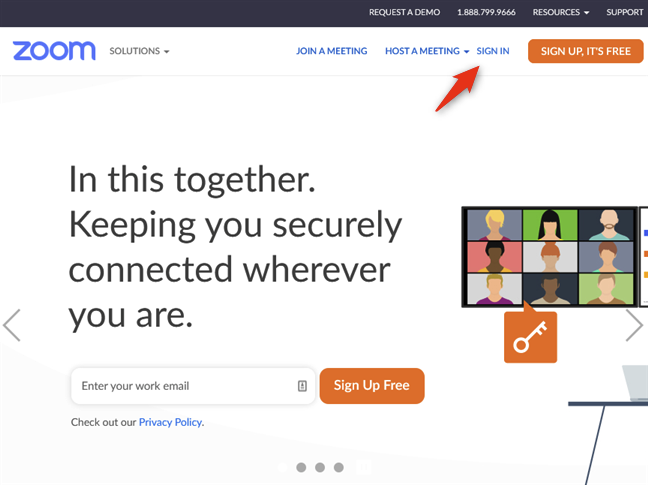
If you don't have the Zoom desktop app installed or if you prefer to use a web browser to schedule a meeting, you can. Start by opening your favorite web browser and sign in to your account on the Zoom website.
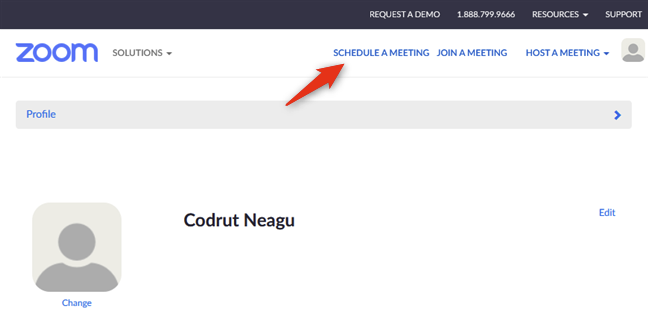
Then, click or tap on the "Schedule a meeting" link from the top of the page.
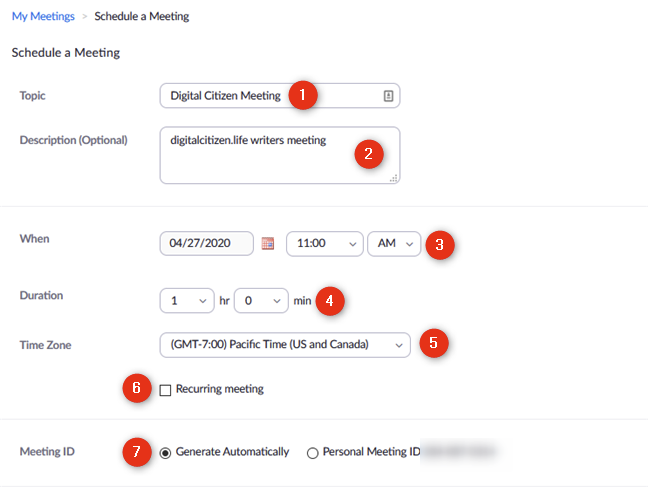
Zoom loads a new page where you can enter the details for the meeting you want to schedule:
- Topic lets you choose a name for the Zoom meeting so that you and the other people joining in know what it's about.
- Description is optional, but you can use it to enter details about the scheduled meeting to give participants an even better idea about its subject.
- When lets you choose the date and time for the scheduled Zoom meeting.
- Duration is an estimation of how long the scheduled Zoom meeting lasts.
- Time Zone allows you to select the time zone used for the scheduled Zoom meeting.
- Recurring meeting lets you schedule the Zoom meeting to start daily, weekly, and so on. Recurring scheduled Zoom meetings have the same ID, password, and settings.
- Meeting ID is generated automatically by Zoom. However, you can also choose to use your own "Personal Meeting ID." Unless you're meeting with family or close friends, we recommend you to use the "Generate Automatically" option.
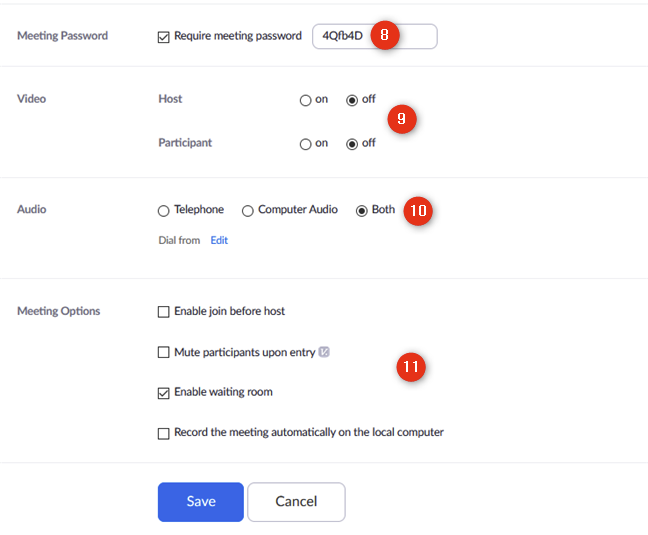
- Meeting Password lets you require a password from the participants to join the meeting. By default, Zoom generates one for you, but you can also change it to something custom if you want.
- Video allows you to choose whether you prefer people to use video during the scheduled Zoom meeting. However, the settings you make here are not mandatory, as both the host and the participants can enable or disable their video feeds once the meeting actually begins.
- Audio lets you choose whether participants can dial in via Telephone, connect with "Computer Audio," or both. The Edit link lets you select the countries from which the participants can join your meeting via phone call. However, this feature is available only for Zoom subscribers, not for free users.
- Meeting Options includes four settings: "Enable join before host" (people whom you invited can join the meeting before you), "Mute participants on entry" (people who join the meeting are initially muted, but can unmute themselves), "Enable Waiting Room" (you must accept people to join the meeting before they can enter), and "Record the meeting automatically on the local computer" (records the meeting on your PC or Mac).
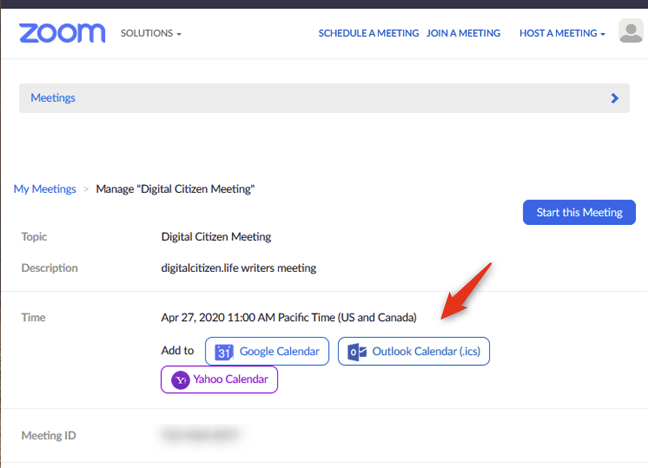
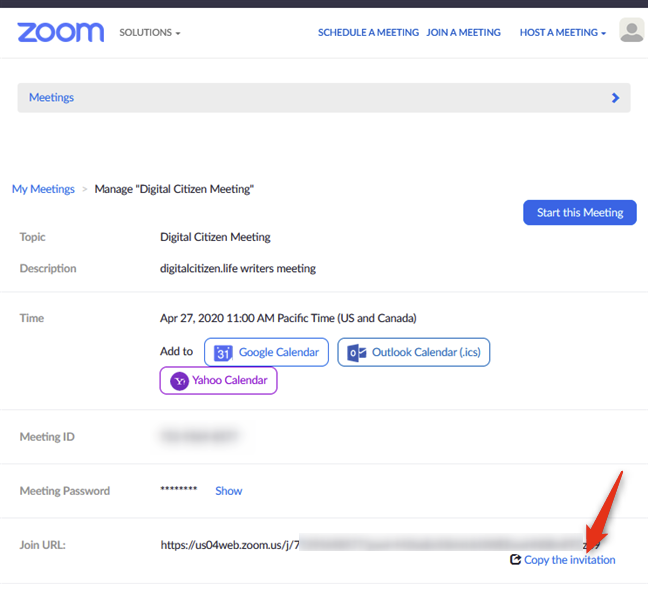
Once you're done adjusting the options for the scheduled Zoom meeting, click or tap on Save. Then, the website loads a new page where it shows you all the settings you've made, the details for connecting to the meeting, and also links for adding the meeting to your calendar.
To add the meeting to your calendar, click or tap on the link corresponding to the calendar service you're using: Google Calendar, Outlook Calendar, or Yahoo Calendar. Then you can use the event settings in your calendar service to invite other people to your scheduled Zoom meeting.
If you want to send invitations to the meeting directly, click or tap on the "Copy invitation" link from the bottom of the webpage. That opens a pop-up with the formal invitation to the meeting, which you can copy and paste in any email, chat app, text message, and so on.
3. How to schedule a Zoom meeting from an Android smartphone or from an iPhone
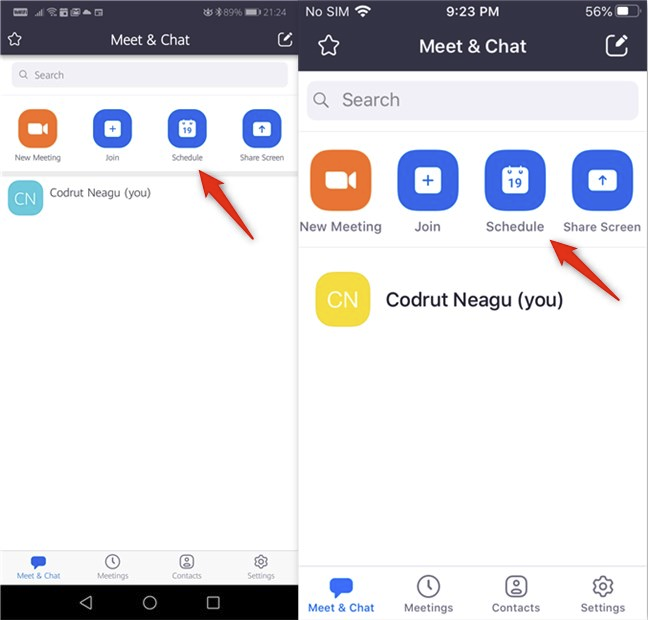
Regardless of whether you use an Android smartphone or an iPhone, scheduling a Zoom meeting is the same. Both the visuals and the options are similar, so the next images contain screenshots taken both from Android (on the left) and from iOS (on the right).
Launch the Zoom app on your phone and tap the Schedule button from the top of the "Meet & Chat" tab.
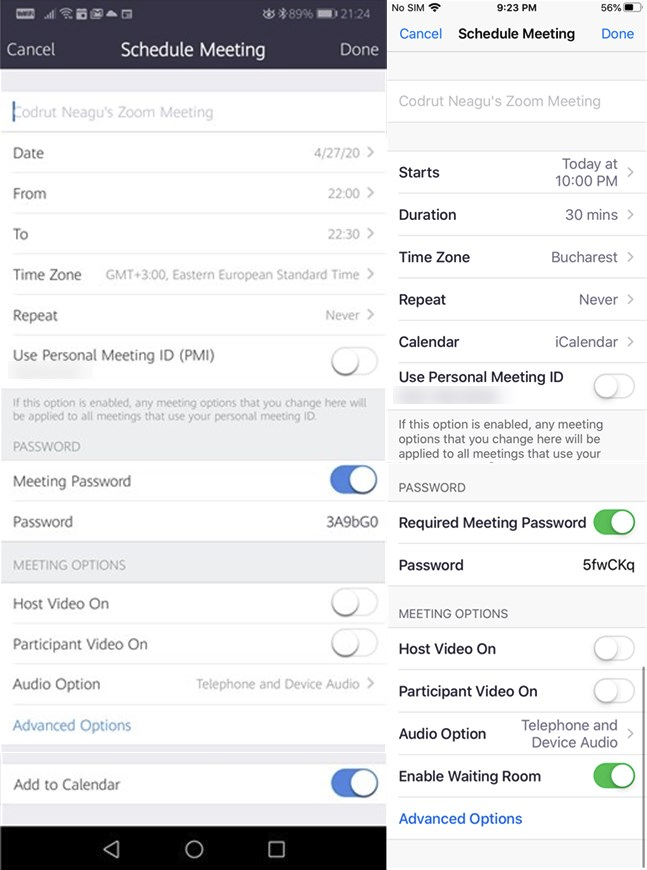
Then, enter the details for the Zoom scheduled meeting:
- On the first field from the top, which by default bears your name and the "Zoom Meeting" suffix, enter the name you want to give to the Zoom meeting so that you and the other people joining in know what it's about.
- Next, choose the date, time, and duration of the scheduled Zoom meeting. On Android, you get three fields for this: Date, From, and To. On an iPhone, the same settings are called Starts and Duration.
- Select the Time Zone used for the scheduled Zoom meeting.
- Repeat lets you schedule the Zoom meeting to start periodically, every day, week, and so on. Recurring Zoom meetings keep their original meeting ID, password, and settings.
- The Use Personal Meeting ID (PMI) switch is off by default, which means that the scheduled meeting gets an automatically generated ID. However, if you want to hold a planned personal Zoom meeting with family or close friends, you can enable this switch. For work or other types of meetings, you should use an automatic ID.
- Meeting Password on Android and Require Meeting Password on iOS configure the Zoom scheduled meeting to require a password from the participants to join the meeting. By default, Zoom generates one for you, but you can also change it to something custom if you want.
- Host Video On allows you to choose whether you prefer to start the scheduled Zoom meeting with your video on. Participant Video On tells people who join in if you want them to use video or not. Still, the settings you make here are not mandatory, as both you and the meeting attendees can turn their video feeds on or off once the meeting actually begins.
- Audio Option lets you choose whether participants can dial in via Telephone, connect with "Device Audio," or both.
- Advanced Options includes three settings: "Allow join before host" (people whom you invited can join the meeting before you), "Enable Waiting Room" (you must accept people to join the meeting before they can enter), and "Automatically Record Meeting" (records the meeting on your PC or Mac if you join the meeting from one, or in the cloud if you're using an Android smartphone or iPhone and you're a licensed user).
- Add to Calendar on Android or Calendar on iOS add an event for the Zoom scheduled meeting in the calendar app from your device. This setting is found at the end of the Schedule Meeting list of settings on Android and in the middle of the list on iOS.
Once you've edited all the settings for the scheduled Zoom meeting, tap the Done button from the top-right corner of the screen.
After you save the planned meeting, the Zoom app automatically adds your new scheduled Zoom meeting to your calendar app. By default, that's Google Calendar on Android smartphones and iCalendar on iPhones. This is also the step where you get to invite people to your scheduled Zoom meeting.
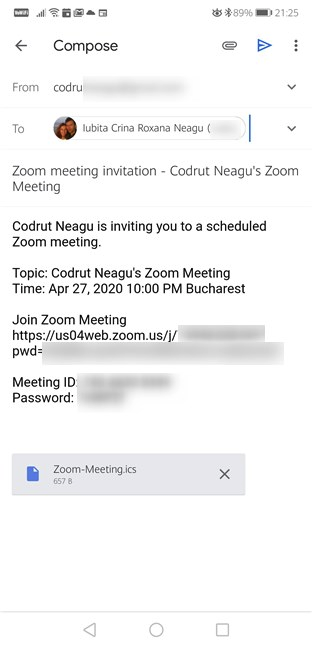
On Android, your default mail app opens, and an automatically generated invitation message is created. To invite people to your scheduled Zoom meeting, you simply send them the email.
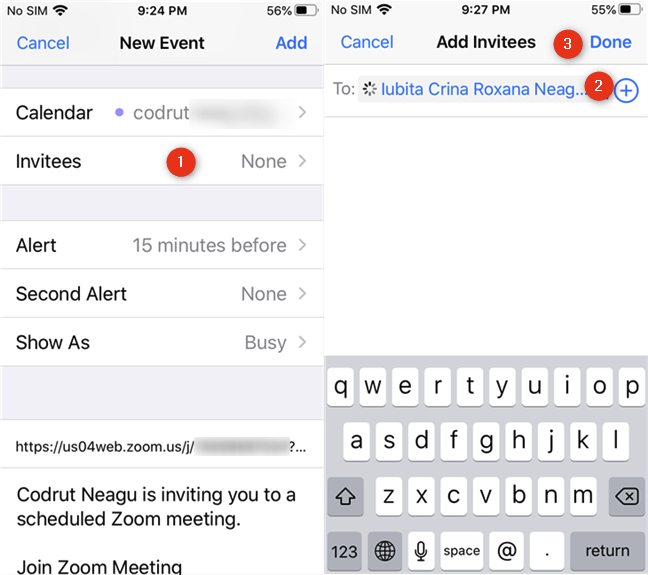
On an iPhone, you have to tap the Invitees button and add the people whom you want to join the scheduled Zoom meeting, either from your contacts list or by manually entering their email addresses. Once you do that, an email with the invitation to the meeting is automatically sent to them; no additional input required from you.
That's it!
What is your favorite way of scheduling Zoom meetings?
Scheduling Zoom meetings is easy regardless of what platform you're using, be it a Windows 10 PC, a Mac, a mobile phone, or even just a web browser. Which of these methods do you prefer? Have you had any trouble scheduling Zoom meetings, or do you have anything to add to our guide? Write a comment below and let us know.


 30.04.2020