03.04.2019
After using the Windows Firewall for a long time, it might stop working as it should. Especially if you have modified its more advanced settings, or you have introduced many changes. It becomes difficult to pinpoint the root problem for your network connectivity issues. One thing that works is to restore the Windows Firewall to its default settings so that it deletes all the rules that were created, and you can start configuring it again from scratch. Here are four different methods to make this reset:
NOTE: This guide works only if you are using a user account with administrator permissions. It covers Windows 10, Windows 7, and Windows 8.1. For each method, we mention the Windows version in which it works. If you do not know the version of Windows that you have, read: What version of Windows do I have installed?. The native firewall is named Windows Defender Firewall in Windows 10 while in Windows 7 and Windows 8.1 it retains the old name of Windows Firewall. For this article, we use screenshots from Windows 10.
1. How to reset Windows Firewall to its default settings (all Windows versions)
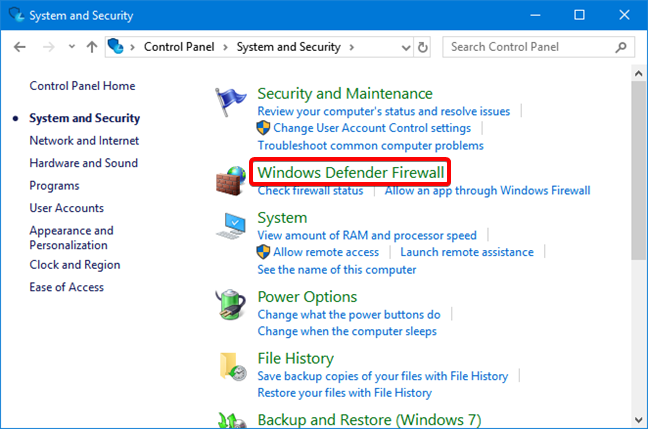
First, you need to open the Windows Firewall. One way to do that is to open the Control Panel, go to System and Security, and click or tap Windows Defender Firewall.
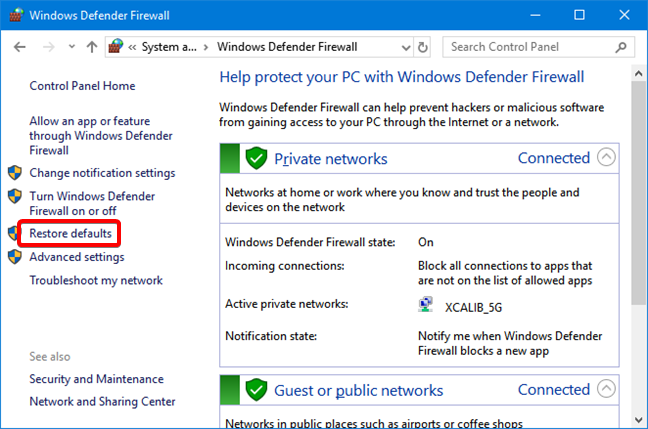
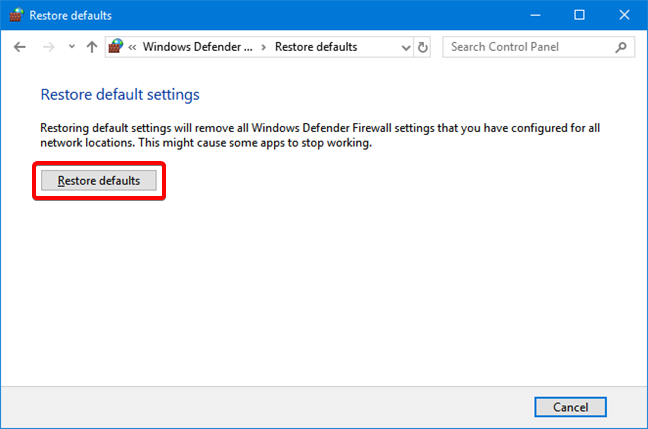
In the Windows Defender Firewall window, click or tap the Restore Defaults link, on the left side of the window.
You are informed about what it means to restore the default settings for the Windows Firewall. To go ahead, click or tap Restore Defaults.
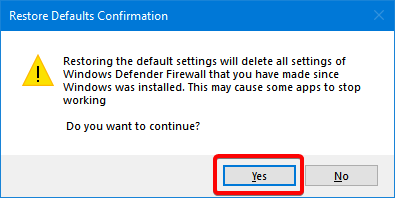
Windows tells you that it is going to delete all settings of Windows Defender Firewall that you have made since Windows was installed. Click or tap Yes to proceed.

You are returned to the Windows Defender Firewall window, and all the firewall rules are now reset to their initial values, as they were when you first installed Windows.
2. How to reset the Windows Defender Firewall to its default settings, with Windows Security (Windows 10 only)
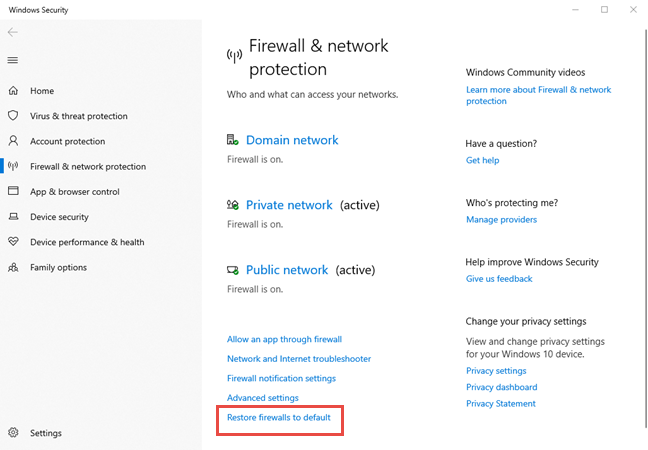
In Windows 10, you can restore the Windows Defender Firewall to its default settings, from the Windows Security app. In the search box on the taskbar, enter the "firewall & network protection" and click or tap the search result with the same name.

This opens the Windows Security app, at its "Firewall & network protection" section with settings. On the bottom, you find the link for "Restore firewalls to default." Click or tap on it.
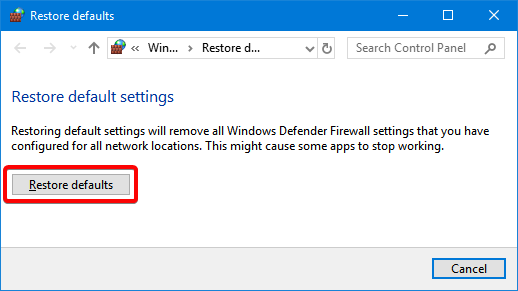
A new window is opened with an explanation of what this does, and how it is going to remove all Windows Firewall settings. Click or tap the Restore defaults button.
Windows 10 asks for your confirmation as the action cannot be reversed. Press Yes to complete the reset.
You are returned to the Windows Security app, and all the firewall rules are now reset to their initial values.
3. How to reset the Windows Firewall to its default settings from the Command Prompt (all Windows versions)
You can reset the Windows Defender Firewall to its default settings using the Command Prompt, also known as CMD. Open the Command Prompt as administrator, and run the following command: netsh advfirewall reset
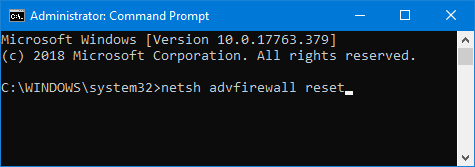
Press Enter on your keyboard, and the Windows Firewall is reset immediately. You only receive a text message saying OK. 🙂 The same command can be run in PowerShell too.
4. How to reset the Windows Firewall to its defaults, using PowerShell (all Windows versions)
Open PowerShell as administrator, and run the following command: (New-Object -ComObject HNetCfg.FwPolicy2).RestoreLocalFirewallDefaults()
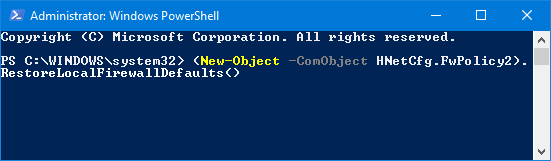
Press Enter on your keyboard, and the Windows Defender Firewall is reset immediately, without any additional confirmation.
Did you solve your problems by resetting the Windows Firewall?
As you can see from this guide, it's easy to restore the Windows Defender Firewall to its default settings. Maybe you were infected with malware which changed the rules you have set up, or the settings were corrupted along the way while trying to configure the Windows Defender Firewall manually. Either way, applying this procedure makes the Windows Defender Firewall work again. We recommend that you start to set new rules immediately, because some of your apps may not work after removing the old rules. Let us know in a comment below if this solved your problems.