Depending on your network, you may need to use a proxy server to browse the web. When you go online, your traffic goes through the proxy server. This allows you to protect your privacy by covering some of your tracks when surfing the web. That’s because the proxy server, which acts as an intermediary between your Windows 11 device and the internet, is used to access online content by all web browsers you have installed and the apps you use. If you need to set the proxy settings in Windows 11, here’s everything you need to know:
IMPORTANT: Before setting up your proxy in Windows 11 and using a proxy server, it’s a good idea to know what a proxy server is, its benefits & drawbacks.
Where to find the proxy settings in Windows 11
When you want to change or configure a proxy server in Windows 11, you must first find the proxy settings. To do that, open Settings (press Windows + I). On the left, go to Network & internet. On the right, click or tap on Proxy.
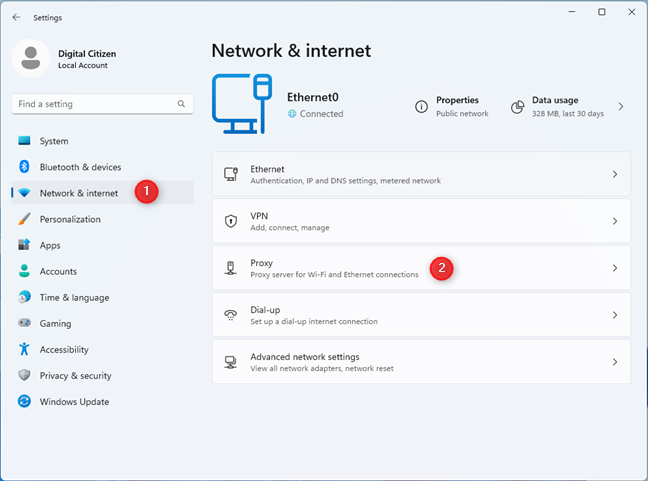
Go to Settings > Network & internet > Proxy
You now see the proxy settings available in Windows 11. The “Automatically detect settings” switch is On by default in Windows 11. This is useful because, in many corporate networks, the proxy settings are distributed through DHCP or through group policies that are applied automatically by your laptop or PC when you connect to the company network. Therefore, business users just need to check that this switch is turned on, and if it isn’t, click or tap on it to enable it.
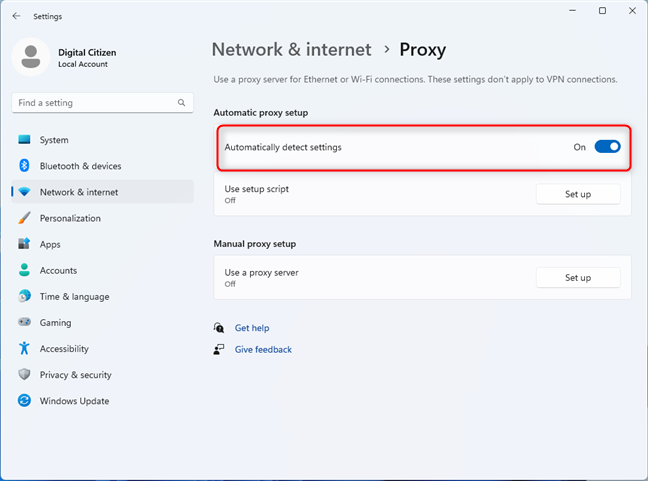
Is Automatically detect settings turned on?
TIP: You may want to read Proxy vs. VPN: When to use a proxy server and when to use a VPN?.
How to configure proxy settings with a setup script (address)
Some organizations use a proxy setup script, and the proxy settings are not detected automatically by Windows 11. In this situation, on the Proxy page, click or tap the Set up button next to “Use setup script.”
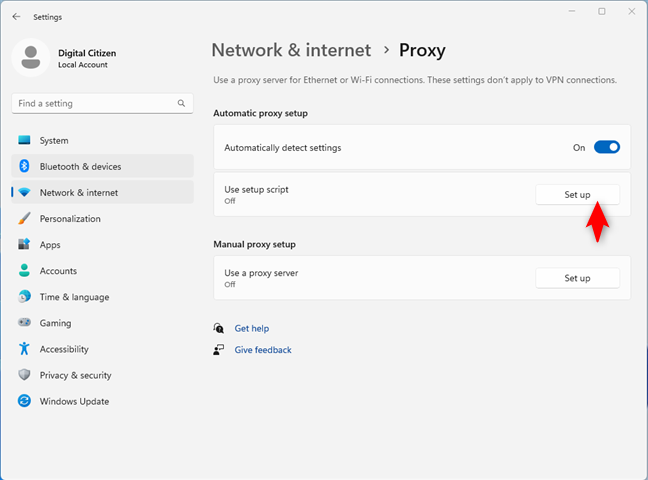
Press Set up next to Use setup script
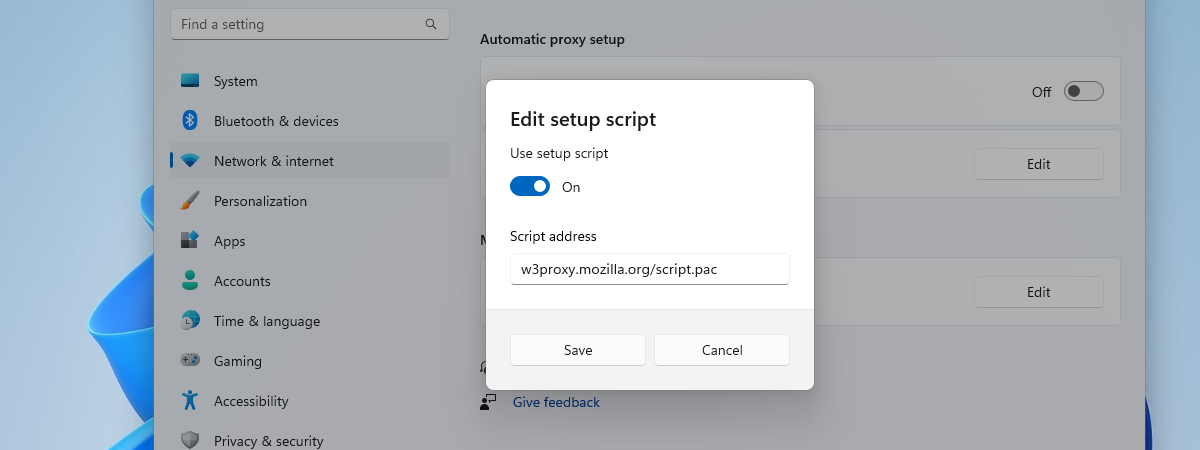
You see the “Edit setup script” dialogue. Click or tap the “Use setup script” switch to turn it on. Then, in the Script address, type the URL or the IP address of the proxy configuration script that has to be loaded by Windows 11 to apply the correct proxy server and settings for your PC.
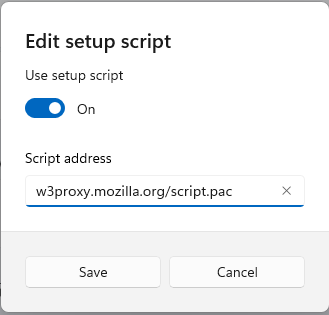
Enter the proxy setup script
When you’re done entering this information, click or tap Save.
How to manually edit the proxy server settings
The manual configuration of the proxy settings requires you to know the exact IP address and port of the proxy server you intend to use. When you have this information, click or tap the Set up button next to “Use a proxy server” on the Proxy page from the Settings app.
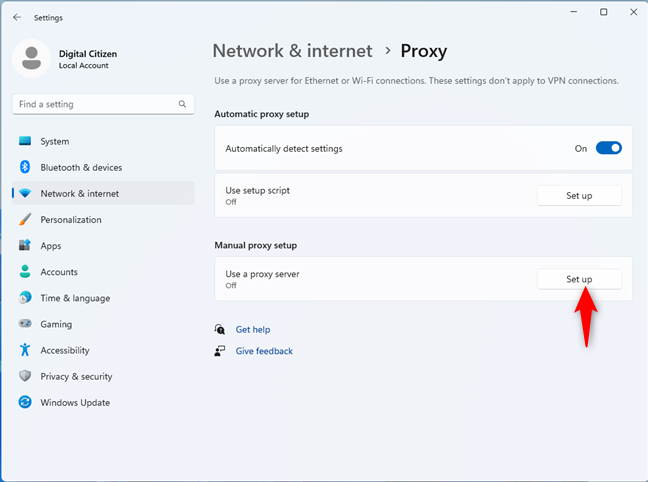
Press Set up next to Use a proxy server
In the “Edit proxy server” dialog, click or tap the “Use a proxy server” switch to enable it. Then, you can complete the required information.
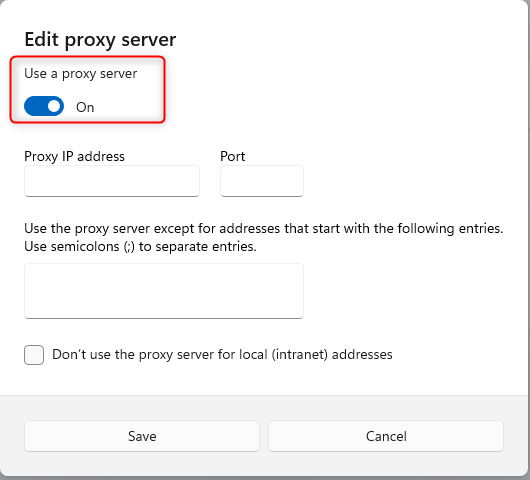
Enter the details of your proxy server
Complete the IP address of the proxy server in the Proxy IP address field. Type the port in the Port field. You can also type specific web addresses, and Windows 11 won’t use the proxy server for them, no matter what browser you’re using. If you need to specify multiple websites, type each website address and separate the addresses with a semicolon. You can also use * as a wildcard. Luckily, most people don’t need to configure this field.
Finally, you may want to check the “Don’t use the proxy server for local (intranet) addresses” box at the bottom. This might be a good idea if you’re connected to a corporate network. However, in most situations, it’s not necessary. When you’re done completing everything, don’t forget to press Save.
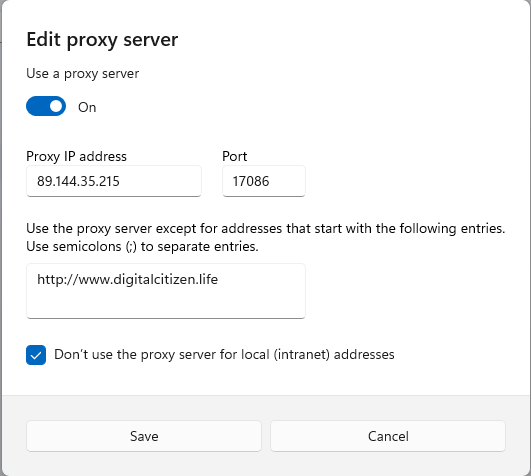
Don't forget to press Save
NOTE: After changing the proxy settings, you might be asking yourself: “How do I know if my proxy is working?”. To determine whether your proxy server is working, check its status on websites like whatismyip.com. You can do this check before changing the proxy settings and after to see the difference between the two states. If your web browser doesn’t seem to use your proxy settings, here’s how to set a proxy server in Chrome, Firefox, Edge, and Opera.
How to reset/stop using a proxy server in Windows 11
If you have taken your Windows 11 laptop or PC to a new location and now use a different internet connection, you can turn off the proxy server. To do this, you must change the Windows 11 proxy settings again.
Open Settings (Windows + I) just like you did when you set up the proxy server, and go to Network & internet and then to Proxy. First, you can set the “Automatically detect settings” switch to Off. If you have enabled a proxy with an automatic setup script, press the Edit button next to “Use setup script.”
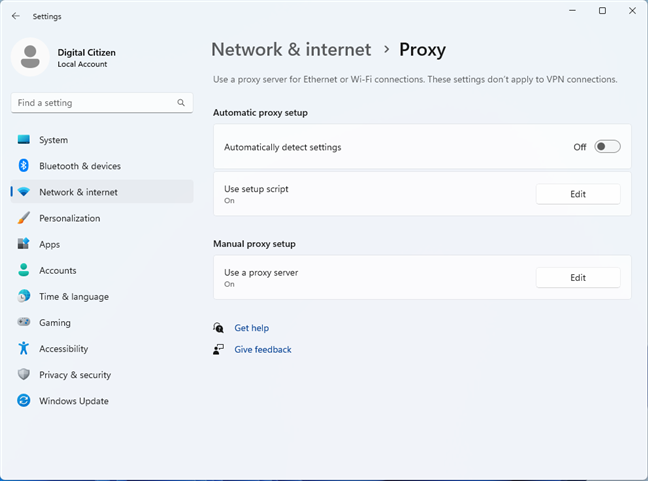
The proxy settings in Windows 11
Then, in the Edit setup script dialog, set the switch to Off and click or tap Save.
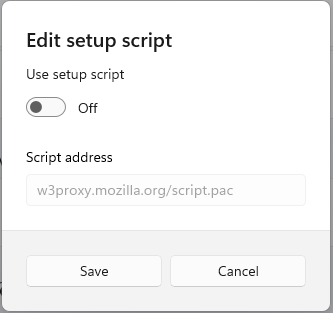
Turn off the proxy setup script
If you have manually added a proxy server, click or tap Edit next to “Use a proxy server.” Then, in the “Edit proxy server” dialog, set the “Use a proxy server” switch to Off, and press Save.
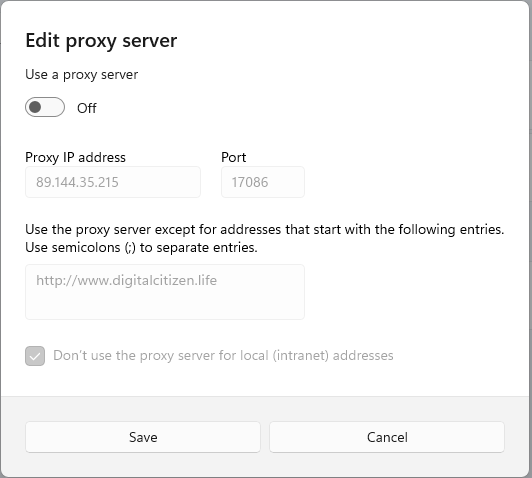
Turn off the proxy server
Your proxy settings are reset because you no longer use a proxy server to connect to the internet. However, when you get back to your old network, you can change your proxy settings again.
Did you manage to set your proxy settings correctly?
Proxy servers are mandatory on some business networks because they’re your only way to access the internet. Therefore, setting your proxy settings in Windows 11 correctly is very important. Small businesses and home users can also benefit from connecting to proxy servers, as they allow you to hide some of your online activities and increase your privacy. However, for such users, a VPN is a better option. Finally, I hope this guide helps you set everything up correctly. Let me know in a comment if your proxy setup was successful or if you need more help.


 31.07.2023
