
 15.05.2025
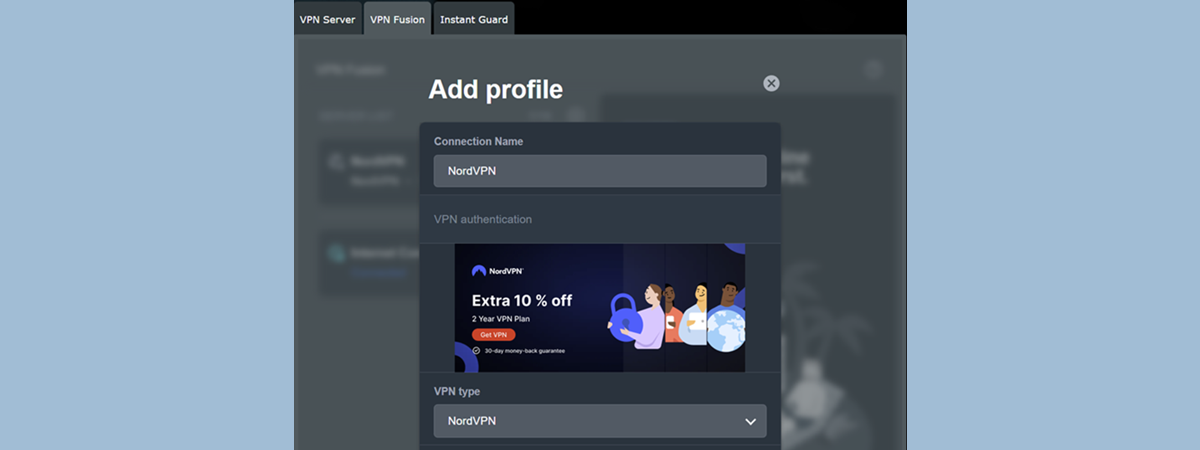
VPN Fusion is one of the most popular features of ASUS extendable routers and ZenWiFi mesh systems. With VPN Fusion, you can connect to multiple VPN servers and assign different network devices to specific VPN connections (or tunnels). For instance, your Smart TV can be connected to a VPN server from a region that provides access to more content on Netflix, while your laptop is connected to a VPN server from work. VPN Fusion is compatible with many well-known services, including NordVPN, which stands out due to its extensive server network, excellent security features, and strict no-logs policy. If you are a NordVPN customer and want to set it up on your extendable ASUS router, here’s how it all works:
NOTE: In this tutorial, I’m using an ASUS RT-BE92U Wi-Fi 7 router, capable of managing a network with many simultaneously connected devices. The steps provided also apply to older Wi-Fi 6 ASUS routers and ASUS ZenWiFi mesh systems.
Step 1: Log in to NordVPN and generate an access token
Before setting up the VPN Fusion feature on your ASUS router or ZenWiFi mesh system, you should log into your NordVPN account. In the left sidebar, under Services, choose NordVPN. On the right, scroll down to Advanced settings and click or tap Get Access token.
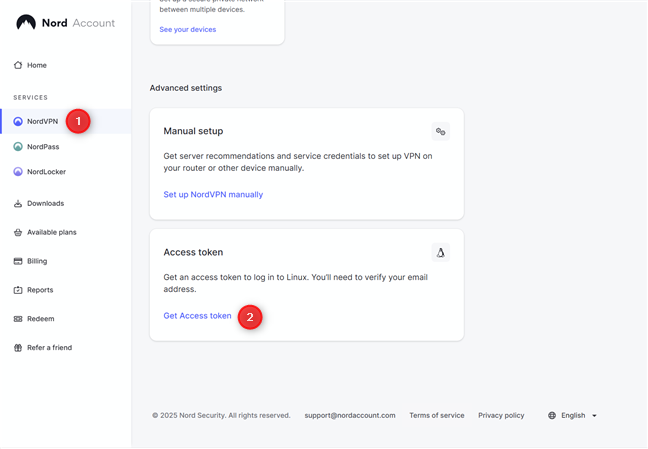
Log in to NordVPN, access your services and get an access token
You’re asked to verify your email address. Check your inbox, and then enter the code you’ve received. If you don’t find an email from NordVPN, check your Spam/Junk folder.
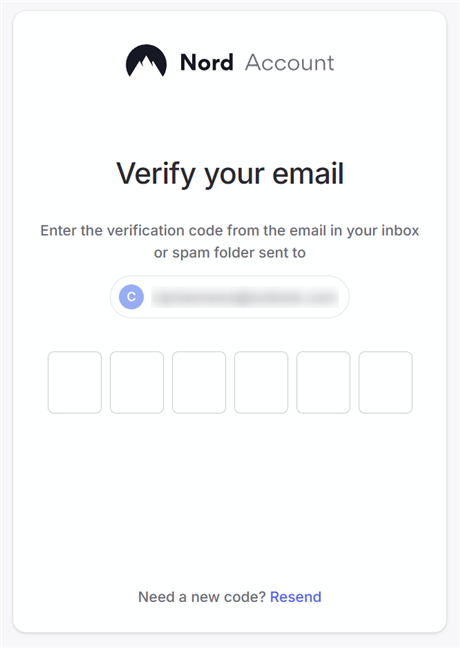
Verify your email
The Access token page is loaded. Here, you see tokens you may have generated in the past and create new ones. Existing tokens can’t be viewed; they can only be revoked.
To create a new token for VPN Fusion, click or tap Generate new token.
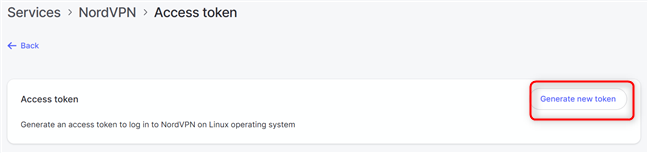
Click or tap Generate new token
You’re asked to choose whether you want to set this token to expire in 30 days or create a token that doesn’t expire. If you need to use VPN Fusion for over 30 days, select Doesn’t expire, and click or tap Generate token.
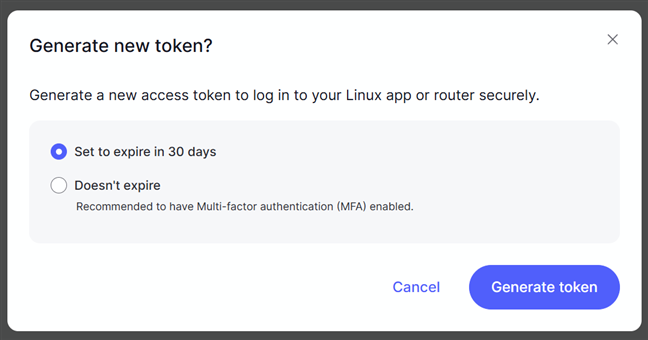
Click or tap Generate token
You see the token that was generated. Copy it to the clipboard or into a text file on your computer to reuse it later.
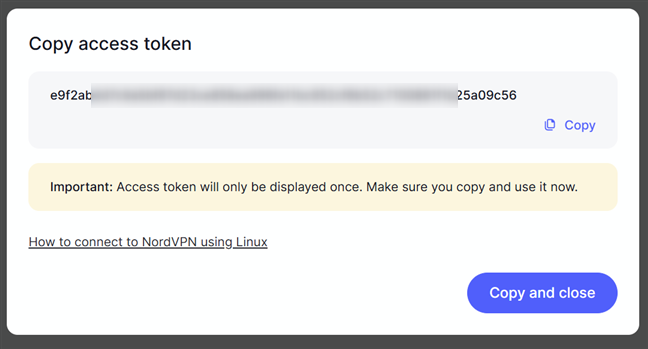
Copy the token or save it to a text file
Step 2: Log in to your ASUS router or ZenWiFi mesh system
It’s time to log in to your ASUS router or ZenWiFi mesh system by opening a web browser. Navigate to www.asusrouter.com or the IP address of your ASUS router (usually 192.168.50.1 or 192.168.1.1), then enter the administrator username and password. Finally, click or tap Sign In.

Log in to your ASUS rotuer
Step 3: Access the settings for VPN Fusion
To configure VPN Fusion, you need to access it. Once you’re signed in and see the web admin interface, look for Advanced Settings in the left sidebar, and click or tap VPN. On the right, click or tap VPN Fusion, then click + (plus sign) next to Add profile.
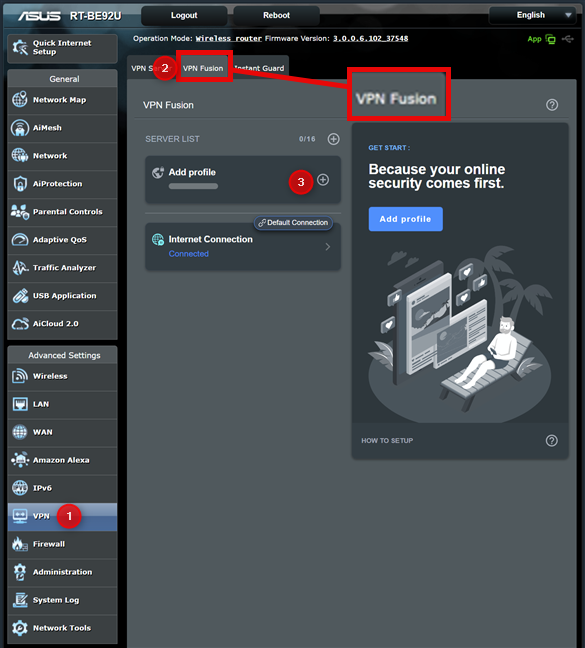
Go to VPN > VPN Fusion > Add profile
Your ASUS router or ZenWiFi mesh system displays the Add profile prompt. This is where you can create a new VPN connection that can be used by one or more devices in your network. By default, Surfshark is selected as a VPN service. However, you can choose other services, including NordVPN.
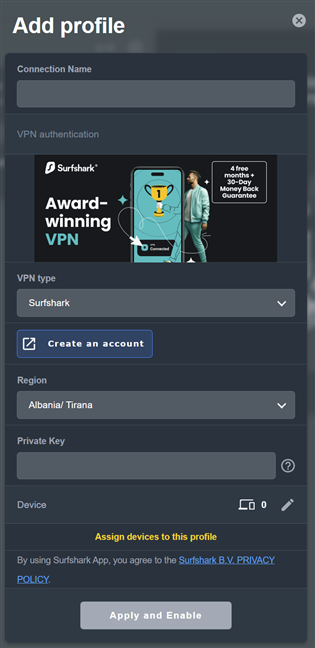
Your options to add a VPN Fusion profile
Keep reading to see how to set up NordVPN in VPN Fusion.
Step 4: Add NordVPN to VPN Fusion on your ASUS router or ZenWiFi mesh
In the Add profile prompt, type NordVPN (or anything else you want) in the Connection Name field . Then, click or tap the VPN type dropdown list and select NordVPN. Next, in the Region dropdown list, choose the country you want to connect to, and then paste the token you’ve created in your NordVPN account during this tutorial’s first step. By default, all devices connected to your network will automatically connect to NordVPN. If you don’t want this, click or tap the pencil icon (Edit) next to Device.

Configuring your NordVPN profile
You see the list of devices connected to the network managed by your ASUS router or ZenWiFi mesh system. Select those you want to connect to NordVPN. They can be anything from a Smart TV to a laptop, smartphone, or gaming console. When you’re done making your selections, press OK, and you’re back to the Add profile prompt. Click or tap Apply and Enable, and VPN Fusion is configured to use NordVPN.
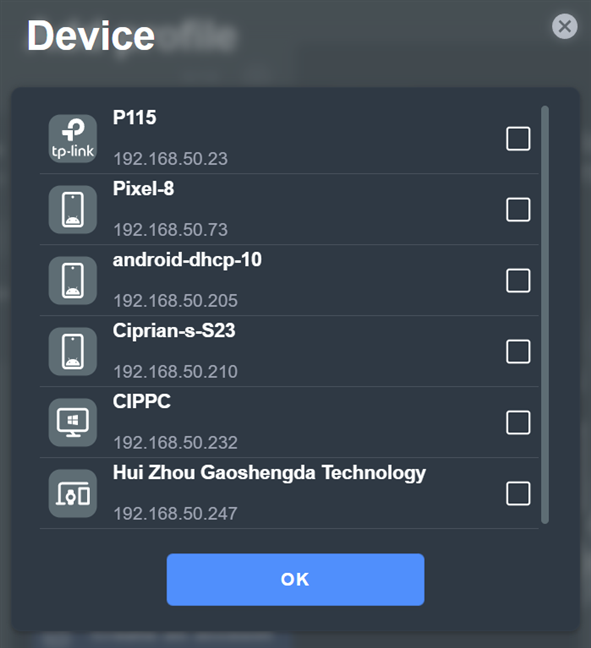
Select the devices you want to connect to NordVPN
Your ASUS router or ZenWiFi mesh system needs some time to apply all the settings. During this time, you see a progress indicator. When it’s done, you’re back to the VPN Fusion section, where you see NordVPN added to the server list, with the status Connected.
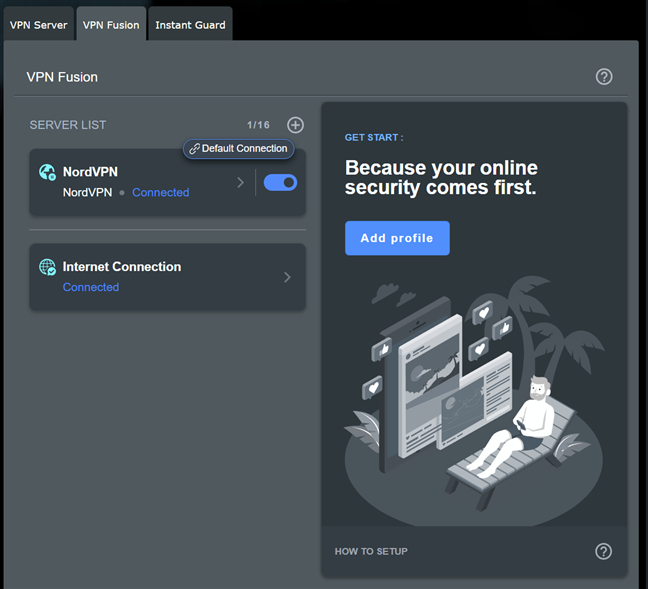
NordVPN is now added to VPN Fusion
Depending on how you’ve set up the NordVPN profile, all your devices (or only those you selected) are connected to NordVPN and using this service.
If you need to disconnect your devices from NordVPN, click or tap the switch next to it in VPN Fusion. After your devices are disconnected, you can change the settings for this profile, choose another region, select other devices, or remove the NordVPN profile (if you no longer need to use it). However, while the NordVPN profile is active and connected through VPN Fusion, you can’t change it.
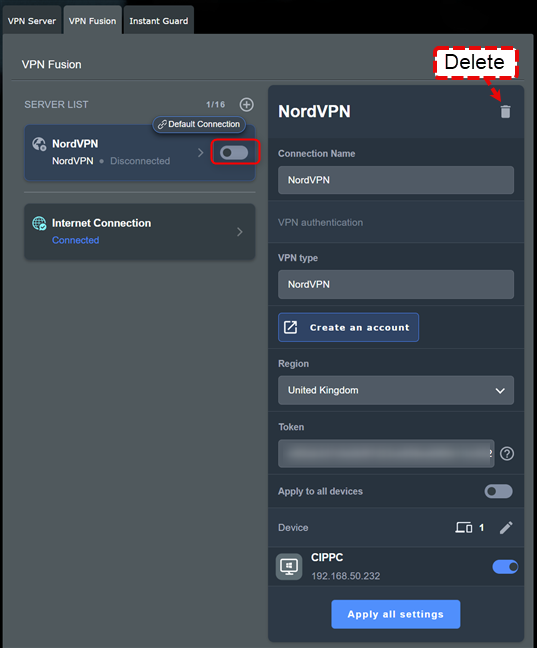
To change a VPN Fusion profile, disconnect it first
BONUS: How to set up NordVPN in VPN Fusion from the ASUS Router app
If you prefer, you can use the ASUS Router app on your smartphone or tablet to set up VPN Fusion to work with NordVPN. First, start the app on your device and log in to your ASUS router or ZenWiFi mesh system. Go to Settings, scroll down until you see VPN, and tap it. Then, select VPN Fusion.
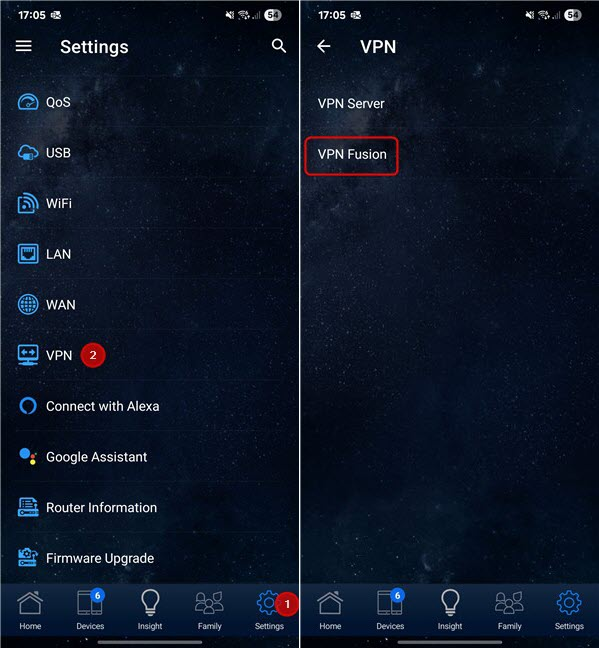
Go to Settings > VPN > VPN Fusion
You see the VPN Fusion server list. Tap the + (plus sign) next to Add profile.
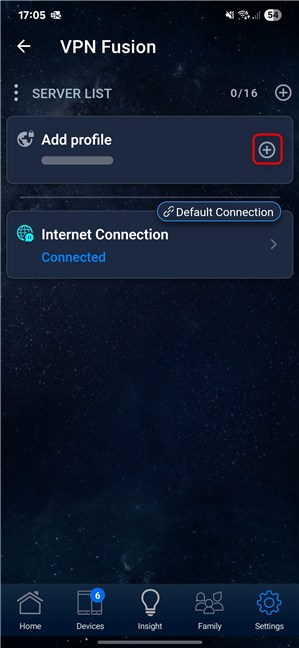
Tap Add profile
In the Add profile dialogue, type NordVPN as the connection name, and select NordVPN as the VPN type. Then, choose the region you want to connect to.
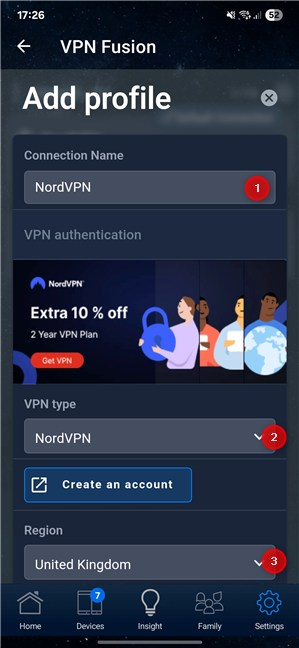
Set up your NordVPN profile
Paste the Token you’ve created during this tutorial’s first step. If you want to connect one or more specific devices to NordVPN, tap the pencil icon (Edit) next to Device, select the one(s) you want from the list, and then press OK.
If you don’t want to select a specific device and prefer your entire network to connect to NordVPN automatically, don't tap on the options next to Device. To save and activate your profile, tap Apply and Enable.
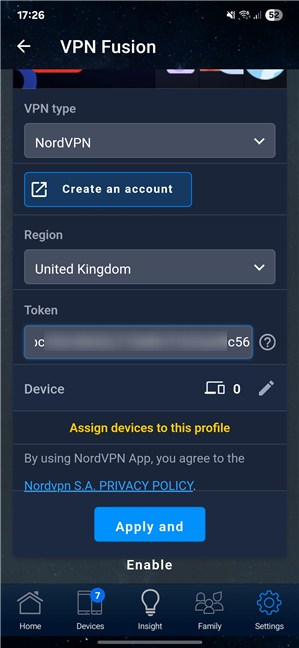
Don't forget to tap Apply and Enable
The ASUS Router app shows you the progress of this operation. When it’s done, it loads the VPN Fusion server list, displaying NordVPN and its connection status. If your configuration was correct, you should see it labeled as Connected. From now on, your devices will automatically connect to NordVPN. If you want to change your settings, tap the switch next to NordVPN to stop this connection. You can then set a different region, change the token and other settings. You can also Delete the NordVPN profile if you want to.
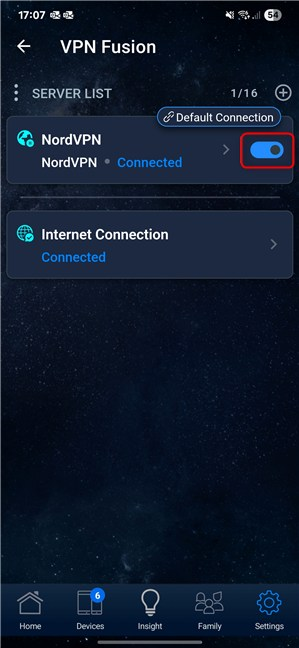
Before changing a VPN Fusion profile, turn it off
Does NordVPN work well on your ASUS router or ZenWiFi mesh system?
I was happy that ASUS has worked on simplifying the configuration process for VPN Fusion, one of its most popular features. As you can see in this tutorial, setting up NordVPN on your ASUS router or ZenWiFi mesh system is easier than ever. All it took was a few minutes, and all my devices were routed through NordVPN, using a server from the country I’ve selected. Not only was the connection performed quickly, but its speed was pretty fast. But this is my experience, and I’m curious to learn more about yours. Did you find it easy to configure VPN Fusion? Did it work well with NordVPN? Comment using the options below, and let me know.