

Location Services allow for a more personalized experience in Windows 11 by enabling location-based information to be displayed. Precise location means better weather reporting, more relevant local news, and overall greater functionality for apps and Windows. The downside is that by turning on Location Services, you are being tracked, which might be a privacy issue for you. This article teaches you how to enable, disable, and configure Location Services in Windows 11. Let’s begin.
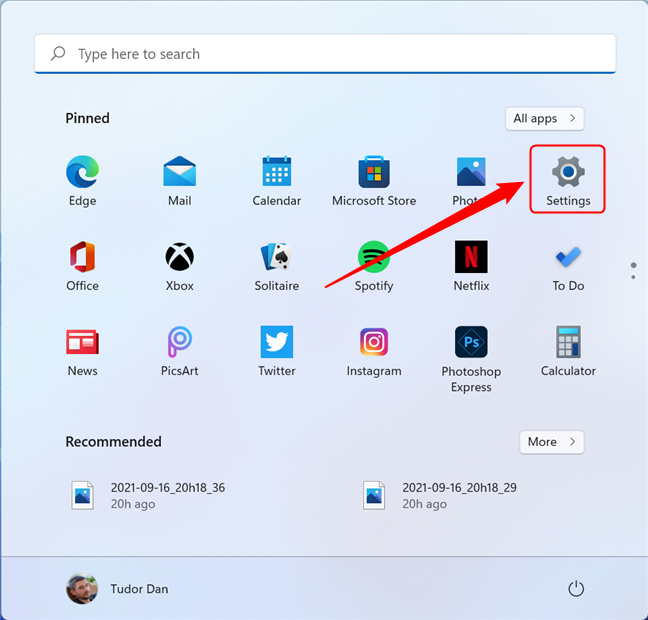
 Access the Settings app in the Start Menu
TIP: For more on how to open the Settings app, read these 17 ways to open Settings in Windows 11.
In the Settings window, select Privacy & Security in the left pane. If the left pane isn’t visible, click or tap on the hamburger button (Open navigation) in the upper left corner of the window. Next, scroll down in the right pane until you reach Location and click/tap on it.
Access the Settings app in the Start Menu
TIP: For more on how to open the Settings app, read these 17 ways to open Settings in Windows 11.
In the Settings window, select Privacy & Security in the left pane. If the left pane isn’t visible, click or tap on the hamburger button (Open navigation) in the upper left corner of the window. Next, scroll down in the right pane until you reach Location and click/tap on it.
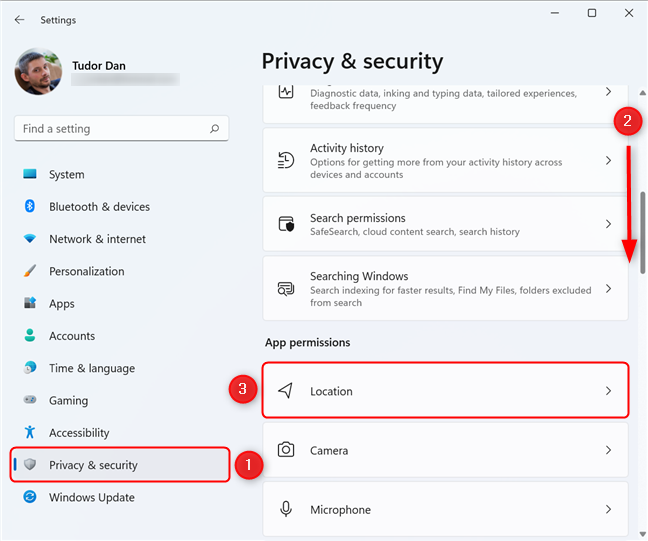
 Select Privacy & security in the Settings menu, then click on Location
This displays the Location settings page. To enable or disable Location Services, click or tap the switch next to it. This toggles precise location for Windows 11.
Select Privacy & security in the Settings menu, then click on Location
This displays the Location settings page. To enable or disable Location Services, click or tap the switch next to it. This toggles precise location for Windows 11.
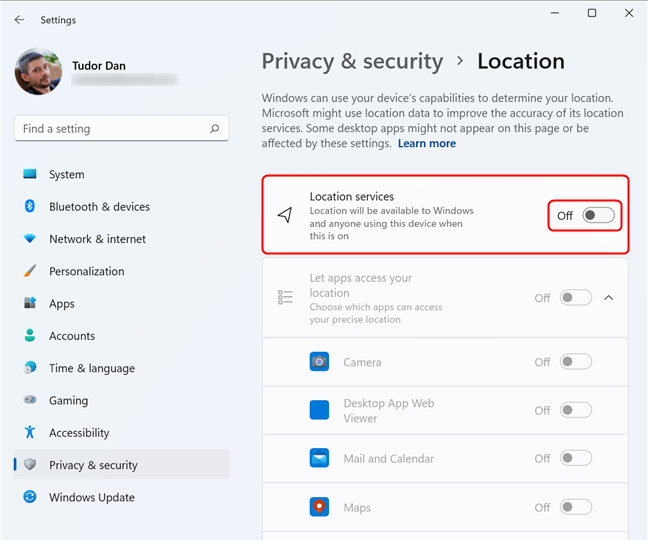 Turn Location Services on and off in Windows 11
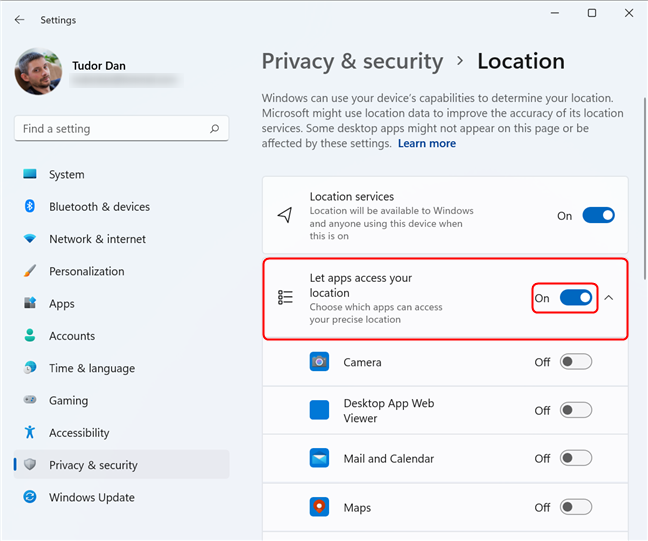 Enable or disable location access for apps with this switch
You can then choose which applications can access your location by toggling the switches next to each app in the list. Click or tap on the arrow next to the “Let apps access your location” switch if the apps aren’t visible.
Enable or disable location access for apps with this switch
You can then choose which applications can access your location by toggling the switches next to each app in the list. Click or tap on the arrow next to the “Let apps access your location” switch if the apps aren’t visible.
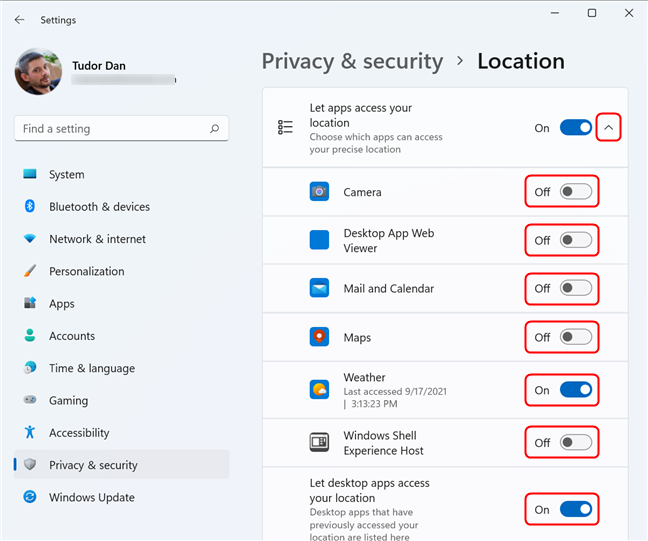 Choose which apps have access to your location
This level of detail is great if you are concerned about privacy. You can browse through the list of Windows 11 apps that requested the use of your location and enable or disable location access for any of them.
Choose which apps have access to your location
This level of detail is great if you are concerned about privacy. You can browse through the list of Windows 11 apps that requested the use of your location and enable or disable location access for any of them.
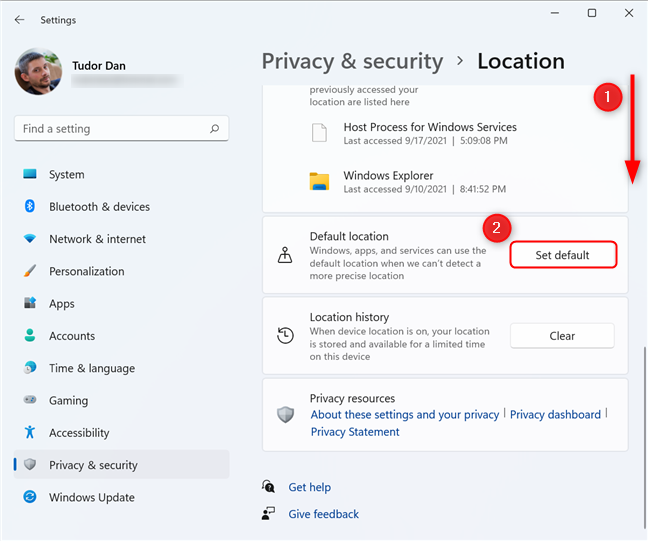 Setting the Default location in Windows 11
This starts the Maps application. In the prompt, click or tap on Set default location.
Setting the Default location in Windows 11
This starts the Maps application. In the prompt, click or tap on Set default location.
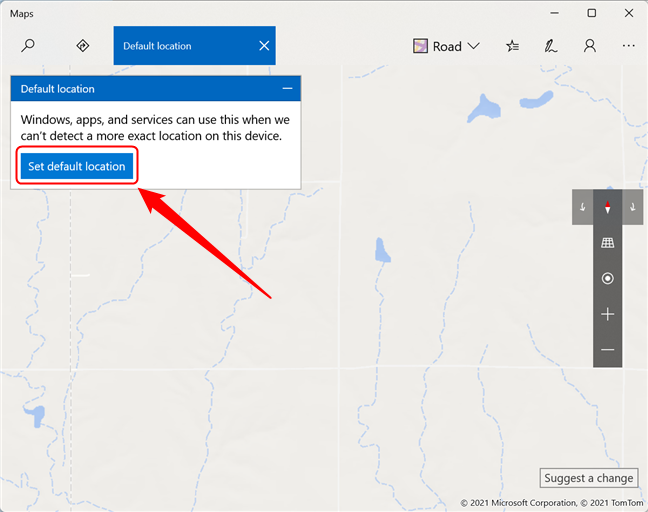
 Click or tap on Set default location
You can now either enter the address in the input field or select a location on the map by clicking on Choose location. You can choose any location on the globe. Press Enter on your keyboard afterward.
Click or tap on Set default location
You can now either enter the address in the input field or select a location on the map by clicking on Choose location. You can choose any location on the globe. Press Enter on your keyboard afterward.
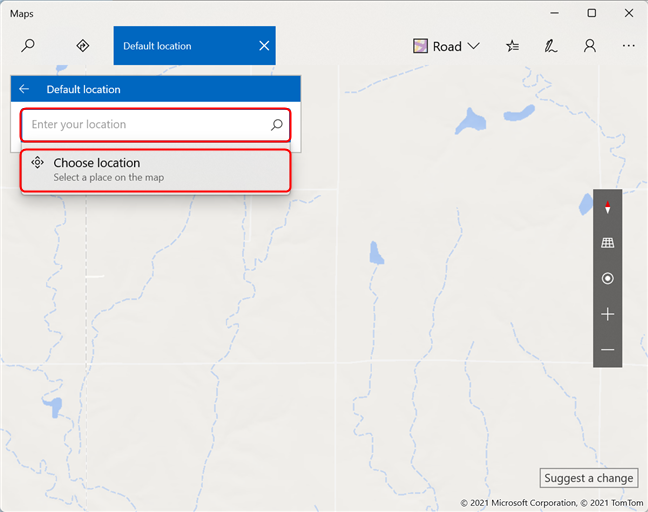 Enter the address or choose a location on the map
After you choose the default location, you can close Maps. If you’re not satisfied, select one of the two options in the prompt: clear your location or change it.
Enter the address or choose a location on the map
After you choose the default location, you can close Maps. If you’re not satisfied, select one of the two options in the prompt: clear your location or change it.
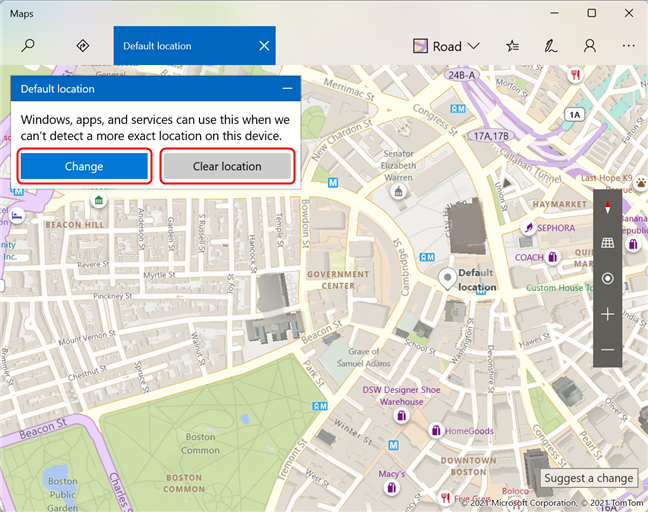 Changing and clearing the Default location in Windows 11
When you’re done, close the Maps app.
NOTE: When Location Services is on and your device can be located, the Default location is ignored.
Changing and clearing the Default location in Windows 11
When you’re done, close the Maps app.
NOTE: When Location Services is on and your device can be located, the Default location is ignored.
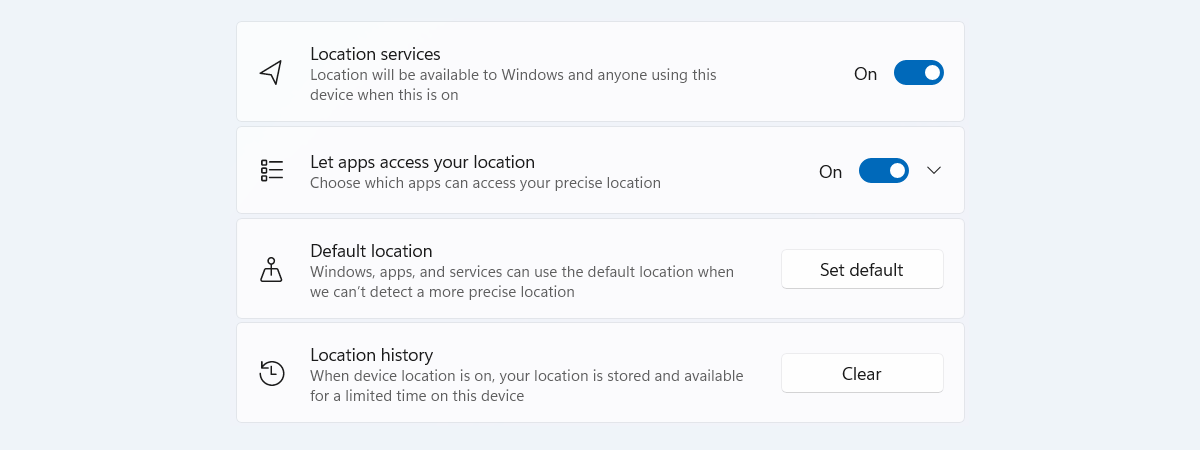
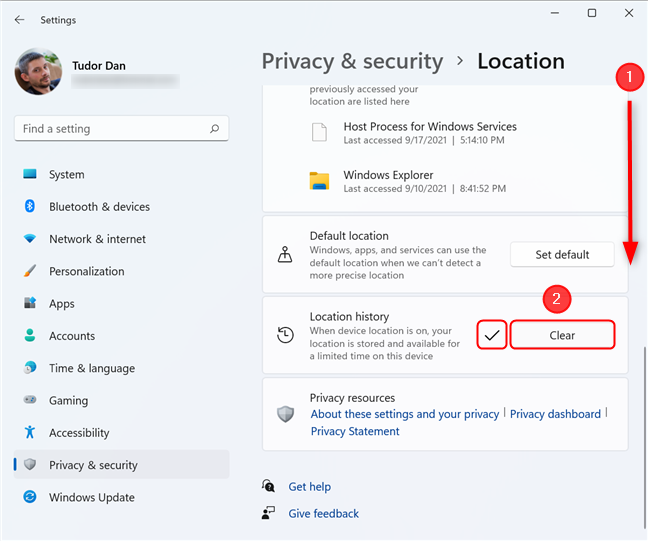 Delete the Location history by pressing Clear
Enabling and disabling Location Services for Windows 11
In order to enable Location Services in Windows 11, first, click or tap the Start button on your desktop and then on the Settings app. Alternatively, you can press Win + I on your keyboard.Enabling Location Services for applications
The Location Services switch toggles precise positioning for the operating system (giving you, for example, the choice to enable Night Light). The “Let apps access your location” switch, on the other hand, toggles location for individual apps (like Weather, Maps, Mail and Calendar, etc.). If you want to enable app access to your location, make sure the switch is set to On.Setting up the Default Location in Windows 11
Another useful option in the Location settings window is Default location. It lets you choose the fallback location if more precise positioning isn’t available (or if you disable the Location Services). In order to set the Default location for your Windows 11 PC, scroll down in the Location settings window until you see the Default Location section, and then click or tap on Set default.Clearing Location History in Windows 11
Another useful feature that Windows 11 offers to people who value their privacy is the ability to delete their location history. By default, when Location Services is on, your Windows 11 PC or device stores your locations for a limited time. You can delete the history from the Location settings page. Scroll down until you get to Location history. Click or tap the Clear button on the right side to delete the location history. If the operation is successful, a check mark appears next to the button.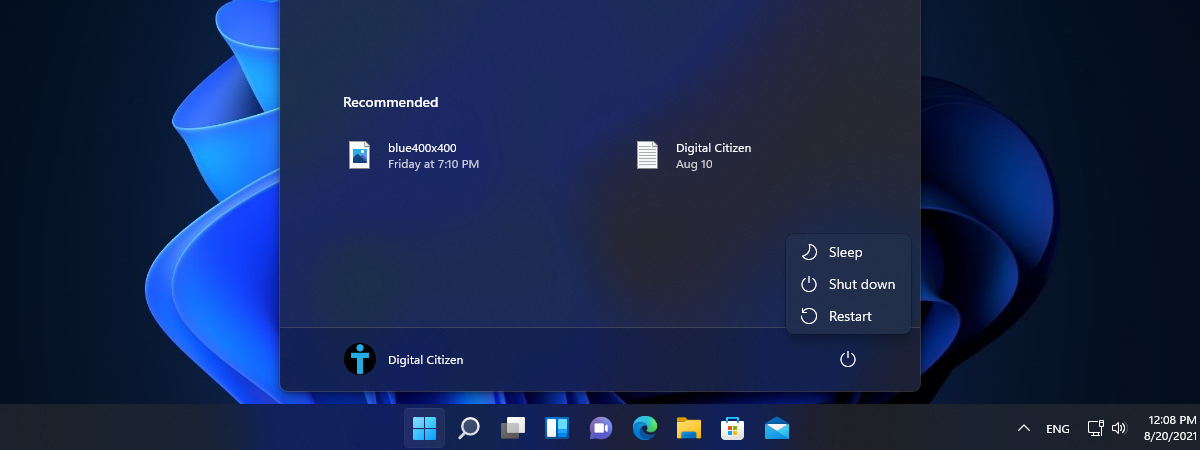

Discussion (0)
Be the first to comment.