




Windows 11 usually detects HDMI displays automatically, but if it doesn’t, you can switch to HDMI manually. Connection problems often come from faulty cables, incorrect settings, or outdated drivers. Here’s how to make HDMI your main display and fix any detection or sound issues quickly.
Before you start
- Inspect the HDMI Ports and make sure you use the HDMI-out port
- If you use a USB-C or DisplayPort adapter, verify that it supports display output (look for “Alt Mode” on USB-C adapters)
- Power cycle your devices by turning off both your computer and external display. Disconnect and reconnect the HDMI cable, then power everything back on. This resets the HDMI handshake that lets devices communicate.
1) Switch to HDMI using display settings
If the monitor doesn’t appear automatically, open Display Settings to force detection and set HDMI as your main display. Press Windows + I to open Settings, then go to System → Display. Under Multiple displays, select Detect in front of Detect other displays to search for connected HDMI screens.

Click the external display thumbnail and check Make this my main display. This forces Windows 11 to output your desktop through the HDMI connection.
2) Use the Project Shortcut
Press Windows + P to quickly switch between display modes. Choose one of the following options depending on how you want to use your HDMI screen.
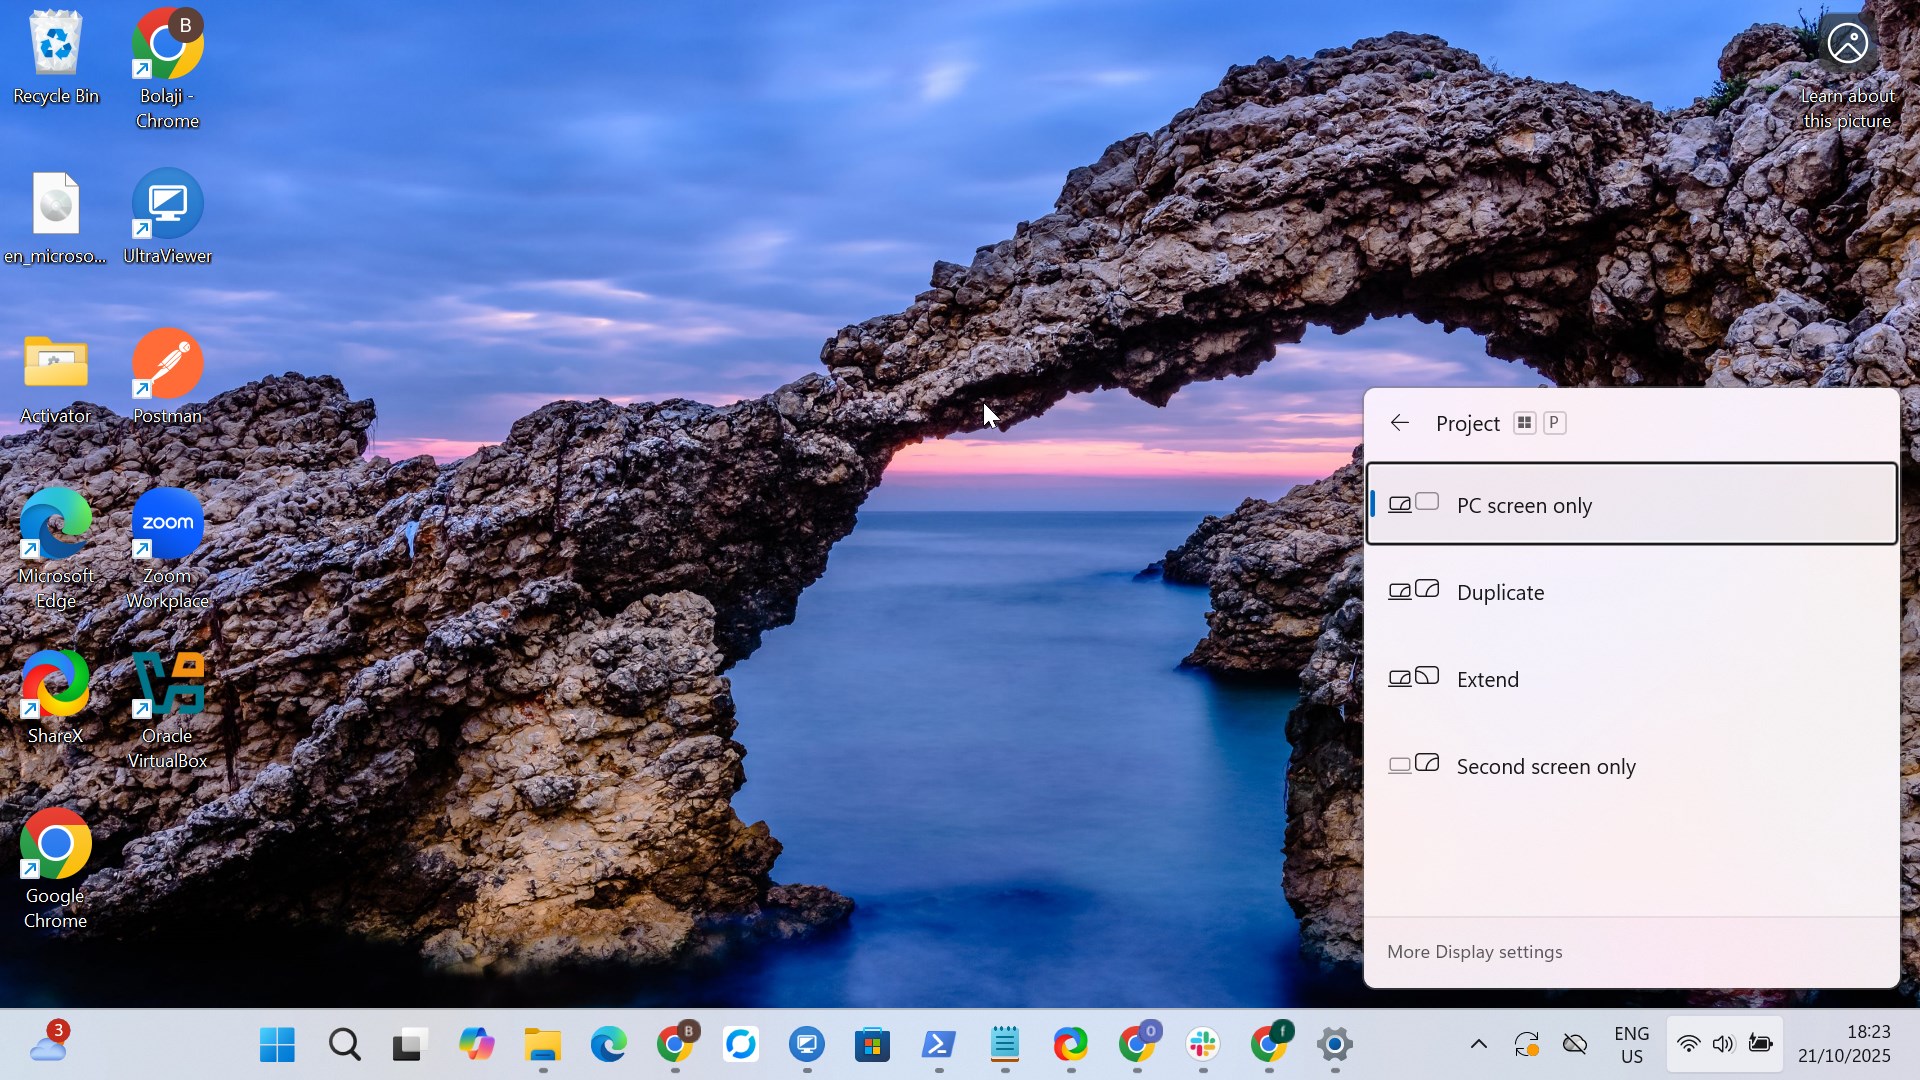
- Duplicate – Shows the same image on both screens.
- Extend – Expands your desktop across both displays.
- Second screen only – Uses the HDMI monitor as your primary display.
Pro tip: Use Second screen only for TVs or projectors, or Extend for multi-monitor work setups.
3) Adjust Resolution and Refresh Rate
If, after switching to HDMI, your monitor flickers or shows No Signal, your display resolution may be unsupported. Adjust the output settings to match your monitor’s capabilities.
To do this, press Windows + I to open Settings, then System → Display. Now, scroll to Scale → Display resolution. Pick the recommended or native resolution for your HDMI monitor.

To ensure the issue is completely addressed, go to Advanced display, confirm the refresh rate (for example, 60 Hz). A mismatched refresh rate can cause blank or distorted screens.

4) Troubleshooting common HDMI issues
- HDMI not working: Update display drivers, force HDMI detection from the GPU control panel, or check the input source on the monitor or TV
- HDMI no sound problem: Set HDMI as the default audio device or update audio drivers.
Quick HDMI switch tips
- If HDMI continues to fail, try DisplayPort or USB-C. Modern adapters can carry the same video and audio signals if compatible with your GPU.
- Ensure your drivers are up to date to prevent issues
FAQs
Why is my HDMI port not showing up in Windows 11? It’s usually due to faulty cables or outdated GPU drivers. Try clicking Detect under Display Settings or reinstalling the graphics driver.
Can I switch from DisplayPort to HDMI in Windows 11? Yes, if your GPU supports both outputs or you use a DisplayPort-to-HDMI adapter. Make sure your monitor input matches the port type.
How do I make HDMI my default display? Keep your HDMI display connected during startup, and check Make this my main display in Display Settings. Windows will remember this preference.
Summary of steps
- Check cables and HDMI ports.
- Open Display Settings and click Detect.
- Use Windows + P to switch display modes.
- Set HDMI as the main display and audio output.
- Update GPU and audio drivers if HDMI isn’t detected.
Conclusion
Switching to HDMI on Windows 11 is simple once the hardware and drivers are working properly. With the right connection and settings, you’ll enjoy full audio and video output on any monitor, TV, or projector.
Discussion (0)
Be the first to comment.