

Google Photos gives you 15GB of free storage shared across your entire Google account, including Gmail and Google Drive. For most people, that fills up faster than expected. Once it does, you either pay for Google One every month or stop backing up your photos entirely. Neither is a great option. The good news is that moving your entire photo library off Google Photos and onto your own Windows PC is straightforward, free, and takes less time than you might expect. This guide walks you through every step.
Why Move Away From Google Photos
The 15GB free limit is the most common reason people start looking for alternatives. But there are others. Google Photos stores your photos on Google's servers, meaning your memories are tied to a company account that could be suspended, hacked, or changed at any time. Paid plans add up over the years. A 100GB Google One plan costs around $24 a year, and a 2TB plan costs around $100 a year, indefinitely.
Moving to a local backup puts your photos on hardware you own. There are no monthly fees, no storage caps beyond your hard drive, and no company has access to your pictures. The tradeoff is that you are responsible for keeping your own backups safe, which this guide also covers.
Step 1: Export Your Photos Using Google Takeout
Google Takeout is the official tool for downloading everything in your Google account, including your entire Google Photos library. It is free and exports your photos at their original quality with no compression.
How to Start Your Google Takeout Export
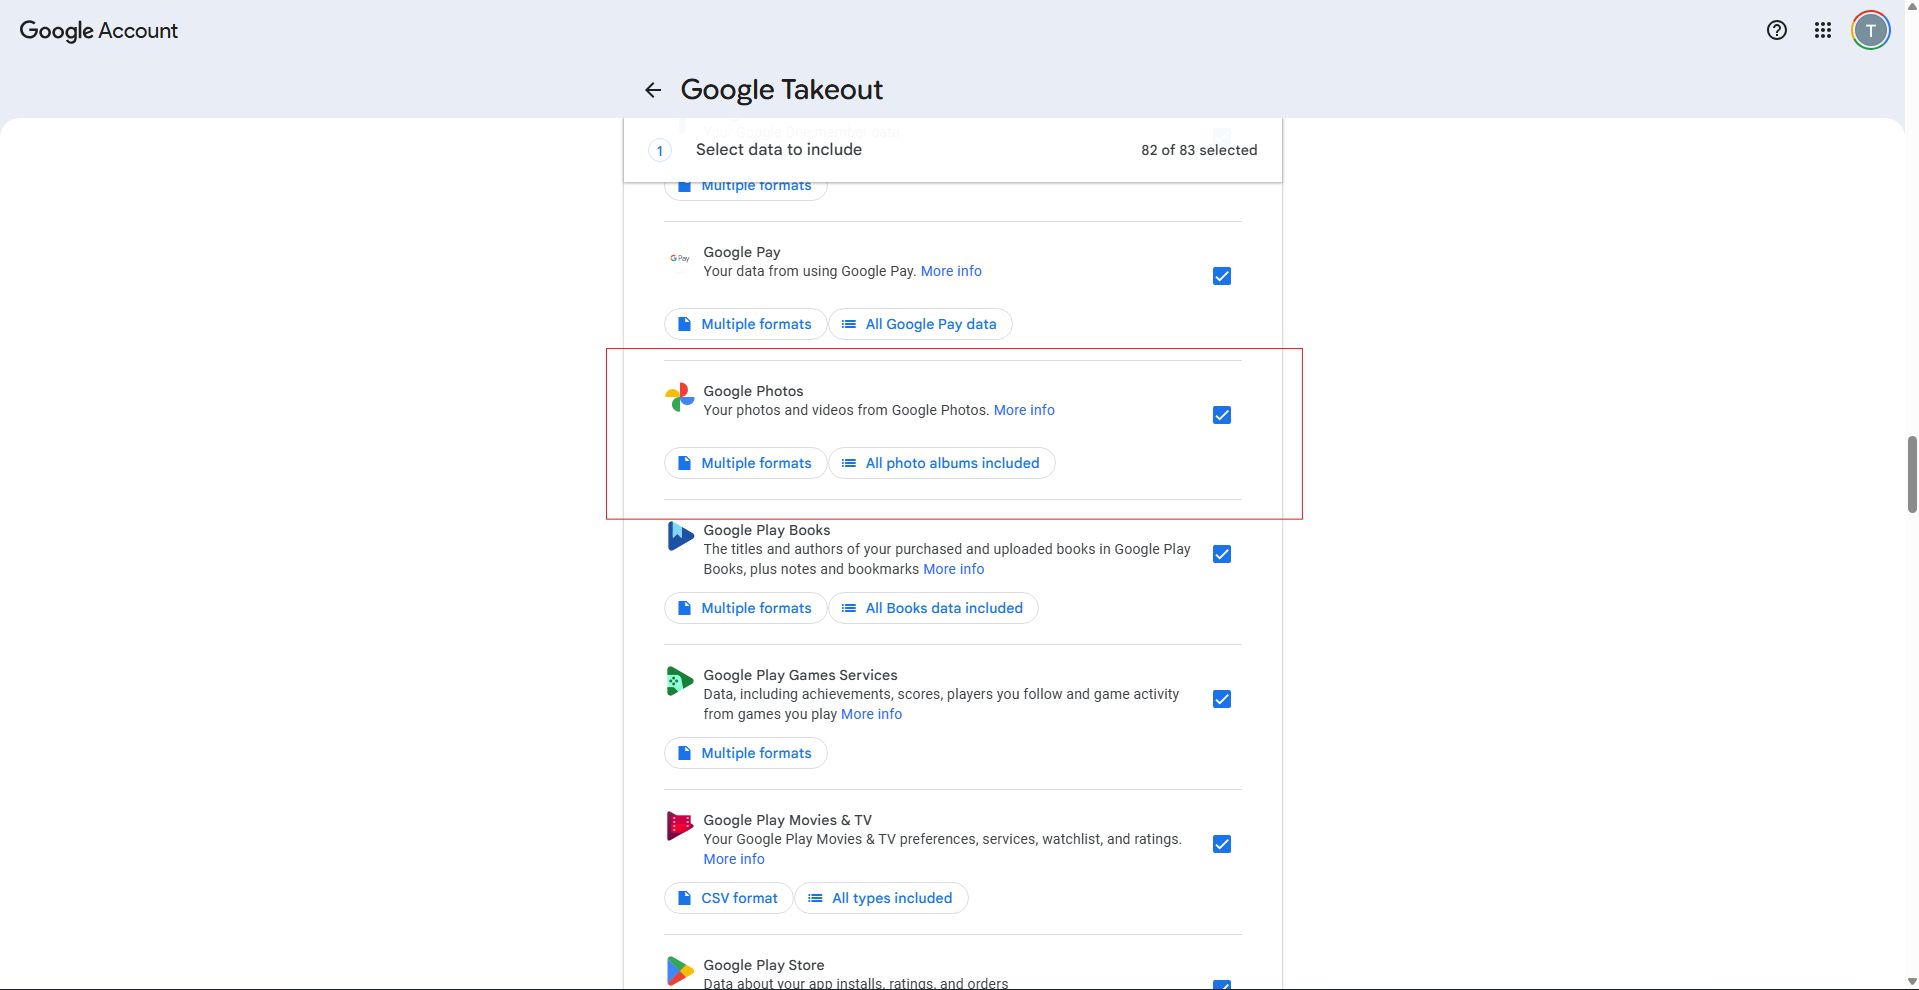
- Go to takeout.google.com and sign in with your Google account.
- Click Deselect all to uncheck every service in the list.
- Scroll down until you find Google Photos and check the box next to it.
- Scroll to the bottom of the page and click Next step.
- Under Delivery method, select Send download link via email.
- Under Frequency, select Export once.
- Under File type, select .zip.
- Under File size, select 2GB or 4GB. Choosing a smaller size creates more zip files to download but each one is smaller and less likely to fail on slower connections.
- Click Create export.
Google will now prepare your archive. This can take anywhere from a few minutes to several days depending on how large your library is. You will receive an email with download links when it is ready. Download links expire after seven days, so download them promptly once the email arrives.
Downloading and Extracting Your Files
Download all the zip files from the email links to a folder on your PC. For a large library, you may receive dozens of zip files. Save them all to the same folder before extracting anything.
Once downloaded, right-click each zip file and select Extract All. Extract everything into a single destination folder such as a folder named Google Photos on your desktop or in your Pictures directory. All your photos and videos will end up in subfolders organized by album and year.
Note that each photo will have an accompanying .json file alongside it. These files contain metadata such as the date taken and location. They are not the photos themselves but it is worth keeping them in case you use software that can read them.
Step 2: Organize Your Photos on Windows
After extraction, your photos are on your PC but spread across many subfolders named after albums and years. You have a few options for how to handle them.
The simplest approach for most people is to leave the folder structure as Takeout created it and move the whole Google Photos folder into your Windows Pictures library. Windows Photos can browse these folders normally and shows your pictures in a timeline view.
If you prefer a cleaner structure, create folders organized by year inside your Pictures library, such as 2022, 2023, 2024, and move photos from the Takeout subfolders into the corresponding year folders manually or using a tool like File Explorer's search and sort functions.
Step 3: Back Up Your Local Photos
Moving photos to your PC is only safe if you have a backup of your PC itself. A hard drive can fail, a laptop can be stolen, and a Windows update can occasionally cause data loss. The 3-2-1 backup rule is the standard approach: keep 3 copies of your data, on 2 different types of storage, with 1 copy stored off-site or in the cloud.
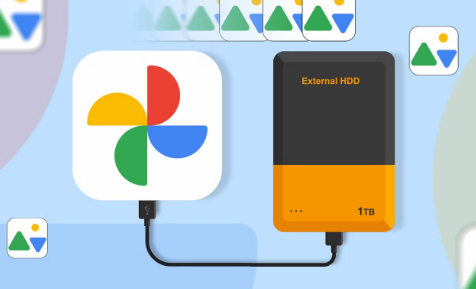
For most home users, a practical version of this is to copy your Photos folder to an external hard drive regularly. External drives with 1TB to 4TB of storage cost between $40 and $80 and are enough for most personal photo libraries. Plug in the drive monthly and copy your updated Photos folder across.
For an automatic off-site backup, services like Microsoft OneDrive, which gives you 5GB free, or Backblaze at around $9 per month for unlimited storage, can keep a second copy in the cloud. This is usually cheaper than Google One and gives you more flexibility.
Step 4: Stop New Photos Going to Google Photos
Once your library is safely on your PC, you can stop your phone from uploading new photos to Google. On Android, open the Google Photos app, go to your profile picture in the top right, select Photos settings, then Backup, and turn Backup off. On iPhone, go to your profile picture, select Photos settings, then Backup, and toggle it off.
New photos taken on your phone will no longer go to Google. To get new photos onto your PC, connect your phone with a USB cable and Windows will offer to import new photos automatically, or use the Windows Photos app which can detect and import photos from a connected phone.
The Simpler Alternative: Just Keep a Local Copy
If the idea of fully leaving Google Photos feels like too much of a change, there is a middle path. Keep using Google Photos normally for convenience on your phone, but run a Google Takeout export every few months and save the download to an external drive. This gives you a local backup without changing your daily habits, and means you are never fully dependent on Google's storage continuing to work.
What About Immich as a Google Photos Replacement
Immich is a free, open-source app that looks and works almost identically to Google Photos but runs on your own hardware. It has Android and iOS apps for automatic phone backup, a web interface that looks like Google Photos, face recognition, timeline view, albums, and search. It reached its first stable release in late 2025 and has an active development community.
The catch is that Immich runs as a Docker container, meaning it requires some technical setup. If you are comfortable following a technical guide, the Immich documentation at immich.app walks through the installation. For most everyday Windows users, organizing photos in a local folder and backing them up to an external drive is simpler and more reliable than setting up a home server.
Final Thoughts
Leaving Google Photos does not have to be complicated. Export your library with Google Takeout, extract the files to your Pictures folder, back them up to an external drive, and turn off backup on your phone. The whole process takes an afternoon. After that, your photos live on hardware you own with no monthly fees and no dependency on a tech company keeping your account in good standing.
Frequently Asked Questions
Does Google Takeout export photos at full quality?
Yes. Google Takeout exports your original photos and videos at full resolution with no compression. If you originally uploaded photos in storage saver mode rather than original quality, Takeout exports them at the compressed size they were stored in, not the original file from your camera.
How long does Google Takeout take to prepare?
It depends on the size of your library. Small libraries of a few hundred photos may be ready in minutes. Large libraries with thousands of photos and videos can take 24 to 48 hours or longer. Google sends you an email when the export is ready.
What are the .json files that come with my Google Photos export?
Each photo exported by Google Takeout has a .json sidecar file containing metadata including the date taken, location coordinates, and other information. The .json files are not photos and can be ignored for basic viewing, but software like Immich can read them to restore the correct date and location to your photos.
Can I still use Google Photos after exporting?
Yes. Exporting with Google Takeout does not delete anything from your account. Your photos remain in Google Photos exactly as before. You would need to manually delete them from Google Photos if you want to free up Google storage space.
What is the best way to back up photos locally on Windows?
The most practical setup for most people is to store photos in the Windows Pictures folder, copy that folder to an external hard drive regularly, and optionally use a cloud backup service like OneDrive or Backblaze for an off-site copy. This gives you redundancy without needing any special software.
Discussion (0)
Be the first to comment.