


You can build a working VR headset at home using cardboard, lenses, and basic tools. This DIY viewer works with most smartphones and gives you an easy way to explore VR without buying a commercial headset. You only need accurate cuts, the right lenses, and a printed template.
Table of contents
- What you need before you start
- Step 1: Print and cut the VR headset template
- Step 2: Assemble the cardboard VR frame
- Step 3: Mount the lenses correctly
- Step 4: Add comfort and durability upgrades
- Step 5: Place and secure your smartphone
- Step 6: Test and calibrate the VR headset
- Troubleshoot common problems
- Safety and usage tips
- FAQs
- Summary
What you need before you start
You only need simple materials, but quality affects comfort and clarity. Strong cardboard and proper lenses matter most.
Cardboard thickness and quality
Use firm cardboard between 1.5 and 2 millimeters thick. This thickness creates a durable shape that supports the phone and lenses.
Lenses and focal length
Pick 37 to 45 millimeter biconvex lenses for a clear VR image. These lenses keep the picture sharp and reduce eye strain.
Template options
Use a printable template to avoid wrong measurements. A4, Letter, and SVG patterns keep your cuts consistent.
Tools you should prepare
Gather scissors, a craft knife, glue, double-sided tape, and a ruler. Accurate cutting and measuring make assembly easier.

Step 1: Print and cut the VR headset template
A template removes guesswork and ensures the headset fits your phone. Print at 100 percent scale to avoid distortion.
Trace or glue the template onto cardboard
Stick or trace the template onto the cardboard so each mark stays aligned. This gives you clean visual guides.
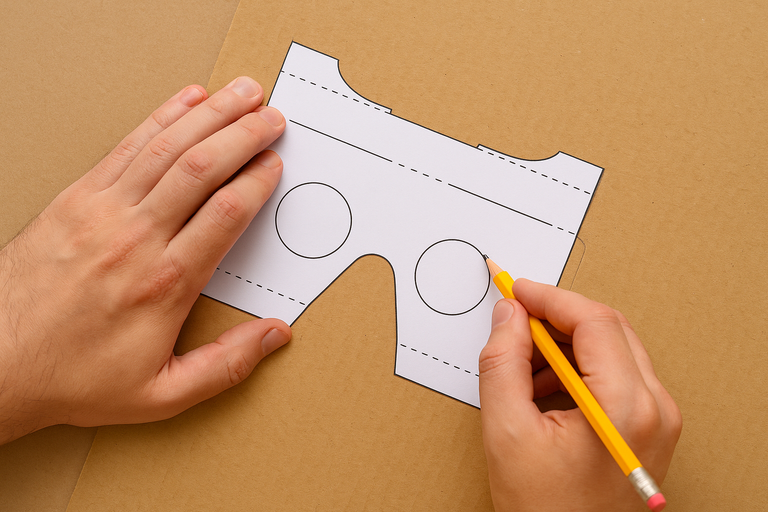
Cut out all sections cleanly
Cut along each line with a craft knife for best accuracy. Clean cuts help the headset fold and lock into shape.
Step 2: Assemble the cardboard VR frame
You will fold the cardboard along marked lines to build the structure. Reinforce the joints so the headset stays firm.
Fold along template lines
Fold each line sharply to create a stable frame. Use a ruler to guide your folds for cleaner edges.
Glue or tape the panels
Secure the joints with glue or strong tape. Reinforce corners and moving panels so they support the phone’s weight.
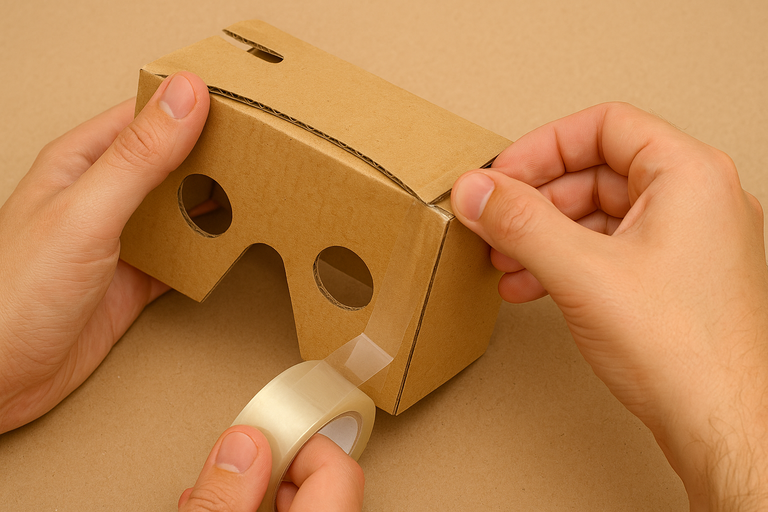
Install the lens holders
Fit the lens brackets into place before closing the frame. Proper alignment keeps the screen centered and reduces blur.
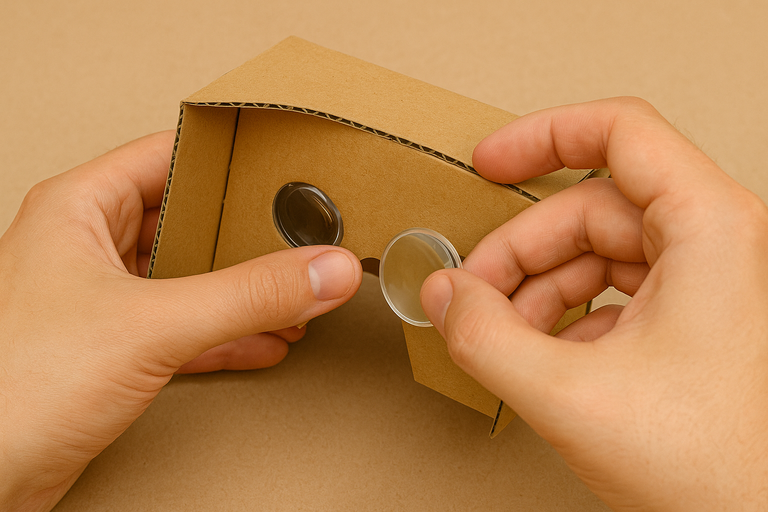
Step 3: Mount the lenses correctly
Lens placement controls the sharpness of the VR image. Small adjustments can improve comfort.
Set the correct distance between lenses
Position the lenses at about the same distance as your eyes. This spacing improves depth and prevents double images.
Adjust focal distance for your phone
Move the lenses slightly forward or back, depending on your phone’s screen size. A larger display often needs more distance.
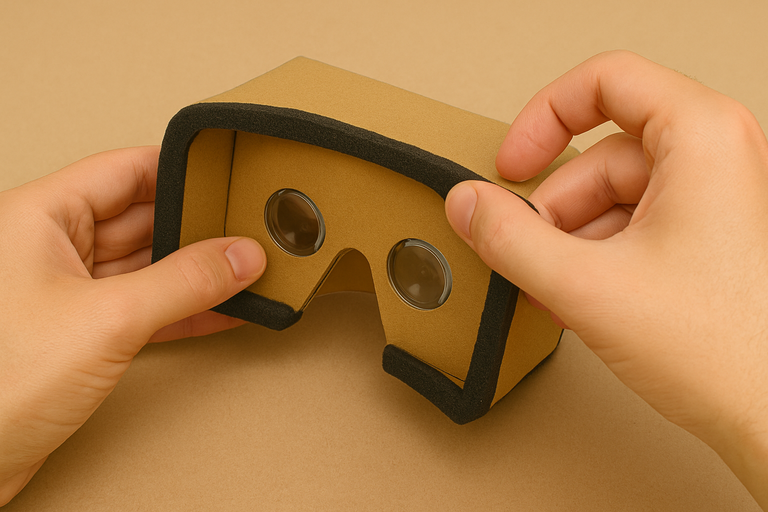
Step 4: Add comfort and durability upgrades
These upgrades make the headset easier to wear and more stable during movement.
Add foam padding
Apply soft foam around the edges to improve comfort. The padding also blocks light by sealing the gaps.
Add a head strap
Attach an elastic band or Velcro strap to keep your hands free. This helps during longer VR sessions.
Reinforce edges for long-term use
Add tape or an extra cardboard layer around high-stress areas. This prevents bending and keeps the shape firm.
Step 5: Place and secure your smartphone
Your phone must sit at the correct angle so the lenses meet the image center.
Align the phone screen with the lens center
Place the phone so that both lenses focus directly on the middle of the screen. Proper alignment prevents blur and eye discomfort.
Secure the phone door or flap
Close the front flap and add a small Velcro patch or tape if needed. This keeps the phone steady while moving your head.
Step 6: Test and calibrate the VR headset
A quick test ensures the headset shows a clear, stable picture.
Use the Google Cardboard app for calibration
Run the Google Cardboard app to check alignment and image clarity. It also helps you set baseline viewing settings.
Adjust the lens position if the image feels blurry
Slide the lenses slightly until the image becomes sharp. Small movements make a big difference.
Troubleshoot common problems
- Image looks blurry or double: Check lens spacing first. Re-align the phone so both eyes view the same point.
- Headset feels uncomfortable: Add more padding or adjust the fold lines. A cleaner frame improves comfort.
- Light leaks around edges: Seal any cracks with foam tape or cardboard strips. This improves immersion in VR scenes.
Safety and usage tips
- Take breaks to avoid eye strain
- Avoid using the headset while walking
FAQs
Can I use any smartphone with a cardboard VR headset? Most modern phones fit, but larger screens may require slight adjustments to lens distance.
Do I need to print a template? A template helps beginners cut accurate shapes. It reduces errors and ensures your folds match the headset’s design.
Why does the image look blurry? Lenses or the phone may be misaligned. Adjust the lens distance and recenter the phone until the picture sharpens.
Can children use a cardboard VR headset? They can use it with supervision. Shorter sessions help avoid eye fatigue.
Summary
- Gather cardboard, lenses, and tools.
- Print the template and cut each part cleanly.
- Assemble the frame and mount the lenses.
- Insert and align your phone.
- Test, calibrate, and apply comfort upgrades.
You can build a cardboard VR headset with basic tools, quality cardboard, and accurate cuts. Careful lens placement improves clarity and comfort, while upgrades such as padding or straps enhance long-term use. Your phone becomes the display, and with proper calibration, the headset delivers a smooth VR experience.


Discussion (0)
Be the first to comment.