


Switching between your code editor and a separate Postman window every time you need to test an API adds friction to your workflow. The Postman VS Code extension removes that friction entirely. It brings Postman's API client directly into Visual Studio Code, letting you send requests, manage collections, work with environments, and view your request history without ever leaving your editor. This guide shows you exactly how to install and set it up.
What Is the Postman VS Code Extension?
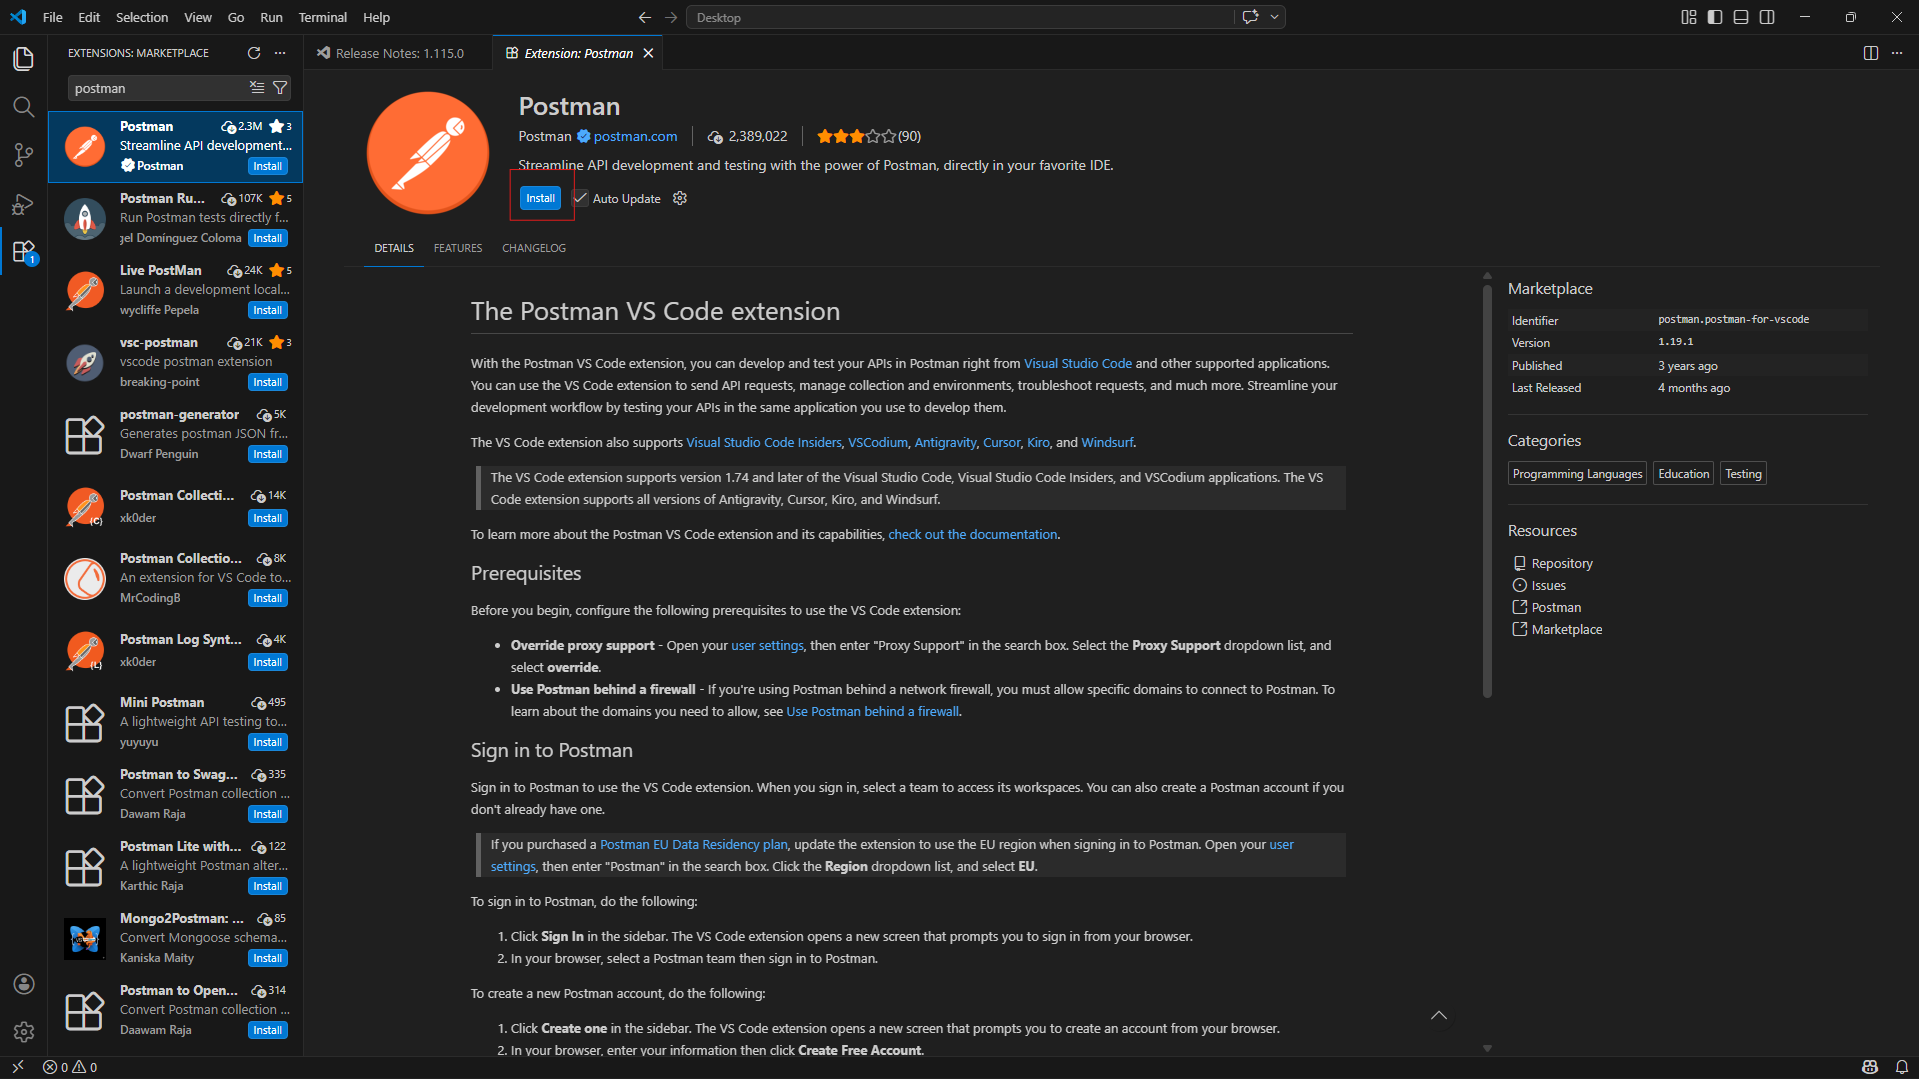
The Postman VS Code extension is an official extension published by Postman that embeds the Postman API client inside Visual Studio Code. Once installed, a Postman icon appears in your VS Code sidebar. Clicking it opens the full Postman interface as a panel within your editor, connected to your Postman account and all your existing workspaces, collections, and environments.
It works independently of the Postman desktop app. You do not need the desktop app installed to use the extension. However, having both gives you access to features like native Git support and offline workflows that are only available in the desktop version.
The extension supports not just VS Code but also VS Code Insiders, VSCodium, Cursor, Windsurf, Kiro, and Antigravity. If you use any of those editors, the installation process is identical.
What You Need Before Installing
You need Visual Studio Code installed on your machine. If you do not have it yet, download it from code.visualstudio.com and complete the standard installation before proceeding.
You also need a Postman account. The extension requires you to sign in to access your workspaces, collections, and history. Creating a free Postman account takes about a minute at postman.com and gives you access to all the core features the extension supports.
How to Install the Postman Extension in VS Code
There are two ways to install it. Both lead to the same result.
Method 1: Install From Inside VS Code
- Open Visual Studio Code on your machine.
- Click the Extensions icon in the left sidebar. It looks like four squares with one slightly separated. Alternatively, press Ctrl + Shift + X on Windows or Cmd + Shift + X on Mac to open the Extensions panel directly.
- In the search bar at the top of the Extensions panel, type Postman.
- Look for the extension published by Postman with the official Postman logo. The publisher name shows as Postman underneath the extension title. Make sure you are selecting the official one and not a third-party extension with a similar name.
- Click the Install button next to the Postman extension. VS Code will download and install it automatically. This takes a few seconds.
- Once installation is complete, the Postman icon will appear in the left sidebar of VS Code.
Configuring Proxy Settings Before Signing In
Before signing in, there is one configuration step that Postman's official documentation recommends completing to avoid connection issues.
Open VS Code Settings by pressing Ctrl + Comma on Windows or Cmd + Comma on Mac. In the settings search bar, type Proxy Support. Find the setting labeled Http: Proxy Support and change its value to override from the dropdown. This ensures that Postman's extension handles proxy connections correctly rather than inheriting VS Code's default proxy behavior, which can cause authentication failures in some network environments.
If you are working behind a corporate firewall, you may also need to allow specific Postman domains through the firewall. Check Postman's official documentation at learning.postman.com for the current list of required domains.
How to Sign In to Postman in VS Code
Once the extension is installed and proxy settings are configured, the next step is signing in to your Postman account.
- Click the Postman icon in the VS Code sidebar. The Postman panel will open.
- Click the Sign In button in the sidebar.
- VS Code will open a new browser tab and redirect you to Postman's sign-in page. Enter your Postman credentials and complete the login.
- After signing in through the browser, you will see a confirmation message. Close that browser tab and return to VS Code.
- Back in VS Code, the Postman panel will now show your workspaces. Select the workspace you want to work in from the dropdown at the top of the sidebar.
If this is your first time using Postman, the extension will prompt you to create a free account instead of signing in. Follow the prompts to set up your account and then return to VS Code once the account is created.
What You Can Do With the Postman Extension in VS Code
Once signed in, the extension gives you access to the core Postman workflow without leaving your editor.
You can send HTTP requests by selecting a workspace, clicking the request dropdown in the sidebar, and choosing HTTP. A new request tab opens inside VS Code where you enter the URL, select the method, add headers, authentication, and a request body, then click Send. The response appears immediately below with the status code, response time, headers, and body all visible.
Your request history is accessible in the sidebar under History. Every request you send from either the VS Code extension or the Postman desktop app appears here, so your history stays in sync across both.
Collections and environments you have created in Postman are available directly in the extension. You can browse, run, and edit collections, switch between environments, and manage variables without switching to the desktop app or browser.
You can write test scripts for your requests, use variables, manage cookies, and generate code snippets for your API requests in languages like Node.js, Python, and cURL. The Postman Console is also available inside the extension for debugging and troubleshooting requests when something does not behave as expected.
Checking Your Extension Version and Viewing Logs
If you need to check which version of the extension you have installed, click the Views and More Actions button at the top of the Postman sidebar and select Version from the menu.
To view logs for debugging or troubleshooting extension issues, click the same Views and More Actions button and select Open Extension Log. The log shows the date, time, and description of events related to the extension, which is useful when reporting issues or diagnosing unexpected behavior.
How the VS Code Extension Compares to the Desktop App
The VS Code extension and the Postman desktop app share your workspaces, collections, environments, and history through your Postman account. Requests sent in the extension appear in the desktop app's history and vice versa. This means you can move between both without losing context.
The desktop app has some capabilities the extension does not, including native Git workflows, full offline support, and some advanced features that have not yet been brought into the extension. For most day-to-day API development and testing tasks, however, the extension covers everything you need without switching windows.
The extension is the better choice when your focus is coding and you want to test APIs quickly as you build. The desktop app is the better choice for dedicated API work like building large collections, running monitors, or collaborating on complex testing workflows.
Final Thoughts
The Postman VS Code extension is one of those quality-of-life improvements that seems small until you start using it. Keeping your API client inside your editor means fewer context switches and a smoother development flow. Installation takes under two minutes, the sign-in process is straightforward, and your existing Postman workspaces are immediately available once you are logged in. If you already use both VS Code and Postman, connecting them through the extension is worth doing today.
Frequently Asked Questions
Do I need the Postman desktop app installed to use the VS Code extension?
No. The Postman VS Code extension works independently of the desktop app. You only need a Postman account to sign in. Having both installed is optional, but the desktop app provides additional features like native Git support and offline workflows that the extension does not currently offer.
Is a Postman account required to use the VS Code extension?
Yes. The extension requires you to sign in to a Postman account to access workspaces, collections, and history. Creating a free account at postman.com takes about a minute and gives you full access to the core features the extension supports.
Will my existing Postman collections be available in the VS Code extension?
Yes. Once you sign in to the extension with your Postman account, all your existing workspaces, collections, and environments are immediately accessible from the sidebar. Requests sent through the extension also sync back to the Postman desktop app and web interface.
Does the Postman VS Code extension work on Mac and Linux as well as Windows?
Yes. The extension works on any operating system that VS Code supports, including Windows, macOS, and Linux. The installation process is identical across all platforms.
What should I do if the extension cannot connect after installation?
The most common cause is the proxy setting. Go to VS Code Settings, search for Http: Proxy Support, and change the value to override. If you are behind a corporate firewall, check Postman's official documentation for the list of domains that need to be allowed through the firewall for the extension to connect correctly.


Discussion (0)
Be the first to comment.