




A USB MIDI keyboard helps you play virtual instruments, record melodies, and control software inside your digital audio workstation. It plugs directly into your computer and avoids the complex setup required by older MIDI gear. At the time of writing, most major keyboards support simple plug-and-play installation, but some models still need drivers or DAW settings to work correctly.
This guide shows you how to hook up a USB MIDI keyboard, install software if required, and verify that your DAW recognizes it. After setup, you can start composing, practicing, or producing music with minimal effort.
Prepare Your USB MIDI Keyboard
Before you connect anything, make sure the keyboard and computer are ready. This avoids connection issues after the cable is plugged in.
- Place the USB MIDI keyboard on a stable surface within reach of your computer.
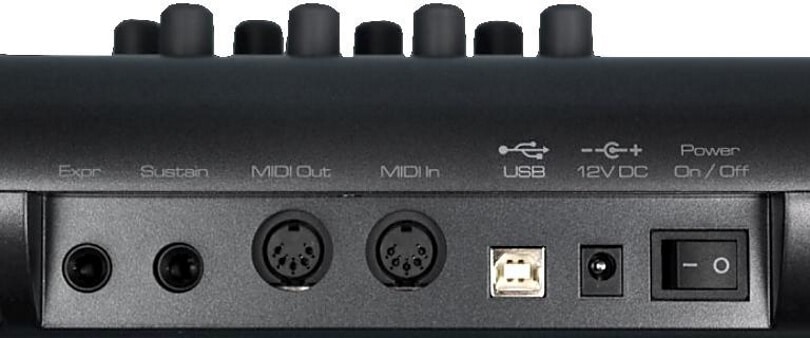
- Check that the included USB cable is in good condition.
- Close any audio software currently running on your computer.
Connect The USB Cable
A USB MIDI keyboard sends both power and data through the same cable, so the connection process is quick.
- Plug the USB A connector into an open USB port on your computer.
- Connect the USB B or USB C port on the keyboard depending on its design.

- Turn on the keyboard if it has a power switch.
Install Drivers If Needed
Many modern keyboards are plug-and-play, but some models require driver installation for proper communication.
- Check the manufacturer’s support page for OS-specific driver downloads.
- Install the driver package and restart your computer afterward.
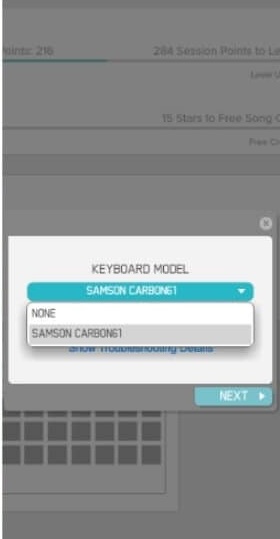
- Confirm that the keyboard appears in your system’s audio or MIDI device list.
Set Up Your DAW
Every DAW handles MIDI input slightly differently. You must enable the keyboard so the software recognizes incoming notes and controls.
- Open your DAW and navigate to its audio or MIDI preferences.
- Enable your USB MIDI keyboard as an input device.
- Select a virtual instrument track so the keyboard can trigger sounds.
Test The MIDI Connection
Before recording, verify that each key and control properly sends MIDI data.
- Play a few keys and check if your DAW meters respond to the input.
- Move knobs, sliders, or pads to ensure DAW automation responds.
- Record a short clip to confirm the keyboard captures performance details accurately.
Troubleshooting Common Problems
- If the keyboard does not power on, try a different USB port or cable.
- If DAW input is silent, verify that MIDI input is enabled in preferences.
- Install manufacturer drivers if the keyboard shows as an “unknown device.”
- If notes lag, reduce your audio buffer size inside your DAW settings.
- Restart both the DAW and computer to clear device conflicts.
Tips
- Use a powered USB hub if you run out of ports or experience unstable power delivery.
- Label your keyboard controls inside the DAW for quicker music production.
- Save a DAW template so your MIDI keyboard loads correctly every time.
- Keep your USB cable away from power adapters to reduce interference.
- Update firmware if your keyboard manufacturer provides improvements.
FAQ
Why is my USB MIDI keyboard not recognized?
Your keyboard may need drivers, a different USB port, or DAW input activation. Check each step in the setup section to diagnose the issue.
Do I need an audio interface to use a USB MIDI keyboard?
No. USB handles MIDI communication directly. An audio interface only improves playback and recording quality, not MIDI connectivity.
Can I use a USB MIDI keyboard on both Windows and macOS?
Yes, as long as drivers exist or the keyboard supports plug-and-play operation.
Why can I hear the virtual instrument but not record it?
You may be monitoring audio correctly but recording the wrong track type. Select a MIDI or instrument track instead of an audio track.
Summary
- Prepare the USB MIDI keyboard and computer for setup.
- Connect the keyboard using its USB cable.
- Install drivers if the device does not appear automatically.
- Enable the keyboard inside your DAW settings.
- Test notes, controls, and recording to confirm proper operation.
Conclusion
Hooking up a USB MIDI keyboard is one of the easiest ways to start producing music on your computer. Once the cable is connected and your DAW recognizes the device, you can record melodies, perform with virtual instruments, and automate controls in real time. With a few adjustments to drivers and preferences, your keyboard becomes a reliable tool for building a home studio setup. As long as you follow the steps and test your connection, your USB MIDI keyboard should work smoothly for both beginners and experienced creators.
Discussion (0)
Be the first to comment.