


Your email signature is the first thing people see after reading your message. A stale signature with an old job title, outdated phone number, or previous company name undermines the professional impression your emails are meant to create.
Changing it in Outlook takes under two minutes once you know where to look. The steps differ slightly depending on whether you use the classic Outlook desktop app, the new Outlook for Windows 11, or Outlook on the web. All three are covered below.
Classic Outlook Desktop App
This is the version most people in business and enterprise environments use. It has a deeper signature editor with more formatting options than the newer versions.
Step 1: Open Outlook Options
Open Outlook. Click File in the top left corner of the screen. In the File menu, click Options at the bottom of the left sidebar. The Outlook Options window opens.
Step 2: Go to Mail and Open Signatures
Click Mail in the left sidebar of the Options window. Scroll down until you see the Compose messages section. Click the Signatures button. The Signatures and Stationery window opens.
Step 3: Select the Signature to Edit
In the Select signature to edit box on the left, click the signature you want to change. Its current content appears in the Edit signature box below. If you want to create a new signature from scratch, click New and give it a name before editing.
Step 4: Edit Your Signature
Click anywhere inside the Edit signature box and make your changes. The editor works like a basic word processor. You can change the text, adjust the font, size, and colour, add bold or italic formatting, insert a hyperlink by clicking the chain link icon, and add an image by clicking the picture icon.
Keep your signature concise. Name, job title, company, phone number, and one or two links is enough for most professional contexts.
Step 5: Set It as the Default
In the Choose default signature section on the right side of the window, use the New messages dropdown to select the signature you want to appear automatically when you compose a new email. Use the Replies/forwards dropdown to choose which signature appears when you reply to or forward messages. Many people use a shorter signature for replies to avoid repeating a lengthy block of text in every exchange.
Step 6: Save
Click OK to close the Signatures and Stationery window. Click OK again to close Outlook Options. Your updated signature now appears automatically in new emails.
Outlook on the Web
If you access Outlook through a browser at outlook.com or through your organisation's Microsoft 365 portal, your signature is managed separately from the desktop app. Changes made here do not automatically sync to the desktop app and vice versa.
Step 1: Open Settings
Go to outlook.com in your browser and sign in. Click the Settings gear icon in the top right corner. In the Settings panel that opens, click View all Outlook settings at the bottom of the panel.
Step 2: Go to Compose and Reply
In the full Settings window, click Mail in the left sidebar. Click Compose and reply in the submenu.
Step 3: Edit Your Signature
Your existing signature appears in the Email signature section. Click inside the text box and make your changes. The web editor offers similar basic formatting to the desktop version. Add links with the chain icon and images with the picture icon.
To add a second signature, click the plus icon at the top of the signature section and give the new one a name.
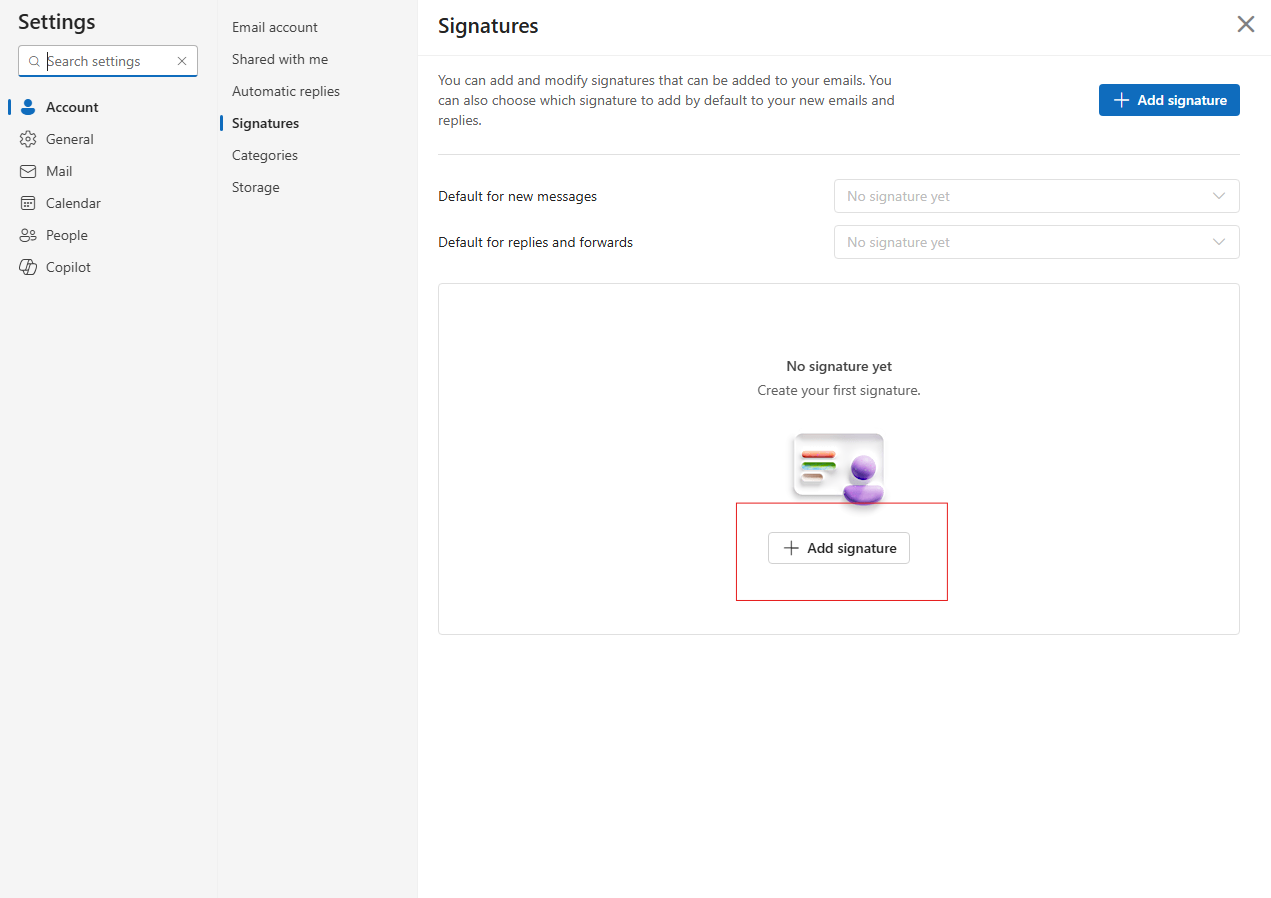
Step 4: Set Default Behaviour
Below the signature editor, use the Select default signature section to set which signature appears for new messages and which appears for replies and forwarded emails.
Step 5: Save
Click Save in the top right corner of the Settings window. Your changes take effect immediately for all emails sent from the browser.
Tips for a Professional Signature
Keep it short. Four to six lines is enough. Long signatures with multiple images, social media icons, legal disclaimers, and motivational quotes create noise rather than value. Most recipients ignore anything beyond your name and direct contact information.
Use consistent formatting. Stick to one or two fonts that match your brand. Avoid using multiple colours unless they serve a specific purpose. A signature that looks like a ransom note does not reflect well on the sender.
Include what matters. Your name, job title, company, phone number, and a link to your website or LinkedIn profile covers everything most people need. If your company requires a legal disclaimer, add it at the very end in smaller text.
Test before sending. After saving changes, compose a test email to yourself to confirm the signature appears correctly and all links work. Images in particular can break when sent to recipients using different email clients.
Frequently Asked Questions
Why is my Outlook signature not saving?
This most commonly happens when changes are made in one version of Outlook but you are checking the results in another. Classic Outlook, the new Outlook, and Outlook on the web each maintain separate signature settings that do not automatically sync. Make your changes in the same version you use for sending emails. If changes genuinely will not save in the classic desktop app, try making the same changes through Outlook on the web, which sometimes resolves sync issues.
Can I have different signatures for different email accounts?
Yes. In the classic Outlook desktop app, open the Signatures and Stationery window and use the Email account dropdown in the Choose default signature section to assign different signatures to each connected account. In the new Outlook, select each account from the dropdown at the top of the Signatures settings page and configure each one separately.
Can I add my company logo to my Outlook signature?
Yes. In the signature editor, click the image or picture icon and upload an image file from your computer. Keep the image file size small. Large images increase the size of every email you send and may be blocked by recipients' email security systems. A logo between 100 and 200 pixels wide at 72 DPI is typically sufficient for signature use.

Discussion (0)
Be the first to comment.