




A Minecraft bridge helps you cross water, ravines, and dangerous terrain safely while adding style to your base. You can build simple survival bridges or advanced themed ones once you understand planning, materials, and structure.
This guide covers everything you need to build the strongest and most efficient Minecraft bridges in record time
Table of contents
- Step 1: Choose the type of Minecraft bridge you want to build
- Step 2: Gather the right materials for your bridge
- Step 3: Plan your bridge location and length
- Step 4: Build a basic Minecraft bridge
- Step 5: Build themed Minecraft bridges
- Tips to optimize your bridge for survival mode
- Common mistakes to avoid when building bridges
- Examples of bridge dimensions and templates
- FAQs
- Summary
Step 1: Choose the type of Minecraft bridge you want to build
Picking a bridge type early helps you collect the right materials and plan your layout. Each design fits different stages of the game.
Simple wooden bridge for early survival
A wooden bridge works best when you need a quick, cheap way to cross rivers. Most players craft it with slabs, stairs, and fences.
Stone or stone-brick bridge for durability
Stone-based bridges resist explosions and weather changes while offering a clean look. You can shape arches and supports easily with stairs and walls.
Decorative bridges for themed bases
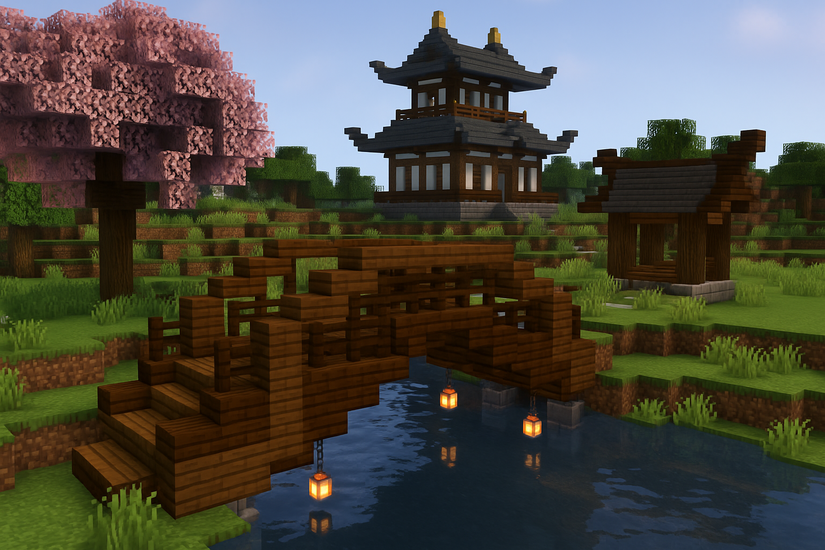
Themed bridges match your world’s style and improve immersion. Medieval, Japanese, or modern designs fit best once you unlock more decorative blocks.
Step 2: Gather the right materials for your bridge
Your materials determine the look, durability, and building speed. Picking cohesive block types keeps the design consistent.
Essential blocks you'll need
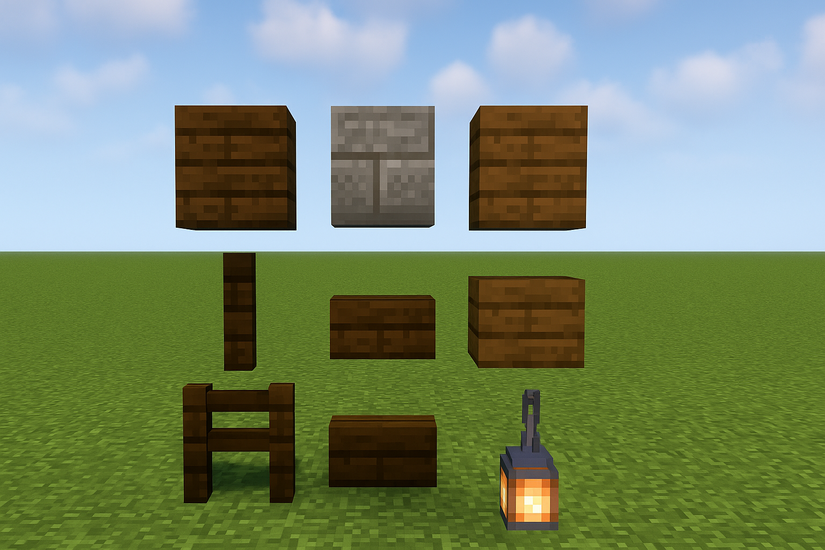
Common materials include wood planks, logs, slabs, and fences. Stone, stone bricks, stairs, walls, and lanterns offer more advanced shaping and lighting.
Optional decorative blocks
Trapdoors, chains, signs, and plants add depth to any build. You can also use mossy blocks, leaves, or candles for extra atmosphere.
Step 3: Plan your bridge location and length
Good placement creates a natural path and prevents awkward shapes. Measure the distance so you know how many supports to add.
Building across rivers
A gentle arch works best across rivers. You can place support beams in the water for added realism.
Building across ravines or valleys
Ravine bridges need stronger supports and railings for safety. Use thicker pillars by making concrete in Minecraft or suspended designs to span long gaps.
Building in the Nether
Build with heat-resistant blocks such as blackstone or basalt. Use scaffolding and fire resistance potions to stay safe while building.
Step 4: Build a basic Minecraft bridge
A simple bridge gives you a repeatable process that works on any terrain. Start with a flat layout, then shape it with slabs and details.
Lay out the foundation and path width
Mark the path with temporary blocks to set the length and width. A 3 or 5-block width works for most builds.
Create the support pillars
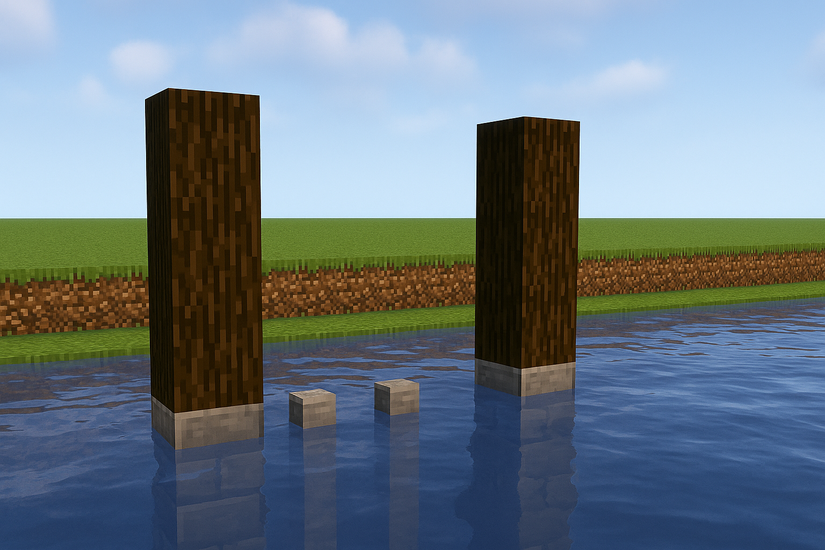
Place logs, stone, or brick columns under the foundation. Supports make the bridge look stable and prevent a flat, floating design.
Add slabs or stairs for the main walkway
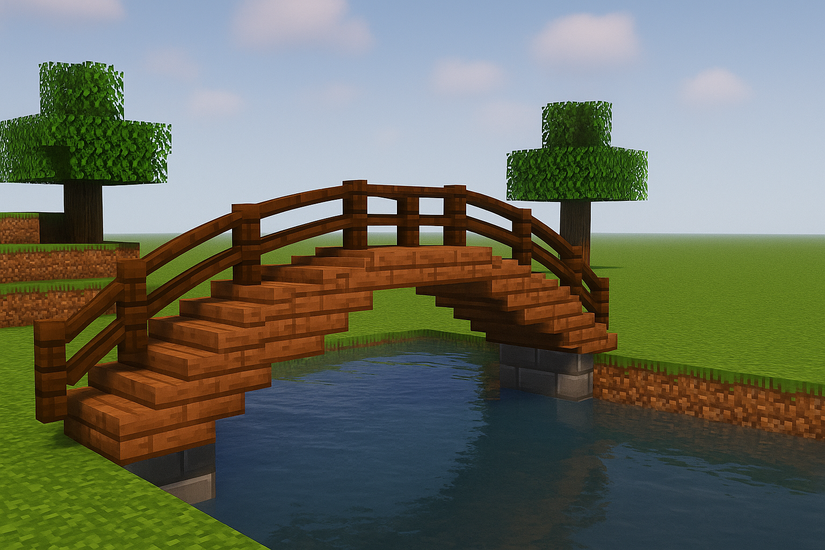
Use slabs to create smoother slopes and save materials. Stairs also help you form gentle arches without steep edges.
Add railings or side barriers
Fences, trapdoors, or walls keep you from falling and add shape to the outline. You can mix block types to match any theme.
Add lighting to prevent mob spawns
Lanterns or hidden lighting stop mobs from spawning on the walkway. Lighting also highlights your bridge at night.

Step 5: Build themed Minecraft bridges
You can upgrade your builds once you understand basic shape and symmetry. The designs below help you match your world’s theme.
Medieval stone arch bridge
Arches, stone bricks, and iron lanterns define medieval bridges. You can add buttresses for depth and structural realism.
Japanese curved garden bridge
These bridges use slabs, trapdoors, and smooth curves. Bamboo or cherry blocks add color that fits Japanese garden styles.
Modern minimalist bridge
A modern bridge uses quartz, concrete, and straight lines. Keep the palette clean and rely on symmetry.
Fantasy rope or suspended bridge
Rope bridges use logs, planks, chains, and uneven shapes. This style works well in jungle and cliff bases.
Tips to optimize your bridge for survival mode
- Resource-light variants for early game: Use slabs instead of full blocks to cut materials in half. Stick to wood or basic stone until you progress.
- Safe building tips to avoid falls and mobs: Place torches early and use scaffolding for temporary platforms. Build during the day to avoid surprise attacks.
- Upgrade your bridge later: As you progress, replace plain blocks with stairs, walls, and decorative details. You can widen the walkway or add new lighting.
Common mistakes to avoid when building bridges
Uneven arches, mismatched blocks, and poor lighting hurt the final design. Planning and symmetry fix most issues early.
Examples of bridge dimensions and templates
These templates give you quick starting points you can copy into any world.
5-block wide flat bridge template
Works for short river crossings and early survival builds.
9-block wide arched bridge template
Creates a large, smooth arch suitable for major roads or castle entrances.
Short 7-block suspension bridge template
Fits ravines, cliffs, and jungle terrains where support beams hang from chains or logs.
FAQs
How wide should my Minecraft bridge be? Most players choose 3 or 5 blocks for small bridges and 7 to 9 blocks for themed designs.
What materials work best for bridge supports? Stone, logs, and brick blocks create a strong visual structure and match most terrain.
How do I stop mobs from spawning on my bridge? Use lanterns, torches, or hidden lighting under slabs.
Can I build a bridge without supports? Yes, but adding supports improves realism and helps your build fit natural landscapes.
Summary
- Pick a bridge style that fits your base theme and materials.
- Gather core and decorative blocks before you start.
- Plan the bridge location based on terrain and distance.
- Build the structure with slabs, stairs, supports, and railings.
- Add lighting and upgrades to improve safety and appearance.
A well-planned Minecraft bridge improves mobility and adds personality to your world. Start with a simple walkway, then expand your style as your resources grow and your builds evolve.


Discussion (0)
Be the first to comment.